Featured image for how to string outdoor lights on trees
Image source: noveltylights.com
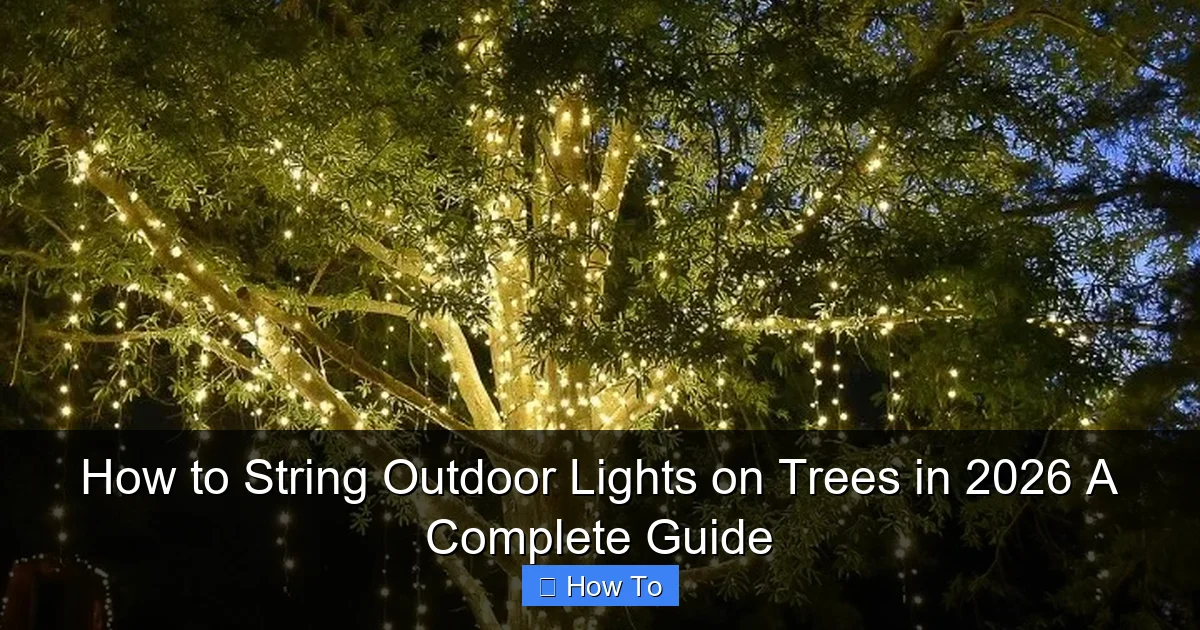
Stringing outdoor lights on trees in 2026 is easier and safer than ever with modern, weather-resistant LED strands and smart planning. Start by mapping your layout and using flexible, outdoor-rated clips or zip ties to secure lights without harming bark, ensuring a clean, professional look. For stunning, long-lasting results, always prioritize safety, symmetry, and energy-efficient lighting options.
“`html
How to String Outdoor Lights on Trees in 2026: A Complete Guide
Key Takeaways
- Plan your layout first: Sketch tree placements and light spacing before installation.
- Use outdoor-rated lights: Ensure lights are waterproof and rated for year-round exposure.
- Anchor securely: Attach lights with clips or zip ties, not nails or staples.
- Work vertically and horizontally: Wrap trunks and drape branches for balanced illumination.
- Hide power sources: Use cord covers or bury cables to prevent tripping hazards.
- Test before finalizing: Check connections and brightness after each tree is strung.
Why This Matters / Understanding the Problem
There’s something magical about a backyard glowing softly under the branches of your favorite tree. Whether you’re prepping for the holidays, hosting a summer BBQ, or just want a cozy evening nook, knowing how to string outdoor lights on trees in 2026 can transform your outdoor space—without damaging your trees or creating a tangled mess.
I learned this the hard way. A few years back, I wrapped cheap LED strands around a young maple with zip ties, thinking it was fine. Fast forward six months: the bark was girdled, the tree struggled, and I felt awful. That experience taught me that how you string lights matters just as much as where.
Today, with smarter tools, safer materials, and a little planning, you can create a stunning, long-lasting display that’s kind to your trees and easy to maintain. This guide walks you through the entire process—from planning to plug-in—so you can enjoy beautiful outdoor lighting safely and sustainably.
Whether you’re a first-timer or a seasoned decorator, this how to string outdoor lights on trees in 2026 a complete guide will help you avoid common pitfalls and get it right the first time.
What You Need
Before you climb any ladders or start wrapping branches, let’s gather your tools and materials. You don’t need a ton of gear—just the right ones. Here’s what I’ve found works best after years of trial, error, and tree-saving interventions.

Visual guide about how to string outdoor lights on trees
Image source: menterarchitects.com
Essential Tools & Materials
- Outdoor-rated LED string lights (preferably warm white or color-changing, with weatherproof ratings)
- Tree-friendly mounting clips or hooks (screw-in or adhesive, not nails or zip ties)
- Extension cords (outdoor-rated, with GFCI protection)
- Measuring tape or soft fabric tape (to measure tree circumference and spacing)
- Step ladder or telescoping pole (for higher branches)
- Twine or removable painter’s tape (for temporary layout marking)
- Timer or smart plug (optional, but highly recommended)
- Scissors and wire cutters
- Drill with small drill bit (if using screw-in hooks)
<
Optional (But Helpful)
- Light tester (to check strands before installation)
- Tree guard tape (for extra bark protection on younger trees)
- Smart home hub (to control lights via app or voice)
- Light clips with adhesive backing (for smooth-barked trees like birch or beech)
Pro Tip: Always test your lights indoors first. There’s nothing worse than spending an hour stringing up a dead strand. Save yourself the frustration—plug them in before you start!
Step-by-Step Guide to How to String Outdoor Lights on Trees in 2026 A Complete Guide
Alright, let’s get into the nitty-gritty. This method is tree-safe, visually balanced, and designed to last through seasons and storms. Whether you’re lighting one tree or a whole grove, these steps will keep your setup looking great and your trees healthy.
Step 1: Plan Your Layout (Before You Touch a Light)
Start with a sketch—on paper or in your head. Decide if you want a spiral wrap, horizontal rings, or a canopy drape (lights hanging down like a chandelier).
For a spiral: measure the trunk’s circumference at chest height (about 4 feet up). Multiply by the number of wraps you want (e.g., 5 wraps on a 3-foot circumference = ~15 feet of lights just for the trunk). Then estimate branch coverage.
Use twine or painter’s tape to mark where each ring or spiral will go. This “dry run” helps you visualize spacing and avoid overcrowding. You don’t want lights too close together (creates glare) or too far apart (looks sparse).
Warning: Avoid wrapping lights tightly around young or thin-barked trees. The how to string outdoor lights on trees in 2026 a complete guide isn’t just about looks—it’s about long-term tree health. Tight wraps can restrict growth and damage vascular tissue.
Step 2: Choose the Right Lights and Check Their Condition
Not all string lights are created equal. For trees, you need outdoor-rated LEDs with an IP44 or higher weatherproof rating. Incandescent bulbs generate heat—bad for bark—and burn out faster.
Look for features like:
- Low voltage (12V or 24V)
- Connectable strands (so you can chain multiple sets)
- Frosted or diffused bulbs (softer glow, less glare)
- UV-resistant cords (won’t degrade in sun)
Before installation, test every strand. Plug in a section and check for flickering, dim bulbs, or dead zones. Replace any faulty strands. Trust me, you don’t want to climb a ladder twice.
Step 3: Install Tree-Friendly Mounting Points
This is where most people go wrong. Nails, staples, and zip ties? They’re tree killers. Instead, use tree-safe clips or hooks designed for bark.
Here’s how I do it:
- For screw-in hooks: Use a drill with a small bit to pre-drill holes (1/8” or 3mm). Screw in plastic-coated tree hooks at your marked spots. Space them every 12–18 inches around the trunk for rings, or along the spiral path.
- For smooth-barked trees: Use adhesive-backed clips (like Command Outdoor Hooks). Clean the bark with rubbing alcohol first for better adhesion.
- For young trees: Use flexible rubber straps that expand with the tree. These are sold as “tree-friendly light straps” and are a game-changer.
Never wrap lights directly around the trunk. Always use a mounting point to create a small gap between the cord and bark.
Pro Tip: If you’re unsure about drilling, use removable zip-tie alternatives like Velcro straps or bungee cords with soft sleeves. They’re not permanent but work for short-term displays.
Step 4: String the Lights (The Fun Part!)
Now comes the actual stringing. Start from the bottom and work your way up. This keeps the cord from dragging on the ground and reduces tripping hazards.
For a spiral pattern:
- Attach the first end of the light strand to a hook at the base.
- Loop the strand around the trunk, using hooks to guide it upward in a spiral. Keep the spacing consistent (I use my hand as a spacer—about 6 inches).
- When you reach a branch, drape the lights over it (not wrapped) using a hook to hold the cord in place.
- Continue until you reach the top or desired height.
For a ring pattern (horizontal bands):
- Install hooks in a circle at your chosen height.
- Run the strand around the ring, securing it to each hook.
- Use multiple rings at different heights for a tiered look.
For a canopy drape (hanging down):
- Secure a central hub (like a metal ring or heavy-duty hook) at the main crotch of the tree.
- Attach multiple light strands to the hub and let them hang down like a chandelier.
- Use varying lengths for a natural, cascading effect.
Step 5: Secure and Conceal the Cord
The cord is the ugliest part—but also the most important. Don’t just let it dangle.
Here’s how to manage it:
- Run the main power cord along the trunk using clips, keeping it tight and off the ground.
- Use camouflage cord covers or wrap the cord in brown electrical tape to blend with bark.
- If the cord must cross grass, bury it shallowly under mulch or use a cord cover strip (sold at hardware stores).
- Plug the cord into a GFCI outlet or use a weatherproof outlet cover to prevent shocks.
Warning: Never run cords across walkways without protection. I once tripped over a loose cord during a party—embarrassing and dangerous. Use cord covers or run cords underground if possible.
Step 6: Connect and Test the System
Now plug everything in. But first—double-check:
- All connections are snug (no loose plugs)
- Cords are secured and not pinched
- No water can pool in sockets (use silicone caps if needed)
Turn on the lights. Walk around the tree from all angles. Look for:
- Dark spots (add more lights or reposition)
- Overly bright areas (add diffusers or reposition)
- Flickering (replace that section)
If using multiple trees, daisy-chain the strands with outdoor-rated connectors. Just don’t exceed the manufacturer’s max wattage or strand count.
Step 7: Add Automation (Optional but Awesome)
Want lights that turn on at sunset and off at midnight? Add a timer or smart plug.
I use a smart plug with geofencing—my lights turn on when I get home and off when I leave. No more forgetting to unplug!
You can also sync lights to music, change colors with an app, or set schedules for holidays. Just make sure your smart device is rated for outdoor use and protected from rain.
Step 8: Maintain and Remove (When the Time Comes)
Lights don’t need to be permanent. In fact, they shouldn’t be on young trees for more than a few months.
Here’s how to remove safely:
- Unplug and turn off the power.
- Remove lights strand by strand, unhooking from clips.
- Unscrew or peel off adhesive hooks (adhesive remover helps).
- Inspect the tree for marks or stress. If you see bark damage, consult an arborist.
For permanent installations (on mature trees), check annually. Remove and reinstall every 2–3 years to allow bark to expand.
Pro Tips & Common Mistakes to Avoid
After years of stringing lights—some successful, some… not so much—I’ve learned a few hard truths. Here are the real-world insights that don’t make it into most guides.
✅ Do: Use a Light Layout Sketch
I used to wing it. Big mistake. Now, I draw a simple diagram showing trunk, branches, and light paths. It saves time, reduces waste, and prevents over-lighting.
✅ Do: Leave Room for Growth
Even mature trees grow. Use slack in the cord and adjustable clips so you can loosen them as the tree thickens. I once had a client’s lights cut into bark because they were too tight after two summers.
❌ Don’t: Use Nails, Staples, or Tight Zip Ties
These damage the cambium layer—the part of the tree that transports water and nutrients. Even small wounds can invite pests and disease. The how to string outdoor lights on trees in 2026 a complete guide prioritizes tree health over convenience.
❌ Don’t: Overload the Tree
Too many lights = too much weight and heat. Stick to 1 strand per 10 inches of trunk diameter as a rule of thumb. For example, a 20-inch diameter tree can handle 2 strands safely.
✅ Do: Use a Timer
Leaving lights on all night wastes energy and can stress trees. A simple timer cuts power after 4–6 hours. Bonus: it saves money and reduces light pollution.
❌ Don’t: Ignore Weather Ratings
Indoor lights won’t survive rain, snow, or UV rays. Always check the IP rating (IP44 or higher for outdoor use). Look for “all-weather” or “year-round” labels.
✅ Do: Involve Your Tree (Yes, Really)
Walk around the tree and look at it from different angles. Does it look balanced? Are lights hidden in shadows? Adjust as needed. The best displays feel natural, not forced.
FAQs About How to String Outdoor Lights on Trees in 2026 A Complete Guide
You’ve got questions. I’ve got answers—straight, honest, and based on real experience.
Q: Can I leave outdoor lights on trees all year?
Only on mature, healthy trees and with tree-safe mounting. Even then, I recommend removing them every 2–3 years to inspect the bark and let the tree breathe. Young trees? Keep lights seasonal (3–6 months max).
Q: What’s the safest way to hang lights on a young tree?
Use flexible rubber straps or adhesive-backed clips. Never wrap lights tightly. For short-term displays (like holidays), consider ground-level uplighting instead—point lights upward from the base.
Q: How do I hide the power cord?
Run it up the trunk with clips, then along the ground under mulch or a cord cover. For a cleaner look, bury it shallowly (2–3 inches deep) or use a camouflage cord tube. Just avoid tripping hazards!
Q: Are LED lights better than incandescent for trees?
Absolutely. LEDs run cooler, use less energy, and last longer. Incandescent bulbs can burn bark and attract insects. Stick with LEDs rated for outdoor use—they’re worth the investment.
Q: What if I have multiple trees? How do I connect the lights?
Use outdoor-rated extension cords and weatherproof connectors. Daisy-chain strands from tree to tree, but don’t exceed the max wattage (usually 210–420 watts, depending on the brand). Use a central power hub near a GFCI outlet to minimize cord clutter.
Q: Can I use solar-powered lights on trees?
Only if the lights get direct sunlight. Most tree canopies block the sun, so solar panels won’t charge well. I’ve tried it—lights died by 8 PM. Stick with grid-powered for reliability.
Q: How do I remove adhesive hooks without damaging the tree?
Use adhesive remover (like Goo Gone) or rubbing alcohol. Gently peel, don’t scrape. If residue remains, wipe with a soft cloth. Avoid acetone—it can damage bark.
Final Thoughts
Stringing outdoor lights on trees isn’t just about aesthetics—it’s about creating a space that feels warm, welcoming, and alive. When done right, the glow of lights through leaves can turn a simple backyard into a personal sanctuary.
This how to string outdoor lights on trees in 2026 a complete guide is built on years of learning, mistakes, and tree-saving fixes. The key takeaway? Respect the tree. Use safe mounting, leave room for growth, and remove lights when needed.
Start small. Try one tree with a simple spiral. Test your layout. Adjust as you go. And most importantly—enjoy the process. There’s no rush. The best outdoor lighting grows with your space, your style, and your trees.
Now grab your lights, a cup of coffee, and get outside. Your tree is waiting—and it’s going to look amazing.
Action Step: Pick one tree this weekend. Sketch your layout, gather your tools, and string those lights with care. You’ve got this.
“`

