Featured image for how to string outdoor lights with wire
Image source: i.pinimg.com
Stringing outdoor lights with wire in 2026 is easier than ever with modern, weather-resistant materials and smart planning. Choose durable, UV-protected wire rated for outdoor use and map your layout to avoid overloading circuits. Secure lights evenly using cable clips or zip ties, ensuring a safe, professional look that lasts through every season.
How to String Outdoor Lights with Wire in 2026 Easy Guide
Key Takeaways
- Plan your layout: Sketch the area to avoid mistakes and ensure even spacing.
- Use outdoor-rated wire: Always choose weatherproof, insulated cables for safety and durability.
- Secure with hooks or clips: Mount lights with proper hardware to prevent sagging or damage.
- Test before finalizing: Check connections and brightness before permanently installing lights.
- Weatherproof connections: Seal joints with silicone or covers to prevent water damage.
- Use a timer: Automate lights to turn on/off, saving energy and adding convenience.
Why This Matters / Understanding the Problem
Remember that first summer night when you tried to string up some fairy lights, only to have them sag, tangle, or fall after two days? Yeah, me too. It’s frustrating—especially when you’re trying to create that cozy, inviting vibe in your backyard, patio, or balcony.
The truth is, most people skip the wire and go straight for clips or adhesive hooks. But those rarely hold up against wind, rain, or even a playful cat. That’s why knowing how to string outdoor lights with wire in 2026 easy guide isn’t just a neat trick—it’s a game-changer.
Using a support wire gives your lights structure, longevity, and that professional look you see in design magazines. Whether you’re lighting a pergola, a garden path, or a simple fence line, a wire system ensures your lights stay taut, safe, and stunning all season long.
And here’s the best part: it’s not hard. With the right tools and a little know-how, you can do this in a weekend—even if you’ve never held a drill before. This guide walks you through every step, with real-life insights and practical fixes I’ve learned after years of trial (and yes, a few errors) in my own backyard.
💡 Pro Insight: The key to lasting outdoor lighting isn’t the lights themselves—it’s the structure behind them. Think of the wire like the bones of your setup. No wire? Your lights will collapse like a house of cards in a breeze.
What You Need
Before we dive in, let’s gather everything you’ll need. I’ve kept this list practical and budget-friendly. You don’t need a full workshop—just a few key tools and materials.
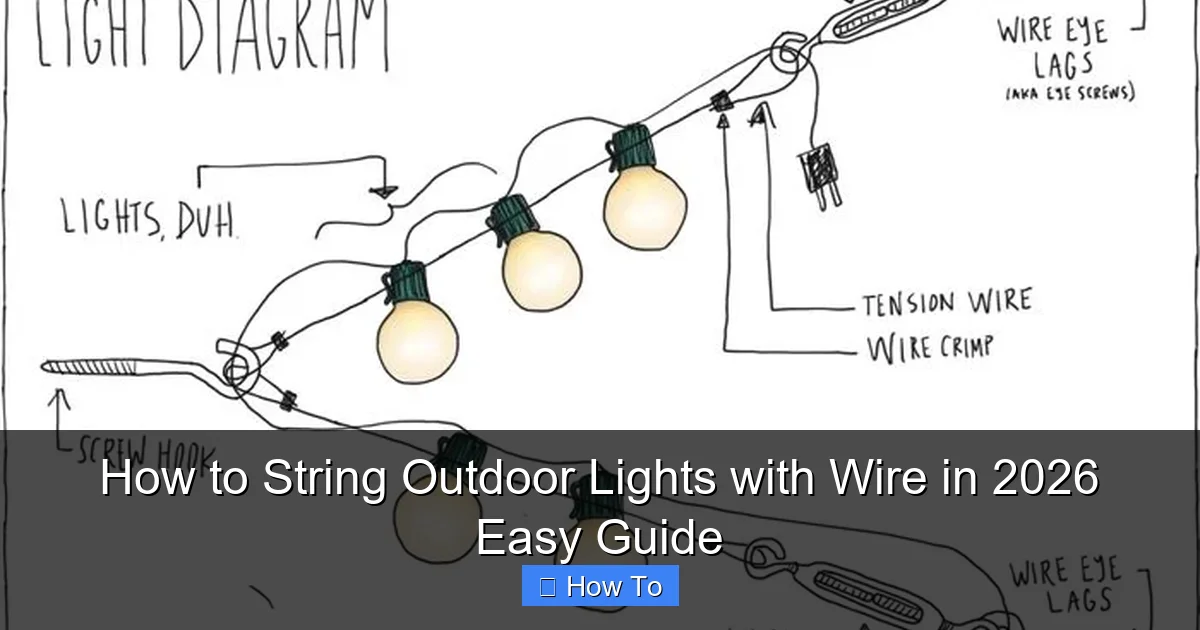
Visual guide about how to string outdoor lights with wire
Image source: themprojects.com
Essential Tools & Materials
- Galvanized or stainless steel wire (16–18 gauge recommended)
- Turnbuckles (for tensioning the wire)
- Eye screws or lag hooks (to anchor the wire at both ends)
- Wire cutters (or heavy-duty scissors)
- Drill with masonry or wood bits (depending on your mounting surface)
- Measuring tape
- Level (optional, but helpful for straight lines)
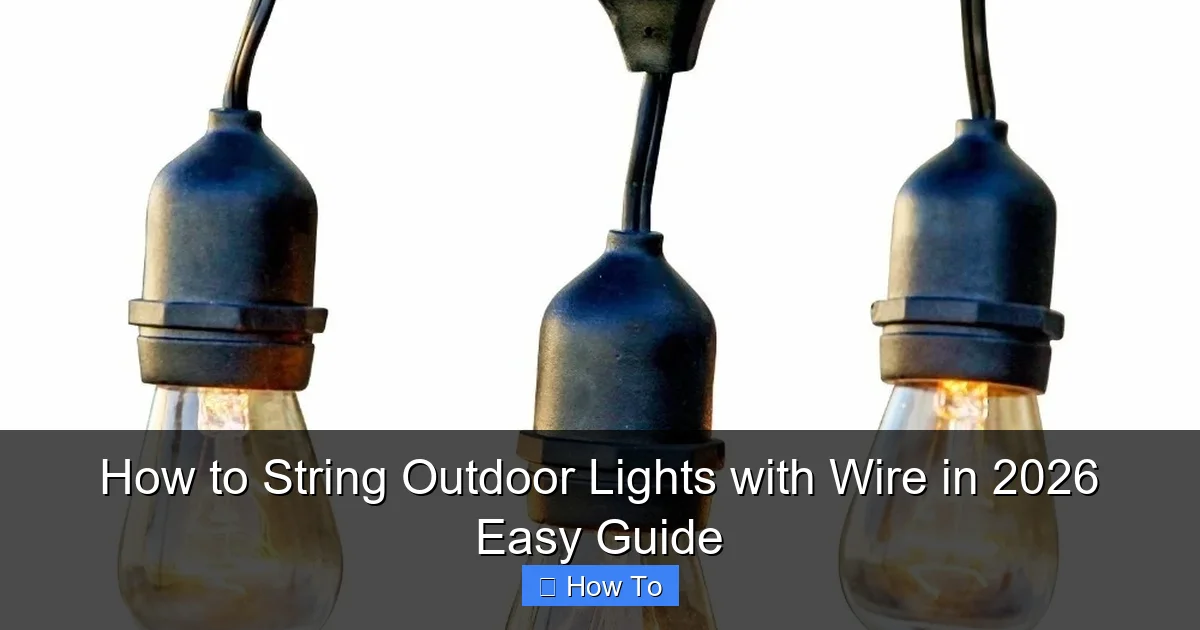
- Outdoor-rated string lights (LEDs are ideal for energy efficiency and durability)
- Light clips or S-hooks (to attach lights to the wire)
- Zip ties (optional) – great for securing loose ends
- Work gloves – trust me, wire can bite
You can find most of these at your local hardware store or online. I like using stainless steel for coastal areas or high-humidity climates—it resists rust better than galvanized.
⚠️ Warning: Avoid cheap plastic-coated wire. It may look nice, but it degrades fast in UV light and snaps under tension. Stick with metal—your future self will thank you.
Step-by-Step Guide to How to String Outdoor Lights with Wire in 2026 Easy Guide
Now for the fun part: building your system. This method works for patios, pergolas, fences, trees, and even between poles. I’ll walk you through each step like we’re doing this together on a sunny Saturday morning.
Step 1: Plan Your Layout and Measure the Distance
Start by deciding where you want your lights to go. Are you lining a walkway? Hanging them between two trees? Creating a canopy over a seating area?
Grab your measuring tape and measure the exact distance between your two anchor points. Write it down. This helps you cut the wire to the right length—plus, you’ll know how many turnbuckles and eye screws you need.
Pro tip: Add about 10–15% extra to your measurement. You’ll need slack for threading the wire through the turnbuckle and adjusting tension later.
Also, consider light spacing. If your lights are on a 6-inch bulb spacing, you’ll want your wire long enough to cover the full span without stretching the lights too thin.
💡 Personal Note: I once skipped measuring and just “eyeballed” it. The wire was too short, and I had to redo the whole thing. Measure twice, cut once—especially with wire.
Step 2: Install Eye Screws or Lag Hooks at Both Ends
Now, mark where you’ll anchor your wire. Use a pencil or marker to pinpoint the spots. Make sure they’re level—especially if you want a clean, straight line.
Drill pilot holes first. This prevents wood from splitting and makes screwing in the eye hooks easier. For masonry (like brick or stucco), use a masonry bit and wall anchors if needed.
Screw in the eye hooks or lag hooks by hand first, then tighten with a wrench or pliers. Make sure they’re secure—these are the foundation of your entire setup.
For trees, use tree-friendly eyebolts or wrap the trunk with a protective sleeve. Never tie wire directly around a tree—it can damage the bark and restrict growth.
⚠️ Safety Note: If mounting on a house, avoid drilling into electrical conduits or water pipes. Use a stud finder to locate safe spots, and when in doubt, call a pro.
Step 3: Thread the Wire Through One End and Attach the Turnbuckle
Cut your wire to length (remember the 10–15% extra). Now, here’s a trick I learned the hard way: thread the wire through the eye hook first, then loop it back and twist it 3–4 times to secure it.
Alternatively, use a wire clamp or crimp sleeve for a more permanent hold. But for most DIYers, a good twist works fine—just make sure it won’t slip.
Now, attach one end of the turnbuckle to the other eye hook. The turnbuckle has two threaded ends that tighten when twisted—this is how you’ll adjust tension later.
Leave the turnbuckle loose for now. You’ll tighten it once the wire is in place.
💡 Pro Tip: If your turnbuckle is stiff, spray it with a little WD-40. It’ll make tightening much smoother—especially after a few months of weather exposure.
Step 4: String the Wire Between the Two Points
Now, stretch the wire across the span and attach it to the second anchor point. Again, thread it through the eye hook, loop it back, and twist tightly.
Don’t pull it too tight yet—just enough to keep it off the ground. You’ll use the turnbuckle for final tensioning.
If your span is long (over 20 feet), consider adding a mid-span support. A small eye hook or hook on a post can prevent sagging. I use these for pergolas with wide beams.
For sloped areas (like a hill or angled roof), adjust the height of one anchor point so the wire runs straight. Use a level to check alignment.
⚠️ Common Mistake: Pulling the wire too tight before attaching the turnbuckle. This can warp your anchors or snap the wire. Let the turnbuckle do the work.
Step 5: Tighten the Wire Using the Turnbuckle
This is where the magic happens. Slowly twist the turnbuckle’s center barrel. As you turn, it pulls both ends inward, tightening the wire.
Go slow. Check the wire frequently. You want it taut—like a guitar string—but not so tight that it’s straining the anchors.
Use your fingers to pluck the wire. A low “thunk” means it’s too loose. A high “ping” means it’s just right.
Once tight, give the wire a gentle tug to make sure it doesn’t slip at the anchors. If it does, double-check your twists or add a crimp sleeve.
💡 Personal Insight: I once tightened a wire so much it pulled an eye hook out of my cedar beam. Lesson learned: tension is good, over-tension is disaster.
Step 6: Attach Your String Lights to the Wire
Now for the fun part—adding the lights! You’ve built the structure. Now it’s time to dress it up.
Use light clips or S-hooks to hang your lights from the wire. Most outdoor string lights come with built-in hooks, but clips give you more control over spacing.
Start at one end and work your way across. Space the lights evenly—about every 6–12 inches, depending on the look you want. Closer spacing = more sparkle. Farther apart = a subtle glow.
For a “curtain” effect (like between two posts), drape the lights vertically. For a “canopy,” run them horizontally or in a zigzag pattern.
Don’t forget to plug in the lights and test them as you go. Nothing worse than finishing and realizing one strand is dead.
⚠️ Warning: Don’t wrap lights directly around the wire. This can damage the insulation and create a fire hazard. Always use clips or hooks.
Step 7: Secure Loose Ends and Manage Cords
You’re almost done! But don’t skip this step—messy cords ruin the look and can be tripping hazards.
Use zip ties or velcro straps to bundle excess cord near the plug. Tuck it behind a beam or under a railing.
If your lights have multiple strands, use a junction box or outdoor-rated extension cord to keep connections dry. Never leave plugs exposed on the ground.
For a clean finish, run the power cord along the wire using clips or tape (outdoor-rated, of course). This hides it from view and protects it from weather.
And hey—consider a timer or smart plug. I use one that turns my lights on at dusk and off at midnight. Saves energy and means I don’t have to remember to switch them off.
💡 Pro Tip: Label your timer “Outdoor Lights” so guests don’t accidentally unplug it. I’ve had that happen… more than once.
Pro Tips & Common Mistakes to Avoid
After doing this for years—and fixing my fair share of botched setups—here are the real-world insights you won’t find in a product manual.
Use the Right Wire Gauge
Thinner wire (20+ gauge) is cheaper, but it’s not strong enough for long spans. I recommend 16 or 18 gauge for most setups. It’s flexible enough to work with, but sturdy enough to last.
Choose Weather-Resistant Materials
Galvanized steel is good. Stainless steel is better—especially if you live near the ocean or in a rainy climate. Avoid aluminum—it’s lightweight but weak under tension.
Don’t Skip the Turnbuckle
I’ve seen people tie knots or use fixed loops. Big mistake. Wire stretches over time, especially with temperature changes. A turnbuckle lets you re-tighten it in spring or after a storm.
Plan for Expansion
Wood expands and contracts with moisture. If you’re mounting on a wooden beam, use expansion eye screws or leave a little slack in the wire to absorb movement.
Check for Clearance
Make sure your lights are at least 7–8 feet off the ground. This keeps them out of the way of people and pets. For walkways, go higher—10 feet is ideal.
Test Before You Celebrate
Plug in the lights, turn them on, and walk around. Look for sagging spots, flickering bulbs, or cords in the way. Fix issues now—before guests arrive.
Common Mistakes (That I’ve Made Too)
- Using indoor lights outdoors: They’re not rated for UV or moisture. Stick with outdoor-rated or wet-location string lights.
- Ignoring the wind: A strong gust can snap a weak wire or pull out an anchor. Always use turnbuckles and mid-span supports on long runs.
- Overloading one circuit: Too many lights on one outlet can trip the breaker. Use a power meter or split across multiple circuits.
- Forgetting the timer: Manual on/off means you’ll forget. A $15 timer saves energy and hassle.
- Not checking bulb types: Some LED strings can’t be cut or extended. Read the label before buying.
💡 Real Talk: My first attempt used cheap plastic wire and no turnbuckle. It lasted one week. My current setup has been up for three years with zero issues. The difference? Planning and quality materials.
FAQs About How to String Outdoor Lights with Wire in 2026 Easy Guide
Can I use any wire for outdoor lights?
Not really. Plastic-coated or aluminum wire won’t last. Go for galvanized or stainless steel—they resist rust and handle tension. I’ve seen people try fishing line or paracord, but those stretch and degrade in UV light. Stick with metal.
Do I need a permit to hang outdoor lights?
Usually not—especially for temporary or seasonal setups. But if you’re wiring into your home’s electrical system or installing permanent fixtures, check your local codes. When in doubt, consult an electrician.
How do I hang lights between two trees without hurting them?
Use tree-friendly eyebolts with protective rubber sleeves. Or, use a ratchet strap system that wraps around the trunk without piercing the bark. Never tie wire directly around a tree—it can girdle and kill it over time.
Can I use this method for Christmas lights?
Absolutely! In fact, this is the best way to hang holiday lights. The wire keeps them straight and prevents sagging. Plus, you can reuse the wire year after year—just swap out the lights.
What if my span is over 30 feet?
Add mid-span supports every 10–15 feet. Use posts, poles, or existing structures. I’ve used old garden stakes or even a tall ladder (temporarily) to keep the wire from sagging. For very long runs, consider a tensioned cable system with multiple turnbuckles.
Are solar lights compatible with a wire system?
Yes—but with a caveat. Most solar lights have their own mounting system. You can still use a wire to guide them, but you’ll need to attach each light individually with clips or ties. It’s a bit more work, but it keeps them aligned and prevents tangling.
How often should I check the wire and lights?
I do a quick check every season—especially after winter. Look for rust, loose anchors, or frayed cords. Re-tighten the turnbuckle if needed. A 5-minute inspection can prevent a big mess later.
Final Thoughts
There’s something magical about walking into a backyard lit by soft, steady string lights. It feels warm, inviting, and just a little bit enchanting. And now, you know how to string outdoor lights with wire in 2026 easy guide—the right way.
This isn’t just about looks. It’s about creating a space where you want to spend time. Where friends gather, stories are told, and memories are made. And with a strong wire system, your lights will stay bright and beautiful for years.
You don’t need to be an electrician or a handyman. You just need a little patience, the right tools, and this guide. Follow the steps, avoid the common mistakes, and don’t rush the tensioning.
And remember: the wire is the hero here. It’s the silent support that keeps your lights shining. So invest in quality, check your anchors, and use that turnbuckle.
When you’re done, step back, turn on the lights, and take a deep breath. You did it. And next summer? You’ll do it even better.
Now go enjoy your glow. And if you run into a snag? Just re-read this guide. I’ve been there—and I’ve got your back.
💡 Final Tip: Take a photo of your setup when it’s done. You’ll want to remember how it looked—and you’ll have a reference for next year. Happy stringing!

