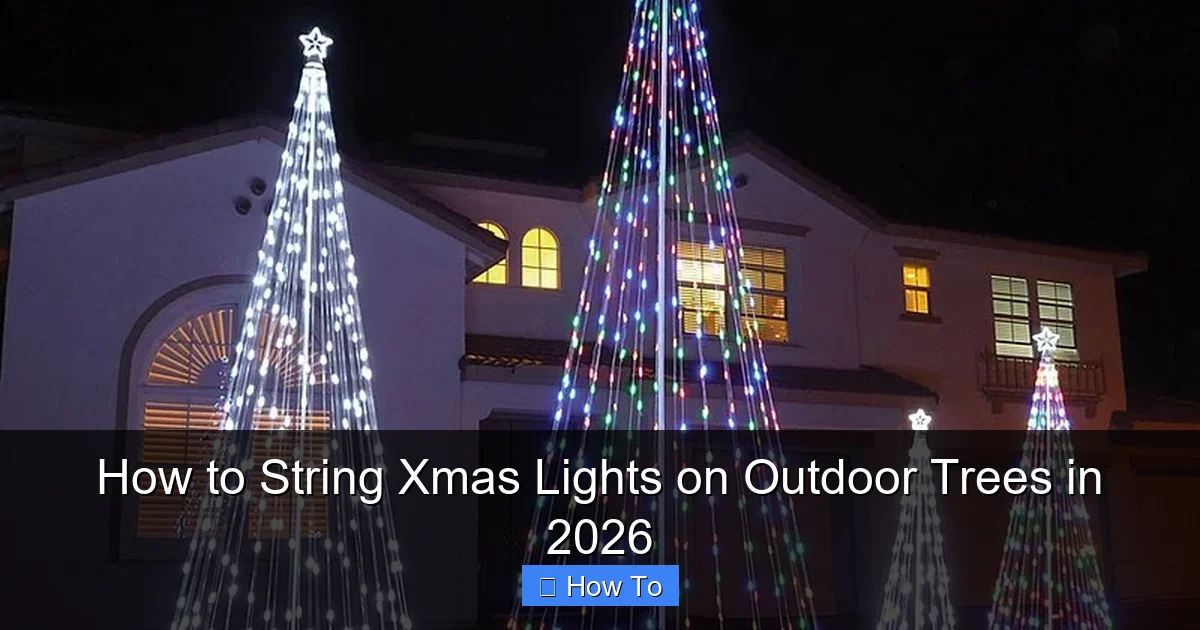
Featured image for how to string xmas lights on outdoor trees
Image source: homebrite.com
Wrap your outdoor trees like a pro in 2026 by starting at the base and working upward in a spiral pattern to ensure even, tangle-free coverage that highlights the tree’s natural shape. Use commercial-grade, weather-resistant LED lights with secure clips or zip ties for a safe, dazzling display that lasts all season.
“`html
How to String Xmas Lights on Outdoor Trees in 2026
Key Takeaways
- Plan your layout first: Sketch tree shapes and light coverage areas before starting.
- Use outdoor-rated lights: Ensure all lights are UL-listed for exterior use.
- Anchor lights securely: Wrap lights around branches, not trunks, to prevent damage.
- Opt for LED lights: Save energy and reduce fire risk with cool-burning LEDs.
- Install a timer: Automate on/off times for convenience and energy efficiency.
- Check connections regularly: Inspect for loose wires or water exposure post-installation.
Why This Matters / Understanding the Problem
There’s something magical about walking through a neighborhood where trees shimmer with twinkling holiday lights. It’s not just festive—it’s a warm, welcoming feeling that says, “The holidays are here.” But let’s be honest: how to string Xmas lights on outdoor trees in 2026 can feel like a chore, especially if you’ve ever tangled a 50-foot strand or spent an hour trying to reach the top of a tall pine.
You’re not alone. Every year, thousands of people struggle with uneven lighting, broken strands, or safety hazards. And with new LED options, smart lights, and weather-resistant tech hitting the market in 2026, the process has changed—but not necessarily gotten easier. That’s why this guide is here: to help you skip the headaches and get that picture-perfect glow with less stress and more joy.
Whether you’re decorating a small maple in your front yard or a towering evergreen, this guide will walk you through the smartest, safest, and most effective way to how to string Xmas lights on outdoor trees in 2026—so your home becomes the talk of the block.
What You Need
Before you start climbing, let’s get your toolkit ready. Here’s what you’ll need—no fancy gear, just smart, practical items.
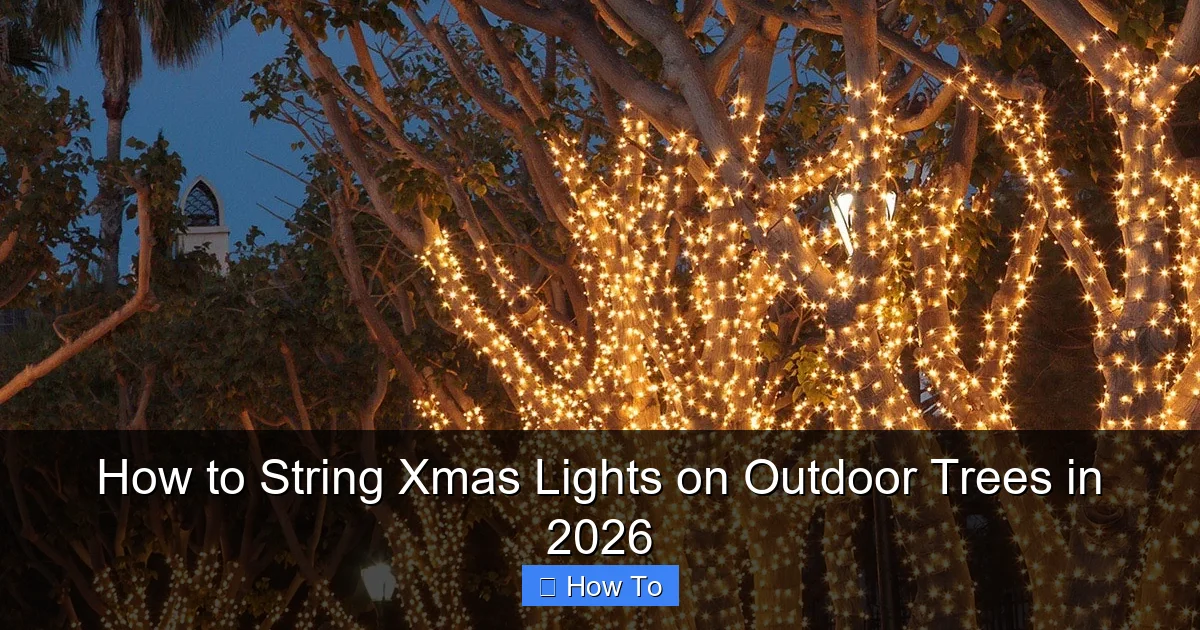
Visual guide about how to string xmas lights on outdoor trees
Image source: cdn.christmaslightsetc.com
- Weatherproof LED Christmas lights: Look for “UL Outdoor Rated” and check the IP rating (IP44 or higher is ideal for rain/snow). In 2026, many are energy-efficient and come with smart features like app control or color-changing modes.
- Extension cords (outdoor-rated): Use GFCI-protected cords to prevent shocks. Get one with multiple outlets if you’re lighting multiple trees.
- Light clips or hooks: Plastic or metal clips designed for outdoor use (avoid nails or staples—they damage bark and create entry points for pests).
- Telescoping light pole or ladder: A telescoping pole (with a hook end) is safer than a ladder for most trees. If you use a ladder, make sure it’s stable and on level ground.
- Work gloves: Protect your hands from rough bark and cold.
- Measuring tape: Helps estimate how many strands you’ll need based on tree height and circumference.
- Timer or smart plug: Automatically turns lights on at dusk and off at bedtime—saves energy and hassle.
- Zip ties or garden twist ties: For securing loose ends or managing cords.
- Flashlight or headlamp: If you’re working in the dark (common when testing lights).
Pro Insight: I learned the hard way that not all “outdoor” lights are truly weatherproof. Last year, a cheap set shorted after a light rain—and I had to redo everything. In 2026, invest in quality. Look for brands like GE, Twinkly, or Brizled with solid warranties.
Step-by-Step Guide to How to String Xmas Lights on Outdoor Trees in 2026
Let’s get into the nitty-gritty. This method works for deciduous trees (like oaks or maples) and evergreens (pines, firs, spruces). We’ll focus on safety, even coverage, and ease of removal.
Step 1: Plan Your Layout and Test the Lights
Before you hang a single bulb, test every strand. Plug them in and walk around the tree. Check for dead bulbs, flickering, or dim areas. In 2026, many LED sets have built-in diagnostics—use the app or remote to run a quick test.
Next, sketch a quick layout. Decide:
- Will you go up and down (vertical) or in a spiral (horizontal)?
- Do you want lights on the trunk only, or on major branches too?
- How many strands? Measure the tree’s height and girth (around the trunk at chest height). A good rule: 100 lights per 1 foot of tree height.
For a 10-foot tree, that’s about 1,000 lights—or 5 strands of 200. If you’re using smart lights, group them in zones (e.g., trunk, left branch, right branch) for easier control.
Why this matters: Planning saves you from running out of lights halfway up or having to re-hang strands. I once ran out of lights on a 12-foot tree—ended up using mismatched colors. Not my proudest moment.
Step 2: Start at the Base and Work Upward
Begin at the trunk, about 2–3 feet off the ground. Why? It gives you a stable starting point and keeps cords from dragging on wet grass.
Attach the first clip to the trunk (or a low branch) and hang the first light. Don’t plug anything in yet—just lay the strand along your planned path.
If you’re doing a vertical pattern, go straight up the trunk, spacing clips every 12–18 inches. For a spiral, wrap the strand around the trunk in a gentle helix, moving upward as you go.
Use your telescoping pole to reach higher clips. The hook end grabs the strand and lifts it into place. No ladder needed for trees up to 20 feet.
Pro Tip: Don’t pull the strand tight. Leave a little slack so wind and snow don’t snap it. Think “snug, not strained.”
Step 3: Secure the Lights with Outdoor Clips
Not all clips are created equal. In 2026, look for UV-resistant plastic clips that won’t crack in winter sun. Metal clips are durable but can conduct electricity if damaged—avoid them near power sources.
Place clips:
- Every 12–18 inches on the trunk.
- On major branches, every 2–3 feet.
- Near bends or turns to prevent sagging.
For evergreens, clip lights to the underside of branches. This hides the clips and creates a “floating” effect.
For deciduous trees, focus on the trunk and main limbs. Smaller twigs won’t hold clips well and may break under weight.
Warning: Never use nails, screws, or staples. They damage the tree’s bark, invite disease, and void warranties on some light sets. I’ve seen trees die from repeated nail use—don’t risk it.
Step 4: Extend to Branches (If Desired)
Want that full, glowing look? Light the branches. But do it smartly.
Start at the trunk and run a strand along the branch, not around it. Clip every 2–3 feet. Use shorter strands (50–100 lights) for smaller branches to avoid drooping.
For evergreens, tuck lights inside the canopy. This creates depth—lights glow from within, not just on the surface.
If you’re using smart lights, assign branches to different zones. That way, you can make one side flash red while the other pulses white. (Yes, it’s overkill—but also fun.)
Real Talk: Don’t overdo it. Too many lights can look gaudy. I once lit every branch on a 15-foot fir. My neighbors called it “the spaceship.” Scale back for elegance.
Step 5: Manage Cords and Power Sources
This is where most people fail. Messy cords are a tripping hazard and a pain to remove.
Here’s how to keep it clean:
- Run the main cord down the trunk, not across the yard. Clip it every 18 inches.
- Use zip ties or twist ties to bundle excess cord near the base.
- Plug into a GFCI outlet (outdoor-rated, with a cover). If you don’t have one, use a GFCI adapter.
- For multiple trees, use a power distribution box (like a holiday light hub) to avoid extension cord tangles.
In 2026, consider solar-powered lights for small trees or accent branches. They charge during the day and glow at night—no cords, no plugs.
Pro Insight: I use a smart plug with a timer. Lights turn on at 5:30 PM and off at 11 PM. No more “Did I leave the tree on?” panic.
Step 6: Test, Adjust, and Finalize
Now plug it in. Step back and look. Ask:
- Are the lights evenly spaced?
- Do any strands sag or droop?
- Is the glow balanced? (No dark spots or blinding areas.)
Adjust clips as needed. If a strand is too tight, add slack. If it’s loose, re-clip.
For smart lights, sync them with your phone or voice assistant. Set scenes (e.g., “Twinkle,” “Steady,” “Rainbow”) and schedules.
Take a photo. This helps you remember the layout for next year—and impresses your Instagram followers.
Personal Note: I always do a “night test” before calling it done. Lights look different in the dark than in daylight. A strand that looked perfect at 3 PM might have a dead section at 8 PM.
Step 7: Safety Check and Weatherproofing
Before you celebrate, do a final safety sweep:
- Are all connections dry and covered? Use waterproof caps or electrical tape.
- Are cords off the ground where pets or kids might chew them?
- Are clips secure but not too tight? They shouldn’t girdle the tree as it grows.
In 2026, many lights come with weatherproof seals on plugs. If yours don’t, cover them with a plastic bag or use a cord protector.
For snowy climates, consider clear plastic sleeves around the trunk (below the lights) to keep snow from piling on the base.
Warning: Never leave lights on during a thunderstorm. Unplug them if a storm is forecast. Better safe than sorry.
Pro Tips & Common Mistakes to Avoid
After 15+ years of decorating trees, I’ve seen what works—and what doesn’t.
- Use a light pole, not a ladder: I’ve fallen off a ladder twice. A telescoping pole (like the LightKeeper Pro) lets you hang lights from the ground. It’s safer, faster, and less tiring.
- Buy extra clips: Clips break, get lost, or don’t fit certain trees. I keep a box of mixed clips in my garage.
- Label your strands: Use colored tags or write on the plug: “Tree A – Trunk,” “Tree B – Branches.” Saves time next year.
- Don’t over-light: A 10-foot tree with 500 lights looks better than one with 1,500. Less is more.
- Check local regulations: Some HOAs limit light brightness or require timers. Know the rules before you start.
- Remove lights gently: Don’t yank them off. Unclip slowly, starting from the top. Store strands in labeled bags or reels.
Common Mistake: People forget to check light direction. If you’re using icicle lights, make sure they hang down, not up. I’ve seen upside-down icicles—it’s a holiday fail.
Pro Insight: In 2026, smart lights are worth the upgrade. You can change colors, sync to music, or set a sunrise mode for January 1st. But don’t overcomplicate it. A simple warm white glow often looks best.
FAQs About How to String Xmas Lights on Outdoor Trees in 2026
Got questions? I’ve got answers—from real-world experience.
Can I use indoor lights outdoors?
Nope. Indoor lights aren’t rated for moisture or temperature swings. In 2026, outdoor lights have thicker insulation, sealed plugs, and UV-resistant bulbs. Using indoor lights outside is a fire hazard.
How high should I go on the tree?
Go as high as you can safely reach—but don’t risk a fall. For most trees, 8–12 feet is plenty. The top third of the tree doesn’t need lights to look festive. Focus on the trunk and mid-level branches.
What if my tree is too tall?
Use a telescoping pole with a hook. Or, hire a professional. Some tree services offer holiday lighting. It’s worth the cost if you’re decorating a 25-foot spruce.
Can I leave lights up all winter?
You can, but it’s not ideal. Lights degrade faster in snow and ice. Remove them by January 15th to prevent damage. If you must leave them, use commercial-grade lights (rated for 6+ months outdoors).
How do I prevent lights from tangling?
Store them properly. Wrap each strand around a cardboard rectangle or use a light reel. Label each one. When you unbox them, lay them out straight before hanging. No more “Christmas light knot” frustration.
Are LED lights better than incandescent?
Yes, in 2026, LED is the clear winner. They use 80% less energy, last 25x longer, and don’t burn out as quickly. Plus, many have smart features. Incandescents are nostalgic but outdated.
What if a bulb burns out?
LED sets often have “shunted” circuits—so one dead bulb won’t kill the whole strand. But check the manual. Some 2026 models have app alerts for dead bulbs. If a strand goes dark, use a light tester or replace the bulb.
Final Thoughts
Stringing Christmas lights on outdoor trees isn’t just about decoration—it’s about creating a moment. A moment where your family gathers outside, hot cocoa in hand, to see the first glow. A moment where neighbors smile as they drive by.
How to string Xmas lights on outdoor trees in 2026 is easier than ever, thanks to better tools, smarter lights, and a focus on safety. But the magic comes from doing it with care, creativity, and a little patience.
Remember: Plan first, test your lights, use the right clips, and prioritize safety. Don’t rush. Take your time. And when you’re done, step back and enjoy it. That’s what the holidays are for.
Next year, you’ll be faster. You’ll know what works and what doesn’t. And you’ll have a photo to prove it. So go ahead—light up that tree. The neighborhood’s waiting.
One last tip: After you finish, leave a note for next year’s you. Tape it to the light box: “Used 4 strands, spiral pattern, timer set to 5:30 PM.” Future you will thank you.
“`

