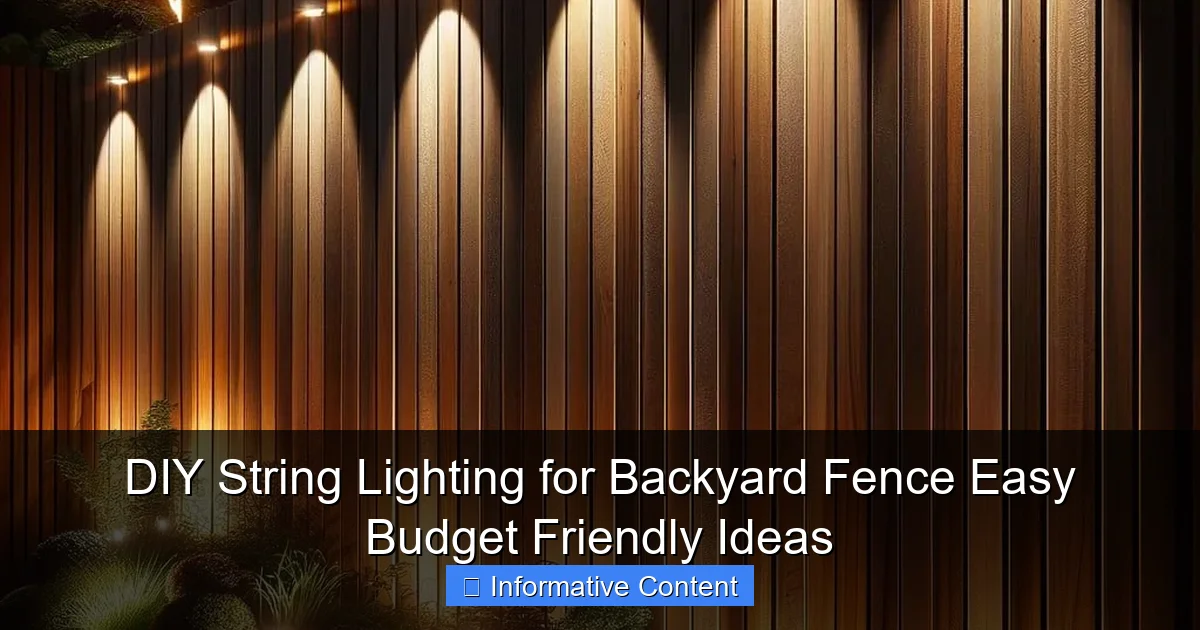
Featured image for diy string lighting for backyard fence
Image source: i.pinimg.com
Transform your backyard fence into a glowing oasis with easy, budget-friendly DIY string lighting ideas that require no electrical expertise and minimal tools. From solar-powered strands to clever clip-on solutions, these simple projects add instant ambiance for cozy nights or lively gatherings—without breaking the bank.
Key Takeaways
- Plan spacing first: Measure fence length to evenly space lights for balanced ambiance.
- Use weatherproof lights: Choose outdoor-rated string lights to withstand elements.
- Install hooks or clips: Secure lights with damage-free clips for easy setup and removal.
- Power source matters: Place lights near outlets or use solar-powered options for convenience.
- Layer for depth: Combine fence lights with ground lighting for a dynamic look.
- DIY on a budget: Repurpose materials like mason jars for low-cost decorative covers.
📑 Table of Contents
- Why String Lighting Can Transform Your Backyard
- Choosing the Right String Lights for Your Fence
- Tools and Materials You’ll Need
- Step-by-Step Installation Guide
- Creative Design Ideas to Elevate Your Fence
- Maintaining and Troubleshooting Your String Lights
- Final Thoughts: Light Up Your Life (On a Budget)
Why String Lighting Can Transform Your Backyard
Remember the last time you hosted a backyard barbecue or sat outside with a glass of wine after sunset? Chances are, the atmosphere made all the difference. Soft, ambient lighting can turn a simple fence into a magical boundary, creating a cozy and inviting space. DIY string lighting for backyard fence is one of the easiest and most budget-friendly ways to achieve this effect. Whether you’re planning a romantic dinner under the stars or a lively gathering with friends, string lights add warmth and charm without breaking the bank.
What’s great about this project is that it doesn’t require professional skills or expensive tools. With a few basic materials and a little creativity, you can install lights that look professionally done. Plus, the flexibility of string lights means you can tailor the design to your space, style, and lighting needs. From rustic Edison bulbs to modern LED strands, there’s something for every taste. And the best part? You can do it all yourself in just a few hours.
Choosing the Right String Lights for Your Fence
Types of String Lights: Pros and Cons
Not all string lights are created equal. Before you start shopping, it’s important to understand the different types available and how they’ll work with your DIY string lighting for backyard fence project.
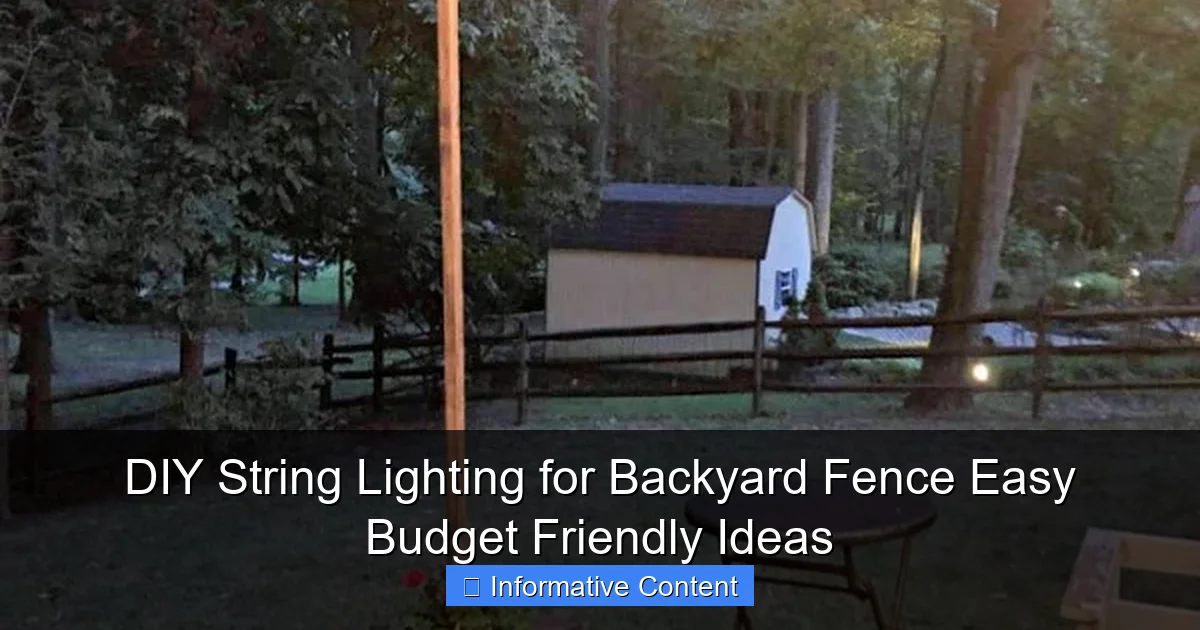
Visual guide about diy string lighting for backyard fence
Image source: craftionary.net
- Incandescent Bulbs: These classic bulbs emit a warm, golden glow that’s perfect for a cozy, nostalgic feel. However, they use more energy and burn out faster than LEDs. They’re also less durable in outdoor conditions.
- LED Bulbs: Energy-efficient and long-lasting, LEDs are ideal for outdoor use. They come in warm white, cool white, and even color-changing options. While slightly more expensive upfront, they save money on electricity and replacements over time.
- Solar-Powered Lights: These are great for eco-conscious homeowners. They charge during the day and turn on automatically at dusk. However, they may not be as bright or reliable in shaded areas or during cloudy weather.
- Edison-Style Bulbs: With their vintage look, these are a popular choice for modern-rustic designs. They’re usually LED-based, so you get the style without the high energy cost.
- Net Lights: These are pre-strung in a grid pattern, making them perfect for covering large areas quickly. They’re ideal if you want even coverage across a wide fence section.
Key Features to Consider
When selecting lights, keep these practical factors in mind:
- Weather Resistance: Look for lights rated for outdoor use (IP44 or higher). This ensures they can handle rain, wind, and humidity.
- Length and Spacing: Measure your fence first. Standard strands are 24–48 feet long. If your fence is longer, you’ll need to connect multiple strands. Check if the lights are end-to-end connectable.
- Power Source: Plug-in lights need access to an outdoor outlet. If that’s not possible, consider solar or battery-powered options. Extension cords are an option, but make sure they’re rated for outdoor use and buried or elevated to avoid tripping hazards.
- Dimming and Controls: Some LED lights come with remote controls or smartphone apps, allowing you to adjust brightness or set timers. This adds convenience and energy savings.
Pro Tip: Buy one extra strand than you think you’ll need. You’ll likely need it for corners, overlaps, or mistakes.
Tools and Materials You’ll Need
Essential Supplies
Before you start hanging lights, gather everything you need. Here’s a checklist to make your DIY string lighting for backyard fence project go smoothly:
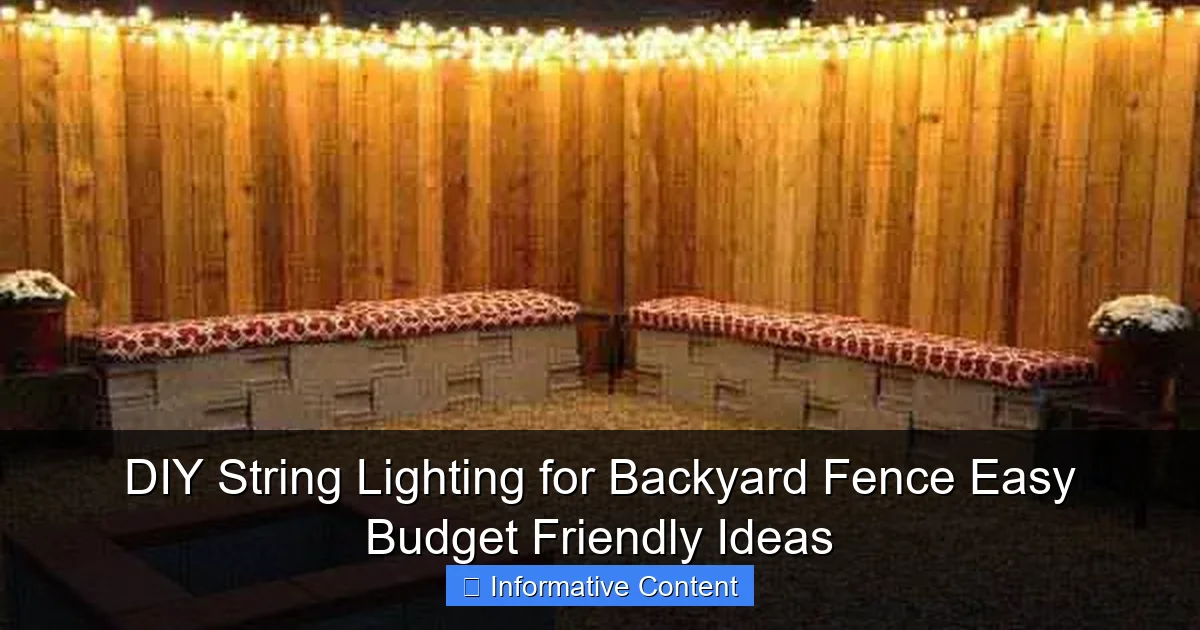
Visual guide about diy string lighting for backyard fence
Image source: woohome.com
- String lights (LED or solar, based on your choice)
- Outdoor-rated extension cords (if using plug-in lights)
- Weatherproof zip ties or cable clips
- Outdoor-rated adhesive hooks or fence clips (great for wood, vinyl, or metal)
- Stainless steel screw-in hooks or eye hooks (for permanent installations)
- Measuring tape
- Drill with appropriate bits (if using screw-in hooks)
- Ladder (for tall fences)
- Scissors or wire cutters (for trimming zip ties)
- Timer or smart plug (optional, for automation)
Optional Upgrades for Longevity
If you want your lights to last through multiple seasons, consider these upgrades:
- Silicone Sealant: Apply a small dab to the base of each bulb socket to prevent moisture from entering.
- Light Hangers with Rubber Pads: These reduce wear on your fence and prevent scratches.
- Weatherproof Junction Box: If you’re connecting multiple strands, use this to protect the connection from rain.
- UV-Resistant Cable Ties: Regular zip ties degrade in sunlight. UV-resistant ones last much longer.
Personal Note: I once used regular zip ties on a vinyl fence. By the next summer, they’d turned brittle and snapped in the wind. Learned my lesson—always go for UV-rated materials!
Step-by-Step Installation Guide
Step 1: Plan Your Layout
Before you start drilling or clipping, take time to plan. Walk around your yard and visualize how the lights will look. Ask yourself:
- Do you want lights along the top of the fence, in a zigzag pattern, or in a canopy style?
- Will you run them straight across, or drape them for a more relaxed look?
- Where will the power source be? Can you reach it without a long extension cord?
For most fences, running lights along the top rail or just below it works best. This keeps them visible and avoids tripping hazards. If your fence has posts, consider wrapping lights around them for added dimension.
Step 2: Install Hanging Hardware
The method depends on your fence material:
- Wood Fence: Use screw-in hooks or eye hooks. Drill a small pilot hole first to prevent splitting. Space hooks 2–3 feet apart.
- Vinyl or Composite Fence: Avoid drilling if possible. Use adhesive hooks or fence clips designed for vinyl. Test a small area first to ensure the adhesive holds.
- Metal Fence: Magnetic hooks work well, or use heavy-duty zip ties around the rails.
Tip: For a cleaner look, install hooks on the inside of the fence (facing your yard). This hides the hardware and keeps the outside looking neat.
Step 3: Hang the Lights
Start at the end closest to your power source. Here’s how:
- Attach one end of the string to a hook or clip.
- Unroll the string as you go, gently draping it over each hook.
- For a straight line, pull the string taut. For a draped effect, let it hang in gentle curves.
- Secure each bulb socket with a zip tie or clip to prevent sagging.
- Connect multiple strands end-to-end, if needed. Use a weatherproof junction box for the connection.
If using solar lights, place the solar panel in a sunny spot—ideally on a post or nearby structure. Angle it toward the afternoon sun for maximum charging.
Step 4: Test and Adjust
Plug in the lights (or wait for dusk with solar) and check the entire run. Look for:
- Dark spots or overly bright areas (adjust spacing if needed)
- Loose bulbs (tighten or re-secure)
- Tripping hazards (tuck cords under rails or use cord covers)
Make small adjustments until the lighting is even and safe. This is also a good time to set a timer or smart plug to automate on/off times.
Creative Design Ideas to Elevate Your Fence
Classic Top Rail Lighting
The simplest and most effective approach. Run lights along the top of your fence, spacing bulbs 6–12 inches apart. This creates a clean, elegant outline that defines your outdoor space. Use warm white LEDs for a timeless look.
Example: My neighbor did this with 40-foot LED strands and adhesive clips. The result? A soft, glowing border that makes her patio feel like a private oasis.
Zigzag or Crisscross Pattern
For a more dynamic look, run lights diagonally between fence posts. This adds movement and visual interest, especially on long fences. Use a measuring tape to keep the angles consistent.
Tip: Start from the center and work outward to ensure symmetry. Use zip ties to secure the crossing points.
Canopy or “Fairy Light” Effect
Attach lights to the top of the fence, then let them hang down in gentle swags or waves. This works especially well if you have trees or posts to anchor the ends. The result is a dreamy, floating canopy of light.
For extra drama, layer multiple strands at different heights. Just be sure to leave space between them so the lights don’t tangle.
Wrap-Around Posts
Highlight individual fence posts by wrapping lights around them. Use a spiral pattern for a modern look, or crisscross for a rustic feel. This is perfect if your fence has decorative posts or pillars.
Pro Tip: Use battery-powered mini lights for posts. No need for outlets, and they’re easier to install.
Themed Lighting for Events
Switch out bulbs or add colored filters for holidays or parties. Use orange and purple for Halloween, red and green for Christmas, or pastels for a spring garden party. Some smart lights even let you change colors with an app.
Maintaining and Troubleshooting Your String Lights
Seasonal Care Tips
Even the best DIY string lighting for backyard fence setup needs occasional maintenance. Here’s how to keep it looking great year after year:
- Winter Storage: In areas with heavy snow or ice, remove lights and store them indoors. Cold can damage wiring and bulbs.
- Spring Checkup: Inspect for frayed wires, loose bulbs, or broken sockets. Replace damaged strands before hanging.
- Cleaning: Wipe down bulbs with a damp cloth to remove dust and grime. Avoid harsh chemicals.
- Hardware Inspection: Check hooks and clips for rust or wear. Replace as needed.
Common Problems and Fixes
Even with careful installation, issues can arise. Here’s how to handle them:
| Problem | Likely Cause | Solution |
|---|---|---|
| Flickering or dim lights | Loose bulb, faulty connection, or low voltage | Check each bulb. Tighten or replace. Use a voltage tester if multiple strands are connected. |
| Half the strand is out | Blown fuse (in plug) or damaged bulb | Replace fuses (if accessible). Test bulbs individually. Replace bad ones. |
| Solar lights not charging | Panel in shade, dirty, or faulty | Clean the panel. Relocate to a sunny area. Replace the panel if needed. |
| Bulbs falling out | Worn socket or improper installation | Use silicone sealant on socket bases. Secure bulbs with zip ties. |
| Lights not turning on | Power issue or timer malfunction | Check outlet. Test with another device. Reset or replace timer. |
Personal Story: Last year, half my strand went dark. After an hour of troubleshooting, I found a single loose bulb—right in the middle. One twist, and the whole thing lit up again. Lesson? Always check the simplest fixes first.
Energy Efficiency and Safety
To save energy and prevent hazards:
- Use timers to turn lights on at dusk and off at bedtime.
- Choose LED lights with high lumens per watt (e.g., 80+ lumens/watt).
- Never overload circuits. Check your outlet’s amperage (15A is standard).
- Keep cords away from foot traffic. Use cord covers or bury them under mulch.
Final Thoughts: Light Up Your Life (On a Budget)
Adding DIY string lighting for backyard fence isn’t just about aesthetics—it’s about creating a space where you actually want to spend time. Whether you’re sipping coffee at sunrise or hosting a late-night fire pit gathering, the right lighting sets the mood and makes your yard feel like an extension of your home.
The beauty of this project is its simplicity. You don’t need a contractor, a huge budget, or weeks of planning. With a few hours of effort, you can transform a plain fence into a glowing, welcoming boundary. And the best part? You’ll enjoy the results every single night.
So grab your lights, gather your tools, and get started. Your backyard is waiting—and it’s going to look absolutely magical. Remember, it’s not about perfection. It’s about creating a space that feels like you. Whether you go for a minimalist glow or a full-on fairy light extravaganza, your DIY touch will make it special.
Now, when your friends ask, “Wow, did you hire someone to do that?” you can smile and say, “Nope—I did it myself.” And that’s a feeling worth every zip tie and hook.
Frequently Asked Questions
How do I install DIY string lighting for backyard fence without drilling holes?
Use adhesive hooks, zip ties, or magnetic mounts to secure lights without damaging your fence. These budget-friendly options work well for renters or temporary setups.
What type of string lights are best for outdoor backyard fences?
Choose weatherproof LED string lights with an IP65 rating for durability. Solar-powered options are ideal for DIY string lighting for backyard fence, as they reduce wiring and energy costs.
Can I use DIY string lights on a wooden vs. metal fence?
Yes! For wooden fences, use hooks or nails; for metal, try magnetic clips or zip ties. Adjust mounting methods to avoid slipping or rust.
How do I hide the wires for a cleaner look?
Route wires behind fence rails or use zip ties to bundle them neatly. Paintable cord covers can also blend wires into the fence for a seamless finish.
Are there solar-powered DIY string lighting ideas for shaded areas?
Solar lights with detachable panels can charge in sunny spots while the bulbs stay on shaded fences. Alternatively, use battery-operated lights for consistent brightness.
How can I make my DIY string lighting last longer?
Opt for LED bulbs, store lights during harsh weather, and use timers to reduce usage. Proper maintenance ensures your budget-friendly setup shines for years.

