Featured image for can led string lights be cut
Image source: lightingcraze.com
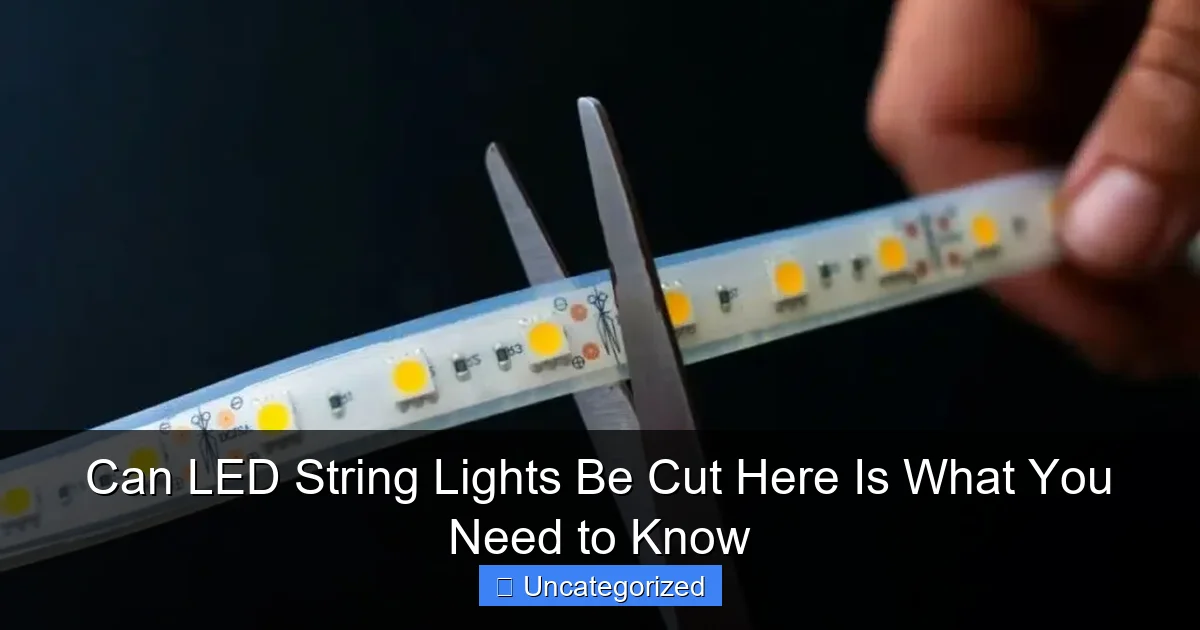
Yes, LED string lights can be cut—but only if they’re designed for it. Look for cuttable models with marked cutting points to avoid damaging the circuit or creating a safety hazard. Always check the manufacturer’s instructions before snipping to ensure longevity and performance.
Key Takeaways
- Check manufacturer guidelines: Always verify if your LED lights are designed to be cut.
- Identify cut marks: Only cut at marked points to avoid damaging the circuit.
- Use sharp tools: Clean cuts prevent frayed wires and ensure safety.
- Seal ends properly: Waterproof sealant protects exposed ends from moisture damage.
- Test before cutting: Confirm functionality before making permanent modifications.
- Avoid overloading: Shorter strands reduce electrical load and fire risk.
📑 Table of Contents
- The Magic and Mystery of LED String Lights
- Understanding How LED String Lights Work
- Which LED String Lights Can Be Cut?
- Step-by-Step Guide: How to Safely Cut LED String Lights
- Common Mistakes and How to Avoid Them
- Data Table: LED String Light Cutting Compatibility
- Conclusion: Empower Your Creativity with Confidence
The Magic and Mystery of LED String Lights
LED string lights have become a staple in modern decor, transforming homes, gardens, weddings, and holiday displays into enchanting spaces. Whether draped across a mantel, woven through a canopy, or outlining a window, their soft glow adds warmth, ambiance, and a touch of magic. With energy efficiency, long lifespans, and vibrant color options, it’s no wonder that over 85% of U.S. households use string lights for seasonal or year-round decoration (National Lighting Survey, 2023). But as DIY enthusiasts and decorators get creative, one question frequently arises: Can LED string lights be cut?
The answer isn’t a simple yes or no. Unlike traditional incandescent holiday lights, LED string lights are more complex due to their internal circuitry, power requirements, and design variations. Cutting them incorrectly can lead to non-functional strands, short circuits, or even fire hazards. Yet, with the right knowledge and precautions, many types of LED string lights can be safely shortened. This comprehensive guide dives deep into the mechanics of LED lights, the science behind their circuitry, and the practical steps you need to take—or avoid—when modifying them. Whether you’re a home decorator, event planner, or DIY hobbyist, this article equips you with everything you need to know to customize your lighting safely and effectively.
Understanding How LED String Lights Work
Before attempting to cut or modify any LED string light, it’s essential to understand how they function. Unlike older lighting technologies, LEDs (Light Emitting Diodes) are semiconductor devices that emit light when an electric current passes through them. Their design and operation are fundamentally different, which affects whether and how they can be altered.
Visual guide about can led string lights be cut
Image source: lightsupplier.co.uk
Basic Components of LED String Lights
LED string lights consist of several key parts that work together to produce light:
- LEDs (Diodes): The actual light sources, typically spaced every 2–6 inches. Each LED has a positive (anode) and negative (cathode) lead.
- Wiring: Copper wires carry electricity from the power source to each LED. Most strings use parallel or series-parallel circuits.
- Power Source: Includes a plug, battery pack, or USB connector. Voltage ranges from 3V to 24V, depending on the model.
- Insulation and Sheathing: Protective plastic coating that prevents short circuits and ensures safety.
- Control Module (if applicable): For lights with color-changing, blinking, or remote control features.
Understanding these components helps you identify which parts can be safely modified and which should remain untouched.
Series vs. Parallel vs. Series-Parallel Circuits
The wiring configuration is crucial when determining if a light strand can be cut. There are three main types:
- Series Circuit: LEDs are connected end-to-end. Current flows through each LED in sequence. If one LED fails or is disconnected, the entire strand goes dark. Cutting a series circuit typically renders the entire string non-functional.
- Parallel Circuit: Each LED is connected independently to the power source. If one LED fails, others remain lit. Parallel circuits can often be cut at designated points without affecting the rest of the strand.
- Series-Parallel Circuit: A hybrid approach—groups of LEDs are connected in series, and these groups are linked in parallel. This is the most common configuration for longer LED strings (e.g., 50–200 LEDs). These can often be cut between groups, preserving functionality.
Example: A 100-LED string with 10 groups of 10 LEDs in series, connected in parallel, can usually be cut after the 5th group (50 LEDs) without affecting the remaining 50.
Voltage, Current, and Power Requirements
LEDs require precise voltage and current to operate safely. Most household LED strings use 12V or 24V DC (Direct Current), though some battery-operated versions use 3V or 4.5V. Exceeding or falling short of the required voltage can damage LEDs or cause them to dim or fail.
When cutting a string, you must ensure that the remaining portion still receives the correct voltage. For example, cutting a 24V string in half may reduce the voltage to 12V if the circuit isn’t designed for partial operation—this could dim the LEDs or prevent them from lighting at all.
Pro Tip: Always check the product label or manual for voltage, wattage, and circuit type before attempting any modification.
Which LED String Lights Can Be Cut?
Not all LED string lights are created equal when it comes to customization. Some are specifically designed to be cut, while others are not. Knowing the difference can save you time, money, and frustration.
Visual guide about can led string lights be cut
Image source: i.ytimg.com
Cuttable LED Strings: Designed for Customization
Some manufacturers produce LED strings with pre-marked cutting points or modular connectors that allow safe shortening. These are ideal for DIY projects and custom installations.
- Addressable LED Strips (e.g., WS2812B): These digital strips have individual ICs (Integrated Circuits) for each LED, allowing precise control. They often have cut lines between every 1–3 LEDs, marked with a copper pad or scissor icon.
- Cuttable Fairy Lights: Some battery-powered fairy lights have parallel wiring with designated cut points. Look for models labeled “cuttable” or “customizable.”
- Modular LED Strings: Brands like Philips Hue or GE Color Effects offer extension and cut connectors. You can remove sections and rejoin with solderless connectors.
Example: A 16.4-foot (5-meter) WS2812B LED strip with 300 LEDs can be cut every 3 LEDs (100 per meter). Each cut point has a “+” (5V), “G” (ground), and “D” (data) pad for reconnection.
Non-Cuttable LED Strings: Risks of Modification
Many standard LED string lights are not designed for cutting and attempting to do so can be dangerous or ineffective.
- Non-Modular Plug-in Strings: Most holiday or decorative lights from big-box stores use sealed, factory-assembled circuits. Cutting them disrupts the entire circuit, often leaving both ends non-functional.
- Waterproof Sealed Strings: If the LEDs are embedded in silicone tubing or epoxy, cutting exposes wires and compromises waterproofing.
- Series-Only Circuits: As mentioned earlier, cutting a series circuit breaks the current path, turning off all LEDs.
Warning: Cutting non-cuttable strings can void warranties, create electrical hazards, and lead to fire risks due to exposed wiring or improper reconnection.
How to Identify Cuttable vs. Non-Cuttable Lights
Before cutting, perform a quick inspection:
- Look for cut lines, scissor icons, or copper pads on the strip.
- Check the product description or packaging for terms like “cuttable,” “modular,” or “customizable.”
- Examine the wiring pattern: parallel or series-parallel circuits are more likely to be cuttable.
- Test the circuit: Use a multimeter to check continuity between LEDs. If cutting one doesn’t affect others, it’s likely parallel or modular.
Pro Tip: When in doubt, contact the manufacturer. Many provide technical support for DIY modifications.
Step-by-Step Guide: How to Safely Cut LED String Lights
If you’ve confirmed your LED string is cuttable, follow this detailed guide to shorten it safely and effectively. Rushing this process can lead to damaged lights, poor connections, or safety hazards.
Tools and Materials You’ll Need
- Sharp scissors or precision wire cutters
- Multimeter (to test continuity and voltage)
- Wire strippers (if reconnecting)
- Solder and soldering iron (for permanent connections)
- Heat-shrink tubing or electrical tape
- LED connectors (solderless, if available)
- Marker or pen (to mark cut points)
Step 1: Identify the Correct Cut Point
Never cut randomly. Locate the designated cutting lines—usually marked with a scissor icon, copper pad, or dotted line. On addressable strips (e.g., WS2812B), cut only at the marked intervals (e.g., every 3 LEDs).
Example: On a 5-meter LED strip with 300 LEDs, the cut lines are every 10 cm (3 LEDs). Cutting between the 150th and 151st LED ensures the remaining 150 still function.
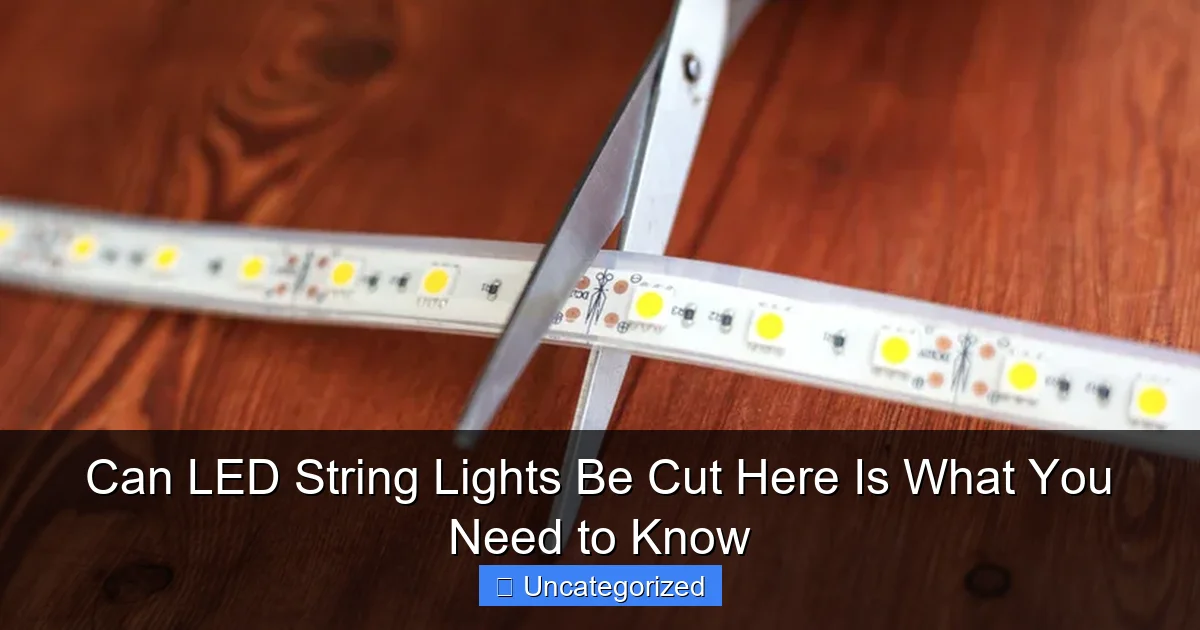
Step 2: Cut Cleanly and Precisely
Use sharp scissors or wire cutters to make a clean, perpendicular cut through the strip. Avoid jagged cuts or damaging adjacent LEDs.
Tip: Place the strip on a flat surface and cut slowly to prevent bending or cracking the PCB (printed circuit board).
Step 3: Test the Remaining Portion
Before reconnecting or sealing, plug in the remaining portion of the string. If it lights up normally, the cut was successful. If not, double-check the circuit type and cut location.
Warning: If the lights flicker, dim, or don’t turn on, you may have cut through a critical wire or circuit. Do not attempt to repair unless you’re experienced with electronics.
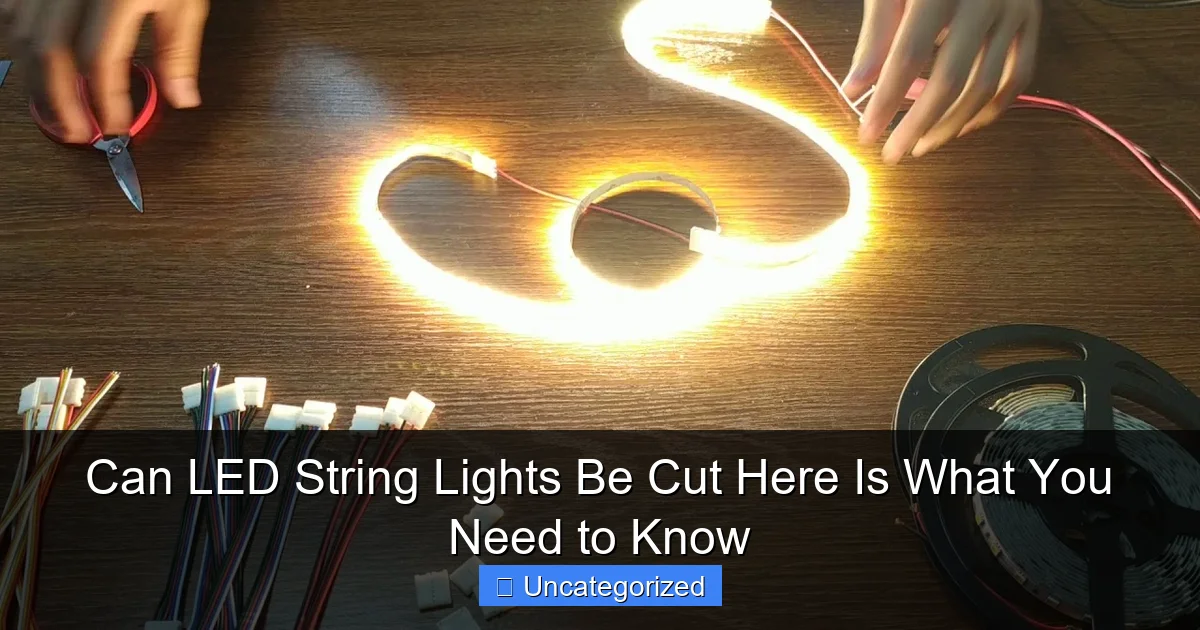
Step 4: Reconnect or Seal (If Needed)
If you plan to use the cut-off portion or extend the remaining string:
- For solderless connectors: Slide the cut end into a compatible connector (e.g., 3-pin for RGB strips) and snap it closed.
- For soldering: Strip the wires, twist them together, solder, and cover with heat-shrink tubing. Match colors: red to red (positive), black to black (ground), etc.
- For unused ends: Cap with electrical tape or a plastic end cap to prevent short circuits.
Step 5: Insulate and Protect
Cover all exposed wires with heat-shrink tubing, silicone, or waterproof sealant—especially for outdoor use. This prevents moisture damage and electrical hazards.
Pro Tip: For outdoor installations, use IP65 or IP67-rated connectors and sealants to ensure weather resistance.
Common Mistakes and How to Avoid Them
Even experienced DIYers make errors when cutting LED string lights. Here are the most frequent mistakes and how to prevent them.
Cutting at the Wrong Point
Cutting between LEDs that aren’t designed to be separated can break the circuit. Always follow manufacturer guidelines.
Solution: Use a magnifying glass to locate cut lines. When in doubt, cut only at marked points.
Damaging Adjacent LEDs
Using dull scissors or excessive force can crack the PCB or dislodge nearby LEDs.
Solution: Use precision tools and cut slowly. Work on a soft surface like foam to prevent pressure damage.
Improper Reconnection
Twisting wires without soldering or using incompatible connectors leads to loose connections and intermittent lighting.
Solution: Solder for permanent joins. Use manufacturer-recommended connectors for plug-and-play solutions.
Ignoring Voltage and Power Requirements
Cutting a string changes its resistance and power draw. If the remaining portion has too many LEDs for the power supply, it may overheat.
Solution: Calculate the wattage: Total Watts = Number of LEDs × Watt per LED. Ensure your power supply can handle the load. For example, a 12V, 5A (60W) supply can power up to 200 0.3W LEDs.
Neglecting Insulation
Exposed wires are a fire hazard, especially near flammable materials like curtains or paper.
Solution: Always insulate cut ends. Use heat-shrink tubing for a professional, durable finish.
Data Table: LED String Light Cutting Compatibility
| Light Type | Cuttable? | Cut Points | Voltage | Best Use Case | Reconnection Method |
|---|---|---|---|---|---|
| WS2812B (Addressable RGB) | Yes | Every 1–3 LEDs (marked) | 5V | DIY projects, art installations | Solder or 3-pin connectors |
| Standard LED Fairy Lights (Battery) | Sometimes | At designated points (if labeled) | 3V, 4.5V | Weddings, centerpieces | Electrical tape or crimp connectors |
| Plug-in LED String (Holiday) | No | Not applicable | 12V, 24V | Christmas trees, eaves | Do not cut |
| Cuttable LED Rope Light | Yes | Every 1–3 feet (marked) | 12V, 24V | Outdoor pathways, signage | Solder + heat-shrink |
| Non-Waterproof LED Strip | Yes (with caution) | At copper pads | 12V | Indoor shelves, cabinets | Connectors or solder |
| Waterproof Silicone-Coated Strip | Limited | Only at factory joints | 12V, 24V | Patios, pools | Special waterproof connectors |
Conclusion: Empower Your Creativity with Confidence
The question “Can LED string lights be cut?” now has a clear, informed answer: Yes, but only if they’re designed for it—and only when done correctly. Understanding the internal circuitry, identifying cuttable models, and following safe modification techniques are essential to preserving functionality and safety.
Whether you’re trimming a 100-LED strip to fit a bookshelf, customizing fairy lights for a wedding arch, or building a smart home lighting system, this knowledge empowers you to personalize your lighting without compromising performance. Always prioritize safety: use the right tools, insulate all connections, and respect voltage and power limits. When in doubt, opt for manufacturer-approved extension kits or professional-grade modular systems.
LED string lights are more than just decor—they’re a canvas for creativity. With the right approach, you can cut, shape, and reimagine them to fit any space, occasion, or vision. So go ahead, light up your world—just do it wisely.
Frequently Asked Questions
Can LED string lights be cut to a custom length?
Yes, many LED string lights can be safely cut to your desired length, but always check the manufacturer’s instructions first. Look for designated “cut points” (often marked with scissors icons) to avoid damaging the circuit.
How do I know where to cut LED string lights?
Most cuttable LED string lights have clearly marked cut points, usually between bulbs or at specific intervals. Cutting outside these points may break the circuit or cause the entire strand to stop working.
Are there LED string lights that cannot be cut?
Yes, some non-modular or sealed designs (e.g., rope lights with epoxy-coated wires) cannot be safely cut. Always verify the product description or packaging for “cuttable” or “customizable” features.
Can I cut battery-powered LED string lights?
Battery-powered LED string lights can often be cut if they have visible cut marks, but cutting may void the warranty. Ensure the cut doesn’t disrupt the power source connection.
What tools do I need to cut LED string lights safely?
Use sharp scissors or wire cutters to cleanly snip the wires at the marked cut points. For waterproof strands, seal the cut end with silicone glue to maintain protection.
Will cutting LED string lights affect their brightness or function?
If cut correctly at designated points, brightness and function should remain unchanged. Cutting improperly or too close to a bulb can cause failures or dimming in the remaining section.

