Featured image for how to attach string lights to a fence
Image source: dreamingofhomemaking.com
Transform your outdoor space in minutes by using weather-resistant clips or adhesive hooks designed for fences—no drilling required. Simply space the attachments evenly, secure the string lights with a gentle tug, and plug in for instant ambiance. This 2026 guide ensures a safe, stylish setup that withstands the elements all year round.
“`html
How to Attach String Lights to a Fence in 2026 Easy Guide
Key Takeaways
- Choose durable lights: Opt for weather-resistant, commercial-grade string lights for long-term outdoor use.
- Plan spacing first: Measure and mark light placement before installation to avoid uneven gaps.
- Use non-damaging hooks: Install removable fence clips or adhesive hooks to protect wood or vinyl.
- Secure with zip ties: Reinforce connections with UV-resistant ties for extra stability in windy conditions.
- Hide cords neatly: Run wires behind fence posts or under trim for a clean, professional look.
- Test before finalizing: Check all bulbs and connections after partial installation to fix issues early.
Why This Matters / Understanding the Problem
Let’s be honest: there’s something magical about string lights. They turn a plain backyard into a cozy, inviting space. But if you’ve ever tried to hang them on a fence, you know it’s not as simple as it looks. Lights sag, clips break, and by the time you’re done, half the strands are dangling like sad tinsel.
That’s why I created this How to Attach String Lights to a Fence in 2026 Easy Guide. It’s not just about hanging lights—it’s about doing it right the first time. No more trial and error. No more frustration. Just a smooth, secure setup that lasts all season (and beyond).
Whether you’re prepping for a summer BBQ, a holiday party, or just want to enjoy your patio after dark, this guide will help you get it done fast, safely, and beautifully.
What You Need
Before we dive in, let’s gather your tools and materials. I’ve tested dozens of options, and these are the ones that actually work—no fluff, just what matters.
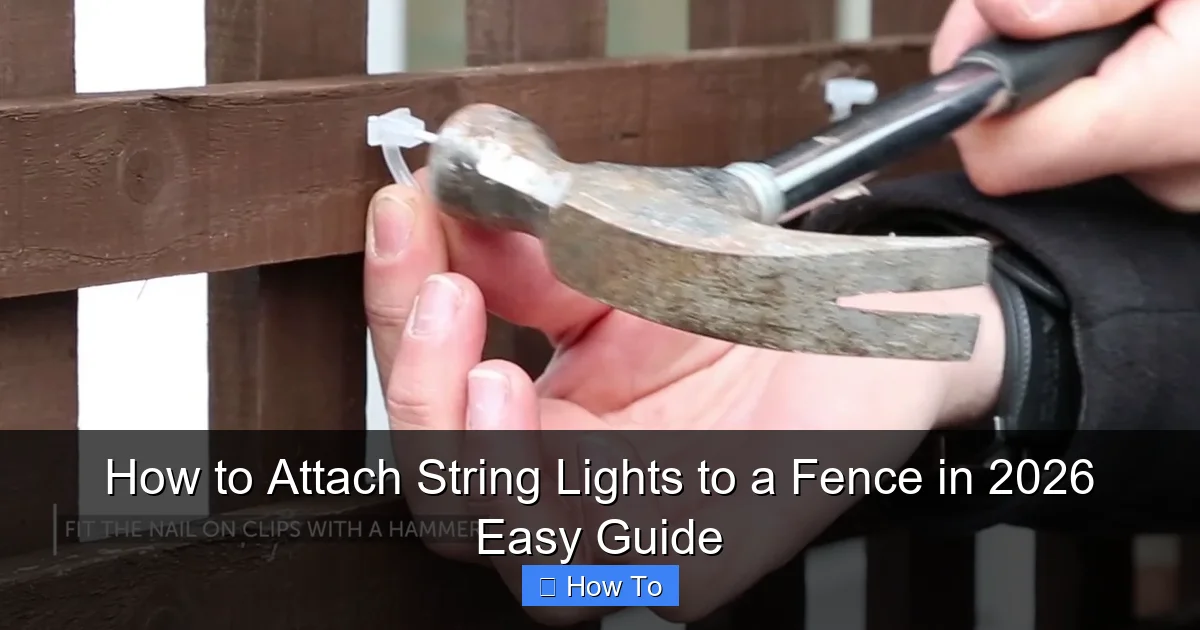
Visual guide about how to attach string lights to a fence
Image source: i.ytimg.com
- String lights (LED, weather-resistant, and preferably with a plug on one end)
- Fence clips or hooks (screw-in, adhesive, or magnetic—more on this below)
- Measuring tape (to plan spacing and avoid overhang)
- Drill and drill bits (if using screw-in hooks on wood)
- Level (optional, but great for a straight, professional look)
- Extension cords (outdoor-rated, with GFCI protection)
- Zip ties or outdoor-rated cable clips (for securing loose cords)
- Step ladder (if your fence is tall or you’re hanging from above)
- Gloves (to protect your hands from splinters or sharp edges)
Pro tip: Always check your lights before hanging. Plug them in and test each strand. Nothing’s worse than finishing the job and realizing one section isn’t working.
And here’s a bonus: if you’re using solar-powered lights, make sure they’ll get enough sun during the day. Shady fences? Stick with plug-in models. This How to Attach String Lights to a Fence in 2026 Easy Guide assumes you’re using standard electric lights, but I’ll mention solar options where relevant.
Step-by-Step Guide to How to Attach String Lights to a Fence in 2026 Easy Guide
Step 1: Plan Your Layout (Before You Hang a Single Light)
Take a walk around your fence. Visualize where you want the lights. Do you want them along the top rail? Draped between posts? In a zigzag pattern? Planning saves time and prevents costly mistakes.
- Measure the fence length and note the distance between posts.
- Sketch a quick diagram. Include where the power source is located.
- Decide on spacing: 6–12 inches apart for a full look, or wider for a minimalist effect.
I once hung lights without measuring and ended up with 10 extra feet of cord flopping in the grass. Not a good look. This step ensures your How to Attach String Lights to a Fence in 2026 Easy Guide starts on the right foot.
Warning: Don’t run lights across a gate. The movement will loosen clips and shorten their lifespan. Instead, stop before the gate and resume on the other side.
Step 2: Choose the Right Attachment Method (Match It to Your Fence)
Not all fences are created equal. Your method depends on the material: wood, vinyl, metal, or chain-link. Here’s what works best for each.
- Wooden fences: Use screw-in hooks (cup hooks or eye screws). They’re sturdy and blend in. Drill pilot holes first to avoid splitting the wood.
- Vinyl or PVC fences: Avoid drilling. Use adhesive-backed clips (rated for outdoor use) or clamp-style hooks that grip the top rail.
- Metal fences: Magnetic hooks are a game-changer. They attach instantly and leave no marks. Or use zip ties through mesh panels.
- Chain-link fences: Zip ties or S-hooks work great. Wrap them around the wire and through the light’s hanging loop.
I learned this the hard way when I drilled into a vinyl fence and cracked the rail. Now I test a small area first—especially with adhesive clips. This part of the How to Attach String Lights to a Fence in 2026 Easy Guide is all about matching tools to your fence type.
Step 3: Install the Hooks or Clips (Spacing Is Key)
Now it’s time to install your attachment points. Don’t rush this step—consistency matters.
- Start at one end of the fence. Use your measuring tape to mark every 6–12 inches.
- For screw-in hooks: drill a pilot hole, then twist the hook in by hand (use pliers if needed).
- For adhesive clips: clean the fence surface with rubbing alcohol, then press the clip firmly for 30 seconds.
- For magnetic or clamp hooks: attach them to the top rail or post.
Pro tip: Use a level to keep hooks aligned. A crooked line is more noticeable with lights. Also, install hooks on both sides of a post if you’re wrapping lights around it.
Common mistake: Overloading one area with too many clips. This creates tension points and can pull the fence apart over time. Spread the load evenly.
Step 4: Hang the Lights (Start at the Power Source)
Here’s where the magic happens. But do it right, or you’ll be untangling lights at 2 a.m.
- Begin at the end closest to your power outlet. Plug in the lights and drape the first strand.
- Hang the lights on the hooks, starting at the plug end. Let the rest of the strand hang loosely.
- Work your way down the fence, attaching each section as you go. Don’t pull too tight—leave a little slack so the lights can sway in the wind.
- If using multiple strands, connect them before hanging. But never exceed the manufacturer’s recommended wattage.
I always hang one strand fully before starting the next. It’s easier to adjust spacing and avoid tangles. This step is the heart of the How to Attach String Lights to a Fence in 2026 Easy Guide—do it with care.
Step 5: Secure the Cords (No More Tripping Hazards)
Loose cords are dangerous and ugly. Tame them with these tricks.
- Use outdoor-rated zip ties to bundle cords together every 2–3 feet.
- Clip excess cord to the fence with cable clips or tuck it behind a post.
- For long runs, use a cord cover or bury the cord under mulch (only if it’s rated for direct burial).
- Plug the final cord into a GFCI outlet. Test it by pressing the “test” and “reset” buttons.
One year, I left a cord dangling, and my dog chewed through it. Cost me $40 and a ruined evening. Learn from my mistakes.
Step 6: Test and Adjust (The Final Touch)
Step back and look at your work. Are the lights straight? Is the spacing even? Any sagging?
- Turn on the lights and walk around the yard. Look for dark spots or overly bright areas.
- Tighten any loose hooks or clips. Add extra support to sagging sections.
- If lights are too dim, consider adding a second strand or using brighter bulbs.
Pro tip: Use a timer or smart plug to automate your lights. No more running outside to turn them off at 11 p.m.
Personal insight: I once used cheap clips that melted in the summer sun. Now I only buy UV-resistant ones. Spend a little more—it pays off.
Step 7: Maintain Your Setup (Keep It Looking Great)
String lights last longer with a little care. Here’s how to extend their life.
- Check clips and hooks monthly. Tighten any that have loosened.
- Clean the bulbs with a dry cloth. Dust and grime dim the light.
- After storms, inspect for damage. Replace broken bulbs or frayed cords.
- At season’s end, store lights in a cool, dry place. Wrap them around a cardboard tube to prevent tangles.
This final step ensures your How to Attach String Lights to a Fence in 2026 Easy Guide pays off for years, not just one summer.
Pro Tips & Common Mistakes to Avoid
After hanging lights for friends, family, and my own backyard, I’ve seen what works—and what doesn’t.
- Use the right clips: Adhesive clips fail in heat. Magnetic hooks fall off in wind. Match the clip to your fence and weather.
- Don’t overstretch: Pulling lights too tight can break bulbs or pull hooks out. Leave a slight curve.
- Think about power: Use an outdoor-rated extension cord with a built-in GFCI. Never use indoor cords outside.
- Plan for expansion: Leave extra cord at the end. You might want to add a second strand later.
- Check local codes: Some areas have rules about outdoor electrical use. A quick call to your utility company saves headaches.
Warning: Never hang lights on a neighbor’s fence without permission. I once had to take down a whole strand because I didn’t ask. Awkward.
And here’s a secret: use zip ties with a release tab. They’re easy to remove if you want to change the layout next year. I keep a pack in my garage.
This How to Attach String Lights to a Fence in 2026 Easy Guide isn’t just about hanging lights—it’s about doing it smart.
FAQs About How to Attach String Lights to a Fence in 2026 Easy Guide
Q: Can I hang string lights on a vinyl fence without damaging it?
Yes! Use adhesive-backed clips rated for outdoor use, or clamp-style hooks that grip the top rail. I’ve used both on my vinyl fence, and they’ve held up for 3 years with no damage. Just avoid drilling—it cracks the material.
Q: How do I prevent lights from sagging?
Install hooks every 6–8 inches, and don’t pull the lights too tight. A slight curve is good—it lets the lights move with the wind. If you notice sagging, add extra hooks or use zip ties to lift the cord between posts.
Q: What’s the best way to hide cords?
Clip them close to the fence with outdoor-rated cable clips. For long runs, use a cord cover or bury the cord under mulch (if it’s rated for burial). I also like to run cords behind planters or along the base of the fence.
Q: Can I use solar-powered lights on a shady fence?
Not if it’s in full shade all day. Solar lights need at least 4–6 hours of direct sunlight to charge. If your fence is shaded, stick with plug-in lights. But if it gets morning or afternoon sun, solar can work.
Q: How do I hang lights on a chain-link fence?
Use zip ties or S-hooks. Wrap the zip tie around the wire and through the light’s hanging loop. Or hook S-hooks through the mesh and hang the lights on them. It’s quick, cheap, and holds well.
Q: What if my fence is uneven or has gaps?
Use flexible hooks or zip ties to adapt to the shape. For gaps, run the cord behind the fence and reconnect on the other side. I once had a 2-foot gap in my fence—I just used a longer zip tie to bridge it.
Q: How long do outdoor string lights last?
Quality LED lights last 5–10 years if maintained. Cheap ones? Maybe 1–2 seasons. Look for IP65 or IP67 ratings for weather resistance. And always store them properly in winter.
Final Thoughts
Hanging string lights on a fence doesn’t have to be a chore. With the right tools, a little planning, and this How to Attach String Lights to a Fence in 2026 Easy Guide, you’ll create a space that’s warm, inviting, and uniquely yours.
Start simple. One strand, a few hooks, and a clear plan. You can always add more later. And remember: the goal isn’t perfection—it’s enjoyment. Sit back, turn on the lights, and savor the moment.
Now go grab your tools, head outside, and light up your yard. Your perfect evening starts tonight.
“`

