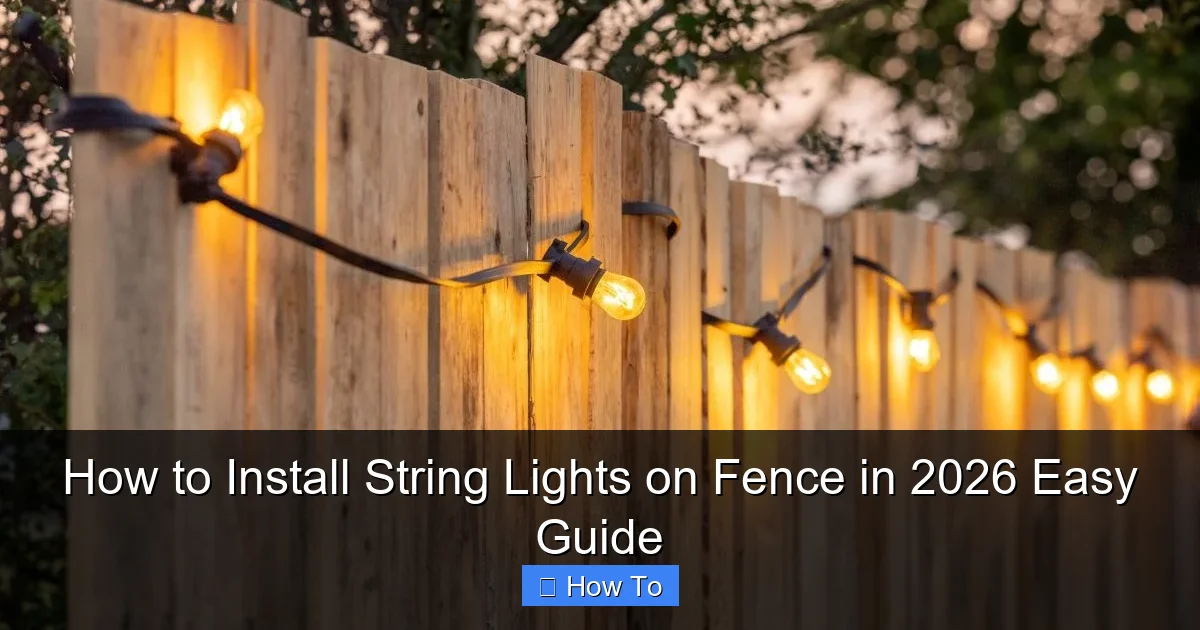
Featured image for how to install string lights on fence
Image source: storables.com
Transform your outdoor space in minutes by securely mounting string lights to your fence using weather-resistant clips or hooks—no drilling required. This 2026 guide walks you through a simple, tool-free installation process that ensures a clean, professional look while protecting your fence and lights. Perfect for patios, backyards, or garden borders, this method guarantees safe, stunning illumination all year round.
“`html
How to Install String Lights on Fence in 2026 Easy Guide
Key Takeaways
- Plan your layout first: Measure fence length and mark light spacing for even coverage.
- Use outdoor-rated lights: Ensure durability and safety with weatherproof string lights.
- Secure with clips or hooks: Attach lights firmly to avoid sagging or damage.
- Test before finalizing: Check connections and brightness before permanent installation.
- Hide cords neatly: Use conduit or clips to keep wires tidy and safe.
- Follow local codes: Adhere to electrical and fence regulations for compliance.
Why This Matters / Understanding the Problem
Let’s be honest—there’s something magical about a backyard lit up with soft, glowing string lights. Whether you’re hosting a summer BBQ, enjoying a quiet evening with a book, or just want to make your outdoor space feel more inviting, how to install string lights on fence in 2026 easy guide can transform your yard from “meh” to “wow” in just a few hours.
But here’s the catch: many people skip this project because they’re worried about tangled cords, uneven lighting, or lights falling down after one windy night. I’ve been there. I once spent a weekend stringing lights only to find half of them sagging or flickering by Monday. It felt like a total waste.
The good news? With the right tools and a simple plan, installing string lights on a fence is easier than it looks—and it’s totally doable, even if you’re not a DIY pro. This guide walks you through every step, from planning to plugging in, so you can enjoy a beautifully lit fence all year long. Whether you’re using solar, plug-in, or smart LED lights, this how to install string lights on fence in 2026 easy guide has you covered.
What You Need
Before you start, gather your supplies. Trust me, having everything ready saves time and frustration. Here’s your checklist:
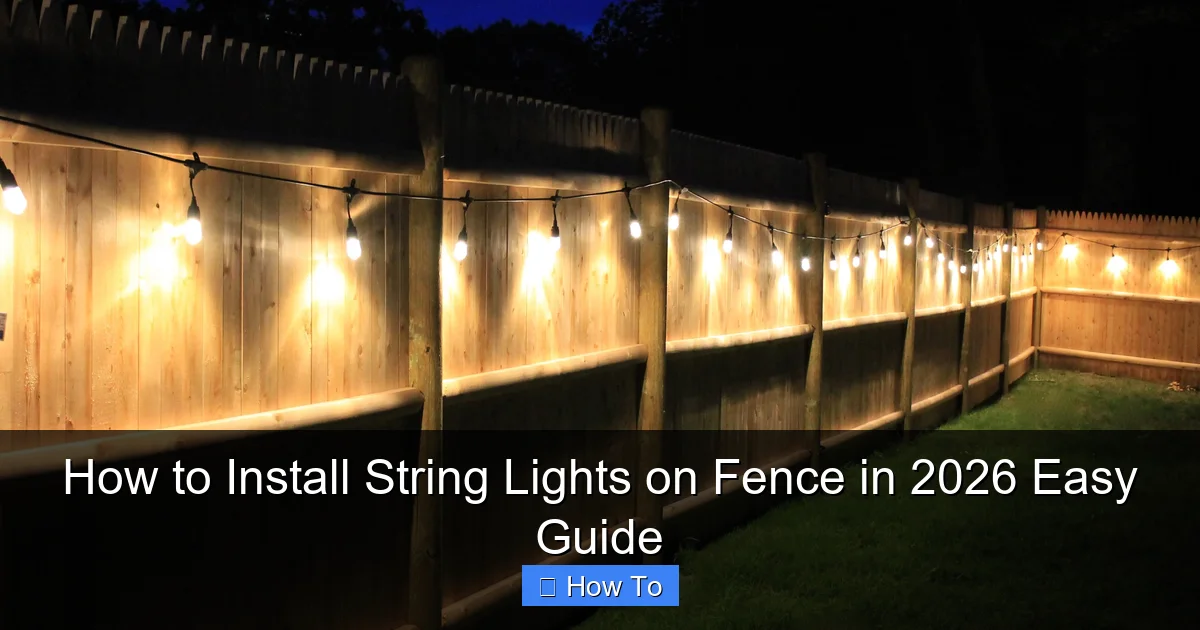
Visual guide about how to install string lights on fence
Image source: i.pinimg.com
- String lights: Choose weatherproof LED lights (solar or plug-in). For fences, I recommend shatterproof and dimmable options for safety and mood.
- Measuring tape: Essential for planning spacing and avoiding overbuying.
- Fence clips or hooks: Use plastic, rubber, or metal clips designed for outdoor use. Avoid nails—they can damage your fence and void warranties.
- Extension cords (if needed): Outdoor-rated, GFCI-protected cords for plug-in lights.
- Power source: Outlet, solar panel, or a smart timer for automation.
- Zip ties or cord clips: For managing excess wire or securing connections.
- Ladder (if needed): For taller fences or reaching the top rail.
- Drill and screws (optional): Only if your fence allows it and you’re using permanent mounts.
- Smart timer or app-controlled hub (optional): For hands-free control and energy savings.
Pro tip: Buy 10–15% more lights than you think you’ll need. It’s better to have extra than to run short and have to reorder mid-project.
Step-by-Step Guide to How to Install String Lights on Fence in 2026 Easy Guide
Step 1: Plan Your Layout and Measure Your Fence
First things first: don’t just start hanging lights. Take a few minutes to plan. Walk around your yard and visualize where the lights should go.
Decide if you want:
- A straight line along the top rail
- An “X” or crisscross pattern
- A canopy effect (lights hanging down like curtains)
- Or a simple zigzag
Once you’ve picked your design, grab your measuring tape. Measure the total length of the fence section you’re lighting. Then, check the length of your string lights. Most are 25–50 feet, so you’ll likely need multiple strands.
For example, if your fence is 60 feet long and you’re using 25-foot lights, you’ll need at least 3 strands (75 feet total) to allow for spacing and connections.
Pro tip: Use painter’s tape to mark where lights will go on the fence. This lets you “see” the layout before committing. It’s like a dress rehearsal for your lighting design.
Step 2: Choose the Right Lights for Your Fence and Climate
Not all string lights are created equal. For outdoor use, you need lights rated for wet or damp locations. Look for an IP65 or IP67 rating—this means they’re protected from rain, snow, and dust.
Here’s what I recommend based on your setup:
- Solar-powered: Great for areas without nearby outlets. Just make sure the solar panel gets 6+ hours of direct sun. I use these on my side fence, where outlets are scarce.
- Plug-in LED: Brighter and more reliable. Use with a GFCI outlet and outdoor extension cord. Best for patios and main entertaining areas.
- Smart LED: Connect to Wi-Fi or Bluetooth. Turn on/off with your phone, set schedules, or sync with music. A bit more expensive, but worth it if you love tech.
Avoid cheap, non-LED lights. They burn out fast, get hot, and aren’t energy-efficient. Stick with brands like Philips Hue, GE, or Brightech for reliability.
This is where how to install string lights on fence in 2026 easy guide really pays off—picking the right lights from the start prevents headaches later.
Step 3: Install Fence Clips or Hooks
Now it’s time to prep your fence. You want to attach lights securely without damaging the wood, vinyl, or metal.
Here are the best options:
- Plastic or rubber fence clips: Snap onto the top rail. No tools needed. I love these for wooden fences—they’re gentle and reusable.
- Adhesive hooks: Stick to smooth surfaces like vinyl or painted wood. Use outdoor-rated 3M Command strips or Gorilla Tape hooks. Avoid on rough or weathered wood.
- Metal hooks (screwed in): Use only if your fence is sturdy and you’re okay with small holes. Pre-drill to avoid splitting wood.
- Zip ties: For temporary setups or quick fixes. Wrap around posts or rails. Use UV-resistant ties so they don’t degrade in sunlight.
Space clips every 12–18 inches. Closer spacing gives a fuller look, but 18 inches is usually plenty for a clean, even glow.
Warning: Never staple or nail lights directly to your fence. It damages the wood, creates fire hazards, and voids warranties. Always use clips or hooks.
Step 4: String the Lights Along the Fence
Now for the fun part—hanging the lights! Start at the power source and work outward.
If you’re using plug-in lights:
- Plug the first strand into an outdoor GFCI outlet.
- Hang the first light near the plug, then run the strand along the clips.
- Use zip ties or cord clips to secure the plug and any loose wire.
- Connect the next strand to the first (if they’re end-to-end compatible).
- Continue until all strands are up.
For solar lights:
- Install the solar panel in a sunny spot—ideally on a post, wall, or roof.
- Run the light strand from the panel to the fence, securing it with clips.
- Make sure the panel isn’t shaded by trees or structures.
For smart lights:
- Follow the app instructions to pair the lights with your hub or phone.
- Hang them just like regular plug-in lights.
- Test the connection before finishing.
As you hang, keep the lights taut but not stretched. A little sag is okay—it adds charm. But avoid pulling so tight that it stresses the clips or wires.
Step 5: Manage Cords and Power Sources
Messy cords ruin the look. Here’s how to keep them tidy:
- Use cord clips or zip ties: Every 2–3 feet, secure the power cord to the fence or post.
- Hide cords behind plants or furniture: Use potted plants, benches, or planters to conceal extension cords.
- Use a cord cover: A plastic raceway or conduit can run along the ground or fence base.
- Elevate cords: If running across grass, use stakes to keep them off the ground and prevent tripping.
For plug-in lights, always use a GFCI outlet. It protects against shocks and automatically cuts power if there’s a short. Never daisy-chain more than three extension cords—it’s a fire hazard.
Pro tip: Label your cords with tape or tags. It’s a lifesaver when you need to unplug or troubleshoot.
Step 6: Test and Adjust the Lighting
Before you call it a night, test your lights. Turn them on and walk around your yard.
Look for:
- Dark spots (add more lights or adjust spacing)
- Sagging strands (tighten clips or add supports)
- Flickering bulbs (replace or check connections)
- Glare (use frosted bulbs or lower brightness)
If you’re using smart lights, test the app controls, schedules, and voice commands (if compatible with Alexa, Google, or Siri).
I once forgot to test mine—turned out one strand was faulty, and I had to re-hang half the fence. Learn from my mistake: test early!
Step 7: Secure and Weatherproof (Optional but Smart)
To make your lights last longer, add a few extra touches:
- Seal connections: Use silicone sealant or electrical tape on plug connections to keep out moisture.
- Use drip loops: Let the cord hang in a “U” shape before plugging in. This prevents water from running down the cord into the outlet.
- Install a weatherproof box: For outdoor outlets, use a flip-lid cover to protect the plug.
- Trim nearby branches: Prevent leaves and debris from damaging lights or creating fire risks.
If you live in a snowy area, consider removing lights in winter or using heavy-duty, cold-rated lights.
Pro Tips & Common Mistakes to Avoid
After installing string lights on three different fences (yes, I’m a little obsessed), here are the real lessons I’ve learned:
- Don’t skip the layout: A quick sketch or tape test saves hours of rework.
- Buy quality lights: Cheap lights fade, burn out, or fail in rain. Spend a little more for durability.
- Use the right clips: Plastic clips for wood, adhesive for vinyl, metal for metal fences.
- Don’t overload circuits: Check your breaker panel. Too many lights on one circuit can trip it.
- Mind the voltage drop: If lights at the end of a long run are dimmer, use a thicker gauge extension cord or a power booster.
- Check local codes: Some areas require permits for outdoor electrical work. When in doubt, consult an electrician.
Personal story: I once used regular zip ties on a vinyl fence. They turned brittle in the sun and snapped after two months. Now I only use UV-resistant ones—lessons learned the hard way!
Also, avoid hanging lights too close to the ground. They can get dirty, damaged by pets, or pose a tripping hazard. Keep the bottom bulbs at least 2–3 feet above ground level.
This how to install string lights on fence in 2026 easy guide isn’t just about hanging lights—it’s about creating a safe, beautiful, and long-lasting outdoor oasis.
FAQs About How to Install String Lights on Fence in 2026 Easy Guide
Q: Can I install string lights on a wooden, vinyl, or metal fence?
Yes! Just use the right clips. Plastic or rubber clips work great for wood and vinyl. For metal, use magnetic hooks or screw-in clips. Avoid adhesive on rough surfaces.
Q: Do I need a permit to install outdoor string lights?
Usually not for plug-in or solar lights. But if you’re running new wiring or installing permanent fixtures, check with your local building department. Better safe than fined!
Q: How do I prevent lights from sagging?
Use clips every 12–18 inches. For long runs, add a support wire (like fishing line or thin cable) behind the lights. Tie it to posts for extra strength.
Q: Can I leave string lights up year-round?
It depends. Most LED string lights are rated for outdoor use and can stay up in rain and light snow. But extreme cold, ice, or high winds can damage them. I recommend removing them in harsh winter weather or using commercial-grade lights.
Q: How do I connect multiple strands?
Use end-to-end connectors. Most LED strings have male/female plugs. Just plug them together. But don’t exceed the manufacturer’s max—usually 2–3 strands per outlet.
Q: What’s the best way to hide extension cords?
Use cord covers, run them behind furniture or plants, or bury them shallowly (at least 1–2 inches deep) in a conduit. Never bury bare cords—it’s a safety hazard.
Q: Are solar string lights worth it?
Absolutely—if you have sun! They’re energy-free and easy to install. But they’re dimmer than plug-in lights and need 6+ hours of direct sun to charge fully. Best for shaded areas or decorative use.
Final Thoughts
Installing string lights on your fence isn’t just about lighting—it’s about creating a mood, extending your living space, and making memories under the stars. With this how to install string lights on fence in 2026 easy guide, you’ve got everything you need to do it right the first time.
Start simple. Pick a small section of fence, use quality lights, and focus on clean, secure installation. Once you see how easy it is, you’ll want to light up your whole yard.
Remember: it’s not about perfection. It’s about enjoyment. A few gentle sags? That’s charm. A little cord showing? That’s real life. What matters is that you’re outside, relaxing, and soaking in the glow.
So grab your lights, call a friend, and get started. Your backyard transformation is just a few clips away. And when the sun sets and your fence lights up, you’ll know—it was worth every minute.
Happy lighting!
“`

