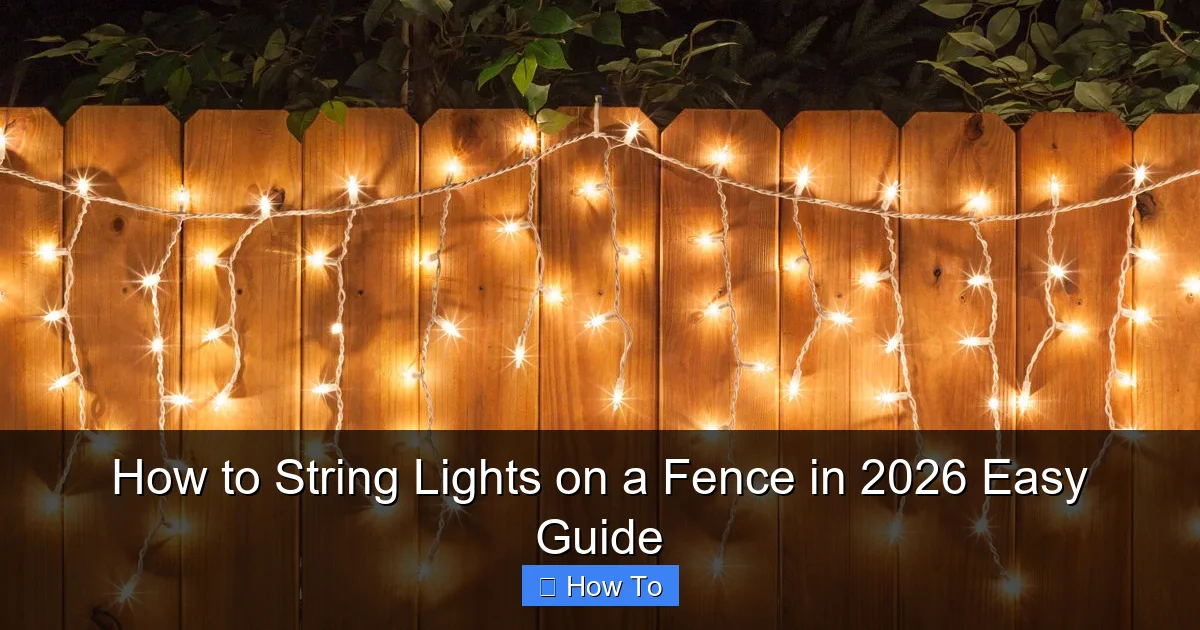
Featured image for how to string lights on a fence
Image source: fenceanddecksupply.com
Transform your outdoor space in 2026 by effortlessly stringing lights on a fence using simple tools and smart techniques. Whether you choose adhesive clips, hooks, or zip ties, ensuring secure, weather-resistant placement keeps your lights shining bright all season. This easy guide walks you through spacing, power options, and creative patterns for a stunning, professional-looking glow.
How to String Lights on a Fence in 2026 Easy Guide
Key Takeaways
- Plan your layout first: Measure fence length and mark light spacing for even, balanced coverage.
- Use outdoor-rated lights: Ensure durability and safety with weatherproof, UL-listed string lights.
- Secure with clips or hooks: Attach lights using fence-friendly hardware to avoid damage.
- Test lights before installing: Check functionality to avoid mid-installation failures or rework.
- Anchor the power source: Position the outlet near the start for easy, hidden access.
- Loop lights loosely: Avoid tension to prevent sagging or broken connections over time.
Why This Matters / Understanding the Problem
Imagine this: You’re hosting a backyard BBQ, the grill is sizzling, laughter fills the air, and the sun dips below the horizon. Then—*poof*—everything goes dark. The mood? Ruined.
That’s why knowing how to string lights on a fence in 2026 easy guide isn’t just about decoration. It’s about creating ambiance, extending your outdoor living space, and making every evening feel special.
But here’s the thing: Fences aren’t always designed for hanging things. They’re often uneven, made of wood or vinyl, and sometimes even wobbly. And if you’ve ever tried to hang lights only to watch them sag, tangle, or fall after one windy night, you know how frustrating it can be.
I learned this the hard way during my first summer in my new home. I bought a beautiful string of Edison bulbs, excited to transform my drab wooden fence into a magical backdrop. But by the third night, half the lights were dangling like limp spaghetti. My neighbor joked that I was running a “light art exhibit on gravity.”
Sound familiar?
Good news: With the right approach, you can avoid that disaster. Whether you’re lighting up a cozy patio, setting the scene for a wedding, or just want to enjoy your garden after sunset, this how to string lights on a fence in 2026 easy guide will walk you through everything—from choosing the right lights to installing them securely, season after season.
And no, you don’t need to be a handyman. Just a little patience, the right tools, and some smart planning.
What You Need
Before we dive into the steps, let’s get your toolkit ready. The beauty of this project is that most of what you need is affordable and easy to find—no special skills required.
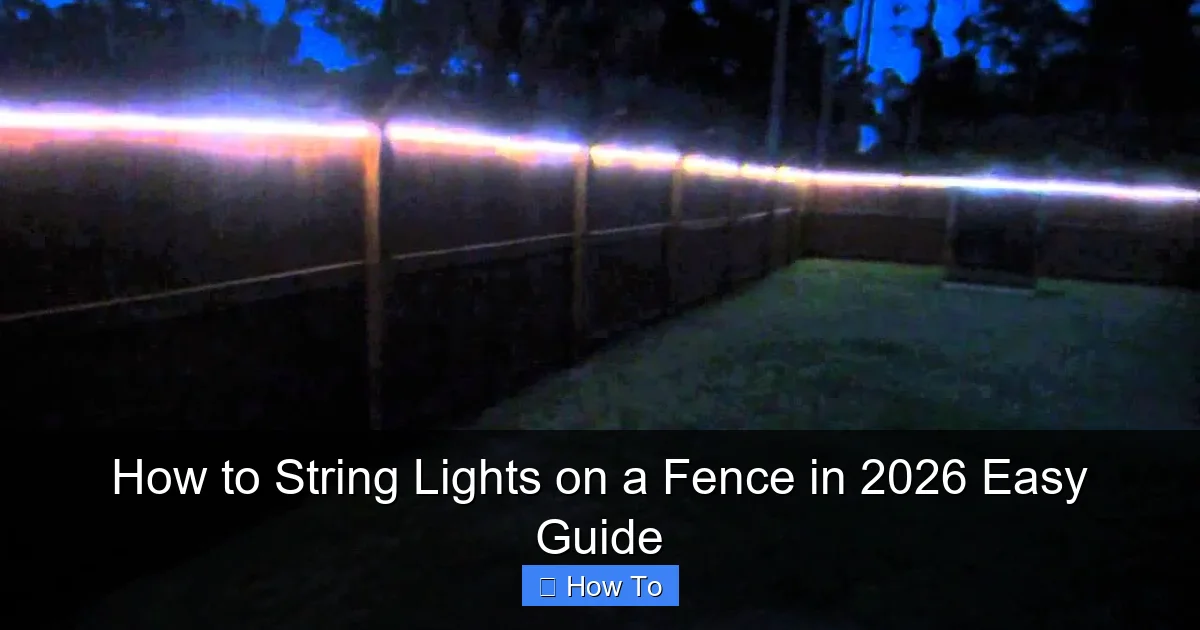
Visual guide about how to string lights on a fence
Image source: i.ytimg.com
- String lights: Choose weatherproof, outdoor-rated lights (LEDs are best for energy efficiency and longevity). Consider length, bulb type (Edison, globe, fairy), and whether they’re plug-in or solar.
- Fence hooks or clips: These are the unsung heroes. Look for fence-specific options—they grip the top rail without damaging the wood or vinyl. Magnetic clips work great for metal fences.
- Measuring tape: To map out your layout and avoid awkward gaps or overlaps.
- Staple gun or hammer: Only if your fence allows it (avoid vinyl or delicate materials).
- Extension cords and outdoor-rated power strips: Make sure they’re rated for outdoor use and have GFCI protection.
- Ladder: A sturdy one with rubber feet for safety.
- Zip ties: For extra security on tricky spots (like corners or posts).
- Timer or smart plug: Optional, but super handy for automatic on/off.
- Gloves: Protect your hands from splinters or sharp edges.
Pro insight: Don’t skimp on the clips. Cheap plastic ones crack in cold weather or slip in wind. I once used dollar-store clips—by winter, they were brittle dust. Invest in UV-resistant, heavy-duty ones. You’ll thank yourself later.
Bonus: If you’re using solar lights, you’ll also need a sunny spot for the panel. And if you’re going for a “floating” effect (like lights strung between posts), you might want thin nylon cord or fishing line as support.
Now that you’re equipped, let’s get to the fun part.
Step-by-Step Guide to How to String Lights on a Fence in 2026 Easy Guide
Step 1: Plan Your Layout (Yes, Really)
Before you touch a single light, take 10 minutes to sketch your plan. Trust me—this saves hours of frustration.
- Measure your fence length and height.
- Decide where you want the lights: Along the top rail? Draped in a zigzag? Straight across?
- Mark where posts are, especially corners and gates—these are natural anchor points.
- Plan for power sources. Where will the plug go? Can you hide the cord?
I like to use chalk or painter’s tape to mark key spots. For example, I once did a “starburst” pattern from the center post—chalk lines helped me keep the angles even.
Also, think about spacing. Too close, and the lights look cluttered. Too far, and you lose the cozy glow. A good rule: 12–18 inches between bulbs, depending on brightness.
And here’s a pro tip: If your fence is long, break it into sections. It’s easier to manage, and if one section fails, the rest stay lit.
This step is the foundation of your how to string lights on a fence in 2026 easy guide—don’t rush it.
Step 2: Choose the Right Lights for Your Fence Type
Not all fences are the same. And neither are all lights.
Wooden fence? You’re in luck. It’s sturdy, accepts hooks, and can handle a bit of weight. But avoid stapling into old, dry wood—it might split.
Vinyl or PVC fence? Be gentle. These can crack under pressure. Use soft rubber clips or adhesive hooks (rated for outdoor use). Never use nails or staples.
Chain-link or metal fence? Magnetic clips are your friend. Or use zip ties through the mesh. Just don’t over-tighten—you don’t want to warp the links.
Composite fence? Similar to vinyl—non-porous and slippery. Use heavy-duty adhesive hooks or clips designed for smooth surfaces.
Now, about the lights:
- Plug-in lights: Most versatile. But you’ll need access to an outlet. Use a GFCI outlet or outdoor extension cord.
- Solar lights: No wires, no hassle. But they need 6–8 hours of sunlight to charge. Best for areas with consistent sun.
- LED vs. incandescent: Always go LED. They’re cooler, last longer, and use less power. I switched last year—my electric bill dropped, and the lights lasted through two winters.
And one more thing: Check the IP rating (Ingress Protection). For outdoor use, you want at least IP44 (splash-proof). IP65 or higher is ideal for rainy climates.
Choosing the right combo of lights and fence type is key to a successful how to string lights on a fence in 2026 easy guide installation.
Step 3: Install the Hooks or Clips
This is where most people rush—and regret it later. Take your time.
- Start at one end (usually near a power source).
- Place your first clip or hook on the top rail of the fence. If it’s a corner post, use two for extra support.
- Space them evenly. For straight runs: every 2–3 feet. For curves or corners: every 1–1.5 feet.
- Press firmly—but not so hard you damage the fence. Rubber grips should bite into wood; magnetic clips should snap onto metal.
- For vinyl, use adhesive hooks. Clean the surface with rubbing alcohol first. Let the adhesive cure for 24 hours before hanging lights.
I learned this the hard way with my vinyl fence. I used cheap adhesive hooks and hung the lights the same day. By morning, they were on the ground. Lesson: Always let adhesive cure.
For wooden fences, you can use small cup hooks or screw-in eyelets. Just pre-drill holes to avoid splitting. And if your fence is painted, use a nail set to avoid chipping.
Warning: Don’t hang lights directly on the fence without clips. The weight can pull down the top rail, especially on older fences. I’ve seen entire sections sag—don’t be that person.
Pro tip: Use a level to keep hooks straight. A crooked line kills the vibe.
Step 4: Hang the Lights (The Fun Part)
Now comes the magic.
- Unroll your lights and lay them out on the ground first. Plug them in to test—make sure every bulb works.
- Start at the end closest to the power source. This minimizes cord tangles.
- Hang the first bulb on the first hook. Let the rest drape gently.
- Work your way along, securing each bulb or socket to a hook. Don’t pull tight—let them have a slight sag (like a “catenary” curve). This looks better and reduces stress on the wires.
- At corners, use extra clips to guide the lights around the post. Avoid sharp bends.
For a “draped” or “zigzag” look:
- Attach lights to the top rail, then run them down to a lower point (like a middle rail or stake).
- Use zip ties or small clips to hold the “drops” in place.
- Keep the spacing even. I use a 12-inch ruler as a guide.
And if you’re going for a “canopy” effect (lights strung between posts), tie thin, nearly invisible nylon cord between the posts first. Then hang the lights on the cord. This takes the weight off the fence.
One thing I do: I always leave a little extra cord at the end. It makes future adjustments easier.
Step 5: Secure the Power Source and Hide Cords
This step is all about safety and aesthetics.
- Use an outdoor-rated extension cord. Don’t daisy-chain more than three cords.
- Plug into a GFCI outlet (or use a GFCI extension cord). This protects against shocks in wet weather.
- Route the cord along the fence base or behind plants. Use cord clips or zip ties to keep it tidy.
- For a cleaner look, run the cord under mulch or along a garden path.
- If you’re using a timer, plug it into the outlet first, then the lights.
Pro insight: I use a smart plug with a weatherproof cover. I can turn the lights on from my phone—or set them to come on at sunset. Total game-changer.
And here’s a safety tip: Don’t run cords across walkways. If you must, use a cord cover or bury them shallowly (at least 6 inches deep, with conduit).
This is often overlooked in guides, but it’s crucial for a polished, safe how to string lights on a fence in 2026 easy guide setup.
Step 6: Test and Adjust
Plug everything in. Watch the glow spread.
But don’t just admire it—check for:
- Flickering bulbs (replace or tighten).
- Sagging sections (add a clip or shorten the span).
- Cord visibility (tuck in or reposition).
- Wind resistance (add extra clips if they flap).
I always do a “wind test”—I turn on a fan or wait for a breezy day. If lights are whipping around, they need more support.
And if you’re using solar, test at night to make sure they’re bright enough. If not, reposition the panel to catch more sun.
This step ensures your lights look great and last.
Step 7: Maintain and Store (For Next Season)
Yes, maintenance matters—even for something as simple as lights.
- Inspect monthly: Check for loose clips, frayed cords, or dead bulbs.
- Clean bulbs gently with a damp cloth (unplug first!).
- Before winter, remove lights from vinyl or composite fences—ice and snow can crack the material.
- Store lights coiled loosely in a dry place. I use a cardboard tube to prevent tangles.
- Replace bulbs as needed. Keep spares on hand.
I learned this after my first winter. I left the lights up, thinking they were “weatherproof.” They survived—but the clips were rusted, and the bulbs were dim. Now I take them down in November.
For a long-lasting, reliable setup, this care is part of the how to string lights on a fence in 2026 easy guide philosophy.
Pro Tips & Common Mistakes to Avoid
After years of trial, error, and neighborly advice, here’s what I wish I’d known sooner.
Pro Tip 1: Use a laser level for long, straight runs. It saves you from “drifting” lines. I use mine for my 30-foot fence—it’s perfect.
Pro Tip 2: Mix light types. I use warm white Edison bulbs along the top rail and tiny fairy lights draped down the sides. It creates depth and dimension.
Pro Tip 3: For a “floating” look, use clear fishing line as support. Hang lights on the line, not the fence. It’s nearly invisible and takes the load off.
Now, the common mistakes:
- Ignoring the power source: Running a 100-foot cord from the house? That’s a tripping hazard and voltage drop. Use a nearby outlet or outdoor-rated extension.
- Overloading circuits: Don’t plug too many lights into one outlet. Check the wattage limit (usually 15–20 amps). I once blew a breaker at a party—not cool.
- Using indoor lights outdoors: They’ll short out in rain. Always check the packaging for “outdoor use.”
- Forgetting about weather: Wind, rain, and snow stress the lights and clips. Secure everything, and consider removable options for harsh climates.
- Skipping the test: Always test before you finish. A single bad bulb can ruin the whole string.
And one last thing: Don’t overdo it. Less is often more. A few well-placed lights create ambiance. A tangled mess just looks chaotic.
These insights come from real experience—and a few backyard disasters. Use them to make your how to string lights on a fence in 2026 easy guide project a success.
FAQs About How to String Lights on a Fence in 2026 Easy Guide
Q: Can I leave my lights up all year?
A: It depends. Plug-in LED lights can stay up in mild climates, but I recommend removing them in areas with heavy snow or ice. For vinyl fences, definitely take them down—ice buildup can crack the material. Solar lights are more durable, but check the manufacturer’s guidelines.
Q: What if my fence is wobbly?
A: Reinforce it first. Tighten loose posts, or add temporary supports (like stakes). Or, skip the fence entirely—string lights between trees, posts, or a pergola instead. I did this when my neighbor’s fence leaned—looked even better!
Q: How do I hide the power cord?
A: Use cord clips along the fence base, bury it shallowly with mulch, or run it behind plants. I use a decorative stone pathway to hide mine. For a seamless look, use a smart plug with a hidden outlet.
Q: Are solar lights bright enough?
A: Yes—but only if they get enough sun. Place the panel in a sunny spot (south-facing is best). Newer models are much brighter than older ones. I use solar fairy lights for a soft glow, and plug-in for the main display.
Q: Can I use nails or staples on a vinyl fence?
A: No. Vinyl is brittle and can crack. Use adhesive hooks or clips designed for smooth surfaces. I learned this when a staple punctured my fence—cost me $200 to fix.
Q: How do I fix a section that sags?
A: Add a clip or hook in the middle. Or, shorten the span by anchoring to a post. For long runs, use a support cord (like fishing line) under the lights.
Q: What’s the best spacing for the lights?
A: 12–18 inches between bulbs for a balanced look. Closer for a dense glow, farther for a subtle effect. I use 15 inches as a sweet spot.
Final Thoughts
There you have it—a complete how to string lights on a fence in 2026 easy guide that’s practical, safe, and beautiful.
Remember: The goal isn’t perfection. It’s creating a space where you want to spend time. Whether it’s a quiet evening with a book or a lively party with friends, the right lighting sets the mood.
Start small. Test one section. Learn what works for your fence, your climate, and your style. Then expand.
And don’t forget the small joys—like watching your kids’ faces light up (pun intended) when they see the backyard transformed.
So grab those lights, a ladder, and a friend. Follow this guide. And enjoy the magic.
Your fence isn’t just a boundary. It’s a canvas. And you’re the artist.
Now go make something beautiful.

