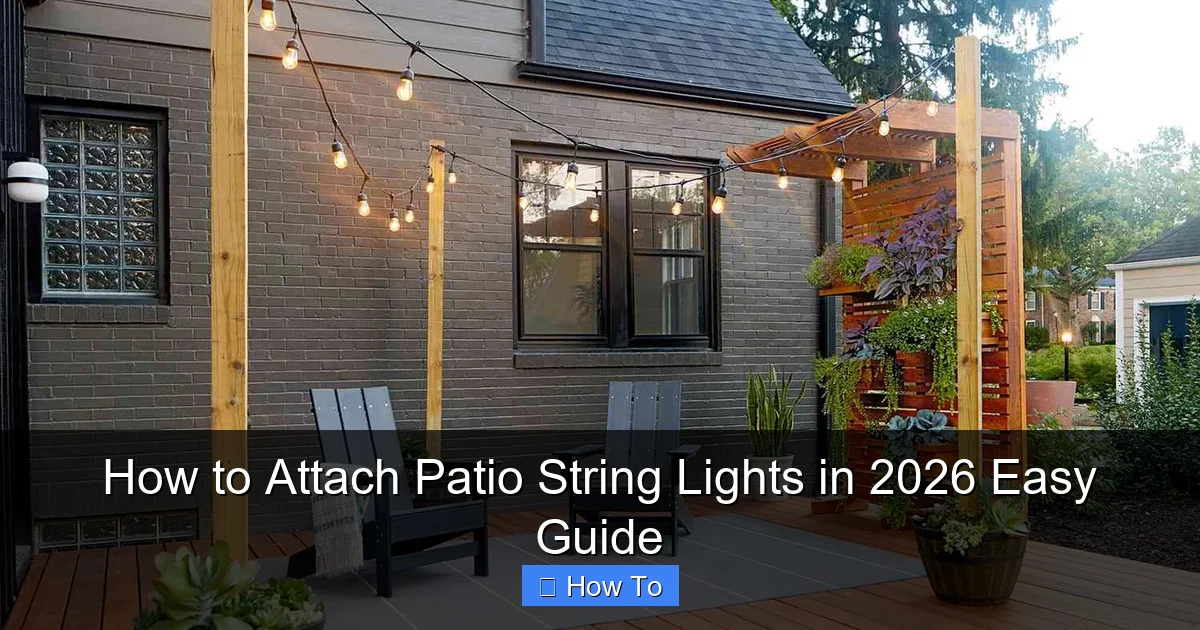
Featured image for how to attach patio string lights
Image source: bhg.com
Transform your outdoor space in minutes by using removable hooks, adhesive clips, or tension wires to securely attach patio string lights—no drilling required. Choose the right mounting method for your surface, whether wood, stucco, or metal, to ensure a safe, weather-resistant setup that lasts all season.
“`html
How to Attach Patio String Lights in 2026 Easy Guide
Key Takeaways
- Plan your layout first: Measure and mark light placement for even spacing and coverage.
- Use durable anchors: Install hooks or eye screws securely into studs or masonry.
- Opt for dimmers: Add a dimmer switch to control brightness and set the mood.
- Test before hanging: Check bulb functionality and wiring before final installation.
- Secure with zip ties: Fasten loose cords to prevent sagging and tripping hazards.
- Weatherproof connections: Seal plugs and junctions with silicone to protect from rain.
- Go solar if possible: Use solar-powered lights for energy efficiency and easy setup.
Why This Matters / Understanding the Problem
Picture this: It’s a warm summer evening. You’re sipping lemonade on your patio, the grill’s off, and the sky is turning pink. You want to string up some lights to keep the vibe going—but then reality hits. How do you actually attach patio string lights without turning your backyard into a DIY disaster?
If you’ve ever wrestled with tangled cords, snapped zip ties, or lights that dangle like sad spaghetti, you’re not alone. The truth is, attaching patio string lights seems simple—until it’s not. In 2026, we’ve got smarter tools, better materials, and more creative setups than ever. But without the right approach, your dreamy ambiance can turn into a tangled mess.
That’s why this How to Attach Patio String Lights in 2026 Easy Guide exists. I’ve been through the trial and error—the sagging lines, the wind-whipped bulbs, the “wait, did I over-tighten that hook?” moments. Now, I’m sharing what actually works, what to avoid, and how to make your outdoor lighting look intentional, safe, and stunning—without needing an engineering degree.
Pro tip: The goal isn’t just to hang lights—it’s to create a space where you actually want to spend time. Good lighting sets the mood, and a well-planned setup lasts years.
What You Need
Before you start, let’s gather your gear. The right tools make all the difference. Here’s your checklist for a smooth How to Attach Patio String Lights in 2026 Easy Guide process.
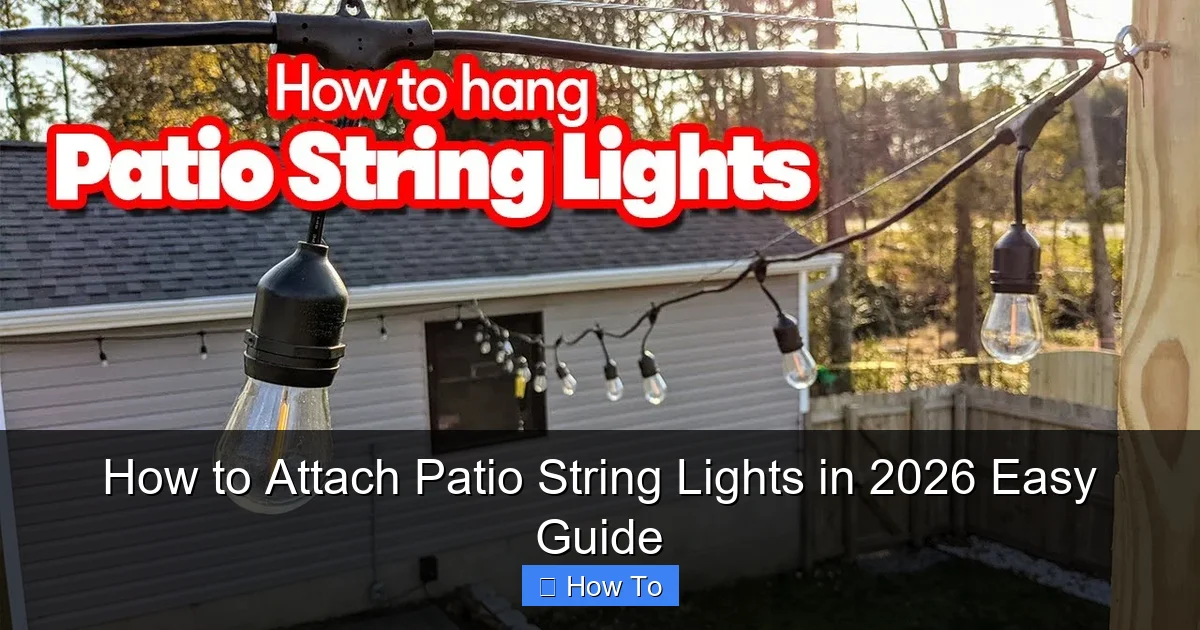
Visual guide about how to attach patio string lights
Image source: i.ytimg.com
- Patio string lights (LED recommended for energy efficiency and durability)
- Measuring tape (to map your layout and avoid overbuying)
- Outdoor-rated mounting hardware:
- Stainless steel eye screws or lag hooks (for wood)
- Plastic or metal anchors with screws (for brick, stucco, or concrete)
- Adhesive outdoor hooks (for low-weight, temporary setups)
- Drill or screwdriver (cordless drill with a Phillips bit makes life easier)
- Level (optional but helpful for straight lines)
- Zip ties or light clips (for securing along fences, railings, or poles)
- Extension cord (outdoor-rated) with GFCI protection (safety first!)
- Timer or smart plug (so you don’t have to remember to turn them off)
- Ladder (if working above 6 feet)
- Gloves (to protect your hands from sharp edges or splinters)
Warning: Never use indoor-only lights or hardware outdoors. UV rays, rain, and wind will destroy them in weeks.
Bonus: If you’re going for a modern look, consider smart string lights with app control or color-changing options. They’re pricier, but the flexibility is worth it—especially if you entertain often.
Step-by-Step Guide to How to Attach Patio String Lights in 2026 Easy Guide
Step 1: Plan Your Layout (The Secret to Success)
Before you drill a single hole, grab your measuring tape and walk your space. Ask yourself: Where do I spend the most time? Is it under a pergola? Along a fence? Across the back of your deck?
Sketch a quick layout on paper or use a free app like RoomSketcher to visualize. Decide whether you want:
– A straight line (e.g., from house to tree)
– A crisscross “canopy” (great for large patios)
– A perimeter run (around a deck or balcony)
– A zigzag or “starburst” (for visual interest)
Measure the total distance. Add 10–15% extra for slack and curves. This ensures you buy the right number of strands—and avoids the “oh no, I’m 3 feet short” panic.
Pro tip: Use painter’s tape to mark anchor points on walls or posts. It’s easy to adjust and won’t damage surfaces.
Step 2: Choose the Right Mounting Method (Match Your Surface)
Not all surfaces are created equal. Here’s how to pick the right hardware based on what you’re attaching to:
- Wood (deck posts, pergola, fence): Use stainless steel eye screws or lag hooks. They’re strong, rust-resistant, and blend in. Pre-drill holes slightly smaller than the screw to prevent splitting.
- Brick or stucco: Use plastic anchors with screws. Drill a pilot hole, insert the anchor, then screw in. Avoid adhesive hooks—they’ll fail in heat or rain.
- Concrete or stone: Use tapcon screws or masonry anchors. These are designed for dense materials and hold tight.
- Metal (railing, awning frame): Use magnetic hooks or zip tie clamps. No drilling needed—perfect for rentals.
- No drilling allowed? Try adhesive outdoor hooks (rated for 5+ lbs). They work best on smooth, clean surfaces and are ideal for temporary setups.
<
For the How to Attach Patio String Lights in 2026 Easy Guide, always prioritize safety and longevity. A $2 anchor today can save you a $200 repair tomorrow.
Step 3: Mark and Drill Anchor Points (Keep It Level)
Now it’s time to mark where your lights will attach. Use your layout plan and measuring tape to mark each point. For straight runs, use a level to ensure alignment—especially on long spans.
For example: If you’re running lights from your house to a pergola 20 feet away, mark every 4–6 feet. This prevents sagging. For canopies, mark points in a grid (like a tic-tac-toe board).
Drill pilot holes at each mark. For wood, go about 1/8 inch smaller than your screw. For masonry, use a masonry bit and vacuum out dust before inserting anchors.
Warning: Don’t skip pilot holes—especially on wood. They prevent splitting and make installation smoother.
Step 4: Install the Mounting Hardware (Go Slow and Steady)
Now screw in your hooks, anchors, or clips. Don’t over-tighten. You want them snug, not so tight they crack the surface.
For eye screws: Screw in until the base is flush with the surface. For anchors: Tap them in gently with a hammer, then screw in the bolt until it’s tight.
If you’re using adhesive hooks, clean the surface with rubbing alcohol first. Let it dry, then press the hook firmly for 30 seconds. Wait 24 hours before hanging anything—this ensures maximum bond.
Pro tip: Label each hook with a piece of tape (e.g., “A,” “B”) to match your layout. It saves time later.
Step 5: Test Your Lights (Plug In Before Hanging)
Before you start stringing, plug in your lights. Check for:
– Dead bulbs or flickering
– Loose connections
– Overheating (LEDs should stay cool)
If something’s wrong, fix it now. Once lights are up, troubleshooting is a pain.
Also, test your extension cord and outlet. Make sure it’s GFCI-protected (most outdoor outlets are). If not, use a GFCI adapter.
Pro tip: Use a timer or smart plug to automate your lights. Set them to turn on at sunset and off at 11 p.m.—no more forgetting!
Step 6: Hang the Lights (Start at the Power Source)
Always start at the outlet. Unroll your string lights and lay them out loosely. Don’t force them—they’re not elastic.
For straight runs: Clip the first bulb or socket into the first hook. Work your way down, clipping every 12–18 inches. Keep tension even—not too tight, not too loose. You want a gentle sag, not a droop.
For canopies or zigzags: Use a helper. One person holds the lights while the other clips. Start at the center and work outward.
For poles or trees: Use zip ties or light clips. Wrap the tie around the pole, then thread the light socket through the loop. Tighten just enough to hold.
Warning: Never hang lights directly on nails, screws, or staples. They can damage the wires and create fire hazards.
Step 7: Secure and Tidy Up (The Final Touch)
Once all lights are up, go back and secure any loose sections. Use zip ties or clips to bundle extra cord near outlets or poles.
Hide cords along baseboards, under railings, or behind furniture. Use cord covers or conduit if they’re in high-traffic areas.
For a clean look, use matching colored zip ties (black, brown, or white) to blend in with your surface.
Finally, step back and admire your work. Walk around the space. Do the lights feel balanced? Is the glow even? Adjust as needed.
Step 8: Weatherproof and Maintain (Keep Them Looking Great)
Even the best setup needs upkeep. Here’s how to make your lights last:
- Check monthly: Inspect for loose hooks, frayed wires, or water in sockets.
- Clean bulbs: Wipe with a dry cloth every few months. Dust and pollen reduce brightness.
- Store properly: At season’s end, unplug and coil lights loosely. Store in a dry, cool place. Avoid plastic bags—they trap moisture.
- Replace bulbs: If one goes out, replace it ASAP. A dead bulb can overload the circuit.
For the How to Attach Patio String Lights in 2026 Easy Guide, maintenance is part of the process. A little effort now means years of use.
Pro Tips & Common Mistakes to Avoid
After hanging lights for 15+ years (and fixing my own disasters), here’s what I’ve learned:
- Don’t daisy-chain too many strands: Most lights max out at 3–5 strands. Check the packaging. Overloading can blow fuses or start fires.
- Use the right bulbs: Vintage-style Edison bulbs are pretty but fragile. For high-traffic areas, use shatterproof LEDs.
- Account for wind: If your area is windy, use heavier-duty hardware and space hooks closer together (every 3–4 feet).
- Think about light direction: Point bulbs downward to avoid glare. Upward-facing lights can create a cool “glow” effect on walls.
- Use a dimmer or smart bulb: Not every night needs full brightness. A dim setting is perfect for quiet evenings.
Personal story: I once used cheap plastic hooks on my stucco wall. Within a month, two broke during a storm. I learned—always use anchors rated for your surface.
Another mistake? Not checking the weather. I hung lights before a big party, only to have them blow down in a windstorm. Now, I wait for calm conditions—or use temporary clips until the forecast clears.
And please—don’t hang lights on live trees with staples or nails. It damages the bark and can kill the tree. Use zip ties or tree-friendly clips instead.
FAQs About How to Attach Patio String Lights in 2026 Easy Guide
Can I use indoor string lights outside?
No, and please don’t. Indoor lights aren’t sealed against moisture or UV rays. Rain can cause short circuits, and sun exposure will crack the casing. Always use outdoor-rated string lights with weatherproof sockets.
How far apart should I space my hooks?
For most setups, every 4–6 feet is ideal. Closer (3 feet) for heavy bulbs or windy areas. Wider (8 feet) for lightweight LED strands on calm patios. The key is preventing sagging without overloading your hardware.
Can I attach lights to my roof?
It depends. If you have gutters, use gutter hooks—they clip on without drilling. For flat roofs, use adhesive mounts or weighted bases. But if you’re not comfortable on a ladder, hire a pro. Safety first.
What if I rent and can’t drill holes?
Great question! Use adhesive outdoor hooks (rated for 5+ lbs), magnetic hooks (for metal railings), or freestanding poles. You can also hang lights from trees, fences, or furniture. Get creative—just make sure they’re secure.
How do I hide the cords?
Run them behind furniture, under railings, or along baseboards. Use cord covers (available in colors) or paint them to match your wall. For a seamless look, run the cord through a PVC conduit.
Are smart string lights worth it?
For me, yes. Being able to change colors, set schedules, or dim from my phone is a game-changer. They’re pricier (around $50–$100 per strand), but if you entertain often or love ambiance, they’re worth the investment. Just make sure they’re outdoor-rated.
How long do outdoor string lights last?
High-quality LED lights can last 5–10 years. Cheaper ones? 1–2 years. Look for brands with replaceable bulbs and weatherproof ratings (IP65 or higher). And always store them properly in winter.
Final Thoughts
Attaching patio string lights isn’t rocket science—but it’s not as simple as “just hang them up.” With the right plan, tools, and a little patience, you can create a space that feels magical every night.
This How to Attach Patio String Lights in 2026 Easy Guide isn’t about perfection. It’s about creating a place where you want to be. Where laughter echoes under a canopy of light. Where a simple string of bulbs turns your backyard into a retreat.
So go ahead—measure, mark, and mount. Start small if you’re nervous. A single strand across a deck can make all the difference. And remember: the best lighting setup is the one you actually use.
Once your lights are up, pour a drink, invite a friend, and enjoy. You’ve earned it.
Final tip: Take a photo of your setup. Not for social media—for yourself. It’s a reminder of what you built, and a reference for next year’s upgrade.
“`

