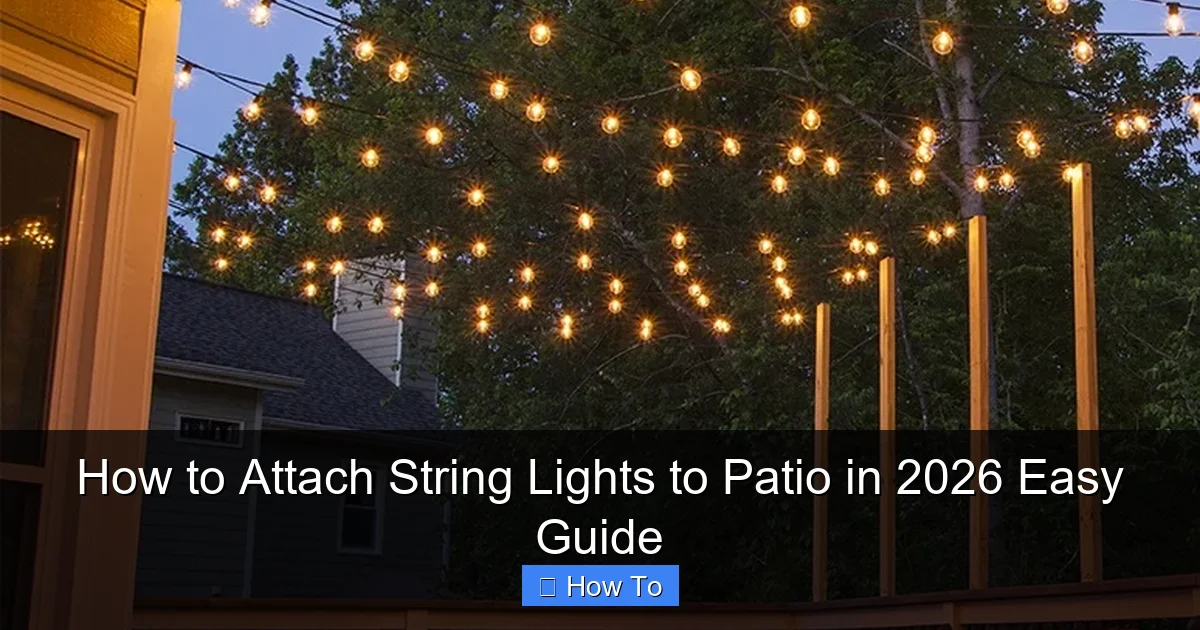
Featured image for how to attach string lights to patio
Image source: cdn.christmaslightsetc.com
Transform your patio into a glowing retreat in 2026 by using removable adhesive hooks or weather-resistant clips—no drilling required. Simply plan your layout, secure the lights at even intervals, and plug into an outdoor-rated outlet for instant ambiance. This quick, damage-free method ensures a stunning, professional look in minutes.
“`html
How to Attach String Lights to Patio in 2026 Easy Guide
Key Takeaways
- Plan your layout first: Sketch light placement to avoid mid-project adjustments.
- Use weatherproof hardware: Ensure all clips, hooks, and lights are rated for outdoor use.
- Anchor securely: Screw-in hooks or tension cables provide stable, long-lasting support.
- Measure twice, install once: Confirm spacing and sag before finalizing connections.
- Hide cords discreetly: Tuck wires under railings or trim for a clean look.
- Test lights pre-installation: Check for faults or dead bulbs before hanging.
Why This Matters / Understanding the Problem
Picture this: it’s a warm summer night, you’ve got friends over, and you’re ready to enjoy your patio—but the lighting is either too harsh or nonexistent. That’s where string lights come in. They’re not just decorative; they transform your outdoor space into a cozy, inviting retreat. But if you’ve ever tried to attach string lights to patio areas, you know it’s not as simple as hanging tinsel on a tree.
The challenge? Most patios don’t have convenient hooks, poles, or overhangs. You might have a concrete slab, a metal pergola, or a wooden deck with no clear anchor points. Plus, you want it to look good, stay secure, and survive wind, rain, and seasonal changes. This How to Attach String Lights to Patio in 2026 Easy Guide walks you through a modern, reliable, and visually appealing approach—no DIY nightmares included.
Whether you’re hosting a backyard dinner, setting the mood for a quiet evening, or just want to boost your home’s curb appeal, the right lighting makes all the difference. And in 2026, with better materials, smarter tools, and more stylish designs, it’s easier than ever to get it right the first time.
What You Need
Before you start, gather your supplies. The good news? You don’t need to be a contractor or own a tool shed full of gear. Most of this is stuff you can pick up at a hardware store or order online. Here’s your quick checklist:

Visual guide about how to attach string lights to patio
Image source: shinymodern.com
- Outdoor-rated string lights – Look for IP44 or higher weather resistance. LED is best: energy-efficient, cool to the touch, and long-lasting.
- Anchor points – This could be hooks, eye screws, zip ties, adhesive mounts, or pergola brackets, depending on your patio type.
- Measuring tape – For planning layout and spacing.
- Drill & bits – If you’re screwing into wood, stucco, or concrete. A hammer drill helps with masonry.
- Level – Optional, but great for keeping lines straight.
- Zip ties or cable clips – For temporary or flexible setups.
- Adhesive outdoor hooks – Like 3M Command Outdoor Strips or heavy-duty VHB tape mounts (great for no-drill options).
- Ladder – If your patio has high overhangs or a ceiling.
- Extension cord (outdoor-rated) – With a GFCI plug for safety.
- Timer or smart plug – Optional, but super convenient for automatic on/off.
Pro tip: Buy string lights with end-to-end connectors so you can daisy-chain multiple strands without overloading a single outlet. And always check the max wattage or strand limit on the packaging.
Step-by-Step Guide to How to Attach String Lights to Patio in 2026 Easy Guide
Step 1: Plan Your Layout (Before You Hang a Single Bulb)
Before you start drilling or sticking anything, take a step back. Literally. Walk around your patio and visualize how the lights will look at night. Do you want a canopy effect? A perimeter glow? Or a zigzag pattern?
Use painter’s tape to mark where each anchor point will go. For a canopy, plan a grid or crisscross pattern across the ceiling or pergola. For a perimeter, follow the edges of your deck or patio.
Measure the distance between each point. Most string lights are 25–50 feet long, but you’ll likely need multiple strands. Leave a 2–3 foot gap between each strand for visual balance. Overcrowding looks messy; too sparse feels empty.
Personal insight: I once rushed this step and ended up with lights sagging in the middle and a tangled mess behind the outlet. Take 15 minutes to plan—it saves hours of frustration later.
Step 2: Choose the Right Mounting Method for Your Patio Type
Not all patios are built the same. Your mounting method depends on what you’re attaching to:
- Wooden pergola or deck beams: Use stainless steel eye hooks or lag screws. They’re strong, discreet, and won’t rust.
- Concrete or brick walls: Use masonry anchors with eye screws. Drill a pilot hole first, then insert the anchor.
- Metal pergola or awning: Try magnetic hooks (for thin metal) or heavy-duty zip ties through pre-drilled holes.
- No structure? (e.g., open slab): Use freestanding poles or attach to nearby trees, railings, or even your house’s eaves.
- Glass or vinyl siding: Avoid drilling. Use outdoor-rated adhesive hooks with high weight capacity (test first).
For a truly How to Attach String Lights to Patio in 2026 Easy Guide experience, consider removable tension rods or outdoor curtain rods that stretch between two points—no drilling required.
Warning: Never use nails, thumbtacks, or duct tape. They’ll damage surfaces, fall off in the wind, or create tripping hazards.
Step 3: Install Your Anchor Points
Now it’s time to get your hands dirty—or sticky, if you’re using adhesives.
For screw-in hooks:
- Mark your anchor points with a pencil.
- Drill a pilot hole (smaller than the screw) to prevent splitting wood or cracking masonry.
- Insert the anchor (if using masonry), then screw in the eye hook by hand or with a screwdriver.
- Double-check each hook is secure and level.
For adhesive hooks:
- Clean the surface with rubbing alcohol and let it dry.
- Peel and press the hook firmly for 30 seconds.
- Wait 24 hours before hanging lights (this ensures maximum adhesion).
For zip ties or cable clips:
- Loop them around beams or poles and pull tight.
- Trim excess with scissors.
- Use UV-resistant ties to prevent brittleness in sun.
Tip: If you’re using multiple strands, label each anchor point (A1, A2, B1, etc.) to match your layout plan.
Step 4: Hang the Lights (Without Tangling or Sagging)
This is where many people go wrong. Don’t just toss the lights up and hope for the best. Here’s how to do it right:
- Start at the outlet. Plug in the first strand and test it. You don’t want to hang 10 strands only to find a dead bulb.
- Unroll the lights on the ground in the direction you’ll hang them. This prevents tangles.
- Hang one end first, then gently pull the strand to the next anchor. Use a carabiner or S-hook to attach to the eye hook—this makes it easy to remove later.
- Keep tension even. Too tight? Lights will stretch and break. Too loose? They’ll sag and look messy.
- For long runs, add a middle support hook to prevent drooping.
- Connect additional strands using end-to-end plugs. Avoid daisy-chaining more than the manufacturer’s recommended number (usually 2–4 strands).
Pro tip: Use zip tie loops on beams to guide lights without damaging the cord. Just loop the tie around the beam and thread the light through—no hooks needed.
Step 5: Secure the Cord and Manage Power
The lights are up—great! But what about the cords running to the outlet? Exposed cords are a tripping hazard and can get damaged.
- Run the cord along a beam or railing, using cable clips every 12–18 inches.
- If the cord must cross the ground, use a cord cover or bury it in a shallow trench (with a conduit for safety).
- Use an outdoor-rated extension cord with a GFCI plug. This shuts off automatically if there’s a short circuit—critical for safety.
- Plug into a weatherproof outlet cover or GFCI outlet.
- For a cleaner look, consider a smart plug with a timer or app control. Set it to turn on at sunset and off at bedtime.
Bonus: If your outlet is far away, run the cord along the house’s edge and secure it with adhesive clips or zip ties. Avoid running cords over sharp edges or through doors.
Step 6: Test, Adjust, and Enjoy
Now the fun part: turn on the lights!
- Check for dark spots, flickering bulbs, or sagging strands.
- Adjust tension or add support hooks as needed.
- Stand back and admire your work. Take a photo—you’ve earned it.
Invite a friend over for a “lighting test” at night. They’ll notice things you might miss: shadows, glare, or uneven spacing.
And remember: this is your space. If you want to tweak the pattern next week, go for it. The beauty of the How to Attach String Lights to Patio in 2026 Easy Guide approach is flexibility.
Pro Tips & Common Mistakes to Avoid
After hanging string lights on three patios (one that survived a thunderstorm and two that hosted countless BBQs), here’s what I’ve learned:
- Don’t skip the weather rating. Indoor lights might survive a light drizzle, but they’ll fail fast in rain or humidity. Look for “wet-rated” or IP65+.
- Use LED, not incandescent. LEDs run cooler, use less power, and last 25,000+ hours. Incandescents burn out faster and get hot.
- Leave slack at connections. If a storm knocks a strand loose, you don’t want it to pull the whole line down. Leave a 6-inch loop at each anchor.
- Avoid overloading outlets. Most outdoor outlets can handle 1,500 watts. A 25-foot LED strand uses about 10–20 watts. Still, do the math: 1,500 ÷ 15 = 100 strands max. You won’t need that many, but it’s good to know.
- Seasonal removal is easier with S-hooks. Instead of untying knots, just unhook and store in a labeled bag. Reinstall next year in minutes.
- Don’t ignore local codes. If your lights are near a walkway or public area, check if you need permits for low-voltage lighting.
Common mistake: Using indoor extension cords. They’re not weatherproof and can overheat. I learned this the hard way when my neighbor’s cord melted during a heatwave.
And one final tip: buy extra bulbs and fuses. Even the best lights have a dud now and then. Keep a spare bulb and the fuse tool in your toolbox.
FAQs About How to Attach String Lights to Patio in 2026 Easy Guide
Q: Can I leave my string lights up year-round?
A: It depends. If they’re wet-rated and securely mounted, many people leave them up. But I recommend taking them down in winter if you get heavy snow or ice. The weight can damage cords or pull out anchors. For a permanent look, consider in-ground pole kits or recessed patio lighting as a long-term upgrade.
Q: What if I don’t have a pergola or overhang?
A: No problem! Use freestanding poles (like shepherd’s hooks or metal stakes) driven into the ground. Or attach lights to your house’s eaves, a nearby fence, or even tall plants. One of my favorite tricks: hang lights between two trees with a cable, then run them down to your patio.
Q: Are adhesive hooks strong enough for wind?
A: Yes—if you use the right ones. Look for 3M Outdoor Heavy Duty Command Strips (rated for 5 lbs or more). Clean the surface well, press for 30 seconds, and wait 24 hours. I’ve used these on stucco and vinyl siding for 2+ years with zero failures.
Q: How do I hide the cords?
A: Run them along beams, under railings, or behind planters. Use cord covers or paint them to match your house. For a high-end look, drill small holes in beams and feed the cord through (seal with silicone to prevent leaks).
Q: Can I connect different brands of string lights?
A: Not usually. Most brands use proprietary plugs. Stick with one brand for daisy-chaining. Or, use separate circuits with their own timers.
Q: What’s the best spacing between strands?
A: For a soft glow, space strands 12–18 inches apart. For a brighter canopy, go 6–8 inches. It’s all about personal preference. I like 12 inches—it’s cozy without being overwhelming.
Q: Do I need a permit to install outdoor lighting?
A: For low-voltage string lights (12V or 24V), usually not. But if you’re hardwiring or using high-voltage lines, check with your local building department. When in doubt, consult a licensed electrician.
Final Thoughts
Hanging string lights doesn’t have to be a chore. With the right tools, a little planning, and this How to Attach String Lights to Patio in 2026 Easy Guide, you can create a magical outdoor space in just a few hours.
Start simple. Test one strand first. Adjust as you go. And don’t be afraid to experiment—your patio is a canvas, not a checklist.
The best part? Every time you walk outside and see those soft, glowing bulbs, you’ll remember the effort you put in. And your guests will notice too. “Wow, this is beautiful,” they’ll say. And you’ll smile, knowing you did it yourself—without a single drill bit mishap (okay, maybe one).
So grab your lights, pick your favorite mounting method, and get started. Your dream patio is just a few hooks away.
“`

