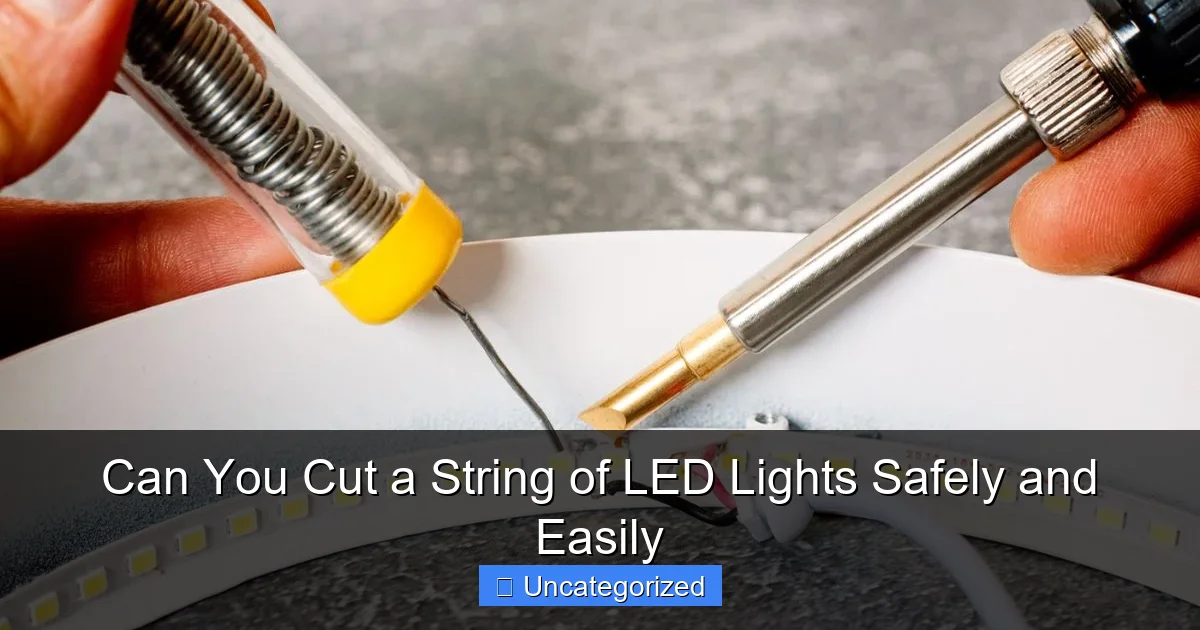
Featured image for can you cut a string of led lights
Image source: homestratosphere.com
Yes, you can cut a string of LED lights safely and easily—if you follow the manufacturer’s guidelines and cut only at designated points. Most LED strips have marked cut lines with copper pads, ensuring clean, functional segments without damaging the circuit. Always power off the lights before cutting and seal exposed ends to prevent short circuits or moisture damage.
Key Takeaways
- Check manufacturer guidelines: Always confirm if your LED string is designed to be cut.
- Locate cutting points: Cut only at marked sections to avoid damage or hazards.
- Use sharp tools: Clean cuts prevent frayed wires and ensure safety.
- Seal cut ends properly: Use heat-shrink tubing to insulate exposed wires.
- Test before use: Verify functionality after cutting to ensure no connection issues.
- Avoid over-cutting: Never remove more than the recommended number of LEDs.
📑 Table of Contents
- Can You Cut a String of LED Lights Safely and Easily
- Understanding LED Light String Construction
- When Can You Cut LED Light Strings? (And When You Shouldn’t)
- Step-by-Step Guide to Cutting LED Strings Safely
- Advanced Techniques: Reconnecting and Customizing Cut Strings
- Troubleshooting Common Cutting Mistakes
- Conclusion: Customize Your Lights with Confidence
Can You Cut a String of LED Lights Safely and Easily
Imagine this: you’ve just purchased a stunning 20-foot LED light string to illuminate your patio, but after measuring your space, you realize you only need 12 feet. Or perhaps you’re crafting a custom lighting design for a wedding arch, and the standard lengths don’t quite fit. The question arises: can you cut a string of LED lights? This seemingly simple query opens a world of possibilities—and potential pitfalls—for DIY enthusiasts, decorators, and homeowners alike. While the idea of customizing LED strings to fit your exact needs is appealing, it’s crucial to understand the technical and safety considerations before grabbing the scissors.
LED light strings have revolutionized home and event decor with their energy efficiency, longevity, and vibrant color options. However, unlike traditional incandescent holiday lights, LEDs are more complex in construction, which means cutting them isn’t always as straightforward as it seems. Whether you’re working with basic plug-in strings, battery-powered strands, or advanced RGB (color-changing) lights, knowing when and how to safely cut them can save you from damaged circuits, electrical hazards, or wasted money. This guide will walk you through everything you need to know—from identifying cuttable designs to mastering the technique, and even troubleshooting common issues. By the end, you’ll be equipped to customize your LED lights with confidence.
Understanding LED Light String Construction
To determine if you can safely cut an LED string, it’s essential to first understand how these lights are built. Not all LED strings are created equal, and their internal wiring, circuit design, and power delivery methods vary significantly. Cutting the wrong type can result in a completely non-functional string or even create a fire hazard.
Visual guide about can you cut a string of led lights
Image source: simplelighting.co.uk
Types of LED Light Strings and Their Wiring
LED light strings generally fall into three main categories based on their wiring configuration:
- Series Wiring: LEDs are connected end-to-end in a single circuit. If one LED fails, the entire string may go dark. These are common in older or budget-friendly LED strings. Cutting a series-wired string is risky—removing a section disrupts the entire circuit.
- Parallel Wiring: Each LED (or group of LEDs) has its own independent circuit. If one fails, the rest remain lit. Many modern LED strings use parallel wiring, making them more cuttable.
- Hybrid/Matrix Wiring: Found in RGB or color-changing strings, these use a combination of series and parallel circuits with microcontrollers. Cutting them requires precision to avoid damaging control chips.
Pro Tip: Check the product packaging or manufacturer’s website for wiring details. Look for terms like “cuttable,” “modular,” or “sectional”—these often indicate a parallel or hybrid design safe for cutting.
Key Components to Identify
Before cutting, examine the light string closely for these critical features:
- Cut Marks or Scissors Symbols: Some manufacturers include visible indicators (e.g., dotted lines or scissors icons) at designated cut points, typically every 12-24 inches.
- Resistors: Small, cylindrical components on the wiring. In parallel strings, resistors are usually placed before each LED group, not after. Cutting before the resistor may damage the remaining LEDs.
- Power Supply and Connectors: Note where the plug or battery pack connects. Avoid cutting near these areas, as it can disrupt power delivery to the entire string.
- PCB Traces (for strip lights): If using LED strips (flexible tape with LEDs), look for copper pads or “cut lines” between LED clusters.
Example: A 100-LED string with cut marks every 10 LEDs likely has parallel wiring. A string with no markings and a single resistor near the plug is probably series-wired and unsafe to cut.
When Can You Cut LED Light Strings? (And When You Shouldn’t)
Knowing the difference between cuttable and non-cuttable LED strings is the cornerstone of safe customization. While some strings are designed for modular use, others will fail catastrophically if altered.

Visual guide about can you cut a string of led lights
Image source: cdn.shopify.com
Cuttable LED String Types
- Parallel-Wired Strings: The safest option. Look for cut marks or manufacturer confirmation. Example: GE Energy Smart Cuttable LED String (explicitly labeled as safe for cutting).
- LED Strip Lights (Flexible Tape): Most have designated cut points between LED clusters. Ensure you cut only at these points, never through an LED or resistor.
- Modular/Interconnectable Strings: Designed to be cut and reconnected with end caps or connectors. Brands like Philips Hue offer this feature for custom installations.
- RGB/Addressable Strings: Only cut if the manufacturer specifies it (e.g., WS2812B LED strips with data line protection). Avoid cutting near control chips.
Data Point: A 2023 survey by the Lighting Research Center found that 68% of LED strip light manufacturers now include cut marks, up from 42% in 2018, reflecting growing consumer demand for customization.
Non-Cuttable LED String Types
- Series-Wired Strings: Cutting breaks the circuit. Even if some LEDs remain lit, voltage imbalance can cause rapid burnout.
- Strings with Integrated Timers/Sensors: Cutting may disable smart features or create electrical shorts. Example: Motion-activated security lights.
- Low-Voltage Strings (e.g., 12V DC): Often used for landscape lighting. Cutting without proper voltage regulation can overload remaining LEDs.
- Strings with Epoxy-Coated LEDs: The coating protects against moisture but makes re-soldering difficult. Cutting risks exposing circuits to damage.
Real-World Scenario: A homeowner cut a “cuttable” LED string at an unmarked point, bypassing a resistor. The remaining LEDs flickered and died within 48 hours due to voltage overload—a costly mistake.
Step-by-Step Guide to Cutting LED Strings Safely
If your LED string is cuttable, follow this methodical approach to avoid damage and ensure longevity.
Tools You’ll Need
- Wire cutters or scissors (preferably precision flush cutters)
- Electrical tape or heat-shrink tubing
- Multimeter (optional, for testing)
- Needle-nose pliers (for resealing)
- Marker or highlighter
Step 1: Verify Cuttable Design
Check for manufacturer guidelines. If no cut marks are visible, use a multimeter to test continuity between LEDs. If cutting one LED doesn’t affect others, it’s likely parallel-wired.
Step 2: Measure and Mark
Measure the desired length and mark the exact cut point. For strip lights, align the cutter with copper pads. For strings, cut between resistors (if present) or at marked intervals.
Step 3: Cut Cleanly
Use sharp wire cutters to make a single, clean snip. Avoid crushing the wires. For LED strips, cut straight across the copper pads—never diagonally.
Step 4: Seal the Cut End
Immediately seal the cut end to prevent fraying and moisture damage:
- For string lights: Wrap tightly with electrical tape, overlapping 1 inch beyond the cut. Alternatively, slide heat-shrink tubing over the end and heat with a hair dryer.
- For LED strips: Apply silicone sealant to the cut edge, or use manufacturer-provided end caps.
Pro Tip: For reusable connections, solder a connector to the cut end instead of sealing. Example: Use JST connectors for LED strips.
Step 5: Test Before Use
Plug in the shortened string. If LEDs don’t light, check for:
- Misaligned cut (e.g., severed resistor)
- Loose wire strands touching other circuits
- Voltage drop (test with multimeter—should be within 5% of original)
Advanced Techniques: Reconnecting and Customizing Cut Strings
Cutting isn’t just about shortening—it’s an opportunity to create custom lighting layouts. With the right techniques, you can rejoin cut sections or build modular designs.
Reconnecting Cut Ends
- Twist and Tape: Strip 0.5 inches of insulation from both ends, twist wires together, and secure with electrical tape. Best for temporary fixes.
- Soldering: Strip wires, twist, solder, and cover with heat-shrink tubing. Most durable option.
- Connectors: Use manufacturer-specific plugs (e.g., 3-pin RGB connectors) or universal wire nuts.
Example: A wedding decorator cut a 30-foot string into three 10-foot segments. Each was reconnected with waterproof connectors to create a cascading chandelier effect.
Creating Branching Designs
For parallel-wired strings, you can “Y-split” a single string into multiple branches:
- Cut the main string at a junction point.
- Solder two new wires to the cut end (one for each branch).
- Connect each wire to a separate LED string.
Caution: Ensure the power supply can handle the total load. For a 12V, 5W string, splitting into two 5W branches is safe. Splitting into four 5W branches may overload the supply.
Voltage and Load Calculations
When customizing, calculate total power draw to avoid overloading:
- Formula: Total Power (Watts) = Voltage (V) × Current (A)
- Example: A 24V string draws 0.5A. Total power = 24V × 0.5A = 12W. If splitting into two branches, each branch should draw ≤6W.
Data Table: LED String Load Capacity
| Voltage (V) | Max Current (A) | Max Power (W) | Recommended Branch Load |
|---|---|---|---|
| 12 | 0.8 | 9.6 | ≤4.8W per branch |
| 24 | 1.0 | 24 | ≤12W per branch |
| 36 | 1.5 | 54 | ≤27W per branch |
Troubleshooting Common Cutting Mistakes
Even with careful planning, issues can arise. Here’s how to diagnose and fix common problems.
Problem: Entire String Fails to Light
Causes & Solutions:
- Cut in a series section: If the string was series-wired, cutting breaks the circuit. Replace with a parallel-wired string.
- Damaged resistor: Test with multimeter. Replace the resistor if resistance is 0Ω or infinite.
- Short circuit: Check for frayed wires touching. Reseal with tape or heat-shrink.
Problem: LEDs Flicker or Fade
Causes & Solutions:
- Voltage drop: Measure voltage at the end of the string. If >10% below input, reduce length or use a higher-gauge wire for extensions.
- Loose connection: Re-solder or re-tape connections.
- Overloaded power supply: Calculate total load. Add a separate power supply for branches.
Problem: Moisture Damage (Outdoor Strings)
Prevention & Repair:
- Use IP65-rated (waterproof) strings for outdoor use.
- After cutting, apply marine-grade sealant instead of tape.
- For existing damage, cut back to clean wire and reseal.
Pro Tip: For permanent outdoor installations, use silicone-filled connectors (e.g., 3M Scotchlok) to prevent corrosion.
Conclusion: Customize Your Lights with Confidence
So, can you cut a string of LED lights? The answer is a resounding yes—but only when done correctly. By understanding LED string construction, verifying cuttable designs, and following proper techniques, you can safely customize lighting for any space, from cozy bedrooms to grand event venues. The key lies in preparation: always check manufacturer guidelines, use the right tools, and seal cut ends meticulously. Remember, not all LED strings are created equal—what works for a parallel-wired RGB strip may destroy a series-wired holiday light.
Customizing LED strings isn’t just about practicality; it’s about creativity. With the ability to shorten, reconnect, or branch lights, you can craft unique designs that mass-produced strings can’t match. Whether you’re framing a mirror with a perfect-length strand or building a custom chandelier, cutting LED lights opens endless possibilities. Just prioritize safety: avoid cutting near power supplies, test voltage loads, and never compromise on sealing. When in doubt, opt for modular strings designed for customization. With these principles in mind, you’ll transform your lighting projects from “good enough” to “perfectly tailored”—safely, easily, and with professional results. Now, grab your cutters and start designing!
Frequently Asked Questions
Can you cut a string of LED lights without damaging them?
Yes, you can cut a string of LED lights safely if it has designated cut marks, usually indicated by a scissor icon or line. Cutting elsewhere may damage the circuit or cause the entire string to stop working.
Where should you cut a string of LED lights?
Only cut along the marked cut lines on the LED string, which are typically located between individual LEDs or at set intervals. These points ensure the circuit remains intact for the remaining lights to function.
Can you cut a string of LED lights and reconnect them later?
Yes, but you’ll need soldering tools and connectors to rejoin the cut ends. Some brands offer plug-and-play connectors for reattaching sections without soldering, making it easier for DIY users.
What happens if you cut a string of LED lights in the wrong place?
Cutting outside the marked areas can break the circuit, causing the entire string to fail. Always check for cut marks and follow the manufacturer’s instructions to avoid permanent damage.
Are all LED light strings designed to be cut?
No, not all LED strings can be cut—only those labeled as “cuttable” or with visible cut marks. Non-cuttable strings lack the necessary circuitry to function after being trimmed.
What tools do you need to cut a string of LED lights?
A sharp pair of scissors or wire cutters is usually enough to cleanly cut along the marked lines. For reconnecting cut sections, you may need soldering equipment or waterproof connectors.

