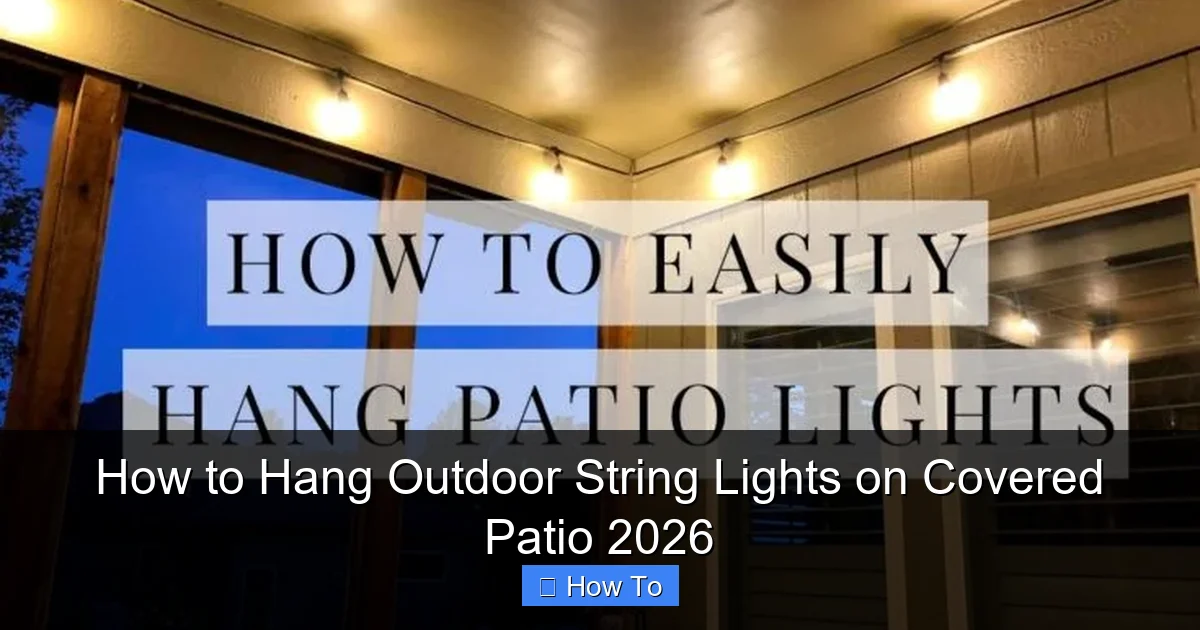
Featured image for how to hang outdoor string lights on covered patio
Image source: sengerson.com
Transform your covered patio into a cozy, inviting retreat by securely mounting outdoor string lights using weather-resistant hooks or adhesive clips designed for permanent installation. Ensure even spacing and proper tension for a professional look, and always use lights rated for outdoor use to withstand the elements. With the right tools and a simple layout plan, you can achieve stunning ambiance in under an hour.
“`html
How to Hang Outdoor String Lights on Covered Patio 2026
Key Takeaways
- Plan your layout first: Sketch light placement to ensure even coverage and avoid overhangs.
- Use weatherproof hooks: Install corrosion-resistant anchors for long-term durability in covered areas.
- Measure spacing carefully: Keep bulbs 6–12 inches apart for balanced brightness and tension.
- Secure with zip ties: Reinforce connections to prevent sagging or accidental detachment.
- Test before finalizing: Power lights to check function and adjust placement as needed.
- Opt for dimmers or timers: Enhance ambiance and energy efficiency with smart controls.
Why This Matters / Understanding the Problem
Let’s be honest—nothing sets the mood for a summer evening quite like the soft glow of outdoor string lights. Whether you’re hosting a backyard BBQ, enjoying a quiet night with a book, or just want your covered patio to feel more inviting, lighting makes all the difference.
But here’s the catch: a covered patio adds a layer of complexity. Unlike open decks or pergolas, you’re working with a roof—be it a solid ceiling, lattice, or awning. That means no easy access to rafters or trees. You can’t just tie lights to a beam or hope they stay put with flimsy tape.
I learned this the hard way. A few summers ago, I spent an entire Saturday trying to hang lights with zip ties and double-sided tape. By Sunday, half the strands were dangling like sad tinsel, and the other half were shorting out. Not the ambiance I was going for.
The truth is, how to hang outdoor string lights on covered patio 2026 isn’t just about aesthetics—it’s about doing it right the first time. You want something secure, weather-resistant, and visually balanced. And yes, it’s totally doable without calling in an electrician or spending a fortune.
In this guide, I’ll walk you through my tried-and-true method—the same one I use every spring when setting up my own patio. We’ll cover everything from tools to troubleshooting, with real-world insights (and a few “I wish I’d known that sooner” moments) sprinkled in.
What You Need
Before you start, let’s gather your supplies. The good news? Most of these are easy to find and won’t break the bank. I’ve broken them into two categories: essentials and nice-to-haves.
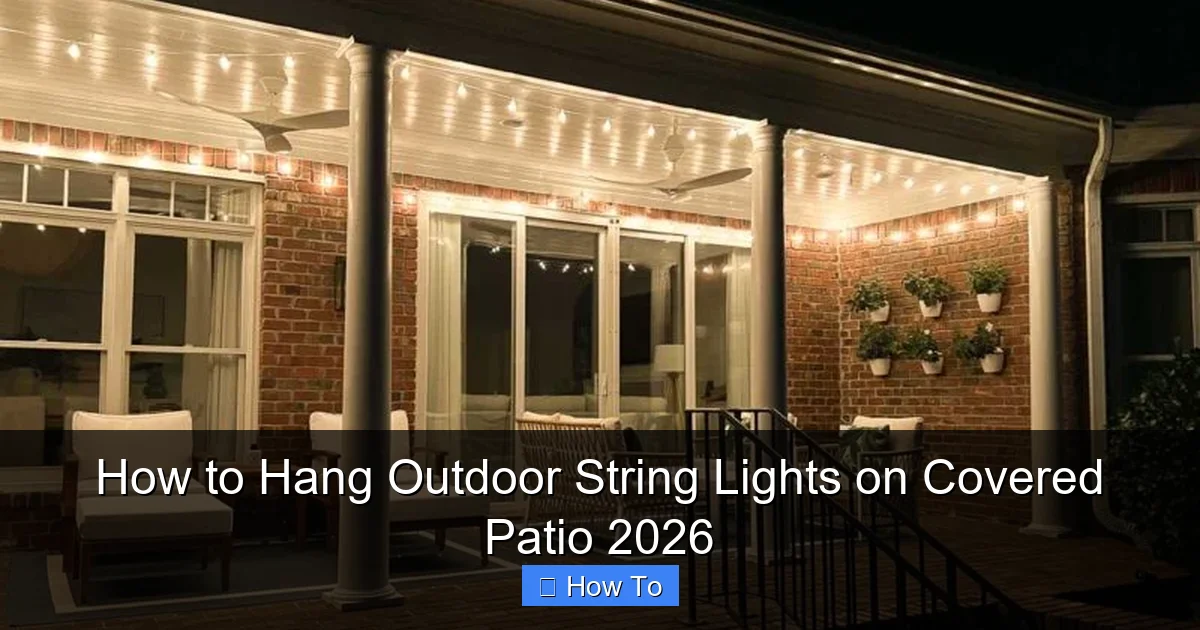
Visual guide about how to hang outdoor string lights on covered patio
Image source: drivenbydecor.com
Essential Tools & Materials
- Outdoor-rated string lights – Look for IP44 or higher waterproof rating. I prefer Edison-style bulbs for that warm, cozy glow.
- Ceiling hooks or screw-in eye bolts – Stainless steel or galvanized to resist rust. Avoid cheap plastic hooks—they’ll fail in a year.
- Measuring tape – For spacing and layout planning.
- Pencil or painter’s tape – To mark drill spots without damaging paint.
- Drill with appropriate bit – Match it to your ceiling material (wood, metal, drywall, etc.).
- Extension ladder – Safety first! Make sure it’s stable and tall enough.
- Zip ties or adjustable cable clips – For securing the cord and managing slack.
- Power source – An outdoor GFCI outlet is ideal. If you don’t have one, use a heavy-duty outdoor extension cord.
Nice-to-Haves (But Highly Recommended)
- Light strand tensioner kit – Prevents sagging over time. Worth every penny.
- Smart plug or timer – Automate your lights to turn on at dusk.
- Level – Ensures your lights run straight, not crooked.
- Extra bulbs and fuse – Always keep spares. I learned this after a raccoon chewed through one strand mid-dinner party.
- Wire clips with adhesive backing – For low-traffic areas or temporary setups.
Pro tip: Buy 10–15% more lights than you think you need. It’s better to have extra than to run short and have to splice in a mismatched strand. Trust me—I’ve tried it. It looks like a patchwork quilt.
Step-by-Step Guide to How to Hang Outdoor String Lights on Covered Patio 2026
Step 1: Plan Your Layout and Measure
Before you grab the drill, take a step back and visualize how the lights will flow. Do you want a crisscross pattern? A simple perimeter? Maybe a central “X” with a chandelier effect in the middle?
I like to sketch a quick bird’s-eye view of my patio on paper. It helps me see where the lights will go and where the power source is. This is the foundation of how to hang outdoor string lights on covered patio 2026—planning saves you from costly mistakes.
- Measure the perimeter of your covered area.
- Note where the outlet is. You’ll want the plug end to reach it easily.
- Decide on spacing: I recommend 2–3 feet between anchor points for a balanced look.
- Mark key spots with painter’s tape—no permanent marks yet!
Warning: Avoid placing lights directly over seating areas where people might bump into them. I once hung a strand too low and spent half the party apologizing to guests with sore foreheads.
Step 2: Choose the Right Anchor Points
Your ceiling material matters. Here’s what works best for each:
- Wooden beams or rafters: Screw-in eye bolts are perfect. They’re strong and blend in.
- Metal roof or awning: Use magnetic hooks or self-tapping screws with rubber washers to prevent leaks.
- Drywall or plaster ceiling (common in screened patios): Use toggle bolts or ceiling anchors rated for outdoor use. Avoid regular drywall anchors—they’ll pull out in humidity.
- Lattice or pergola-style ceiling: Use S-hooks or zip ties to secure to the crossbeams.
I once had a client with a vinyl ceiling. We used adhesive-backed hooks with UV protection—worked great for a year, then started peeling. Lesson learned: always check long-term durability.
For how to hang outdoor string lights on covered patio 2026, anchor points are everything. Weak ones = droopy lights = frustration.
Step 3: Mark and Drill Anchor Points
Now, remove the painter’s tape and use a pencil to mark each spot. Double-check your measurements—this is where a level comes in handy. A crooked line is obvious once the lights are on.
- Use a drill bit slightly smaller than your screw or anchor.
- Drill slowly to avoid cracking wood or warping metal.
- Insert your anchor or screw. Don’t overtighten—snug is enough.
- For eye bolts, make sure the loop is horizontal so the light strand slides in easily.
Pro tip: If you’re drilling into metal, apply a drop of lubricant (like WD-40) to the bit. It reduces heat and extends the bit’s life.
Step 4: Install the Lights (Start from the Power Source)
Here’s a golden rule: always start hanging the lights near the power outlet. That way, you can plug them in as you go to test each section.
- Attach the first end of the light strand to the anchor point using an S-hook or loop the cord through the eye bolt.
- Run the strand to the next anchor, keeping it taut but not stretched.
- Use zip ties or cable clips to secure the cord every 12–18 inches. This prevents sagging and protects the wires from wind damage.
- If you’re using multiple strands, connect them end-to-end before hanging. Most outdoor lights have male/female connectors.
I like to hang one side first, then the other. It’s easier to adjust spacing when you can see both sides. If you’re doing a crisscross pattern, start with the perimeter, then add the diagonals.
Warning: Never use nails or staples to secure cords. They can pierce the insulation and create a fire hazard. I’ve seen it happen—don’t be that person.
Step 5: Manage Slack and Prevent Sagging
Even the best lights will sag over time, especially in heat. That’s why I swear by tensioners.
- Use a light strand tensioner kit—it has a spring-loaded mechanism that keeps the cord tight.
- For DIYers, you can use a turnbuckle (available at hardware stores) between two anchor points. Just don’t over-tighten!
- If you don’t have tensioners, add an extra anchor point in the middle of long runs.
I once skipped this step on a 20-foot run. By fall, the lights were sagging so much they looked like a hammock. Not a good look.
This is a key part of how to hang outdoor string lights on covered patio 2026—durability matters as much as beauty.
Step 6: Secure the Cord and Protect the Connection
Now, let’s keep everything tidy and safe.
- Use zip ties or adhesive clips to run the cord from the last light to the outlet.
- Keep the plug elevated off the ground. Use a cord cover or run it along a beam.
- If you’re using an extension cord, make sure it’s outdoor-rated and rated for the total wattage of your lights.
- Use a GFCI outlet or adapter. It protects against moisture and short circuits.
Pro tip: Wrap the plug connection with electrical tape for extra weatherproofing. I do this every year before monsoon season.
Step 7: Test, Adjust, and Automate
Plug it in and turn it on. If all lights work—great! If not, don’t panic.
- Check for loose connections or damaged bulbs.
- Use a bulb tester if one strand isn’t lighting up.
- Adjust spacing or tension if any section looks uneven.
- Install a smart plug or timer so your lights turn on at sunset. I use a Wi-Fi plug that I can control from my phone.
I love setting mine to turn on 30 minutes before sunset. It’s like the patio is welcoming me home.
Pro Tips & Common Mistakes to Avoid
After years of hanging lights (and fixing others’ mistakes), here’s what I’ve learned:
- Don’t overconnect strands. Most outdoor lights can handle 2–3 strands max. Check the manufacturer’s rating. Overloading can blow fuses or start fires.
- Use the right bulb type. LED bulbs last longer and generate less heat. Incandescent bulbs are cheaper but burn out faster and can warp plastic sockets.
- Check your ceiling’s load capacity. A few hooks are fine, but don’t hang heavy chandeliers or multiple strands from one point.
- Think about shadows. If you have ceiling fans or vents, make sure lights don’t cast annoying shadows. I once hung lights over a fan—every time it spun, the light flickered like a disco ball.
- Seasonal maintenance. Once a year, inspect hooks, cords, and bulbs. Replace anything frayed or rusted.
Real talk: I once saw a setup where someone used duct tape to hold up a strand. It lasted three days before falling during a windstorm. Invest in proper hardware. It’s cheaper than replacing broken lights.
For how to hang outdoor string lights on covered patio 2026, the key is longevity. Do it once, do it right, and enjoy it for years.
FAQs About How to Hang Outdoor String Lights on Covered Patio 2026
Can I use adhesive hooks on a vinyl ceiling?
You can, but I don’t recommend it for long-term use. Adhesive hooks work great for temporary setups (like holiday lights), but they can peel off in heat or humidity. For a permanent install, use screw-in anchors or magnetic hooks if your ceiling is metal.
How many strands can I connect together?
It depends on the lights. Most outdoor string lights are rated for 2–3 strands. Always check the packaging. If you’re unsure, err on the side of caution. Overloading can damage the circuit or create a fire hazard.
What if I don’t have an outdoor outlet?
You’ll need an outdoor-rated extension cord. Run it from an indoor GFCI outlet through a window or door. Use a cord cover to protect it from weather and foot traffic. For a permanent fix, consider hiring an electrician to install an outdoor outlet.
Are solar string lights a good option for covered patios?
Solar lights work, but they’re less reliable under a solid roof. They need direct sunlight to charge. If your patio has a skylight or open sides, they can work. Otherwise, stick with plug-in lights. I tried solar once—ended up with dim, flickering lights by 8 PM.
How do I keep the lights from swaying in the wind?
Use more anchor points. Every 12–18 inches is ideal. Also, avoid long, unsupported runs. If you have a large space, use a tensioner or add a central support pole (if your patio allows it).
Can I hang lights on a screened-in porch?
Absolutely! Screened porches are perfect for this. Use ceiling anchors for the screen frame or screw into the wooden/metal structure behind the screen. Just make sure the screen isn’t blocking airflow to the bulbs—LEDs run cool, so this is rarely an issue.
How do I remove the lights without damaging the ceiling?
Unscrew eye bolts or remove anchors carefully. For adhesive hooks, use a hairdryer to soften the glue, then gently peel them off. Never yank the lights—this can tear out anchors or damage the cord.
Final Thoughts
Hanging outdoor string lights on a covered patio isn’t just a DIY project—it’s a way to transform your space into a personal retreat. And with the right approach, it’s easier than you think.
When I first tried how to hang outdoor string lights on covered patio 2026, I was overwhelmed. But once I broke it down—plan, anchor, install, secure—it became almost relaxing. Now, every time I flip the switch and see that warm glow, I remember: it was worth the effort.
So grab your tools, sketch your layout, and take it step by step. Use quality materials, plan for the long term, and don’t skip the tensioners. Your future self (and your guests) will thank you.
And hey—once it’s done, pour yourself a drink, sit back, and enjoy the ambiance. You’ve earned it.
Happy lighting!
“`

