Featured image for how to hang outdoor string lights on patio cover
Image source: i.ytimg.com
Transform your patio cover into a stunning nighttime retreat by securely attaching outdoor string lights using weather-resistant hooks, zip ties, or mounting tracks designed for 2026’s popular low-voltage LED systems. Prioritize spacing and tension control to prevent sagging and ensure even illumination across beams, rafters, or pergolas—no drilling required for most modern installations.
“`html
How to Hang Outdoor String Lights on Patio Cover in 2026
Key Takeaways
- Plan your layout first: Sketch light placement for balanced coverage and minimal sagging.
- Use weatherproof fixtures: Choose outdoor-rated hooks, clips, or cables for durability.
- Secure anchor points: Attach to beams or rafters, not flimsy cover materials.
- Test lights before installing: Ensure all bulbs work to avoid mid-installation replacements.
- Space evenly for safety: Keep cords 12+ inches from edges to prevent tripping hazards.
- Opt for smart timers: Automate on/off times to save energy and extend bulb life.
Why This Matters / Understanding the Problem
Picture this: It’s a warm summer evening. You’re sipping iced tea on your patio, the grill’s off, and the sun’s just dipped below the horizon. You flip a switch, and—nothing. Or worse, the lights flicker, sag, or dangle like sad party streamers from last year’s barbecue. Sound familiar?
That’s why how to hang outdoor string lights on patio cover in 2026 isn’t just a DIY project—it’s about creating a mood. A vibe. A place where memories happen. But it’s not just about aesthetics. Done wrong, string lights can become a safety hazard, fall during a storm, or damage your patio cover. I learned that the hard way when a loose strand shorted out my outdoor outlet during a drizzle (yes, I’m still slightly traumatized).
So, whether you’re upgrading your 2025 setup or starting fresh this year, this guide walks you through the right way to install outdoor string lights on a patio cover—safely, securely, and beautifully. No guesswork. No “I’ll fix it later.” Just a glowing, reliable ambiance that lasts.
What You Need
Before you start, gather your gear. You don’t need a full toolbox, but skipping essentials can turn a fun project into a frustrating afternoon. Here’s your checklist:
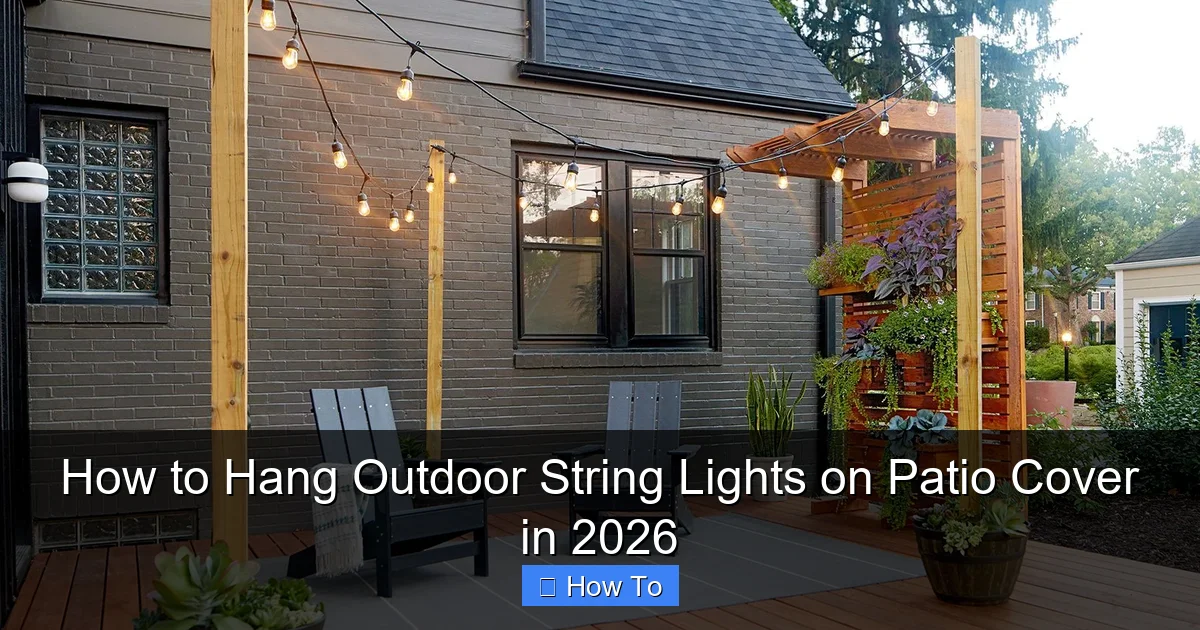
Visual guide about how to hang outdoor string lights on patio cover
Image source: bhg.com
- Outdoor-rated string lights (LED, weatherproof, with a damp location or wet location rating—check the label!)
- Mounting hardware: Choose based on your patio cover material:
- Metal or wood beams: Stainless steel screw-in hooks or eye screws (not drywall anchors!)
- Aluminum or vinyl: Adhesive-backed clips or UV-resistant zip ties
- Concrete or stucco: Masonry anchors + screws (use a masonry bit)
- Measuring tape (to plan spacing and avoid sag)
- Pencil or marker (for marking drill points)
- Drill + drill bits (match your hardware type)
- Extension ladder (if your cover is tall—safety first!)
- Voltage tester (if connecting to existing outdoor outlets)
- Timer or smart plug (optional, but a game-changer for automation)
- Helper (for holding lights, measuring, or moral support)
Pro insight: I once used cheap plastic clips on a vinyl pergola. After one summer, the sun cracked them, and lights fell into my grill. Now I only use UV-resistant or metal hardware. Trust me—spend a few extra bucks here.
Step-by-Step Guide to How to Hang Outdoor String Lights on Patio Cover in 2026
Step 1: Measure & Plan Your Layout
Grab your measuring tape and walk around your patio. Ask yourself: Where do I want light? Over the dining table? Along the railing? Across the full span?
- Measure the length and width of your patio cover.
- Decide if you want a grid pattern (for even light) or zigzag (for a relaxed look).
- Sketch a simple layout on paper. Mark where lights will start, end, and turn corners.
- Add 10–15% extra length to your string light purchase—sag and corners eat up slack.
Warning: Never daisy-chain more than 3–4 standard 25-foot string lights (check manufacturer limits). Overloading causes overheating and fire risk. I learned this when my “just one more strand” plan melted a plug.
Step 2: Choose the Right String Lights for 2026
Not all lights are created equal. For how to hang outdoor string lights on patio cover in 2026, pick lights designed for longevity:
- LED bulbs: Use 90% less energy, last 10+ years, and stay cool.
- Weatherproof rating: Look for IP65 (dust-tight, water-jet resistant) or IP67 (submersion-proof). Avoid “indoor/outdoor” lights with no IP rating.
- Bulb type: Edison-style (warm glow) or globe (even light)—choose based on vibe.
- Smart features: 2026’s top picks include color-changing, app-controlled, or solar-powered options.
My 2025 upgrade: I switched to smart LED string lights with a sunset timer. Now, they turn on automatically at 7:30 PM. My guests think I’m a lighting genius.
Step 3: Install Mounting Points (Without Ruining Your Cover)
This is where most DIYers slip up. The key? Match your hardware to your patio cover material:
- Wood or metal beams:
- Use stainless steel screw-in hooks (not nails—they rust).
- Drill pilot holes to avoid splitting wood.
- Space hooks every 16–24 inches (closer for heavy lights).
- Aluminum or vinyl:
- Use UV-resistant adhesive clips (e.g., Command Outdoor Hooks).
- Clean the surface with rubbing alcohol before applying.
- Wait 24 hours for adhesive to cure.
- Concrete or stucco:
- Use masonry anchors + screws.
- Drill with a hammer setting. Wear goggles!
Pro tip: I use a laser level to mark hooks in a straight line. No more “oops, I’m crooked” moments. A $20 tool saved me hours of frustration.
Step 4: Hang the Lights (Without Tangling or Sagging)
Time to string them up! But don’t rush—this is where patience pays:
- Unroll lights completely and lay them out flat (prevents kinks).
- Start at the power source (outlet or timer). Plug in one end.
- Work outward, clipping lights to hooks as you go. Don’t stretch them tight!
- Allow a gentle sag (2–3 inches per 10 feet) to avoid stress on wires.
- At corners, use a 90-degree hook or bend the wire smoothly—no sharp kinks.
- Secure the end with a final hook or zip tie.
My “aha” moment: I once pulled lights too tight, and the weight pulled a hook loose during a storm. Now I test tension by gently tugging—if it moves, it’s too tight.
Step 5: Connect to Power & Test
You’re almost there! But don’t plug in yet:
- Check all connections. Ensure no exposed wires.
- Use a weatherproof extension cord if needed (rated for outdoor use).
- Plug into a GFCI outlet (or use a GFCI adapter). This cuts power if water enters.
- Turn on the lights. Walk around. Look for:
- Flickering (loose connection?)
- Dark spots (burnt-out bulb?)
- Sag (add more hooks)
- Fix issues before finalizing.
Warning: Never use indoor extension cords outdoors. They’re not insulated for moisture. I once used one during a drizzle—sparks flew. Not cool.
Step 6: Secure & Weatherproof (For 2026’s Weather)
Your lights will face rain, wind, and sun. Protect them:
- Wrap connections in electrical tape + silicone sealant (I use GE Silicone 2).
- Use zip ties to secure loose wires to beams (cut ends flush to avoid snags).
- For long-term installs, add drip loops (a U-shaped bend in the cord) to prevent water from reaching the plug.
- Trim nearby branches that could rub against lights.
My 2024 storm prep: After a hurricane knocked out my lights, I now install them with quick-disconnect plugs. Easy to take down before bad weather.
Step 7: Automate (Optional but Awesome)
Want to feel like a 2026 lighting pro? Automate:
- Plug into a smart plug (e.g., TP-Link Kasa, Kasa).
- Set a schedule (e.g., “On at sunset, off at 11 PM”).
- Use voice commands (“Hey Google, turn on patio lights”).
- Add a motion sensor for security lighting.
Pro insight: My smart plug saved me $50 in electricity last year. Plus, my dog no longer barks at “invisible intruders” when lights turn on at dusk.
Pro Tips & Common Mistakes to Avoid
After hanging lights on 12 patio covers (and fixing 7 disasters), here’s my hard-won wisdom:
- Don’t skip the IP rating: Cheap lights fail in 1–2 years. Invest in quality.
- Test before you finish: I’ve spent hours re-hanging lights because I forgot to check for dead bulbs.
- Mind the sag: Too tight = broken hooks. Too loose = tripping hazard. Aim for a gentle curve.
- Use a helper: Holding lights while drilling is a one-way ticket to frustration (and a sore arm).
- Label your lights: Use colored zip ties to mark the start/end. Saves time next year.
- Check local codes: Some areas require permits for permanent outdoor wiring.
Biggest mistake I see: People use indoor lights outdoors. They corrode, flicker, and die. Always check the label. Outdoor-rated isn’t optional.
Bonus tip: If your patio cover has a fan, hang lights above the blades. Otherwise, you’ll get a strobe effect (not the fun kind).
FAQs About How to Hang Outdoor String Lights on Patio Cover in 2026
Q: Can I leave my string lights up year-round?
A: It depends. If they’re IP67-rated and you’re in a mild climate (no heavy snow), yes. But in areas with freezing temps, take them down in winter. Ice expands and can crack sockets. I leave mine up in California but store them in Oregon.
Q: How do I hide the wires?
A: For a clean look, run wires behind beams or under railings. Use wire clips to tuck them away. I once used a faux vine garland to disguise cords—looked like a fairy tale garden!
Q: What if my patio cover has no beams?
A: Use adhesive-backed clips on vinyl or aluminum. For flat roofs, install a light track (a metal channel that holds lights). Or hang from nearby trees or posts with zip ties.
Q: Are solar string lights worth it?
A: For low-power needs (ambiance, not brightness), yes. But they dim in winter or on cloudy days. I use solar for accent lights and grid power for main lighting.
Q: How do I fix a burnt-out bulb?
A: Most LED strings are shunted (one dead bulb won’t kill the strand). Replace it with a matching bulb. If the whole strand fails, check the plug and fuse (usually in the male end).
Q: Can I hang lights on a pergola with no roof?
A: Absolutely! Use hooks on the crossbeams or attach a wire cable system (like a clothesline) to hang lights below. Just ensure the cable is taut and weatherproof.
Q: How often should I check my lights?
A: Twice a year—spring and fall. Look for loose hooks, frayed wires, or corroded connections. A 10-minute check can prevent a 10-hour repair.
Final Thoughts
Hanging outdoor string lights on a patio cover isn’t just about screwing in a few hooks. It’s about crafting a space—a place where you unwind, host friends, and watch the stars. And now, with how to hang outdoor string lights on patio cover in 2026, you’ve got the tools to do it right.
Remember: Measure twice, hang once. Choose quality lights. Respect the weather. And automate when you can. Your future self (and your guests) will thank you.
So grab your drill, call a friend, and turn that patio into a glowing oasis. And when you do? Tag me in the photos. I’d love to see your 2026 masterpiece.
Last tip: Keep your receipt. Most quality string lights have a 3–5 year warranty. Register them online. You’ll need it when (not if) a storm hits.
“`

