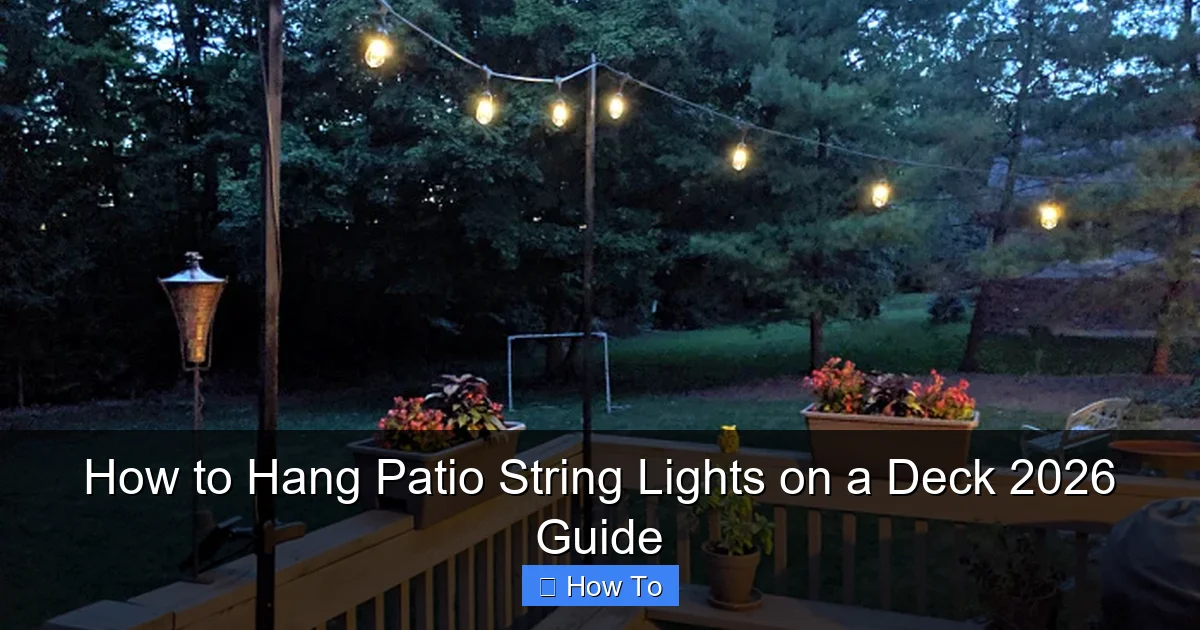
Featured image for how to hang patio string lights on a deck
Image source: chaosisbliss.com
Transform your deck into a glowing outdoor retreat by securely mounting patio string lights using durable hooks, eye screws, or zip ties—ensuring they’re anchored to stable structures like railings, posts, or eaves. For a polished look, plan your layout, maintain consistent spacing, and use a dimmer or smart plug for adjustable ambiance in 2026’s top-rated setups. Always prioritize safety by checking load limits and weatherproofing connections for year-round enjoyment.
“`html
How to Hang Patio String Lights on a Deck 2026 Guide
Key Takeaways
- Plan your layout first: Sketch light placement to ensure even coverage and avoid last-minute adjustments.
- Use sturdy anchors: Secure lights to deck posts or beams for long-term stability and safety.
- Choose weatherproof lights: Pick LED or outdoor-rated string lights to withstand sun, rain, and wind.
- Hide cords creatively: Tuck wires under railings or use clips to keep them tidy and trip-free.
- Test before finalizing: Check brightness and spacing before securing lights permanently for perfect ambiance.
- Opt for dimmers: Install dimmers to control brightness and set the mood effortlessly.
Why This Matters / Understanding the Problem
You’ve just finished your deck—maybe you built it yourself or had it done last summer. It’s beautiful, spacious, and perfect for grilling. But when the sun sets? It’s pitch black. You want to enjoy those warm summer evenings without tripping over a cooler or losing your drink in the shadows.
That’s where string lights come in. They’re not just pretty—they’re practical. But here’s the catch: hanging them wrong can ruin the look, damage your deck, or worse, create a fire hazard. I learned this the hard way when I used cheap hooks and ended up with a sagging, tangled mess by mid-August.
So, whether you’re hosting a birthday bash or just want to sip wine under the stars, this How to Hang Patio String Lights on a Deck 2026 Guide will help you get it right—safely, stylishly, and without stress. No prior DIY skills required.
What You Need
Before you start, gather your tools and materials. Trust me, nothing kills momentum like realizing you’re missing a key piece halfway through.
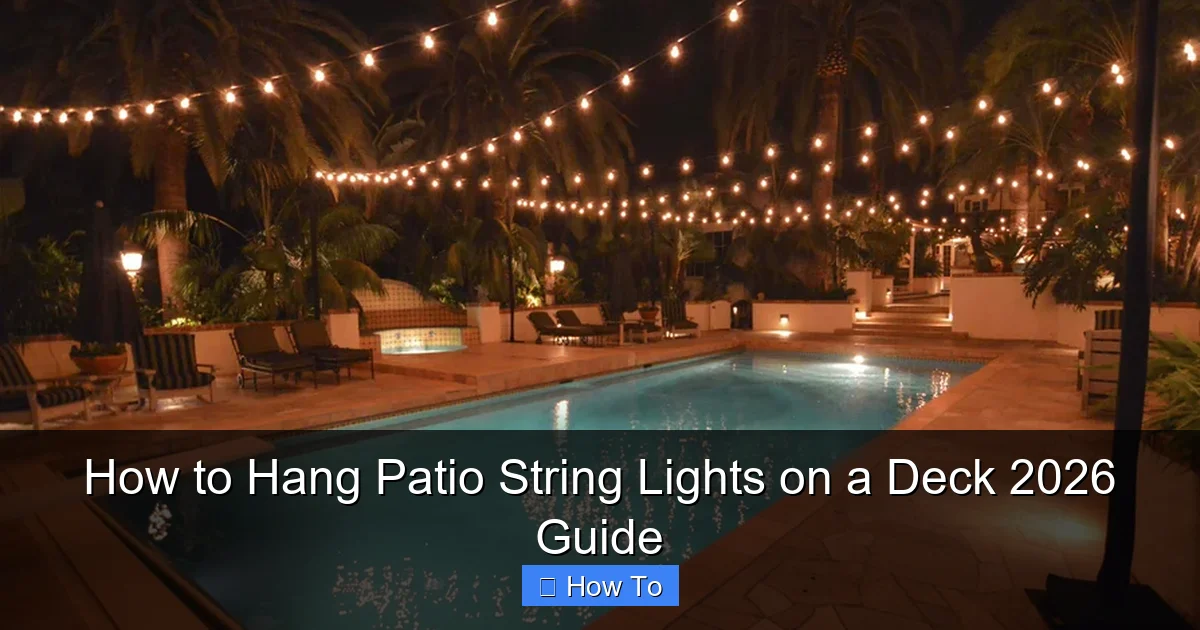
Visual guide about how to hang patio string lights on a deck
Image source: img.yardenvy.com
- String lights: LED, weatherproof, with a warm white glow (2700K–3000K). I prefer shatterproof bulbs for safety.
- Measuring tape: For spacing and layout planning.
- Drill and drill bits: Use a small bit (⅛”) for pilot holes.
- Screws or eye hooks: Stainless steel or coated for rust resistance. Size depends on your deck material.
- Zip ties or outdoor-rated clips: For securing wires and avoiding sagging.
- Level: To keep lines straight (optional but highly recommended).
- Extension cord(s): Outdoor-rated, GFCI-protected.
- Timer or smart plug: For automatic on/off (game-changer).
- Ladder or step stool: For reaching high points safely.
Pro tip: Buy 10–20% more lights than you think you’ll need. It’s easier to cut excess than to run out mid-hang. And always check the maximum wattage your string lights can handle—daisy-chaining too many can overload the circuit.
Step-by-Step Guide to How to Hang Patio String Lights on a Deck 2026 Guide
Step 1: Plan Your Layout Like a Pro
Before touching a screw, sketch your deck. Use graph paper or a free app like SketchUp Free. Mark where you want lights: along railings, between posts, over the seating area, or in a canopy style.
Ask yourself: Where do people gather? Lights over the dining table or lounge chairs make the biggest impact. Also, consider power sources. You don’t want extension cords running across walkways.
Tip: For a “floating” canopy, run lights diagonally from corner to corner, or in a grid. For railings, go horizontal. I once tried a zigzag—looked cool but was a pain to install. Stick to simple patterns.
Measure the total length needed. Most string lights are 24–48 feet. Use the How to Hang Patio String Lights on a Deck 2026 Guide rule: plan for 1.5x the deck’s perimeter to allow for curves and spacing.
Step 2: Choose the Right Mounting Method
Deck material matters. Here’s what I’ve learned:
- Wood decks: Use eye hooks or screw-in cup hooks. Drill pilot holes to prevent splitting. I use #8 stainless steel hooks—strong and rust-proof.
- Composite or PVC decks: Avoid metal hooks that can scratch. Use adhesive-backed clips or zip ties with UV resistance. I like 3M Outdoor Clips—they hold up to wind and rain.
- Metal railings: Use magnetic hooks (if railing is steel) or zip ties. I once used a magnet on a wrought iron railing—worked great until a storm knocked it loose. Now I double up with a zip tie.
For high points (like roof eaves), use a ladder and secure the first hook before hanging lights. Safety first!
Step 3: Install the Mounting Points
Start at the power source. Mark spots every 2–3 feet. This prevents sagging. Use a level to keep lines straight—especially for horizontal runs. Nothing worse than crooked lights.
For eye hooks:
- Drill a pilot hole (⅛” bit).
- Screw in the hook clockwise until snug. Don’t over-tighten.
- Repeat every 2–3 feet.
For adhesive clips:
- Clean the surface with alcohol.
- Press clips firmly for 30 seconds.
- Wait 24 hours before hanging lights (yes, really—I ignored this once and lost half my clips in a windstorm).
Warning: Don’t use nails or staples. They can puncture the light wire and create a fire hazard. I learned this from a neighbor’s melted cord. Not pretty.
Step 4: Hang the Lights (The Fun Part!)
Start at the power source. Plug in the first string and run it along your hooks. Use zip ties every 3 feet to secure the cord—not the bulb. This prevents strain on the socket.
For canopies:
- Hang lights from corner hooks first, then fill the grid.
- Use a ladder and a helper to keep tension even.
- Keep bulbs 6–8 inches apart for a balanced look.
For railings:
- Loop the cord over each hook. Don’t pull tight—allow slight slack for wind.
- Use clips on the railing’s underside to hide wires.
Pro tip: Test each string before moving on. I once hung 10 strings before realizing one had a dead bulb. Nightmare.
Step 5: Manage Power and Cords
Extension cords are unavoidable, but hide them well:
- Run cords along railings or deck edges.
- Use cord clips or zip ties to keep them flush.
- For ground-level cords, use a cord cover or bury them in a shallow trench (not under foot traffic).
Use a GFCI outlet (outdoor-rated) or a GFCI extension cord. This cuts power if there’s a short—critical for safety.
Plug all strings into a timer or smart plug. I use a $20 timer that turns lights on at dusk and off at midnight. No more forgetting to turn them off.
Step 6: Adjust for Weather and Aesthetics
Wind and rain are your enemies. Check your lights after a storm. If any bulbs are loose, tighten them. If wires sag, add more zip ties.
For aesthetics:
- Use dimmable lights or a dimmer switch. Bright lights feel like a parking lot.
- Angle bulbs downward to reduce glare. I use a 30° tilt—perfect for ambiance.
- Add a second layer (like fairy lights) for depth. I did this last year—looked like a fairy tale.
Seasonal tip: Take down lights in winter if you live in a snowy area. Or use a cover. I left mine up once—ice cracked three bulbs. Lesson learned.
Pro Tips & Common Mistakes to Avoid
After 15+ years of hanging lights, here’s what I wish I knew sooner:
Tip 1: Use a light tester. A $15 tool saves hours of troubleshooting. I keep one in my toolbox.
Tip 2: Buy lights with replaceable bulbs. When one goes out, you don’t lose the whole string. I use Edison-style LED strings—bulbs pop in and out easily.
Tip 3: Avoid overloading circuits. Most outdoor circuits handle 15 amps. Calculate total wattage: (number of strings) x (watts per string). Stay under 80% capacity.
Common Mistakes:
- Sagging lights: Caused by too few hooks. Add more every 2 feet.
- Tripping hazards: Loose cords. Secure them with clips or tape.
- Uneven lighting: Bulbs too far apart. Aim for 6–8 inches.
- Ignoring weather ratings: Indoor lights outdoors will die fast. Always check for IP65 or higher rating.
- Forgetting a plan: Random hanging = chaotic look. Sketch first.
One last thing: Don’t rush. I once tried to finish in one night—ended up with tangled cords and a sore back. Take your time. The How to Hang Patio String Lights on a Deck 2026 Guide is about enjoying the process, not just the result.
FAQs About How to Hang Patio String Lights on a Deck 2026 Guide
Q: Can I use indoor string lights outside?
A: Nope. Indoor lights lack weatherproofing. Rain or humidity can cause shorts or shocks. Always use outdoor-rated lights. I learned this when my “indoor” lights sparked during a drizzle. Scary.
Q: How do I hide the cords?
A: Use cord clips, zip ties, or paint them to match your deck. I use brown zip ties on my cedar deck—almost invisible. For railings, run cords behind the balusters. Works like a charm.
Q: Can I hang lights from my roof?
A: Only if you can reach safely. Use a ladder with a spotter. Or hire a pro. I once tried to reach my eaves—almost fell. Now I use a pole hook for high spots.
Q: What if my deck has no railing?
A: Use freestanding poles (like shepherd’s hooks) or mount hooks to the deck’s edge. I used 4’ metal poles in my railing-free deck—looked great and doubled as plant supports.
Q: How do I keep lights from blowing in the wind?
A: Secure cords with zip ties every 2–3 feet. Add extra hooks at corners. I also use a “loop and hook” method: loop the cord over the hook, then secure with a tie. No more flapping.
Q: Can I leave lights up year-round?
A: In mild climates, yes. But in snowy or icy areas, take them down. Or use a cover. I leave mine up in California, but my cousin in Michigan stores his every winter.
Q: What’s the best spacing for bulbs?
A: 6–8 inches for a cozy glow. Closer feels festive; farther feels sparse. I use 7 inches—perfect for dining and lounging.
Final Thoughts
Hanging patio string lights isn’t just about adding light—it’s about creating a vibe. A place where laughter lingers, stories flow, and the night feels magical.
This How to Hang Patio String Lights on a Deck 2026 Guide is your roadmap to getting it right. Plan first, install carefully, and don’t skip safety steps. And remember: it’s okay to make mistakes. My first attempt had crooked lines and a dead bulb. But by year three? I had a deck that looked like a magazine cover.
So grab your tools, sketch your layout, and start hanging. In a few hours, you’ll have a space that’s not just functional—but unforgettable. And when you’re sipping that evening cocktail under your glowing lights, you’ll know it was worth every minute.
Now go make your deck shine. 🌟
“`

