Featured image for how to hang patio string lights on a fence
Image source: i.pinimg.com
Hanging patio string lights on a fence in 2026 is easiest and safest using durable, weather-resistant mounting clips designed for outdoor use—skip the nails and zip ties. Measure your layout first, then attach lights evenly along the fence line, securing each strand at both ends and every few feet to prevent sagging. For a polished look, choose smart LED string lights with app control and built-in timers for effortless ambiance all year.
“`html
How to Hang Patio String Lights on a Fence in 2026
Key Takeaways
- Plan spacing first: Measure and mark light intervals before installation.
- Use durable hooks: Choose rust-proof hooks for long-lasting support.
- Check power access: Ensure outlets are nearby or use battery-powered lights.
- Secure with zip ties: Reinforce connections for windy conditions.
- Test lights early: Verify functionality before finalizing the setup.
- Angle for ambiance: Hang lights slightly slanted for better coverage.
Why This Matters / Understanding the Problem
Let’s be honest—there’s something magical about patio string lights. They turn a plain backyard into a cozy, inviting space. Whether you’re hosting a summer BBQ, enjoying a quiet evening, or just want to feel like you’re dining under the stars, the right lighting makes all the difference. But here’s the catch: if you don’t hang them right, they can look messy, saggy, or even damage your fence.
I learned this the hard way. A few years ago, I tried how to hang patio string lights on a fence in 2026 with flimsy clips and no planning. The result? Lights drooping like wet spaghetti, and one storm later—lights dangling from the neighbor’s side. Not my finest moment.
The good news? With a little prep and the right technique, you can avoid those headaches. In this guide, I’ll walk you through everything—from choosing the right tools to avoiding common pitfalls—so your lights stay secure, stylish, and shine bright all season long.
What You Need
Before you start, gather your supplies. Trust me, having everything on hand saves time and frustration. Here’s what you’ll need for a clean, safe, and lasting install:
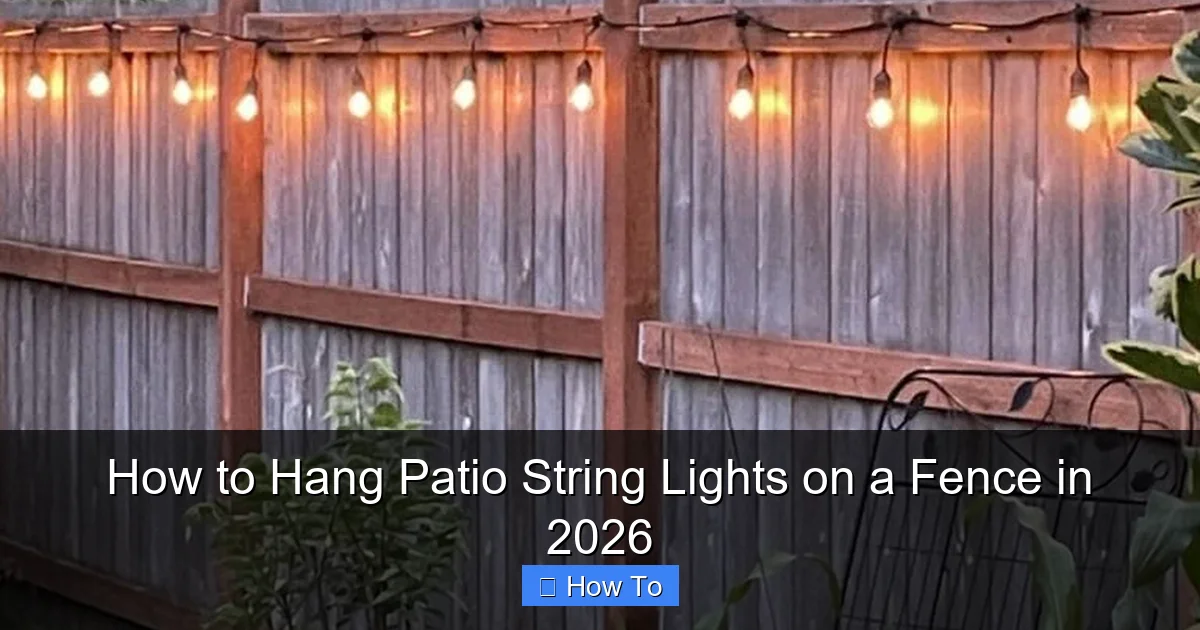
Visual guide about how to hang patio string lights on a fence
Image source: jessicawellinginteriors.com
- Patio string lights (LED, weather-resistant, preferably with a plug on one end)
- Fence-compatible mounting hardware (e.g., plastic or rubber-coated S-hooks, zip ties, or fence clips)
- Measuring tape (to plan spacing and avoid guesswork)
- Drill with a small drill bit (optional, for pilot holes if using screws)
- Stainless steel screws or eye hooks (if you want a more permanent look)
- Zip ties (great for temporary or renter-friendly setups)
- Extension cord (outdoor-rated, GFCI-protected)
- Level (to keep lines straight—no one wants a crooked glow)
- Work gloves (protect your hands from splinters and sharp tools)
- Helper (optional, but a second pair of eyes helps with alignment)
Pro tip: Always check the maximum wattage and daisy-chain limit on your lights. Most outdoor string lights can handle 3–5 strands in a row. Overloading can blow fuses or create fire hazards.
Step-by-Step Guide to How to Hang Patio String Lights on a Fence in 2026
Step 1: Plan Your Layout and Measure the Space
Start by sketching a rough layout. Do you want a single row along the top of the fence? A zigzag pattern? Or maybe a canopy-style grid across multiple fences?
Use your measuring tape to determine the total length. For a standard 6-foot fence, you’ll likely need lights that cover at least 1.5x the length—this accounts for slight drooping and ensures even coverage. For example, a 20-foot fence works best with 30–35 feet of lights.
Mark your starting and ending points. If you’re using multiple strands, plan where to connect them (ideally near an outlet or extension cord access point). This step is crucial for how to hang patio string lights on a fence in 2026 without running out of lights or power.
Pro insight: I once skipped measuring and ended up with a 5-foot gap at the end. Not cute. Now I always measure twice, hang once.
Step 2: Choose the Right Mounting Method
Your fence material matters. Wood, vinyl, and metal each need different approaches.
- Wooden fence: Use eye hooks or S-hooks. Drill a pilot hole first to prevent splitting. Screw in hooks every 16–24 inches for even support.
- Vinyl or aluminum fence: Avoid screws that can crack the material. Use heavy-duty plastic clips or zip ties. Look for clips designed for vinyl fences—they grip without damaging.
- Chain-link fence: S-hooks or zip ties work great. Just loop them through the mesh and secure the lights.
For a semi-permanent look, stainless steel eye hooks are my go-to. They’re strong, rust-resistant, and blend in. For renters or temporary setups, zip ties or adhesive clips are perfect—no tools, no damage.
Step 3: Install the Mounting Points
Now it’s time to put up your hooks or clips. Here’s how:
- Use a level to mark where each mounting point should go. I like to space them 18 inches apart—close enough to prevent sagging, far enough to look clean.
- For eye hooks: Drill a small pilot hole, then screw in the hook by hand or with a screwdriver. Don’t over-tighten—snug is enough.
- For vinyl clips: Snap them into place along the top rail or side posts. Make sure they’re secure and won’t pop off in wind.
- For zip ties: Wrap them around fence posts or rails. Tighten firmly, but don’t over-crank—this can weaken the plastic.
Pro tip: If your fence isn’t perfectly straight, adjust the spacing slightly. A few inches more or less won’t matter—just keep the overall pattern balanced.
Step 4: Test the Lights Before Hanging
Plug in your lights and lay them out on the ground or a table. Check that all bulbs work and the cord isn’t frayed. If you’re using multiple strands, connect them and test the full run.
Why do this now? Because once the lights are up, fixing a dead bulb or faulty connection is a pain. I once spent an hour on a ladder just to find one loose plug. Lesson learned.
Also, check the weather. Don’t install lights in rain or high wind—safety first.
Step 5: Hang the Lights
Now for the fun part. Start at the outlet side—this is where your extension cord connects.
- Hang the first light near the plug. Use an S-hook or clip to secure it to the first mounting point.
- Unroll the lights as you go, gently draping them over the next hook or clip.
- Keep slight tension—enough to prevent drooping, but not so tight that it stresses the cord.
- If using multiple strands, connect them at a mounting point, then continue hanging.
For a zigzag pattern: Hang lights diagonally between fence posts. Use extra hooks at the turning points to keep the angle sharp.
For a canopy (across two parallel fences): Run lights horizontally between the fences. Use longer S-hooks or zip ties to span the gap. Add vertical “drops” every few feet for a starry effect.
Warning: Never pull or stretch the lights. The cord can break internally, creating a fire hazard. Let them hang naturally.
Step 6: Secure the Cord and Manage the Plug
Once the lights are up, don’t forget the cord. A dangling plug or tangled wire ruins the look and is a tripping hazard.
- Use zip ties or clips to secure the cord along the fence or to a nearby post.
- Keep the plug off the ground. Use a hook or clip to hang it at waist height or higher.
- If the cord is too long, coil the excess neatly and zip-tie it to a post—don’t wrap it around the lights.
For outlets, use a weatherproof outlet box or cover. I keep mine under a small plastic dome to protect from rain and debris.
Step 7: Adjust for Symmetry and Aesthetics
Step back and look at your work. Are the lights level? Evenly spaced? Do they drape smoothly?
Make small tweaks:
- Adjust hooks to straighten droops.
- Re-position bulbs so they face the right direction (downward for ambient light, sideways for accent).
- Trim excess zip tie ends for a cleaner look.
Pro tip: Take a photo and view it on your phone. It’s easier to spot unevenness from a different angle.
Pro Tips & Common Mistakes to Avoid
After hanging lights for over a decade (and fixing plenty of mistakes), here’s what I’ve learned:
Pro tip #1: Use LED lights. They’re energy-efficient, last longer, and don’t get hot—safer near wood and plants.
Pro tip #2: Add a timer or smart plug. No more running outside to turn them on/off. I use a dusk-to-dawn sensor—lights come on automatically at sunset.
Pro tip #3: For extra stability, use light clips instead of tying knots. Knots can damage the cord. Clips distribute weight better.
Common mistake #1: Overloading the circuit. Don’t daisy-chain more than the manufacturer recommends. I once ran 8 strands—lights dimmed, and the breaker tripped. Now I stick to 4 max.
Common mistake #2: Using metal hooks on vinyl. They can scratch or crack the fence. Always use plastic or rubber-coated hooks.
Common mistake #3: Ignoring wind. In windy areas, add extra support. Use zip ties to secure the cord to posts every few feet. I lost a strand in a storm because I skipped this.
Common mistake #4: Poor bulb placement. If bulbs face up, they collect water. Angle them slightly downward or sideways. This keeps them dry and extends life.
And one last thing: don’t rush. Take your time. A well-hung light setup looks intentional and lasts years. A rushed one? It shows.
FAQs About How to Hang Patio String Lights on a Fence in 2026
Can I hang string lights on a vinyl fence without damaging it?
Yes! Use plastic fence clips or zip ties. Both grip securely without scratching. Avoid metal screws or hooks—they can crack the vinyl. I’ve used zip ties on my vinyl fence for 3 years with zero damage.
How do I prevent sagging between hooks?
Two things: use more hooks (every 16–18 inches) and don’t pull too tight. A little natural droop is fine—it adds charm. But if it’s more than a few inches, add a middle hook. I use a fishing line trick: run a thin, clear line across the fence first, then hang lights on that. It’s invisible and supports the weight.
Are solar string lights a good option?
They’re convenient, but not always reliable. Solar lights need full sun to charge. If your fence is in shade, they won’t shine bright or last all night. I use solar for accent lights (like around a planter), but for main ambiance, I stick with plug-in. Better brightness, longer runtime.
Can I leave string lights up year-round?
Only if they’re rated for all-weather. Check the box for “wet location” or “IP65” rating. Even then, take them down in harsh winters—ice and snow can damage cords. I leave mine up from spring to fall, then store them in a dry bin. They last longer this way.
How do I connect multiple strands safely?
Always plug them into a GFCI outlet (outdoor outlet with a “test” button). Connect strands end-to-end—don’t use a power strip with multiple plugs. And never exceed the max wattage. For example, if your lights say “max 3 sets,” don’t add a fourth.
What if my fence isn’t straight?
No problem! Embrace the imperfection. Use slightly uneven spacing or a staggered pattern. I once hung lights on a wavy fence and loved the organic look. Just keep the overall flow balanced. A crooked line is better than a broken one.
Can I use command hooks on a fence?
Only on smooth, clean surfaces like vinyl or painted wood. Avoid rough or textured wood—they won’t stick. I tried command hooks once—they fell off after two weeks. Stick with clips, zip ties, or screws for long-term use.
Final Thoughts
Hanging patio string lights isn’t just about looks—it’s about creating a space you love. When done right, it’s the difference between a backyard and a backyard oasis.
Remember, how to hang patio string lights on a fence in 2026 isn’t about perfection. It’s about planning, patience, and picking the right tools. Whether you’re a DIY newbie or a seasoned pro, these steps will help you avoid the common traps and end up with a setup that’s safe, stylish, and shines bright.
Start simple. One strand, one fence, one evening. Once you get the hang of it, you can expand—add a zigzag, a canopy, or even lights around a pergola. The possibilities are endless.
And when you finally sit back with a drink, watching the soft glow dance across the yard? That’s the real reward. You did it. And it looks amazing.
So grab your lights, your tools, and a friend. The night’s young—and your patio’s about to get a whole lot brighter.
“`

