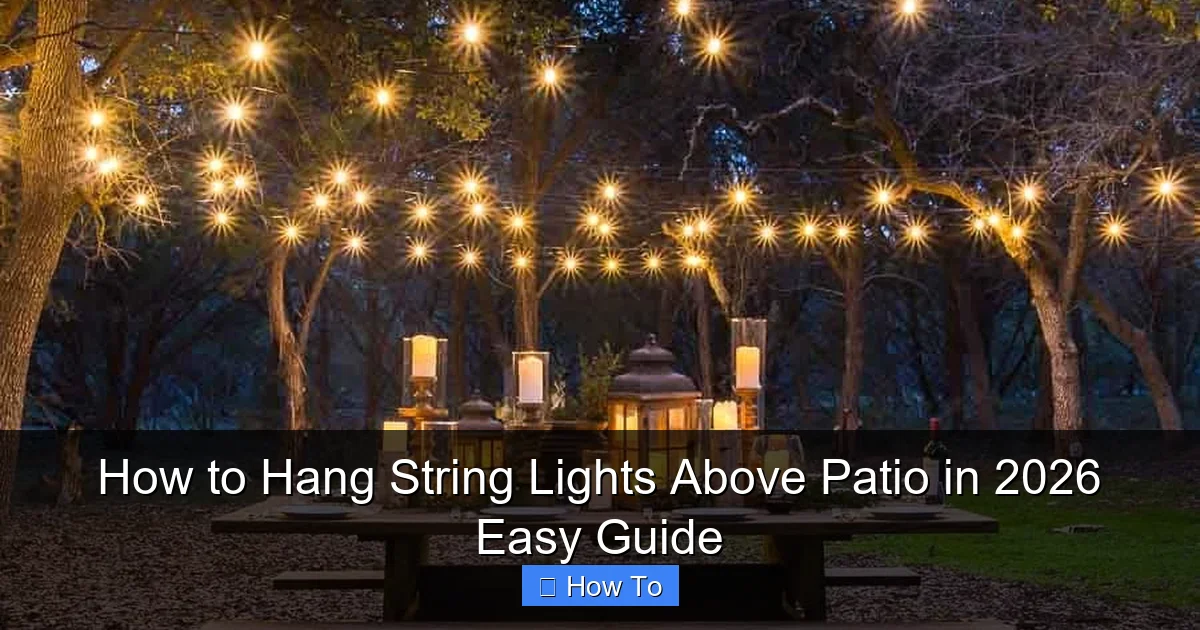
Featured image for how to hang string lights above patio
Image source: maisondepax.com
Transform your patio into a magical nighttime retreat by hanging string lights securely and stylishly in 2026. This easy guide walks you through simple, damage-free methods—from tension cables and pergolas to smart hooks and poles—ensuring a safe, professional-looking setup in under an hour. Perfect for any outdoor space, no electrician needed.
“`html
How to Hang String Lights Above Patio in 2026 Easy Guide
Key Takeaways
- Plan layout first: Sketch your design before hanging to ensure even spacing and coverage.
- Use durable anchors: Install heavy-duty hooks or eye screws for long-lasting support.
- Measure carefully: Account for sagging and add 10% extra cord length for flexibility.
- Choose weatherproof lights: Opt for UL-listed, outdoor-rated string lights for safety.
- Secure connections: Elevate plugs and use waterproof covers to prevent damage.
- Test before finalizing: Check lighting pattern and brightness before completing installation.
Why This Matters / Understanding the Problem
Picture this: It’s a warm summer evening. The grill’s off, the drinks are cold, and you’re lounging on your patio—only to realize the space feels… flat. No mood, no magic. That’s when you remember: you haven’t hung those string lights you bought last year.
You’re not alone. So many of us buy string lights with big dreams, only to let them gather dust in the garage. Why? Because hanging them above a patio feels overwhelming. How high should they go? Where do you anchor them? What if they sag? And honestly, what if they look cheap?
That’s exactly why I wrote this How to Hang String Lights Above Patio in 2026 Easy Guide. I’ve done it wrong (twice), learned from every mistake, and now I’m sharing a clear, stress-free method that works for any patio—no matter if it’s wood, concrete, or open-air.
This isn’t just about adding light. It’s about transforming your outdoor space into a cozy, inviting retreat. And with the right approach, it’s easier than you think.
What You Need
Before we dive in, let’s get your toolkit ready. Don’t worry—most of this is probably already in your garage or can be borrowed from a neighbor.
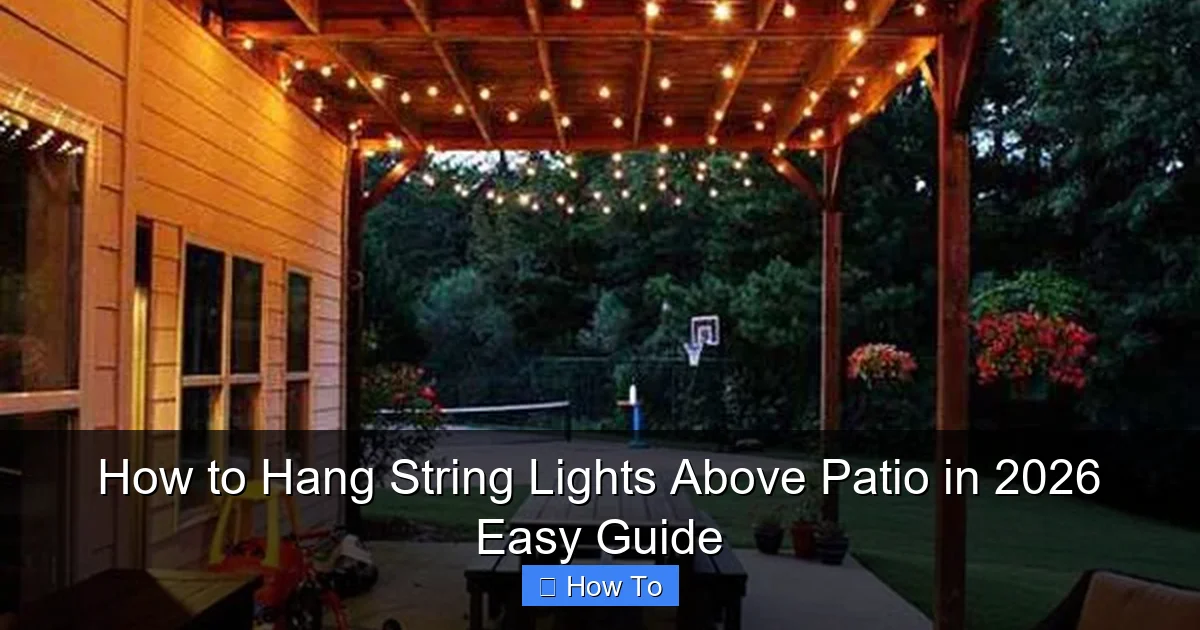
Visual guide about how to hang string lights above patio
Image source: homemydesign.com
- String lights (LED, weatherproof) – Choose warm white or soft amber for a cozy vibe. Avoid cheap, non-weatherproof models.
- Measuring tape – A 25-foot tape measure works best.
- Drill with masonry and wood bits – For concrete or wood anchors.
- Eye hooks, screw eyes, or cup hooks – Stainless steel or coated to resist rust.
- Zip ties or cable clips – For securing wires and managing slack.
- Anchor screws or wall plugs – Use appropriate ones for your surface (concrete, stucco, wood).
- Extension cords (outdoor-rated) – Make sure they’re GFCI-protected for safety.
- Step ladder or extension pole – For reaching high spots safely.
- Optional: Gutter clips, tension wire kit, or zip-tie mounts – Great for tricky setups.
Pro tip: Buy 10–15% more lights than you think you need. You’ll thank me later when you realize the corner needs a little extra glow.
Step-by-Step Guide to How to Hang String Lights Above Patio in 2026 Easy Guide
Step 1: Plan Your Layout (Before You Drill)
Start with a sketch. Grab a piece of paper or use a simple app like SketchUp Free. Draw your patio from above and mark where you want lights to go.
Ask yourself: Do you want a single strand across the center? A crisscross pattern? Or a canopy effect with multiple parallel lines?
For most patios, a parallel line setup (3–5 strands, evenly spaced) works best. It’s balanced, easy to install, and creates a soft, even glow. Aim for lines about 2–3 feet apart.
Warning: Don’t just eyeball it. Measure twice, drill once. Misplaced hooks can ruin the look and waste time.
Also, consider where your power source is. You’ll want one end of the lights near an outdoor outlet or GFCI-protected plug. If you don’t have one, use a heavy-duty outdoor extension cord (but keep it out of foot traffic).
This step is the foundation of your How to Hang String Lights Above Patio in 2026 Easy Guide—get it right, and the rest flows smoothly.
Step 2: Choose Your Mounting Points
Now, decide where the lights will anchor. Most patios have at least two of these:
- House walls – The most common and stable option.
- Fence posts – Great if your patio is adjacent to a fence.
- Pergola or roof beams – Ideal for covered patios.
- Freestanding poles or trees – For open-air spaces (we’ll cover this later).
For house walls, look for studs or solid framing. If you can’t find one, use a wall anchor rated for outdoor use.
On wood surfaces (like pergolas or fences), screw in cup hooks or eye hooks directly. For stucco or concrete, use a masonry bit and wall plugs.
Here’s a personal trick: Use painter’s tape to mark your hook positions before drilling. It’s easy to adjust, and you avoid permanent mistakes.
Step 3: Install the Hooks or Anchors
Now it’s time to drill. But first, double-check your layout with the measuring tape.
For each mounting point:
- Measure and mark the exact spot.
- Use the correct drill bit (masonry for concrete, wood for timber).
- Drill a pilot hole slightly smaller than your anchor or hook.
- Screw in the anchor or hook by hand, then tighten with a screwdriver or wrench.
For cup hooks, turn them clockwise until snug. For eye hooks, make sure the “eye” points upward—this gives the string light the best angle to hang.
Pro tip: Don’t overtighten. You want the hook secure, not stripped. If it wiggles, add a tiny dab of outdoor caulk around the base for extra grip.
Install all hooks before hanging lights. This lets you test spacing and adjust if needed.
Step 4: Hang the String Lights (Without the Sags)
This is where most people go wrong. They hang the lights and end up with a droopy, messy look. Not us.
Start at the end farthest from the power source. Why? So you don’t have a dangling cord in your way.
Hook one end of the string light to your first anchor. Then, walk the other end to the next hook. Don’t stretch it tight—just let it hang with a slight sag (about 6–12 inches in the middle).
Why sag? It prevents stress on the wire, reduces wind noise, and looks more natural—like stars in the sky, not a clothesline.
Once you’ve hooked the second end, adjust the sag by gently pulling or releasing. Use zip ties or cable clips every 2–3 feet to secure the cord to the hook or nearby structure.
For multiple parallel lines, repeat this process. Keep them evenly spaced and aligned. Use a level or laser tool if you’re picky (and I am).
This is the heart of the How to Hang String Lights Above Patio in 2026 Easy Guide: controlled sag, secure mounting, and clean alignment.
Step 5: Connect to Power and Test
Now, plug in the lights. But wait—don’t just plug into any outlet.
- Use an outdoor-rated, GFCI-protected outlet.
- If using an extension cord, make sure it’s rated for outdoor use and heavy-duty (14-gauge or thicker).
- Route the cord along a wall, under furniture, or through a cord cover to avoid tripping.
Turn on the lights. Check for:
- Even brightness
- No flickering
- Proper sag (no tight lines)
- Secure hooks (no wobbling)
If one bulb is out, don’t panic. Most LED strings have bypass circuits—just replace the bulb or contact the manufacturer.
Let them run for 15 minutes to test heat buildup. Cheap lights can overheat, especially in summer. If they’re hot to the touch, unplug and upgrade to a better model.
Step 6: Manage Cords and Hide Wires
Even the best lighting looks bad with messy cords. Here’s how to clean it up:
- Use cord clips or raceways – Stick them along the wall or under eaves to guide the cord neatly.
- Zip-tie excess cord – Coil it loosely and secure with a zip tie near the outlet.
- Paint cords to match – Use outdoor spray paint to blend cords with your wall or trim.
- Use a power box cover – A small, weatherproof box hides plugs and GFCI outlets.
I once left cords dangling, and my dog chewed through one. Lesson learned: always manage the power side.
Step 7: Optional – Add Tension Wire for Extra Support
If you have a large patio (over 20 feet), or live in a windy area, consider adding a tension wire.
Run a thin, coated steel wire between your anchor points (use turnbuckles to tighten). Then, attach the string lights to the wire with zip ties or S-hooks.
This method reduces sag, handles wind better, and lets you hang heavier lights (like vintage Edison bulbs).
It’s a bit more work, but for permanent setups, it’s worth it. Think of it as the “pro mode” of our How to Hang String Lights Above Patio in 2026 Easy Guide.
Step 8: For Open-Air Patios (No House Walls)
No walls? No problem. You can still create a stunning glow.
Options include:
- Freestanding poles – Install 4×4 posts with concrete footings at each corner. Add hooks at the top.
- Trees or shrubs – Use soft tree straps (not metal) to avoid damaging bark. Hang lights between trees and a nearby structure.
- Canopy or shade sail anchors – If you have a shade structure, use it as a mounting point.
For poles, make sure they’re at least 8–10 feet tall and anchored deep (18–24 inches in concrete). You don’t want them tipping in a storm.
I used this method on my friend’s backyard—no house nearby, just a deck. We used four poles and a crisscross pattern. It looked like a boutique bistro. Total cost? Under $100.
Pro Tips & Common Mistakes to Avoid
After hanging lights on three patios, I’ve learned a few things the hard way. Here’s what you should know:
- Don’t buy the cheapest lights. I once got a $20 set from a big-box store. Half the bulbs died in three months. Invest in weatherproof, shatterproof, and energy-efficient LED models.
- Check the IP rating. Look for IP65 or higher. It means the lights are dust-tight and water-resistant.
- Use a timer or smart plug. Set it to turn on at dusk and off at midnight. Saves energy and keeps the ambiance consistent.
- Don’t overload circuits. Most outdoor outlets handle 15–20 amps. Don’t plug in lights, a heater, and a fan at the same time.
- Clean lights once a year. Dust and pollen can dull the glow. Wipe bulbs with a damp cloth (unplugged, of course).
- Avoid hanging lights in high-traffic areas. You don’t want someone walking into a low-hanging strand.
Common mistake: Hanging lights too high. You want them visible from the ground, not lost in the sky. Aim for 7–9 feet above the patio surface.
And here’s a bonus tip: test the lights at night before finalizing. Colors look different in daylight. Warm white at noon? Cozy. Warm white at midnight? Magical.
These insights are built into every step of the How to Hang String Lights Above Patio in 2026 Easy Guide—so you skip the trial and error.
FAQs About How to Hang String Lights Above Patio in 2026 Easy Guide
Can I hang string lights without drilling into my house?
Absolutely. Use gutter clips (if you have gutters), adhesive hooks (for smooth surfaces), or freestanding poles. I’ve used gutter clips on my own home—no damage, and they hold up fine in light rain.
Just avoid adhesive hooks in high-wind areas. They can peel off in storms.
How high should I hang string lights?
For most patios, 7 to 9 feet is ideal. It’s high enough to walk under, low enough to see the glow.
If you have a pergola, hang them just below the beams. For open spaces, use poles at least 8 feet tall.
Are LED string lights safe for outdoor use?
Yes—if they’re rated for outdoor use. Look for the IP65 rating, weatherproof cords, and UV-resistant bulbs. Never use indoor-only lights outside.
LEDs also generate less heat, so they’re safer around plants and fabric.
What if my patio has a roof or pergola?
Great! You’ve got built-in mounting points. Use cup hooks or S-hooks on the beams. For a canopy effect, hang lights in a grid or diamond pattern.
Just make sure the roof can handle the weight. Most can, but check for rot or weak joints.
Can I leave string lights up all year?
It depends. If they’re commercial-grade, weatherproof, and rated for extreme temps, yes. But most consumer models last 2–3 years outdoors.
I recommend taking them down in winter if you get heavy snow or ice. Or use a timer to turn them off during storms.
How do I fix a sagging string light?
First, check the anchors. Are they loose? Tighten or replace them.
Next, add a zip tie or cable clip in the middle to pull the sag up. Or install a tension wire (see Step 7).
If the wire itself is stretched, it might be time to replace the strand.
Do I need a permit to hang lights?
In most cases, no. But check local codes if you’re using poles, drilling into historic walls, or running cords across public spaces.
When in doubt, call your city’s building department. A quick call can save a fine.
Final Thoughts
Hanging string lights isn’t just a DIY project—it’s a transformation. One night, your patio is just a slab of concrete. The next, it’s a glowing oasis where you want to linger.
The How to Hang String Lights Above Patio in 2026 Easy Guide is all about simplicity, safety, and style. No fancy tools. No engineering degree. Just clear steps, smart choices, and a little patience.
Start small. Try one strand this weekend. Once you see how it changes the mood, you’ll want to go all in.
And remember: the goal isn’t perfection. It’s ambiance. A few sags? A little cord showing? That’s part of the charm. Real life isn’t Instagram—it’s better.
So grab your lights, follow this guide, and turn your patio into the place everyone wants to be. Your future self (and your guests) will thank you.
Now go hang some magic.
“`

