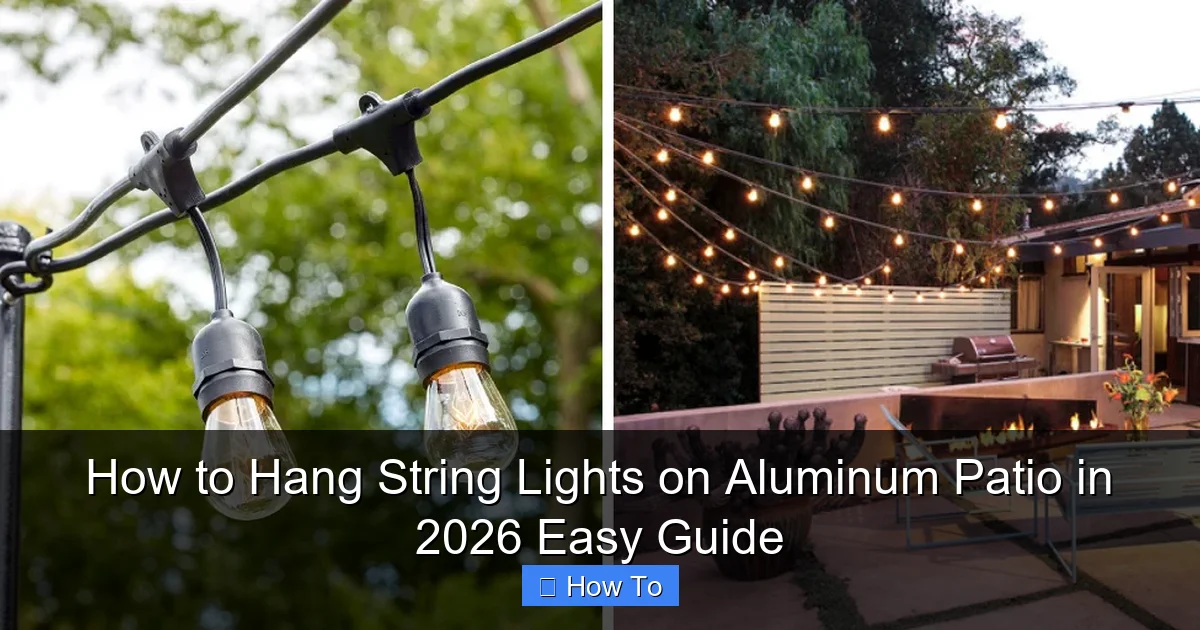
Featured image for how to hang string lights on aluminum patio
Image source: brightlighthub.com
Transform your aluminum patio into a glowing oasis in 2026 with simple, damage-free string light hacks. Use magnetic clips or adhesive hooks rated for metal surfaces to hang lights securely without drilling or permanent modifications. This quick, tool-free method ensures a stunning ambiance while protecting your patio’s sleek finish.
How to Hang String Lights on Aluminum Patio in 2026 Easy Guide
Key Takeaways
- Measure your patio to determine the right string light length and spacing.
- Use adhesive hooks designed for aluminum to avoid drilling or damage.
- Secure lights with clips for a taut, professional look without sagging.
- Check power source proximity to ensure safe, accessible electrical connections.
- Weatherproof all connections to protect against rain and outdoor elements.
- Test lights before finalizing to confirm placement and functionality upfront.
Why This Matters / Understanding the Problem
Let’s be honest—there’s something magical about string lights. They transform a plain aluminum patio into a cozy, inviting retreat. Whether you’re hosting a summer BBQ, enjoying a quiet evening with tea, or just trying to make your backyard feel a little more *you*, the right lighting sets the mood.
But here’s the catch: aluminum patios are tricky. They’re sleek, modern, and often have a smooth, non-porous surface. That means nails won’t hold, and tape? Forget it—it peels off in a week. I learned this the hard way when I tried to use regular hooks on my new aluminum pergola. The lights looked great… for three days. Then, *plink*, they were on the floor.
So, if you’ve been searching for a reliable, long-term solution for how to hang string lights on aluminum patio in 2026 easy guide, you’re not alone. The good news? It’s absolutely doable—with the right tools, a little patience, and a few pro tricks. This guide walks you through every step, so your lights stay up, look amazing, and survive wind, rain, and seasons.
Whether you’re going for a boho vibe, modern minimalism, or a classic café look, this method works. And the best part? No drilling, no damage, and no regrets.
What You Need
Before we dive in, let’s gather your gear. You don’t need a toolbox full of gadgets—just a few smart, purpose-driven items. Here’s your checklist:
- String lights (LED, weatherproof, and preferably with a built-in timer or remote)
- Magnetic clips or magnetic hooks (rated for outdoor use and at least 5 lbs per clip)
- Adhesive cable clips with strong outdoor-rated adhesive (like 3M VHB tape)
- Rubber-coated aluminum-safe clips (for non-magnetic areas)
- Measuring tape (to space lights evenly)
- Soft microfiber cloth (for cleaning the surface)
- Isopropyl alcohol (70%) (to prep the surface)
- Zip ties (optional) (for extra security in windy areas)
- Extension cord (outdoor-rated) (if your outlet isn’t close)
- Ladder or step stool (for reaching high spots)
Pro Tip: Always buy lights rated for outdoor use—even if you plan to take them down seasonally. Moisture, UV rays, and temperature swings can fry indoor lights fast.
Now, why this combo? Magnetic clips work *perfectly* on aluminum because most aluminum patio structures (like pergolas, railings, or frames) are made from magnetic aluminum alloys. But not all—so we include adhesive and rubber-coated options as backups.
This mix gives you flexibility. You’ll use the method that works best for each section of your patio. That’s the secret to a successful how to hang string lights on aluminum patio in 2026 easy guide—adaptability.
Step-by-Step Guide to How to Hang String Lights on Aluminum Patio in 2026 Easy Guide
Step 1: Plan Your Layout (Before You Hang a Single Light)
Don’t just start clipping—take 10 minutes to plan. This saves time, avoids mistakes, and makes your lights look *intentional*, not haphazard.
First, sketch a rough layout on paper or use a free app like SketchUp or even Google Slides. Think about:
- Where will the lights start and end?
- Will you drape them in a zigzag, straight line, or canopy pattern?
- Where’s the power source? (You don’t want a 50-foot extension cord snaking across the yard.)
- Are there trees, furniture, or railings that can support the lights?
For a classic look, I like a “canopy” pattern—running lights from one end of the pergola to the other, then back, creating a crisscross above. It feels cozy and covers a lot of space with fewer clips.
Measure the total distance you’ll need. Most string lights come in 25–40 ft lengths. If you need more, plan where to plug in the next strand. Avoid daisy-chaining more than 3–4 strands unless your manufacturer says it’s safe.
Warning: Overloading circuits can trip breakers or damage lights. Always check the wattage or amperage rating on the plug.
This step is crucial for your how to hang string lights on aluminum patio in 2026 easy guide—because a bad layout means you’ll be rehanging everything in a week.
Step 2: Clean the Aluminum Surface
Aluminum looks clean, but it’s often coated with dust, grease, or oxidation. That’s why your clips won’t stick.
Grab your microfiber cloth and isopropyl alcohol. Wipe down every spot where you plan to attach a clip—especially the top edges, beams, and railings.
Use a circular motion and let the surface dry completely (about 1–2 minutes). This removes any residue and creates a strong bond for adhesive clips.
For magnetic clips, cleanliness ensures maximum grip. Even a thin layer of grime can reduce magnetic strength by 30% or more.
Bonus: If you notice white powdery spots (oxidation), gently buff them with a soft cloth and a tiny bit of aluminum polish. It’s not required, but it helps clips stay put longer.
Pro Tip: Do this on a dry, sunny day. Humidity slows drying and weakens adhesion.
Step 3: Test Your Clips on the Aluminum
Before you commit, test each clip type:
- Place a magnetic clip on a beam. Does it hold firmly when you gently tug it? If it slides, the aluminum might be non-magnetic (common in some anodized or coated alloys).
- Stick an adhesive clip to a small section and wait 24 hours. Then tug it. If it holds, great. If not, you may need a stronger adhesive or a different surface prep.
- Try a rubber-coated clip on a railing. Does it grip without slipping? Does it scratch the finish?
I once wasted an entire afternoon using adhesive clips on anodized aluminum. They looked perfect—until the first rain. Lesson learned: always test first.
This step ensures your method works for your specific patio. Every aluminum structure is a little different. Your how to hang string lights on aluminum patio in 2026 easy guide needs to be customized, not copied.
Step 4: Attach the Clips (Spacing Matters!)
Now, the fun part. Start attaching your clips—but don’t rush.
For a straight line or canopy pattern, space clips every 12–18 inches. Closer spacing = more support, less sagging. Farther spacing = less work, but risk of drooping.
Here’s how I do it:
- Start at the power source end. Attach the first clip.
- Unroll the lights, letting them hang loosely.
- Move down the line, attaching clips every 12–18 inches. Use your measuring tape to stay consistent.
- For magnetic clips: Press firmly and wiggle slightly to ensure full contact.
- For adhesive clips: Press and hold for 30 seconds, then wait 24 hours before hanging lights (critical for VHB tape).
- For rubber-coated clips: Snap them over railings or beams—no tools needed.
On corners or curves, use two clips close together to guide the lights smoothly. Avoid sharp bends that can stress the wires.
If you’re doing a zigzag, attach clips on both sides of the beam. Run the lights back and forth, securing each “leg” of the zigzag.
Pro Tip: Leave a little slack in the wire at each clip. This prevents tension that can pull clips loose over time.
Step 5: Hang the Lights (Go Slow, Be Gentle)
With clips in place, it’s time to hang the lights.
Start at the plug end. Hook the first bulb socket (or loop, if your lights have them) into the first clip. Then move down the line, securing each socket or every other one.
Don’t yank or stretch the wire. String lights are delicate. If a bulb is loose, tighten it gently with pliers (wrap the tip in tape to avoid scratching).
For longer runs, have a helper hold the lights as you go. It prevents tangling and keeps the tension even.
If you’re using multiple strands, connect them *before* hanging. Then run the entire length as one continuous line. This avoids weak spots at the joints.
Once all lights are up, step back and look. Is the line straight? Are bulbs evenly spaced? Adjust as needed.
Warning: Don’t hang lights during or right after rain. Wet wires can short-circuit, and damp surfaces reduce clip adhesion.
Step 6: Secure the Power Cord (The Forgotten Step)
Most people focus on the lights and forget the cord. Big mistake.
The power cord is heavy, and if it dangles, it can:
- Pull on the first clip
- Create a tripping hazard
- Look messy
Here’s how to fix it:
- Use adhesive cable clips to run the cord along a beam or railing.
- Every 12 inches, secure it with a clip or zip tie.
- If the cord is long, coil the excess near an outlet and tuck it behind furniture.
- For extra safety, use a GFCI outlet (outdoor-rated). It cuts power if water gets in.
I once had a guest trip on my loose cord—embarrassing and dangerous. Now, I always secure it like a pro.
Step 7: Test and Adjust
Plug in the lights. Do they turn on? Are all bulbs working? Any flickering?
If one bulb is out, the whole strand might go dark (if it’s an older incandescent). LED strands usually keep working with a few dead bulbs, but replace them anyway—it’s easier than troubleshooting later.
Look for sagging or loose clips. Gently tug each section. If anything feels wobbly, add an extra clip or tighten the existing one.
For windy areas, add zip ties to reinforce magnetic clips. Or use rubber-coated clips as backups.
Finally, take a photo in the dark. Does it look how you imagined? Adjust spacing or add a few extra clips for a fuller look.
This final check is what turns a good setup into a great one—part of any solid how to hang string lights on aluminum patio in 2026 easy guide.
Pro Tips & Common Mistakes to Avoid
After hanging lights on dozens of aluminum patios (including my own, my mom’s, and my neighbor’s), I’ve learned a few things the hard way. Here are the real-world insights:
- Don’t skip surface cleaning. I once thought, “It looks clean enough.” Two weeks later, half my clips were on the ground. Clean = long-term hold.
- Use magnetic clips first, but have backups. Not all aluminum is magnetic. Some modern pergolas use aluminum with a non-magnetic core. Always test.
- Avoid cheap adhesive clips. I tried $2/pack clips from a discount store. They failed in a week. Spend a few extra bucks on 3M VHB or outdoor-rated brands.
- Don’t overload the clips. One clip can hold a few bulbs, but not the entire weight of a 40-ft strand. Distribute the load.
- Mind the weather. Wind can whip lights around, loosening clips. After a storm, do a quick check. Tighten anything that’s shifted.
- Use timers or smart plugs. No need to leave lights on all night. A timer saves energy and extends bulb life.
- Store properly in winter. If you take them down, coil them loosely and store in a dry, cool place. Avoid folding or kinking.
Real Talk: I once used regular picture hooks on aluminum. They looked great… until a gust of wind sent the whole strand flying. Now I only use clips designed for metal. Your how to hang string lights on aluminum patio in 2026 easy guide should prioritize safety and durability.
Also, avoid hanging lights directly on thin aluminum panels (like some roof covers). They flex in wind, which stresses the clips. Stick to structural beams, railings, or pergola rafters.
And one last thing: don’t rush the adhesive cure time. If you hang lights on adhesive clips before 24 hours, they *will* fail. I know. I tried. It’s painful.
FAQs About How to Hang String Lights on Aluminum Patio in 2026 Easy Guide
Q: Can I use regular hooks on an aluminum patio?
A: Nope. Regular hooks need something to grip—like wood or stucco. Aluminum is too smooth. You’ll end up with loose hooks and falling lights. Use magnetic, adhesive, or rubber-coated clips instead. They’re made for metal and stay put.
Q: Will magnetic clips scratch my aluminum?
A: Not if you use rubber-coated magnetic clips. The rubber layer protects the finish. I’ve used them for 3 years—no scratches. Just avoid dragging them across the surface.
Q: How do I hang lights on a non-magnetic aluminum pergola?
A: Use outdoor-rated adhesive clips (like 3M VHB) or rubber-coated tension clips. Clean the surface well, press firmly, and wait 24 hours before hanging. For extra security, add zip ties.
Q: Can I leave the lights up all year?
A: Yes—if they’re outdoor-rated and you use weatherproof clips. But check them monthly for loose clips, frayed wires, or water damage. In snowy areas, consider taking them down in winter to avoid ice buildup.
Q: What if my aluminum is painted or powder-coated?
A: Adhesive clips work best here. Magnetic clips may not stick well to thick coatings. Clean the area with alcohol, use high-quality adhesive, and wait the full cure time. Avoid clips that pinch the coating—they can chip it.
Q: How do I avoid sagging in the middle of a long run?
A: Add extra clips in the center. Or use a support wire (like a thin, clear fishing line) between two points, and hang the lights from that. It’s invisible at night but holds the weight.
Q: Are LED string lights better for aluminum patios?
A: 100%. LEDs are cooler, more energy-efficient, and last longer. They also put less strain on clips because they’re lighter. Plus, many come with timers, remotes, and dimmers—perfect for setting the mood.
Final Thoughts
Hanging string lights on an aluminum patio doesn’t have to be a headache. With the right approach, it’s actually one of the easiest ways to upgrade your outdoor space.
Remember: plan first, clean second, test third, hang fourth. That order makes all the difference. And don’t forget the power cord—it’s the unsung hero of a clean, safe setup.
Whether you’re following this how to hang string lights on aluminum patio in 2026 easy guide for a romantic dinner, a family gathering, or just your own peace of mind, the result is the same: a patio that feels warm, inviting, and uniquely yours.
So grab your clips, clean that aluminum, and get hanging. Your perfect outdoor glow is just a few steps away. And when the sun sets and the lights come on? You’ll be glad you did it right.
One last tip: Take a photo when it’s done. You’ll want to remember this moment—and share it with friends who ask, “How did you do that?”
Now go light up your world.

