Featured image for how to hang string lights on patio ceiling
Image source: cdn.christmaslightsetc.com
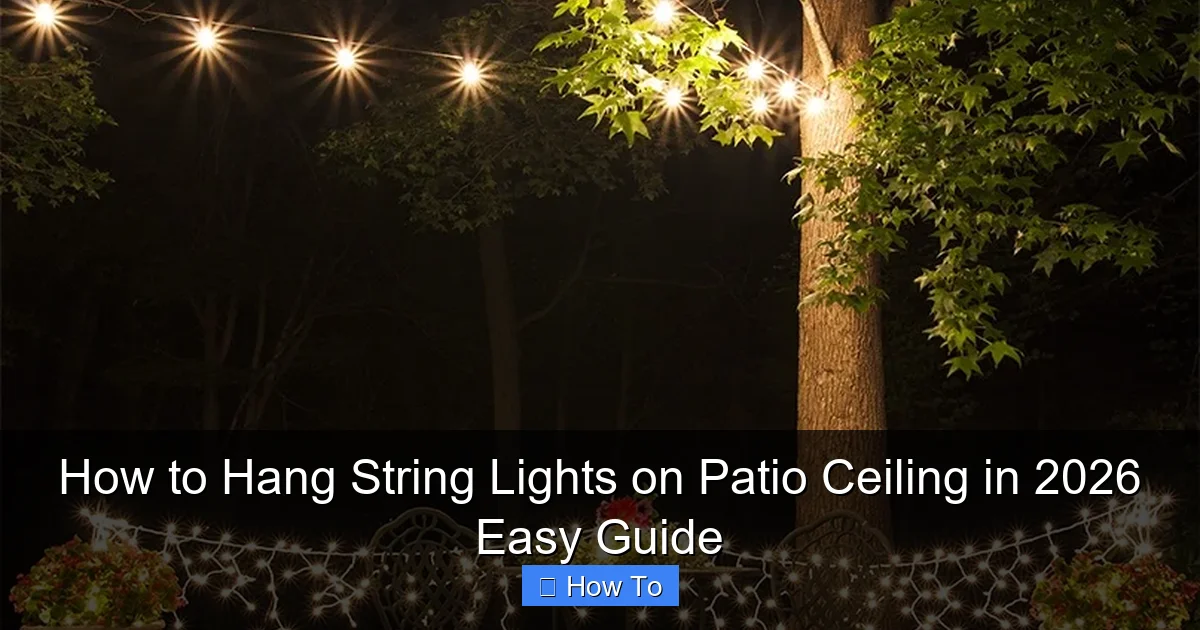
Transform your patio into a glowing retreat in 2026 by securely mounting string lights to the ceiling using weather-resistant hooks or adhesive clips—no drilling required. This easy guide walks you through measuring, spacing, and powering lights for a safe, stunning setup that lasts all season. Perfect ambiance, zero hassle.
“`html
How to Hang String Lights on Patio Ceiling in 2026 Easy Guide
Key Takeaways
- Plan your layout first: Measure and mark light placement for balanced, even coverage.
- Use durable anchors: Secure heavy-duty hooks or clips for long-lasting support.
- Check light spacing: Match bulb distance to your ceiling height for ideal brightness.
- Weatherproof connections: Use outdoor-rated lights and seal plugs to prevent moisture damage.
- Test before finalizing: Turn on lights during installation to spot issues early.
- Hide cords neatly: Use clips or channels to keep wires tidy and safe.
Why This Matters / Understanding the Problem
Imagine this: It’s a warm summer evening, you’ve just grilled the perfect burgers, and the sun is setting. You want to keep the party going, but the darkness creeps in. That’s when you realize—your patio has zero ambiance. No mood lighting, no sparkle, just shadows.
String lights can fix that in minutes. But here’s the catch: hanging them on a patio ceiling isn’t as simple as tossing them up and hoping they stick. Without the right plan, you end up with sagging wires, crooked lines, or worse—falling lights during your friend’s birthday toast.
That’s why I wrote this How to Hang String Lights on Patio Ceiling in 2026 Easy Guide. I’ve been there—tangled in wires, frustrated with anchors that won’t hold, and wondering if I should just buy a lantern and call it a day. But after years of trial, error, and a few DIY disasters, I’ve cracked the code.
Whether you’ve got a covered pergola, a sloped roof, or a flat ceiling, this guide walks you through every step—no guesswork, no overcomplicating. Just clear, practical advice to get that dreamy glow without the headache.
What You Need
Before you start, let’s make sure you’ve got everything on hand. Trust me, nothing kills momentum like realizing you’re missing a crucial tool halfway through.
- String lights (LED, weatherproof, and ideally with a plug-in end that reaches an outlet)
- Measuring tape (to map your layout)
- Pencil or chalk (for marking anchor points)
- Drill with appropriate bits (for wood, metal, or masonry, depending on your patio ceiling)
- Anchors and screws (toggle bolts for hollow ceilings, wood screws for solid wood, etc.)
- Hangers or hooks (cup hooks, eye screws, or commercial light clips—your choice)
- Level (to keep lines straight—yes, even string lights deserve symmetry!)
- Ladder or step stool (safety first!)
- Zip ties or wire clips (for securing excess wire or guiding the path)
- Extension cord (if needed) (outdoor-rated, GFCI-protected)
- Gloves (to protect your hands during installation)
Bonus: A second pair of hands. Not essential, but highly recommended—especially if you’re working solo and don’t want to climb up and down the ladder 20 times.
Pro insight: I once tried hanging lights alone and ended up with a zigzag pattern that looked like a drunk spider’s web. A friend helping me mark points made all the difference. Don’t be a hero—ask for help!
Step-by-Step Guide to How to Hang String Lights on Patio Ceiling in 2026 Easy Guide
Now let’s get into the nitty-gritty. This guide works whether your patio has a solid ceiling, a pergola with beams, or a sloped roof. I’ll walk you through each step with real-life scenarios so you can adapt it to your space.
Step 1: Plan Your Layout (The Secret to a Pro Look)
Before you touch a drill, sketch your patio ceiling. Use a measuring tape to note the length and width. Decide where you want the lights to go: in a straight line, a grid, a zigzag, or even a starburst pattern.
For most patios, a grid (like a tic-tac-toe board) or parallel lines (running from one end to the other) works best. These layouts distribute light evenly and are easier to install.
- Measure the distance between beams or ceiling joists.
- Decide how many lines of lights you want (e.g., 3–5 parallel lines for a 12-foot span).
- Mark anchor points every 18–24 inches along each line—this prevents sagging.
Warning: Don’t space anchors more than 2 feet apart. I learned this the hard way when my lights drooped like a tired cat in summer heat. Sagging lights look sloppy and can strain the wires.
This is the foundation of your How to Hang String Lights on Patio Ceiling in 2026 Easy Guide—get this right, and the rest is smooth sailing.
Step 2: Choose the Right Hangers for Your Ceiling Type
Not all ceilings are created equal. What works for a wooden pergola might fail on a metal roof. Here’s how to pick the right hangers:
- Wooden ceiling/pergola: Use cup hooks or eye screws. They’re easy to install and blend in.
- Metal roof or corrugated panels: Use magnetic clips or adhesive-backed hooks (rated for outdoor use).
- Concrete or stucco: Use masonry anchors and screws with plastic anchors. A drill with a masonry bit is a must.
- Hollow ceiling (like drywall): Use toggle bolts or snap-in anchors. Never rely on regular screws—they’ll pull out.
Pro tip: If you’re unsure, take a photo of your ceiling and ask at your local hardware store. I once bought the wrong anchors and had to redo half the job. Save yourself the hassle.
For this How to Hang String Lights on Patio Ceiling in 2026 Easy Guide, I recommend starting with cup hooks for wood and magnetic clips for metal. They’re affordable, reusable, and look clean.
Step 3: Mark and Drill Anchor Points
Grab your pencil, level, and measuring tape. Start at one corner and mark your first anchor point. Use the level to draw a faint line across the ceiling—this ensures your lights won’t look like a drunk surveyor did the job.
Now, measure and mark every 18–24 inches along that line. Repeat for each line of lights. If you’re doing a grid, mark both horizontal and vertical lines.
Once marked, drill pilot holes at each point. This prevents wood from splitting and makes screwing in hooks easier. For masonry, use a masonry bit and go slow.
Pro tip: I use a piece of masking tape on the drill bit to mark the depth. That way, I don’t drill too deep and hit wiring or insulation.
After drilling, insert your anchors (if needed) and screw in the hooks. Don’t overtighten—just enough so they’re snug.
Step 4: Test the Lights Before Hanging
Before you start stringing, plug in your lights and lay them out on the ground. Check for:
- Any burnt-out bulbs
- Frayed wires
- Proper length (do they reach from one end to the other with slack?)
This step saved me once when I found a short in the third strand. I fixed it on the ground instead of 8 feet in the air. Lesson learned.
If your lights have multiple strands, connect them now (if they’re end-to-end) and test again. Make sure the total length doesn’t exceed the manufacturer’s limit (usually 3–5 strands for LED).
Step 5: Hang the Lights (The Fun Part!)
Now, start at the plug end. Attach the first bulb or clip to the first hook. Work your way along, securing each bulb or clip to the next hook.
Don’t stretch the lights tight—leave a little slack (about 2–3 inches) between hooks. This prevents tension on the wires and gives a soft, natural drape.
If you’re doing parallel lines, finish one line before starting the next. Use zip ties to guide the wire between lines if needed, but keep it hidden behind beams or trim.
Warning: Don’t hang lights in a straight pull from one end to the other. The weight can pull on the first hook and make the whole line crooked. Always work from the center outward or use a support wire.
For long spans (over 15 feet), consider using a support wire (like a thin steel cable) threaded through the light clips. Attach the wire to the first and last hooks, then hang the lights on it. This is a game-changer for large patios.
Step 6: Secure the Plug and Manage Cords
The plug end is often the weakest link. If it dangles, it can pull on the first hook and ruin your alignment.
- Use a zip tie or wire clip to attach the plug to a nearby beam or hook.
- Route the power cord along the ceiling edge or under a trim piece.
- Plug into an outdoor-rated GFCI outlet. If the outlet is far, use a heavy-duty extension cord (rated for outdoor use).
Pro tip: I use adhesive-backed cable clips to guide the cord along the wall. It keeps everything neat and prevents tripping hazards.
This step is crucial in the How to Hang String Lights on Patio Ceiling in 2026 Easy Guide—no one wants a dangling plug or a tripping hazard during a party.
Step 7: Final Check and Adjust
Step back and look at your work. Are the lines straight? Are the lights evenly spaced? Is there any sagging?
If you see droops, add extra hooks or tighten the support wire. If lines are crooked, adjust the hooks slightly.
Turn the lights on at dusk to see how they look. Sometimes, what looks good in daylight looks too bright or uneven at night. Adjust spacing if needed.
Pro Tips & Common Mistakes to Avoid
Let’s talk about the stuff they don’t tell you in DIY videos. These are the lessons I’ve learned from years of trial and error.
- Use LED lights: They’re cooler, more energy-efficient, and last longer. Incandescent bulbs get hot and can be a fire hazard on wood.
- Buy lights with replaceable bulbs: If one goes out, you don’t have to replace the whole strand. Look for “replaceable LED” on the packaging.
- Don’t overconnect strands: Most LED lights can handle 3–5 strands max. Exceeding this can overload the circuit or burn out bulbs.
- Consider a timer or smart plug: No more running outside to turn lights on/off. A simple timer or Wi-Fi plug saves effort and extends bulb life.
- Check local regulations: Some HOA rules restrict permanent installations. If you’re renting, ask your landlord first.
- Use weatherproof lights: Even if your patio is covered, moisture can still get in. Look for an IP44 or higher rating.
Common mistake: I once used indoor lights on my covered patio. After one rainy night, half the bulbs died. Now I only buy outdoor-rated lights—even if they cost a few bucks more.
Another big one: not planning for expansion. I started with 3 lines, then realized I wanted more. Now I leave extra hooks in place so I can add more lights later.
And finally—don’t rush. Take your time. A rushed job leads to crooked lines, loose hooks, and frustration. This How to Hang String Lights on Patio Ceiling in 2026 Easy Guide is about doing it right the first time.
FAQs About How to Hang String Lights on Patio Ceiling in 2026 Easy Guide
Let’s tackle the questions I get asked the most.
Can I hang string lights on a metal roof?
Yes! Use magnetic clips or adhesive-backed hooks (rated for outdoor use). Just make sure the surface is clean and dry before applying. Magnetic clips are my go-to for metal roofs—they’re strong, reusable, and don’t require drilling.
How far apart should I place the hooks?
18–24 inches is ideal. Closer spacing (12–18 inches) works for longer spans or heavier lights. Farther than 24 inches, and you’ll get sagging. I use 20 inches as a sweet spot for most setups.
Do I need a support wire?
For spans over 15 feet, yes. A support wire (like a thin steel cable) threaded through the light clips prevents sagging and takes the load off the hooks. It’s a small investment that makes a big difference.
What if my patio ceiling is sloped?
No problem! Use adjustable hooks or clips that let you angle the lights. Or, install a horizontal support wire across the slope and hang the lights from it. I did this on my sloped pergola, and it looks perfect.
Can I leave the lights up year-round?
You can, but I recommend taking them down in winter. Snow and ice can weigh down the wires, and extreme cold can damage bulbs. If you leave them up, use heavy-duty outdoor lights and check them after storms.
How do I hide the power cord?
Route it along the ceiling edge, under trim, or behind beams. Use adhesive cable clips to secure it. I also paint the cord the same color as the ceiling to make it blend in.
Are battery-powered string lights a good option?
For short-term use, yes. But for a permanent patio setup, I prefer plug-in lights. Battery lights don’t last as long, and replacing batteries is a hassle. Save them for renters or temporary events.
Final Thoughts
Hanging string lights on your patio ceiling isn’t just about adding light—it’s about creating a mood, a vibe, a place where memories happen. And with this How to Hang String Lights on Patio Ceiling in 2026 Easy Guide, you’ve got everything you need to do it right.
Remember: plan your layout, choose the right hangers, test your lights, and don’t rush. A little extra time upfront saves you from redoing the whole thing later.
And if you’re ever in doubt, just think: Would I be proud to show this to my friends? If the answer is yes, you’ve nailed it.
Now go enjoy that warm glow. Your patio is ready for summer nights, backyard BBQs, and stargazing under the twinkle of your own creation.
“`

