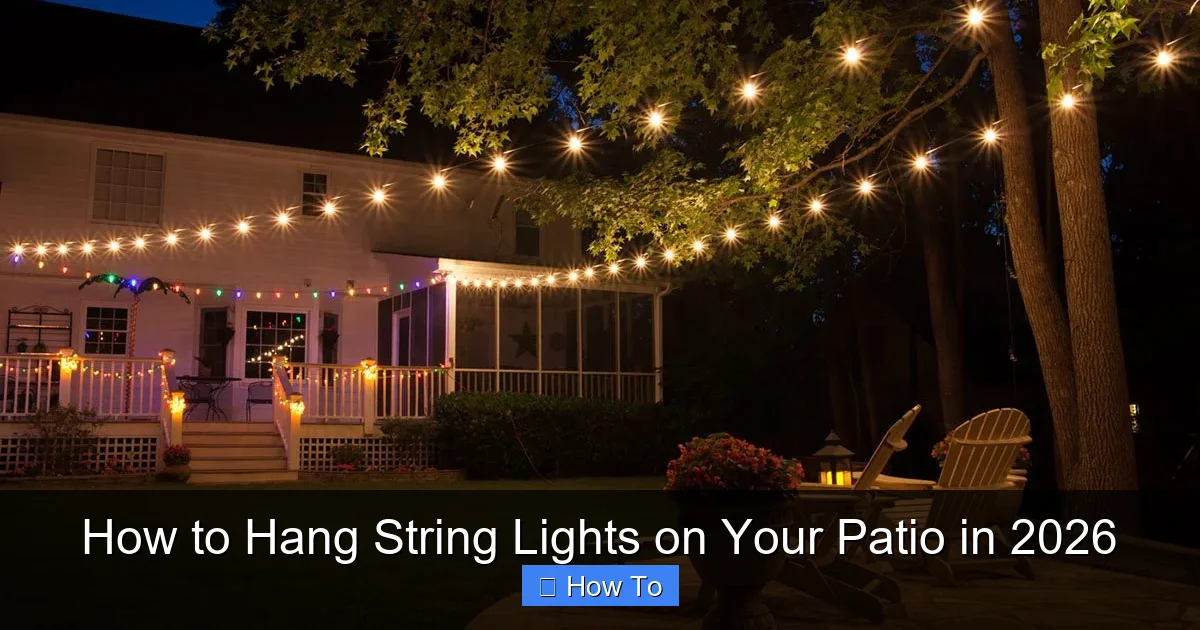
Featured image for how to hang string lights on your patio
Image source: homemydesign.com
Transform your patio into a glowing oasis in 2026 by securely mounting string lights using weather-resistant hooks or adhesive clips designed for outdoor surfaces. Ensure even spacing and a safe electrical connection by planning your layout and using outdoor-rated extension cords. For a professional finish, drape lights in gentle swags between posts or along railings—no nails, no hassle.
How to Hang String Lights on Your Patio in 2026
Key Takeaways
- Plan your layout first: Sketch light placement to avoid gaps and ensure even coverage.
- Choose weatherproof lights: Opt for UL-listed or IP65-rated fixtures for durability.
- Use proper mounting tools: Secure hooks, clips, or cables based on your patio surface.
- Test lights before installation: Check for defects to save time and effort later.
- Maintain safe spacing: Keep cords away from high-traffic zones to prevent tripping.
- Add dimmers or timers: Boost ambiance and efficiency with automated controls.
Why This Matters / Understanding the Problem
Let’s be real—after a long day, there’s nothing quite like unwinding on your patio with a drink in hand, soft music playing, and the gentle glow of string lights above. That cozy, inviting ambiance? It’s not magic—it’s lighting done right.
But if you’ve ever tried how to hang string lights on your patio in 2026, you’ve probably faced the struggle: lights sagging, clips failing, or worse—lights dangling unevenly like a bad DIY Pinterest fail.
Whether you’re hosting summer barbecues, enjoying quiet evenings, or just want to elevate your outdoor space, proper lighting changes everything. And in 2026, we’re not just hanging lights—we’re creating experiences.
I’ve been there. I’ve used flimsy clips that snapped in a week, overestimated how many lights I needed, and even had to re-hang a whole strand after one windy night. But over the years, I’ve learned what works—and what doesn’t.
This guide is your shortcut to getting it right the first time. No guesswork. No frustration. Just a beautifully lit patio that feels like a retreat.
What You Need
Before we dive into how to hang string lights on your patio in 2026, let’s gather your toolkit. Don’t worry—this isn’t a hardware store scavenger hunt. Most of these items you might already have.
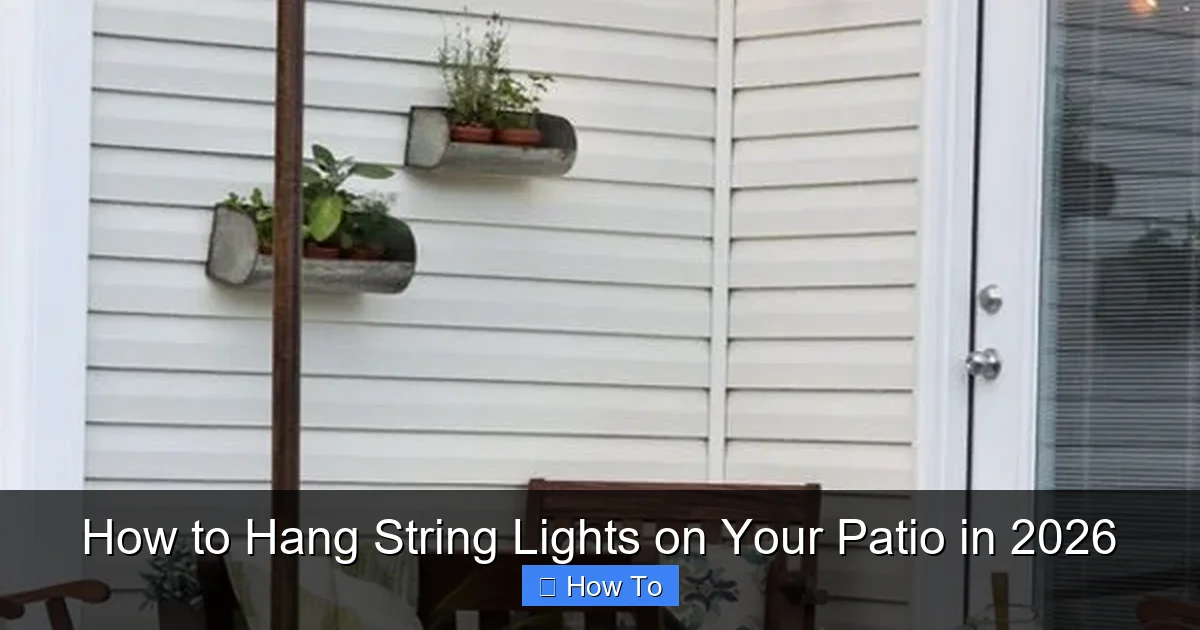
Visual guide about how to hang string lights on your patio
Image source: houseilove.com
- String lights – LED, weather-resistant, preferably with a warm white glow (2700K–3000K). Look for “outdoor-rated” or “IP44+” on the label.
- Measuring tape – For planning your layout and spacing.
- Drill and drill bits – For permanent mounting (optional, but recommended for long-term setups).
- Eye hooks, cup hooks, or screw eyes – Stainless steel or rust-proof for outdoor use.
- Zip ties or outdoor-rated cable clips – For temporary or semi-permanent attachment.
- Extension cords and outdoor-rated outlet covers – Safety first!
- Ladder – A sturdy one, especially if your patio has high eaves or a pergola.
- Level – To keep things straight and avoid the “drunken chandelier” look.
- Optional: Smart plugs or timers – For automation and energy efficiency.
Pro tip: Buy 10–20% more lights than you think you need. It’s easier to hide extra length than to scramble for another strand mid-project.
Step-by-Step Guide to How to Hang String Lights on Your Patio in 2026
Step 1: Plan Your Layout (The Secret to a Pro Look)
Before you even touch a drill, take 10 minutes to sketch your patio. Where are the seating areas? The dining table? The walkways? These are your “hot zones”—places where light matters most.
For a balanced look, aim for even spacing and avoid overloading one area. Think of it like decorating a room—too many lamps in one corner feels cluttered.
Use your measuring tape to mark where you’ll place anchors (like hooks or clips). A good rule: place an anchor every 2–3 feet. For longer runs, go every 4 feet but use a support wire to prevent sagging.
Sketch a few options. Maybe you want a crisscross pattern over the dining table, or a simple straight line along the pergola. In 2026, people love the “canopy effect”—lights fanning out from a central point.
Pro move: Use painter’s tape to mark hook positions. It’s removable and won’t damage paint or wood.
Step 2: Choose the Right Mounting Method for Your Surface
Not all patios are created equal. Your mounting method depends on your patio’s structure and surface material.
- Wooden pergola or beams: Use stainless steel cup hooks or screw eyes. Drill pilot holes first to avoid splitting the wood.
- Masonry or stucco walls: Use masonry anchors with eye bolts. A hammer drill makes this much easier.
- Metal railings or fences: Use heavy-duty zip ties or magnetic hooks (if the metal is magnetic).
- Ceiling or eaves (wood/metal): Screw-in hooks work great. For vinyl, use adhesive hooks rated for outdoor use—but don’t rely on them long-term.
- No permanent structure? Try a freestanding frame: A simple 4-post frame with crossbars (like a pergola kit) gives you flexibility and a clean look.
For how to hang string lights on your patio in 2026, the key is matching the hardware to your surface. Don’t force a solution that could fail in a storm.
Warning: Avoid using nails or staples. They can damage wires and create fire hazards. Always use clips or hooks designed for outdoor string lights.
Step 3: Install Your Anchors (The Foundation)
Now it’s time to install your hooks, clips, or anchors. Start from one end and work your way across.
Use your drill with the correct bit size for the anchor. For wood, a 1/8” pilot hole is usually perfect. For masonry, use a masonry bit and insert the anchor with a hammer.
Twist the hook in until it’s snug but not over-tightened—especially on wood. Over-tightening can strip the thread or crack the surface.
Check each hook with a level. Even a slight tilt can make lights look crooked later. Trust me, your OCD self will thank you.
For zip ties on railings: thread them through the railing, pull tight, and trim the excess. Use black or dark-colored ties—they’re less noticeable.
If you’re using adhesive clips, clean the surface first with rubbing alcohol. Let it dry completely. Adhesive fails on dusty or damp surfaces.
Step 4: Run a Support Wire (For Longer Runs or Heavy Lights)
This step is a game-changer—especially if you’re spanning more than 15 feet or using heavy Edison-style bulbs.
Attach a thin, weather-resistant wire (like stainless steel or coated steel) between your anchors. Use turnbuckles or wire clips to tighten it slightly. You want it taut but not overly stretched.
Now, hang your lights on top of the wire. Use S-hooks or carabiners to attach each bulb socket or loop. This takes the weight off the light cord and prevents sagging.
Without a support wire, your lights will droop in the middle—especially after a few months. It’s not just ugly; it stresses the cord and can lead to breakage.
For a seamless look, tuck the support wire behind the lights. Most people won’t even notice it.
Step 5: Hang the Lights (The Fun Part!)
Now for the magic. Start at the power source—usually the outlet or transformer. This reduces strain on the cord and makes troubleshooting easier.
Attach the first light socket or loop to the anchor. Work your way across, securing each point. Don’t pull the cord tight—leave a slight curve (called “catenary sag”) for wind movement and thermal expansion.
For crisscross or canopy patterns: use a central anchor (like a pergola beam or pole) and run lines outward. Think of it like a spider web—each line anchored at the edge.
If you’re using zip ties, loop them around the cord and the support wire (if you have one). This adds extra security.
Test the lights as you go. Plug them in halfway through. If one section isn’t working, you’ll catch it early instead of redoing the whole thing.
Step 6: Manage Cords and Power (Safety First!)
Messy cords are a tripping hazard and look sloppy. Plus, exposed cords can degrade in sunlight.
Use outdoor-rated cable clips or zip ties to secure cords to beams, railings, or walls. Keep them off the ground and away from high-traffic areas.
For outlets: use a weatherproof outlet cover. These flip open when you plug in and close when not in use. They’re cheap and prevent water damage.
Use outdoor-rated extension cords. Indoor cords aren’t UV-protected and can become brittle in sunlight.
Consider a smart plug or timer. Set your lights to turn on at dusk and off at midnight. It saves energy and gives you hands-free control.
Pro tip: If your outlet is far away, use a heavy-duty outdoor extension cord (14 or 16 gauge). Thin cords overheat and are a fire risk.
Step 7: Fine-Tune and Adjust (The Details Matter)
Step back and look at your work. Are the lights level? Evenly spaced? Do they cast the right glow?
Adjust any sagging sections. If a light is too high or low, loosen the hook, reposition, and re-secure.
Trim excess zip ties with scissors or wire cutters. A clean finish makes a big difference.
For a softer glow, consider using a dimmer switch (if your lights support it). Warm white lights at 50% brightness create a cozy, intimate feel.
Take a photo at night. This helps you spot uneven spots or dark zones. You can’t fix what you can’t see!
Pro Tips & Common Mistakes to Avoid
After years of hanging lights—and fixing my own mistakes—here’s what I wish I knew earlier.
- Don’t skip the support wire. It’s the #1 reason lights fail. Even “lightweight” LED strands sag over time. A support wire adds years to your setup.
- Buy quality lights. Cheap lights may save $20 upfront, but they burn out faster, flicker, or don’t handle weather well. Look for brands like Brightech, Govee, or Philips Hue Outdoor.
- Use warm white, not cool white. Cool white (5000K+) feels clinical. Warm white (2700K–3000K) mimics candlelight and is more inviting.
- Check bulb type. Shatterproof plastic bulbs are safer for outdoor use. Glass bulbs are prettier but can break in wind or storms.
- Don’t overload circuits. Most outdoor outlets are on a 15-amp circuit. Check the wattage of your lights. If you’re close to the limit, use a separate outlet or a lower-wattage strand.
- Plan for wind. In windy areas, use more anchors (every 2 feet) and secure cords tightly. Loose cords can whip around and damage fixtures.
- Think about maintenance. If you’re using screw-in hooks, they’re easy to remove for cleaning or bulb replacement. Adhesive clips? Not so much.
My biggest mistake? Using adhesive hooks on stucco. They held for two weeks—then half the lights fell during a storm. Lesson learned: when in doubt, go permanent.
For how to hang string lights on your patio in 2026, the trend is toward smart integration and minimalist design. People are using app-controlled lights, color-changing options, and hidden wiring for a clean look.
But the basics haven’t changed: plan, secure, test, and enjoy.
FAQs About How to Hang String Lights on Your Patio in 2026
Can I leave string lights up all year?
It depends. If your lights are outdoor-rated and securely mounted, yes—you can leave them up year-round. But check the manufacturer’s guidelines. Some LED lights can handle snow and rain, but extreme cold or UV exposure can shorten their lifespan.
I’ve had the same set up for 3 years. I just do a quick inspection each spring—tighten loose hooks, replace any dead bulbs, and clean off dust or leaves.
What if my patio has no roof or pergola?
No problem! You have options:
- Use a freestanding frame (like a 4-post pergola kit).
- Anchor lights to trees, fences, or railings on opposite sides.
- Install a ceiling-mounted track system (great for patios with overhangs).
- Use magnetic hooks on metal structures (like a garage or shed).
The key is creating anchor points. Even a simple A-frame with crossbars gives you a mounting surface.
How do I avoid sagging lights?
Three words: support wire. It’s the secret weapon. Run a thin, taut wire between your anchors and hang the lights on top. Use S-hooks or carabiners for easy attachment.
Without it, even the best lights will sag—especially after a few months. It’s not just cosmetic; it stresses the cord and can cause breakage.
Are solar string lights worth it?
They’re great for low-traffic areas or temporary setups. But for patios where you want consistent, bright light, I’d stick with plug-in lights.
Solar lights depend on sunlight. On cloudy days or in shaded areas, they’re dim or don’t turn on at all. Plus, the batteries degrade over time.
For how to hang string lights on your patio in 2026, I recommend solar only if you’re in full sun and don’t mind lower brightness.
How do I hide the cords?
Great question! Here’s how:
- Run cords along beams or railings and secure with cable clips.
- Use cord covers (outdoor-rated) to blend them into walls or floors.
- Route cords through existing structures (like a pergola post).
- For ground-level cords, use a cord cover mat or tuck them under outdoor rugs.
Bonus: paint zip ties or clips to match your surface. A little effort goes a long way.
Can I connect multiple light strands?
Yes, but check the maximum wattage on your first strand. Most outdoor lights allow 2–3 strands connected end-to-end.
Never exceed the limit. Overloaded circuits can trip breakers or, worse, cause a fire.
Use outdoor-rated connectors and keep connections off the ground (use a hook or clip to suspend them).
What’s the best time of year to hang lights?
Spring or early summer is ideal. The weather is mild, and you have time to test and adjust before peak patio season.
But if you’re using how to hang string lights on your patio in 2026 as a winter project, go for it! Just avoid hanging them in rain, snow, or high winds. Dry, calm days are best.
Final Thoughts
Hanging string lights isn’t just about adding light—it’s about creating a mood. A place where laughter lingers, conversations deepen, and memories are made.
With the right tools, a little planning, and the steps I’ve shared, you’ll have a patio that feels like a getaway—right in your backyard.
Remember: how to hang string lights on your patio in 2026 isn’t about perfection. It’s about progress. Start simple. Use quality lights. Secure them well. And don’t forget to enjoy the glow.
My advice? Do it on a Saturday morning with a coffee in hand. Play some music. Invite a friend to help. And when you flick that switch at dusk? Take a moment to stand back and admire your work.
You’ve earned it.
Now go make your patio shine—literally.

