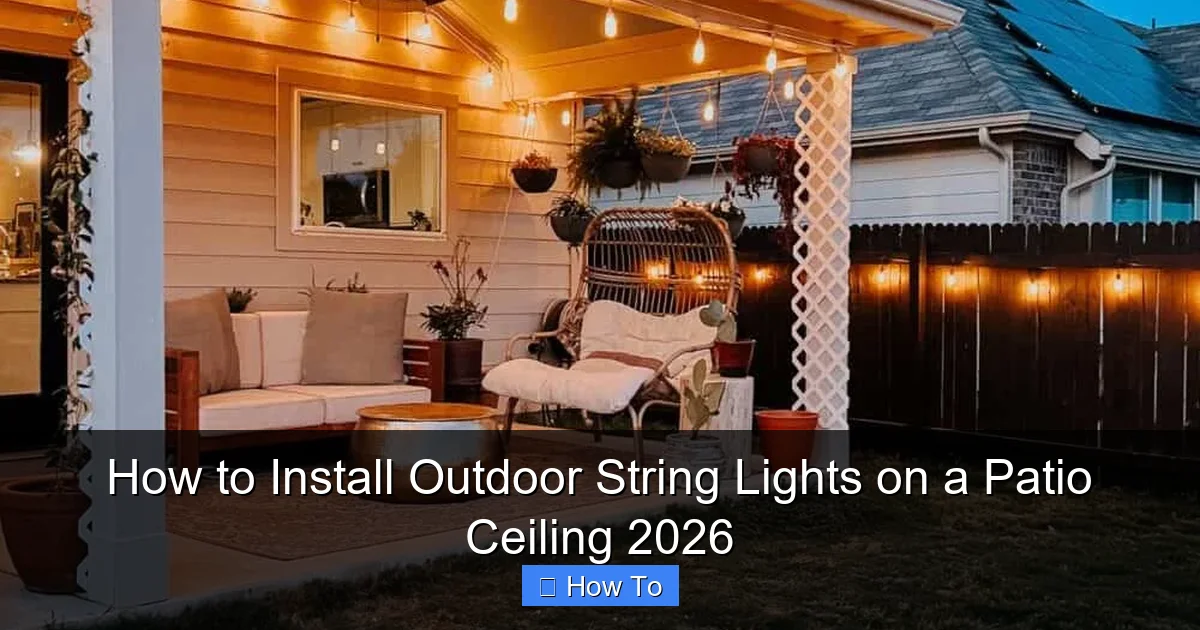
Featured image for how to install outdoor string lights on a patio ceiling
Image source: loveandrenovations.com
Transform your patio into a stunning nighttime retreat by securely installing outdoor string lights on your ceiling with weather-resistant mounting hardware. This step-by-step guide covers measuring, spacing, and safely connecting lights for a professional, energy-efficient glow that enhances ambiance and extends outdoor enjoyment—perfect for 2026’s top-rated LED and solar-powered options.
How to Install Outdoor String Lights on a Patio Ceiling 2026
Key Takeaways
- Plan your layout first: Measure and mark light placement for even spacing and coverage.
- Use weatherproof fixtures: Choose UL-rated outdoor lights and connectors for durability.
- Secure mounting points: Install hooks, clips, or cables to support light weight and tension.
- Check power source proximity: Ensure access to GFCI outlets and use outdoor-rated extension cords.
- Test lights before finalizing: Verify functionality and brightness before securing all connections.
- Maintain safe clearances: Keep lights away from flammable materials and water sources.
Why This Matters / Understanding the Problem
Let’s be honest: nothing transforms a backyard like the warm glow of outdoor string lights. I remember the first time I strung up lights on my patio—I thought I was just adding ambiance, but what I really did was create a whole new living space. Suddenly, dinner al fresco felt like a vacation, and late-night chats turned into cozy, intimate moments.
But here’s the catch: installing outdoor string lights on a patio ceiling isn’t as simple as hanging them from a tree. If you’ve ever dealt with sagging wires, tangled cords, or lights that flicker after one rainy night, you know how frustrating it can be. That’s why how to install outdoor string lights on a patio ceiling 2026 is more than just a DIY project—it’s about creating a safe, lasting, and beautiful atmosphere.
Whether you’re planning a summer party, want to enjoy your patio year-round, or just love the cozy aesthetic, getting this right means your lights will shine for years, not weeks. And the good news? With the right approach, you don’t need to be an electrician or a contractor. This guide walks you through every step, from planning to plugging in, with real-life tips I’ve learned after installing lights on three different patios.
What You Need
Before we dive in, let’s talk tools and materials. You don’t need a full workshop—just a few essentials to get the job done safely and cleanly. Here’s what I recommend:
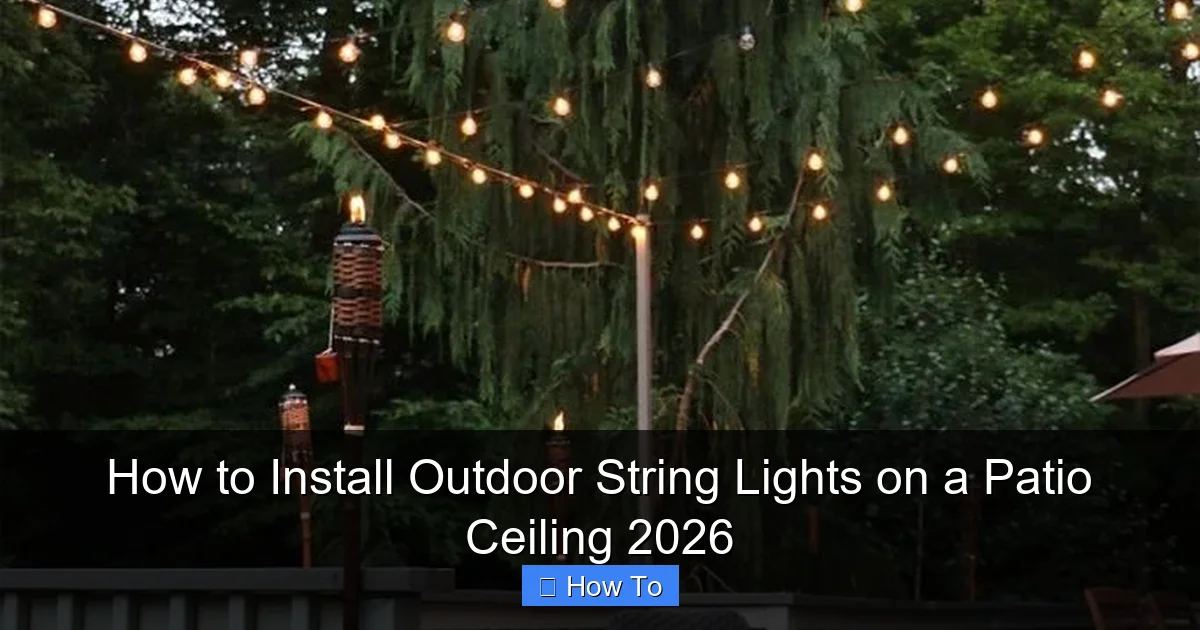
Visual guide about how to install outdoor string lights on a patio ceiling
Image source: mycozylive.com
- Outdoor-rated string lights (look for “wet-rated” or “damp-rated” on the packaging)
- Mounting hardware: eye hooks, J-hooks, or cable clips (stainless steel or coated for weather resistance)
- Measuring tape (I use a 25-foot retractable one)
- Drill with appropriate bits (masonry, wood, or metal, depending on your patio ceiling)
- Stud finder or magnet (to locate ceiling joists—trust me, you’ll want this)
- Level (a small one works fine)
- Pencil or masking tape (for marking)
- Extension cord (outdoor-rated) (GFCI-protected is a must)
- Ladder (a stable, non-slip one—safety first!)
- Optional but helpful: zip ties, wire clips, or a tension cable kit for longer runs
- Safety gear: gloves, safety glasses, and non-slip shoes
Pro insight: I once tried to use regular indoor string lights on my patio. Big mistake. After one storm, half the bulbs were out, and the cord started fraying. Always check the rating—“outdoor use” isn’t enough. Go for wet-rated if your patio is uncovered.
The goal of how to install outdoor string lights on a patio ceiling 2026 is to create a system that’s both beautiful and built to last. So skip the cheap hardware store hooks—invest in weatherproof mounts. Your future self will thank you.
Step-by-Step Guide to How to Install Outdoor String Lights on a Patio Ceiling 2026
Step 1: Plan Your Layout (Measure Twice, Install Once)
Before you even touch a drill, grab a pen and paper (or your phone). Sketch your patio ceiling and decide where you want the lights to go. Are you going for a grid pattern? A zigzag? A simple perimeter?
- Measure the length and width of your patio ceiling.
- Decide how many strings you’ll need. Most outdoor string lights are 24–48 feet long. Don’t forget: you’ll need extra length for slack and connections.
- Mark where each light socket will hang. Aim for 6–8 inches between bulbs for even spacing.
- Plan your power source. Where’s the nearest outdoor outlet? You’ll want to minimize visible extension cords.
I made the mistake of eyeballing my first layout. The result? Lights sagged in the middle, and one side was noticeably dimmer. Now, I always use a measuring tape and mark key points with masking tape. It takes 10 extra minutes but saves hours of frustration.
Warning: Avoid running more than 3–4 strings in series unless the manufacturer says it’s safe. Overloading can cause overheating and shorten bulb life. Check the packaging for “maximum connected strings.”
When planning your how to install outdoor string lights on a patio ceiling 2026 project, think about sightlines. You don’t want lights blocking your view or shining directly into someone’s eyes when they sit down.
Step 2: Choose the Right Mounting Method
Not all patio ceilings are the same. Yours might be wood, concrete, stucco, or even a metal pergola. The mounting method depends on the material.
- Wood or joisted ceiling: Use stainless steel eye hooks or J-hooks. These screw directly into the wood and provide strong support.
- Concrete or stucco: Use masonry anchors with eye hooks. A hammer drill and carbide bit are essential here.
- Metal pergola: Use magnetic hooks or clamp-style mounts. Avoid drilling into thin metal unless you’re certain it won’t warp.
- Ceiling with existing hooks or beams: Reuse them if they’re in good condition—just clean and inspect for rust.
I once installed lights on a stucco ceiling without anchors. Two weeks later, the hooks pulled out during a windstorm. Lesson learned: always anchor properly. Use a stud finder (or a strong magnet) to locate ceiling joists if you’re on wood. For concrete, mark spots with a pencil, then drill pilot holes slightly smaller than the anchor.
For longer runs, consider a tension cable system. It’s like a clothesline for lights—you run a steel cable across the ceiling and clip the lights to it. This prevents sagging and looks incredibly clean. I used this method on a 20-foot span, and the lights look perfect after two years.
Step 3: Mark and Drill Mounting Points
Now comes the fun part—actually putting holes in your ceiling (don’t worry, it’s reversible!).
- Use your layout sketch to mark each mounting point with a pencil or masking tape.
- Double-check spacing with a measuring tape. Use a level to ensure your marks are aligned horizontally.
- For wood: drill a pilot hole slightly smaller than the hook’s screw shaft. This prevents splitting.
- For concrete: use a hammer drill to create holes for the anchors. Clean out dust with a small brush or compressed air.
- Insert anchors (if needed), then screw in the eye hooks by hand. Don’t overtighten—this can strip the wood or crack the anchor.
I like to start from the power source and work outward. That way, I can plan the cord path and avoid crossing lines. If you’re using multiple strings, leave extra cord at connection points for flexibility.
Pro tip: If you’re unsure about drilling, use removable adhesive hooks rated for outdoor use. They won’t hold forever, but they’re great for testing layouts or seasonal setups.
When tackling how to install outdoor string lights on a patio ceiling 2026, precision matters. Misaligned hooks mean uneven light patterns. Take your time here—it pays off in the final look.
Step 4: Install the Mounts and Test Fit
Once all hooks are in, it’s time to test the layout.
- Loop a string or light rope through each hook to simulate the light path.
- Check for sagging, tight spots, or obstructions (like vents or fans).
- Adjust hook positions if needed. Better now than after the lights are up!
- Ensure all hooks are securely fastened. Give each a gentle tug.
I once skipped this step and ended up with a light that dangled over my grill. Not ideal. Now, I always do a “dry run” with twine. It takes 15 minutes and prevents layout disasters.
If you’re using a tension cable, install the end brackets first, then thread the cable through the eye hooks. Use a turnbuckle to tighten it—just enough to remove slack, not so much that it warps the mounts.
Step 5: Hang the Lights
Now for the magic moment—hanging the lights!
- Start at the power source. Plug in the first string and let it hang.
- Use the built-in hooks (or add zip ties) to attach each bulb socket to the ceiling mounts.
- For strings without hooks, use small S-hooks or zip ties to secure the cord at each mounting point.
- Keep the cord taut but not stretched. A little slack helps absorb wind movement.
- Connect multiple strings end-to-end if needed. Make sure connections are snug and weatherproof.
I prefer to hang one string at a time, starting from the outlet and working outward. This lets me manage the cord and avoid tangles. If you’re using a tension cable, clip the lights to the cable with small carabiners or zip ties.
Common mistake: Hanging lights too tight. This can stress the sockets and shorten bulb life. Aim for a slight “S” curve between hooks—it looks better and handles wind better.
For how to install outdoor string lights on a patio ceiling 2026, the key is consistency. Each bulb should hang at the same height, and the cord should follow a smooth path. Step back and check from different angles before moving on.
Step 6: Secure the Power Cord
This is where many installations fail. A dangling cord isn’t just ugly—it’s a tripping hazard and a weather risk.
- Use outdoor-rated zip ties or wire clips to secure the power cord to the ceiling or a beam.
- Route the cord along the same path as the lights, or hide it behind a fascia board.
- Plug into a GFCI outlet (required by code in most areas). Test it with a GFCI tester.
- If you must use an extension cord, choose one rated for outdoor use and keep it off the ground.
I once ran an extension cord across the patio floor. It looked messy, and my dog chewed through it in a week. Now, I always run cords along walls or under eaves. If you have a soffit, tuck the cord behind it for a clean look.
Safety note: Never use indoor extension cords outdoors. They’re not insulated for moisture and can become fire hazards.
Step 7: Test and Adjust
Turn on the lights and walk around your patio. Look for:
- Bulbs that don’t light (replace or check connections)
- Sagging sections (add extra support)
- Glare or dark spots (adjust bulb angles or spacing)
- Flickering (could mean a loose connection or overloaded circuit)
I keep a spare bulb and a multimeter handy for troubleshooting. Most issues are simple fixes—like a loose socket or a bad connection.
If you’re using smart lights, pair them with your phone or voice assistant now. Set up schedules or color modes for different moods.
Step 8: Weatherproof and Maintain
Your work isn’t done until the lights can survive a storm.
- Seal all connections with silicone sealant or use weatherproof connectors.
- Inspect mounts every 3–6 months. Tighten loose hooks and check for rust.
- Clean bulbs with a soft, dry cloth. Avoid water on electrical parts.
- Consider removing lights in extreme weather (hurricanes, heavy snow) if they’re not designed for it.
I leave my lights up year-round, but I do a quick check after every major storm. It takes five minutes and keeps everything safe.
Pro Tips & Common Mistakes to Avoid
After installing lights on patios, decks, and pergolas, I’ve picked up a few tricks—and learned from my mistakes.
Pro tip #1: Use LED bulbs. They’re brighter, last longer, and use less power. Plus, they don’t get hot, so they’re safer around kids and pets.
Pro tip #2: Mix bulb styles. I like to use warm white for the main run and add a few colored bulbs for holidays or special occasions. It’s easy to swap them out.
Pro tip #3: Install a dimmer or smart switch. It lets you adjust the brightness for different moods—bright for parties, soft for romance.
Common mistake #1: Ignoring the weather. I once used plastic clips on a metal pergola. In direct sun, they melted and the lights fell. Always choose UV-resistant and weatherproof hardware.
Common mistake #2: Overloading circuits. Outdoor outlets often share a circuit with other devices. If your lights dim when the sprinkler kicks on, you’ve got a load issue. Run a dedicated line or use lower-wattage LEDs.
Common mistake #3: Poor cord management. A tangled mess of cords is a safety hazard and looks unprofessional. Use cable clips or run cords through PVC conduit for a clean finish.
When you’re working on how to install outdoor string lights on a patio ceiling 2026, think long-term. Cheap shortcuts might save money now, but they’ll cost you in maintenance and replacements later.
FAQs About How to Install Outdoor String Lights on a Patio Ceiling 2026
Q: Can I install string lights on a concrete ceiling?
Absolutely. Use masonry anchors and a hammer drill. I’ve done it on three patios, and the lights have held up for years. Just make sure the anchors are rated for outdoor use.
Q: How do I prevent sagging over long distances?
Use a tension cable system or add extra support hooks in the middle. I once had a 25-foot span—I added a center hook and used a steel cable. No sag, even in high winds.
Q: Are solar-powered lights a good option?
They can be, but they’re not as bright or reliable as plug-in lights. Solar works best for short runs or shaded areas. For a patio ceiling with consistent sun, they’re fine. But for evening use, I still prefer wired.
Q: Can I leave the lights up all year?
Yes, if they’re wet-rated and your mounts are secure. I do it, but I inspect them every few months. Remove them during extreme weather if you’re in an area with heavy snow or hurricanes.
Q: Do I need a permit or professional help?
For simple installations—no. But if you’re running new wiring, installing a subpanel, or working with high-voltage systems, hire a licensed electrician. Safety first!
Q: How do I hide the power cord?
Run it along a wall, tuck it behind soffits, or use cable raceways. I once used a decorative wooden cover—it looked like a beam and hid the cord completely.
Q: What if my patio has no ceiling?
No problem. You can string lights from trees, posts, or install a pergola. The principles are the same—just anchor securely and plan for weather.
Final Thoughts
Installing outdoor string lights on a patio ceiling isn’t just about lighting—it’s about creating a space where memories happen. Whether it’s a family dinner, a birthday party, or just a quiet night with a book, the right lighting changes everything.
The key to mastering how to install outdoor string lights on a patio ceiling 2026 is patience and attention to detail. Plan your layout, choose the right hardware, and don’t rush the installation. A little extra time now means years of beautiful, safe, and reliable lighting.
And remember: it’s okay to make mistakes. I’ve had sagging wires, blown fuses, and even a bird’s nest in my lights (true story). But each time, I learned something new. Now, my patio is my favorite room in the house.
So grab your tools, take a deep breath, and get started. Your perfect outdoor oasis is just a few hooks and a string of lights away. And when you flip that switch for the first time? That warm glow will make every minute worth it.

