
Featured image for can you cut led string lights
Image source: elk-bledom.com
Yes, you can cut LED string lights safely and easily—if they’re designed to be cut and you follow the manufacturer’s guidelines. Look for designated cut points, usually marked by a line or scissor icon, to avoid damaging the circuit or creating a safety hazard. Never cut non-modular or non-waterproof strips without proper precautions, as this can void warranties or cause malfunctions.
Key Takeaways
- Always check manufacturer guidelines before cutting to avoid voiding warranties or damaging lights.
- Cut only at marked points to maintain circuit integrity and prevent electrical hazards.
- Use insulated tools to safely trim wires without risking short circuits or shocks.
- Seal cut ends properly with caps or silicone to protect against moisture and fraying.
- Test lights after cutting to confirm functionality before final installation.
- Avoid cutting non-modular strings—they’re unsafe to modify and may fail entirely.
📑 Table of Contents
- Can You Cut LED String Lights Safely and Easily
- Understanding LED String Light Circuitry
- How to Tell If Your LED String Lights Are Cuttable
- Step-by-Step Guide to Cutting LED String Lights Safely
- Common Mistakes to Avoid When Cutting LED String Lights
- Creative Uses and Tips for Cut LED String Lights
- Data Table: Cuttable vs. Non-Cuttable LED String Lights
- Conclusion
Can You Cut LED String Lights Safely and Easily
LED string lights have revolutionized the way we illuminate our homes, gardens, and special events. Their energy efficiency, durability, and versatility make them a go-to choice for holiday decor, wedding backdrops, bedroom ambiance, and even commercial displays. But as creative as these lights are, many users eventually ask the same question: Can you cut LED string lights to fit a specific space or design? The answer isn’t always a simple yes or no—it depends on the type of lights, their construction, and whether they’re designed for modification.
Whether you’re trying to shorten a long strand to wrap around a window frame, create a custom garland for a mantel, or avoid excess wire in a compact room, cutting LED string lights might seem like a quick fix. However, doing so improperly can result in dead circuits, short circuits, or even fire hazards. This comprehensive guide walks you through everything you need to know about cutting LED string lights safely and effectively. From understanding circuit design and identifying cuttable models to following step-by-step instructions and troubleshooting common issues, you’ll learn how to personalize your lighting without compromising safety or functionality.
Understanding LED String Light Circuitry
Before you even consider cutting your LED string lights, it’s essential to understand how they’re wired. Unlike traditional incandescent strings, LEDs operate on low-voltage direct current (DC) and use complex circuitry that can be easily disrupted by improper handling. The way LEDs are connected—whether in series, parallel, or a hybrid configuration—determines whether cutting is possible and how to do it correctly.
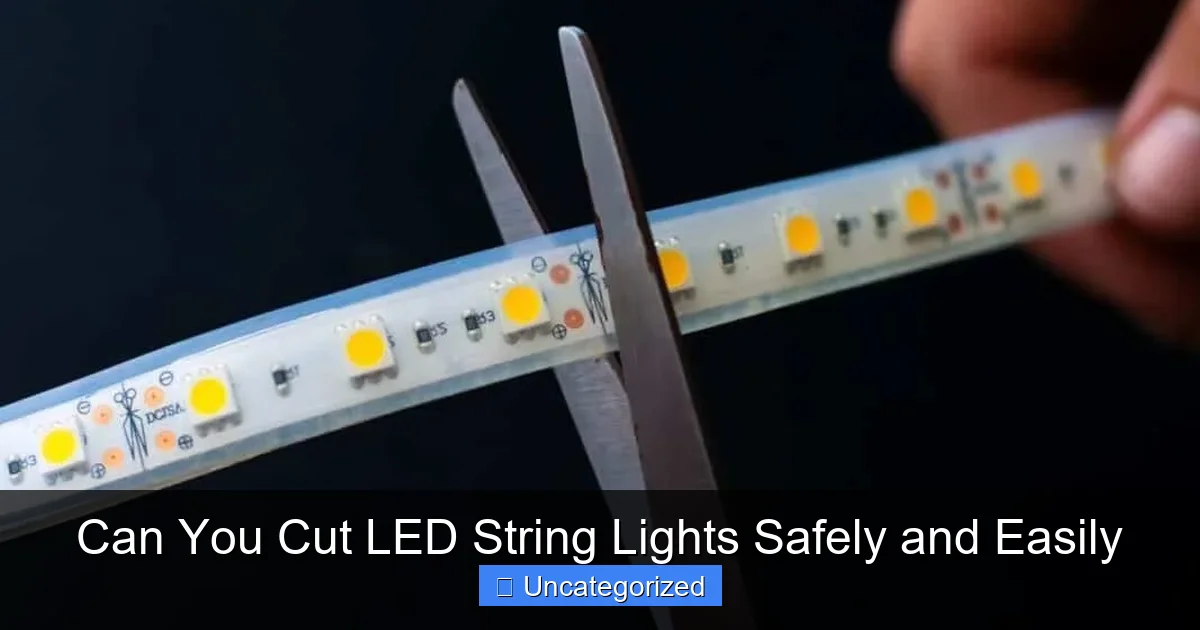
Visual guide about can you cut led string lights
Image source: homebec.com
Series vs. Parallel Wiring
LEDs in a string are typically connected in one of two ways: series or parallel. In a series circuit, each LED is connected end-to-end in a single path. If one bulb fails or the circuit is broken (like by cutting the wire), the entire string goes dark. This is the most common setup in older or cheaper LED strings and is not safe to cut, as any break in the wire disrupts the entire circuit.
In contrast, parallel circuits connect each LED across a common positive and negative bus wire. This means each LED has its own independent connection, so if one fails or is removed, the others continue to work. Most modern, high-quality LED string lights use parallel or “dual-wire” systems, which are designed to be cut or modified. These often feature visible cut points marked on the wire—usually small notches or symbols—indicating safe locations to sever the string.
Hybrid and Addressable LED Strings
Some advanced LED strings use hybrid configurations, such as multiple parallel branches connected in series (called “series-parallel”). These are common in longer strings (e.g., 500+ LEDs) and are engineered to maintain functionality even if one branch fails. However, cutting these requires careful analysis. For example, if you cut through the main series wire, the entire string may fail. But if you cut at designated parallel junctions, you can safely remove a section.
Addressable LED strings (like those with RGB color control via remote or app) use microcontrollers (e.g., WS2812B chips) and are generally not cuttable. These rely on precise data signals sent from one end to the next. Cutting them disrupts the data flow and can render the entire strand useless. Always check the manufacturer’s label or manual before attempting to cut any addressable lights.
Voltage and Power Supply Considerations
LED strings are designed for specific voltage levels (typically 12V, 24V, or 120V for plug-in models). Cutting a string can alter the load on the power supply. For example, removing 20 LEDs from a 50-LED 12V string changes the total resistance and may cause the remaining LEDs to draw more current than intended, potentially overheating the driver or causing premature burnout. Always ensure the power supply matches the new load after cutting—especially when working with low-voltage (12V/24V) systems powered by transformers.
How to Tell If Your LED String Lights Are Cuttable
Not all LED string lights are designed for modification. Before reaching for the scissors, perform a few quick checks to determine if your lights are safe to cut.
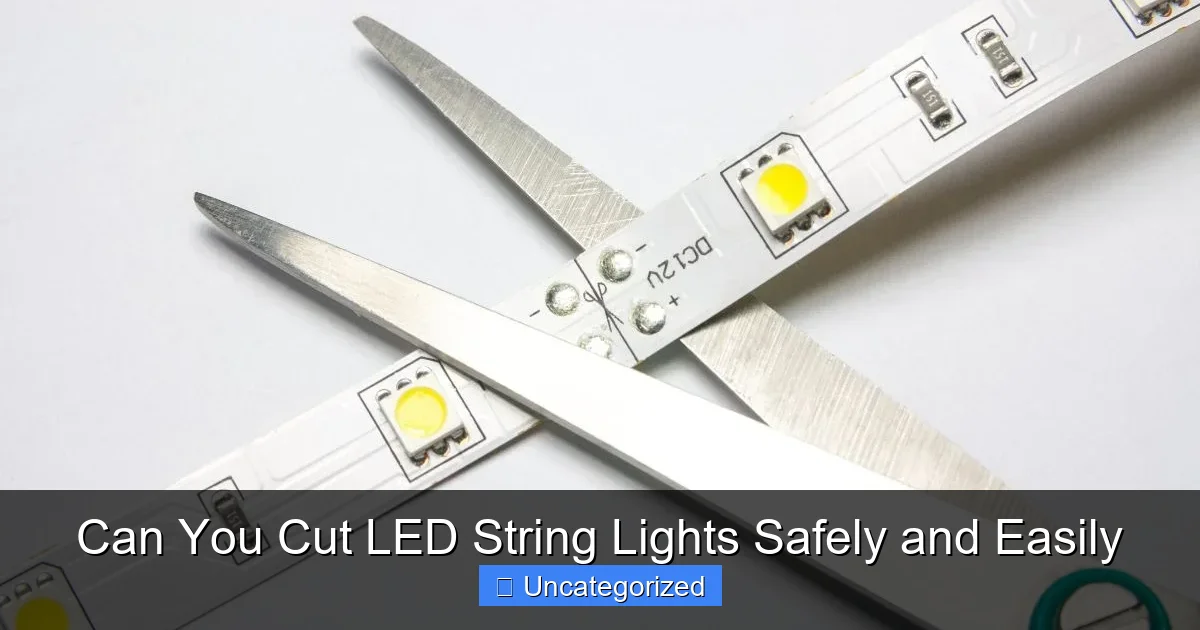
Visual guide about can you cut led string lights
Image source: homestratosphere.com
Check for Manufacturer Labels and Manuals
The first step is to inspect the packaging, user manual, or product listing (if purchased online). Look for keywords like “cuttable,” “modular,” “extendable,” or “cut at marked points.” Reputable brands like GE, Philips, and Luminoodle often specify whether their strings can be safely shortened. For example, Philips Hue Lightstrip Plus is explicitly labeled as cuttable at 3-LED intervals, while their standard string lights are not.
Example: A GE LED string light box states: “Cuttable at every 3rd bulb—do not cut elsewhere.” This is a clear green light (pun intended) for safe modification. Conversely, if the manual warns against cutting or splicing, heed that advice.
Look for Cut Points or Notches on the Wire
Many cuttable LED strings have visible indicators where you can safely cut. These may appear as:
- Small notches or grooves on the wire
- Symbols (e.g., scissors icon) near a bulb or connector
- Color-coded sections (e.g., red wire every 10 inches)
- Pre-installed connectors or “T” junctions
For instance, a 50-foot LED rope light designed for outdoor use might have cut points every 3 feet, allowing you to create multiple shorter strands from one roll. If you don’t see any markings, assume the lights are not cuttable unless otherwise specified by the manufacturer.
Test the Circuit Type
If documentation is missing, perform a simple test:
- Turn on the lights.
- Carefully unplug one LED from the socket (if removable).
- If the rest stay lit, the string is likely parallel-wired and may be cuttable.
- If the entire string goes dark, it’s probably series-wired and should not be cut.
Note: This test only works with non-addressable, non-microcontroller-driven lights. Avoid this method with RGB or app-controlled strings, as it may damage the circuitry.
Inspect the Power Source and Wiring
Examine the plug and transformer. Cuttable strings often have a thicker, dual-wire construction (two parallel wires running the length of the strand) with individual LED pods attached perpendicularly. This design allows for safe separation at junctions. In contrast, series strings usually have a single thin wire with LEDs soldered directly in line—cutting here breaks the circuit.
Tip: Use a flashlight to inspect the wire near a bulb. If you see two distinct wires (positive and negative) with the LED bridging them, it’s likely parallel and cuttable. If there’s only one continuous wire with the LED in series, avoid cutting.
Step-by-Step Guide to Cutting LED String Lights Safely
If your LED string lights pass the safety checks, follow this detailed guide to cut them without damaging the lights or risking electrical hazards.
Gather the Right Tools
Using the correct tools ensures clean cuts and prevents wire fraying or insulation damage. You’ll need:
- Sharp wire cutters or scissors (preferably insulated)
- Wire strippers (if reattaching or splicing)
- Electrical tape or heat shrink tubing (for sealing cut ends)
- Multimeter (optional, to test continuity)
- Marker or highlighter (to mark cut points)
- Heat source (lighter or heat gun, for heat shrink)
Never use dull or rusted tools, as they can crush the wires and create sharp edges that may cause shorts.
Identify and Mark the Cut Point
Locate the manufacturer’s designated cut point (e.g., every 3rd bulb, every 2 feet). If none are marked, look for natural junctions—places where the LED pod connects to the main wire. These are usually the safest spots to cut, as they minimize disruption to the circuit.
Example: A 20-foot cuttable LED string has cut points every 2 feet. You want a 6-foot section. Count 3 cut points from one end, then mark the wire just before the next LED pod using a highlighter. This ensures you’re not severing a bulb or its connection.
Cut the Wire Cleanly
Position your wire cutters perpendicular to the wire at the marked point. Apply firm, even pressure to make a clean cut through both the positive and negative wires. Avoid angling the cutters, as this can leave sharp protrusions or uneven insulation.
Pro Tip: If the string has multiple parallel branches (e.g., for RGB LEDs with data, red, green, blue, and ground wires), cut only the power (positive) wire first. This prevents accidental shorts while handling the remaining wires. Then cut the negative and data wires separately.
Seal the Cut Ends to Prevent Moisture and Shorts
Exposed wire can lead to corrosion (especially outdoors) or accidental contact with metal surfaces. Immediately seal the cut end using one of these methods:
- Electrical tape: Wrap tightly 2–3 times around the cut, extending 1/2 inch beyond the insulation on both sides.
- Heat shrink tubing: Slide a small piece (3/8 inch) over the cut before sealing. Use a heat gun or lighter to shrink it for a watertight seal.
- Silicone sealant: Apply a small dab over the cut, then let it cure for 24 hours (ideal for outdoor use).
Important: Never leave cut wires bare, even indoors. Dust, humidity, and accidental contact can cause flickering or failure.
Test the Remaining Lights
Plug in the original end (with the power supply) and verify that the remaining LEDs light up. If they don’t:
- Check for loose or crushed wires at the cut point.
- Use a multimeter to test continuity between the power supply and the first LED.
- Ensure the cut didn’t sever a hidden data line (common in RGB strings).
If the lights work, you’ve successfully shortened your string. The cut end is now a dead end—do not attempt to power it or extend it without proper wiring.
Common Mistakes to Avoid When Cutting LED String Lights
Even with the right tools and knowledge, mistakes happen. Avoid these common pitfalls to keep your lights functional and safe.
Cutting at the Wrong Location
The most frequent error is cutting between designated cut points. For example, slicing a wire in the middle of a 3-LED section (instead of at the junction) disrupts the circuit and can damage adjacent LEDs. Always cut at marked points or bulb junctions.
Real-World Example: A user cuts a GE cuttable string 6 inches before a marked cut point to fit a narrow shelf. The lights turn off immediately. Inspection reveals the cut severed the power bus wire before the last LED, breaking the circuit. The fix? Use a shorter section or reattach the wire with a connector.
Failing to Seal Cut Ends
Leaving wires exposed is a recipe for disaster. Moisture can corrode the metal, and accidental contact with metal objects (like a ladder or gutter) can cause short circuits. Always seal cut ends, especially for outdoor or high-humidity environments.
Using Damaged or Low-Quality Tools
Dull scissors or improper wire cutters can crush the insulation, making it difficult to seal or reconnect wires. Invest in a good pair of insulated wire cutters (under $15) for clean, safe cuts.
Overloading the Power Supply After Cutting
While removing LEDs reduces the load, some power supplies (especially low-voltage transformers) have minimum load requirements. Cutting a 100-LED 12V string down to 20 LEDs may drop the load below the driver’s threshold, causing it to shut off or flicker. Check the power supply specs—many require at least 20–30% of the original load. If needed, add a dummy load resistor to stabilize the circuit.
Attempting to Cut Non-Cuttable Lights
Never cut series-wired, addressable, or non-modular LED strings. For example, cutting a 50-foot incandescent-style LED string (with bulbs in series) will render the entire strand useless. Similarly, slicing an RGBIC strip light (like those from Nanoleaf) disrupts the data signal and may require a new controller.
Tip: When in doubt, contact the manufacturer. Many brands offer customer support for technical questions about modification.
Creative Uses and Tips for Cut LED String Lights
Once you’ve safely shortened your LED string lights, the creative possibilities expand. Here’s how to make the most of your custom-length strands.
Custom Decor for Small Spaces
Use cut lights to frame mirrors, headboards, bookshelves, or window trim. For example, a 4-foot cut section wrapped around a bathroom mirror adds a spa-like glow without excess wire. Use adhesive clips or clear mounting tape to secure the lights without damaging walls.
DIY Light Art and Sculptures
Cut multiple sections and connect them with waterproof connectors to create 3D shapes—stars, hearts, or abstract forms. Hang them as wall art or centerpieces. Use colored or warm-white LEDs for a dramatic effect.
Outdoor and Garden Lighting
Shorten strings to fit around planters, trellises, or fence posts. Seal all cut ends with heat shrink tubing for weather resistance. For pathways, bury the sealed end under mulch or use outdoor-rated conduit to protect the wire.
Extend or Combine Strands
Cuttable strings often have connectors on both ends. Cut a long strand into two 25-foot sections, then use a male-to-female extension cable to join them with a gap (e.g., to skip a doorway). Ensure the extension matches the voltage and connector type (e.g., 2-pin, 3-pin, or 4-pin).
Emergency and Portable Lighting
Cut a 2–3 foot section and wire it to a portable battery pack for emergency use. Add a switch for convenience. This is ideal for power outages, camping, or car repairs.
Data Table: Cuttable vs. Non-Cuttable LED String Lights
| Feature | Cuttable LED Strings | Non-Cuttable LED Strings |
|---|---|---|
| Wiring Type | Parallel or series-parallel with cut points | Series or addressable (data-driven) |
| Cut Points | Marked (notches, symbols, or intervals) | None or not specified |
| Voltage | 12V, 24V, or 120V (with transformer) | 120V (direct plug-in) |
| Common Uses | Custom decor, DIY projects, commercial displays | Pre-set holiday lights, temporary decor |
| Tools Needed | Wire cutters, sealant, optional connectors | None (do not cut) |
| Risk if Cut | Low (if done correctly) | High (entire string fails) |
| Examples | Philips Hue Lightstrip, GE Cuttable LED, Luminoodle Pro | Standard Christmas lights, RGBIC strips, incandescent-style LEDs |
Conclusion
So, can you cut LED string lights? The answer is a cautious yes—but only if they’re designed for it. By understanding circuit types, checking for manufacturer guidance, and following safe cutting practices, you can customize your lighting for any space, event, or creative project. Always prioritize safety: use the right tools, cut at designated points, and seal exposed wires to prevent moisture damage and electrical hazards.
Remember, not all LED strings are created equal. Cuttable models offer flexibility, while non-cuttable ones are best left intact. When in doubt, consult the manual or reach out to the manufacturer. With the knowledge from this guide, you can confidently modify your LED string lights to fit your unique needs—whether it’s a cozy bedroom accent, a festive holiday display, or a stunning outdoor installation. Light up your world, one safe cut at a time.
Frequently Asked Questions
Can you cut LED string lights without damaging them?
Yes, you can cut LED string lights safely if they’re designed to be cut (look for marked cutting points). Always check the manufacturer’s instructions to avoid damaging the circuit or creating a safety hazard.
Where should you cut LED string lights to keep them working?
Cut only at the marked scissor icons or copper solder points, usually found every few inches. Cutting elsewhere may disrupt the circuit and cause the remaining lights to stop working.
Can you cut LED string lights and still use both pieces?
Most LED string lights can’t be reused after cutting unless they have end connectors or are part of a modular system. The remaining strip typically won’t power on without a sealed end or connector.
What tools do you need to cut LED string lights safely?
Use sharp scissors or wire cutters to cleanly cut at the designated points. A clean cut ensures no frayed wires and maintains the integrity of the remaining string.
Can you cut LED string lights and reconnect them later?
Only if the lights have built-in connectors or soldering points. For non-modular strings, cutting is usually a one-way process, so plan your length carefully before trimming.
Is it safe to cut LED string lights yourself?
Yes, it’s safe to cut LED string lights if you follow the manufacturer’s guidelines and use proper tools. Avoid cutting live wires or non-designated areas to prevent shorts or electrical risks.

