
Featured image for how to string christmas lights on a patio
Image source: images.clipartpanda.com
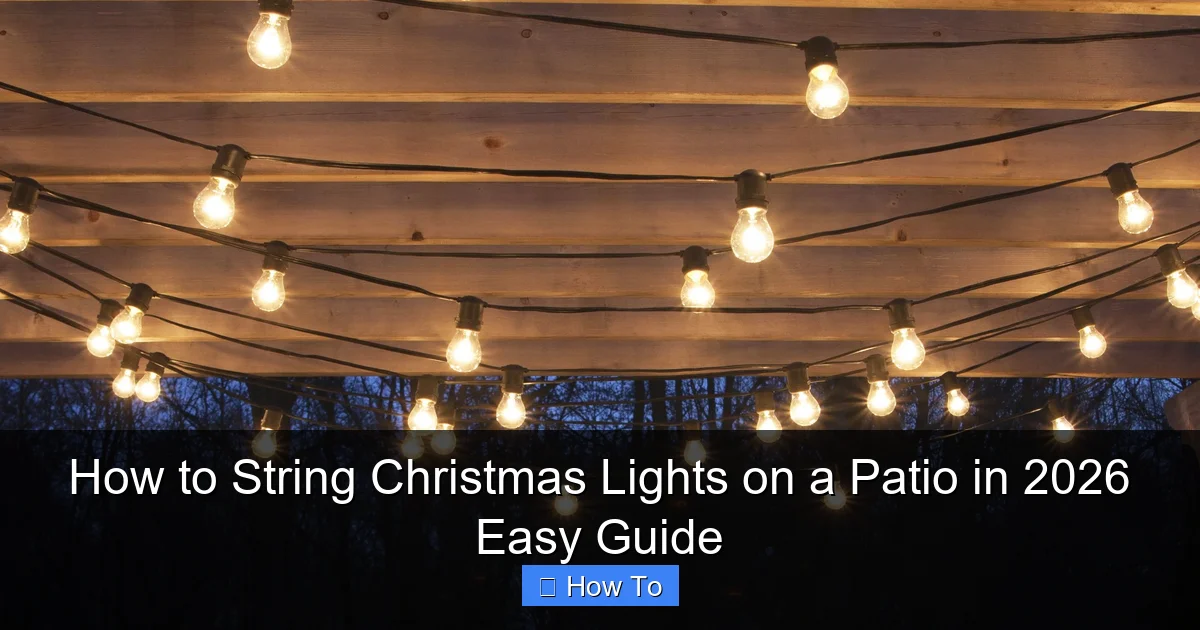
Transform your patio into a festive 2026 wonderland by choosing durable, weather-resistant LED lights and securing them with removable hooks or zip ties to avoid damage. Plan a layout that highlights architectural features, like railings or beams, and use a timer for effortless, energy-efficient illumination all season long.
“`html
How to String Christmas Lights on a Patio in 2026 Easy Guide
Key Takeaways
- Plan your layout: Sketch light placement before hanging to avoid mistakes.
- Use outdoor-rated lights: Ensure safety and durability with weatherproof strings.
- Secure with clips: Attach lights with hooks or clips—no nails or staples.
- Test before hanging: Check all bulbs and connections to save time later.
- Layer for depth: Combine string, icicle, and rope lights for visual impact.
- Control with timers: Automate on/off times to save energy and effort.
Why This Matters / Understanding the Problem
Let’s be honest: there’s nothing quite like walking out onto your patio on a crisp December evening, wrapped in a blanket, and seeing your space glow with warm, festive lights. But if you’ve ever tried to hang them without a plan, you know how quickly it can go sideways—lights tangled, hooks falling, and that one strand that just won’t reach the outlet. Been there. Done that. Learned the hard way.
That’s why this how to string Christmas lights on a patio in 2026 easy guide is different. It’s not about flashy marketing or over-the-top setups. It’s about real solutions for real people—like you—who want a beautiful, safe, and stress-free holiday display. Whether you’re lighting up a small balcony or a full backyard oasis, this guide walks you through every step with clarity, empathy, and a few laughs along the way.
We’ll cover everything from choosing the right tools to avoiding common pitfalls (like overloading circuits or using indoor lights outside). And yes, we’ll make sure your lights stay up through wind, rain, and even that unexpected January snowstorm.
What You Need
Before you start, let’s gather your gear. Think of this like prepping for a small DIY project—nothing too fancy, but having the right stuff makes all the difference. Here’s what you’ll need to successfully follow this how to string Christmas lights on a patio in 2026 easy guide:
Visual guide about how to string christmas lights on a patio
Image source: i.pinimg.com
- Outdoor-rated Christmas lights: Look for the “UL Listed Outdoor Use” label. Indoor lights won’t survive moisture or temperature swings.
- Extension cords (outdoor-rated): Get ones with three-prong plugs and weatherproof covers. Gauge matters—14-gauge is ideal for longer runs.
- Light clips or hooks: Use patio light clips designed for gutters, railings, or eaves. Avoid nails or staples—they damage surfaces and create safety hazards.
- Measuring tape: You don’t want to buy too many lights or run short halfway across the patio.
- Ladder or step stool: For high spots. Safety first—use a stable, non-slip model.
- Timer or smart plug: Saves energy and keeps your lights on a schedule. Bonus: you can control them with your phone.
- Zip ties or cable clips: For securing cords and avoiding tripping hazards.
- Gloves: Protect your hands from sharp edges and cold metal.
- Power source with GFCI outlet: Essential for outdoor safety. If your outlet isn’t GFCI, consider hiring an electrician to add one.
Pro Tip: Before buying anything, sketch a quick layout of your patio. Mark where you want lights—railings, roofline, pergola, trees—and measure each section. This helps you calculate how many strands you need and avoids last-minute trips to the store.
Step-by-Step Guide to How to String Christmas Lights on a Patio in 2026 Easy Guide
Step 1: Plan Your Layout (The Secret to a Stunning Display)
Start with a plan. I know it sounds boring, but it’s the most important step. Last year, I skipped this and ended up with a lopsided mess that looked like a raccoon had a party on my pergola. Lesson learned.
- Walk around your patio and decide where you want lights: railings, roofline, columns, trees, or even the ceiling of a covered porch.
- Sketch a simple diagram. Use colors or symbols to represent different light types (e.g., warm white for railings, colored for trees).
- Measure each section. For example: “Railing: 20 ft,” “Pergola beam: 15 ft,” “Roofline: 30 ft.”
- Calculate total length needed. Most light strands are 20–35 ft long. Don’t forget: you can connect multiple strands, but most are limited to 2–3 at a time.
Warning: Don’t daisy-chain more than the manufacturer recommends. Overloading can blow fuses or even cause a fire. Check the packaging—most say “Max 3 strands connected.”
This planning phase is where the how to string Christmas lights on a patio in 2026 easy guide truly shines—because it prevents the “I bought too many” or “I can’t reach the plug” disasters we’ve all faced.
Step 2: Choose the Right Lights for Your Patio
Not all Christmas lights are created equal. For patios, you need lights that can handle the elements—rain, wind, snow, and temperature swings.
- LED vs. Incandescent: Go LED. They’re brighter, last longer, use less power, and don’t get hot. Plus, they’re safer around kids and pets.
- Bulb Style:
- C9 bulbs: Large, classic look—great for rooflines.
- C7 bulbs: Slightly smaller, good for railings.
- Mini lights: Tiny bulbs—perfect for wrapping trees or outlining shapes.
- Net lights: Lay them over bushes or hedges.
- Color Temperature:
- Warm white (2700K–3000K): Cozy, inviting—ideal for most patios.
- Cool white (4000K+): Crisp, modern—better for minimalist spaces.
- Colored lights: Use sparingly. A pop of red or blue can be fun, but too much looks like a disco.
- Smart vs. Static:
- Want to change colors or patterns? Try smart LED lights (like Philips Hue or Govee). They’re pricier but super fun for parties.
- For a classic look, stick with static warm white.
Personal Insight: I used cool white lights last year and realized my patio looked more like a hospital waiting room than a cozy retreat. Switched to warm white—instant mood upgrade. Trust me: warmth wins.
Step 3: Install Mounting Hardware (The Right Way)
Now it’s time to attach the clips or hooks. This is where many people go wrong—using duct tape, nails, or zip ties that damage surfaces or fall off in the wind.
- For gutters or eaves: Use gutter clips. They snap on easily and don’t require drilling. Just hook them over the edge.
- For railings or posts: Use railing clips or adhesive hooks. Adhesive ones work great on smooth surfaces like metal or glass. For wood, use screw-in hooks (but pre-drill holes to avoid splitting).
- For pergolas or beams: Use eave clips or bungee cords with hooks. Bungee cords are great because they stretch and stay tight.
- For trees: Use tree wrap clips or fishing line (tied loosely to avoid girdling the trunk).
Warning: Avoid staples, nails, or tape. They damage surfaces, rust, or fall off. I once used tape on my metal railing—it melted in the sun and left a sticky mess. Never again.
Pro tip: Install clips before you start hanging lights. This lets you test spacing and avoid awkward gaps. For a professional look, space clips every 6–8 inches.
Step 4: Test Your Lights Before Hanging
Before you climb up and start stringing, test every strand. Plug them in, check for dead bulbs, and make sure they’re working. Nothing’s worse than finishing the job and realizing one strand is dead.
- Use a light tester (available at hardware stores) to find bad bulbs or fuses.
- If a strand doesn’t work, check the fuses in the plug. Replace them if needed.
- For LED strands, sometimes a single dead bulb kills the whole line. Replace it or use a “shunt” tool to bypass it.
Personal Insight: I once spent an hour hanging a strand only to realize it was dead. Now I test everything on the ground. Saves so much time and frustration.
Step 5: String the Lights (The Main Event)
Now the fun begins! But don’t rush—this step requires patience and a steady hand.
- Start at the power source. Hang the first strand near the outlet, leaving a few feet of cord for flexibility.
- Work outward from the plug. This avoids tangled cords and makes it easier to connect strands later.
- Use clips to secure the light sockets, not the wires. This reduces strain and prevents breaks.
- For railings: Drape lights evenly, with bulbs facing outward. Avoid sagging—it looks messy.
- For rooflines: Follow the contour of the roof. Use clips to keep lights taut and straight.
- For trees: Wrap lights from trunk to branches, moving upward in a spiral. Don’t wrap too tight.
- For pergolas: Hang lights along the beams, or drape them like a canopy. Use zip ties to secure cords to beams.
Pro Tip: Use a light hanger pole (like a fishing rod with a hook) to reach high spots without a ladder. Game-changer for second-story eaves.
When connecting strands, plug them in before hanging the next one. This lets you test the connection and avoid dead zones.
Step 6: Manage Cords and Power Sources
Messy cords are a tripping hazard and an eyesore. Here’s how to keep them tidy and safe.
- Use zip ties or cable clips to secure cords to railings, beams, or walls.
- Run cords along the edge of the patio, not across walkways. Use cord covers if they must cross.
- Use a timer or smart plug to control when lights turn on. Set it for 5 PM to 11 PM, or use a light sensor for dusk-to-dawn operation.
- If you’re using multiple outlets, label each cord with tape so you know which is which.
- For long runs, use a junction box (weatherproof) to connect multiple strands to one outlet.
Warning: Never use indoor extension cords outside. They’re not rated for moisture and can overheat. Always use outdoor-rated cords with GFCI protection.
Step 7: Test the Entire Setup
Once everything’s hung, plug it all in and test. Walk around your patio and check for:
- Dead bulbs or dark spots
- Loose clips or sagging lights
- Overheating cords (feel them—they should be warm, not hot)
- Tripping hazards
If you find issues, fix them now. It’s much easier than taking everything down later.
Step 8: Maintain and Monitor
Your work isn’t done yet. Weather and wear can affect your lights over time.
- Check weekly for loose clips, damaged cords, or dead bulbs.
- After heavy rain or wind, inspect for water in sockets (can cause shorts).
- Use a surge protector to guard against power spikes.
- If you’re using smart lights, update the app and check for firmware updates.
Personal Insight: I once ignored a small tear in a cord. A week later, the whole strand died. Now I do a quick weekly check—takes 5 minutes and saves headaches.
Pro Tips & Common Mistakes to Avoid
After years of trial and error (and a few “what was I thinking?” moments), here are my top insider tips and mistakes to dodge.
Pro Tips
- Use a light meter app: Some phones have apps that measure brightness. Helps you balance light levels across your patio.
- Layer your lighting: Combine string lights with spotlights or lanterns for depth. For example, hang string lights on the railing and use a spotlight on a tree.
- Go for symmetry: Even spacing looks more professional. Use clips every 6–8 inches for a clean line.
- Use battery-powered lights for hard-to-reach spots: Great for small trees or planters where cords are awkward.
- Store lights properly: Use light reels or cardboard tubes to avoid tangles next year.
Common Mistakes
- Using indoor lights outside: They’ll short out in the rain. Always check the label.
- Overloading circuits: Most outdoor outlets can handle 15–20 amps. Don’t plug in a space heater, lights, and a grill all at once.
- Ignoring local rules: Some HOAs or cities have rules about light brightness or duration. Check before you go all-out.
- Forgetting the timer: Lights left on all night waste energy and annoy neighbors. Use a timer or smart plug.
- Hanging lights in high-traffic areas: Avoid tripping hazards. Keep cords off walkways.
Personal Insight: I once hung lights across my patio’s main walkway. My dog tripped on a cord and knocked over a planter. Now I plan around foot traffic—saves plants and pride.
FAQs About How to String Christmas Lights on a Patio in 2026 Easy Guide
Can I use indoor Christmas lights on my patio?
No. Indoor lights aren’t rated for moisture, temperature swings, or UV exposure. They can short out, overheat, or become a fire hazard. Always use outdoor-rated lights with the “UL Listed Outdoor Use” label.
How many strands of lights can I connect together?
Most manufacturers limit it to 2–3 strands. Check the packaging. For example, if it says “Max 3,” don’t connect 4. Overloading can blow fuses or damage the lights.
What’s the best way to hang lights on a metal railing?
Use magnetic clips or adhesive hooks. Magnetic clips work great on steel railings. For aluminum, use adhesive hooks (like Command Outdoor Hooks). Avoid tape—it leaves residue and fails in heat.
How do I keep lights from sagging on a long railing?
Use clips every 6–8 inches to keep the line taut. For extra support, run a thin, clear fishing line behind the lights and tie it to the clips. The fishing line is nearly invisible but holds the weight.
Can I leave my patio lights on all night?
Technically, yes—but it’s not recommended. Use a timer or smart plug to turn them off after 10–11 PM. This saves energy, reduces light pollution, and prevents overheating.
What if my outlet isn’t GFCI?
Install a GFCI outlet. It’s essential for outdoor safety—it cuts power if it detects a ground fault (like water in a socket). If you’re not comfortable wiring it, hire an electrician. It’s worth the investment.
How do I take down lights without breaking them?
Unplug everything first. Remove clips one by one. Coil each strand gently and store it in a reel or cardboard tube. Label them by location (e.g., “railing,” “pergola”) so next year’s setup is easier.
Final Thoughts
Stringing Christmas lights on your patio doesn’t have to be a chore. With the right tools, a solid plan, and a little patience, you can create a magical space that brings joy all season long.
This how to string Christmas lights on a patio in 2026 easy guide is designed to be your go-to resource—whether you’re a first-timer or a seasoned decorator. Remember: start with a sketch, use outdoor-rated gear, test everything, and keep cords tidy.
And most importantly? Enjoy the process. There’s something special about stepping back at the end of the day, turning on the lights, and seeing your patio transform. It’s not just about decoration—it’s about creating moments, memories, and that cozy holiday feeling.
So grab your lights, put on some festive music, and get started. Your perfect patio glow-up is just a few clips away.
“`

