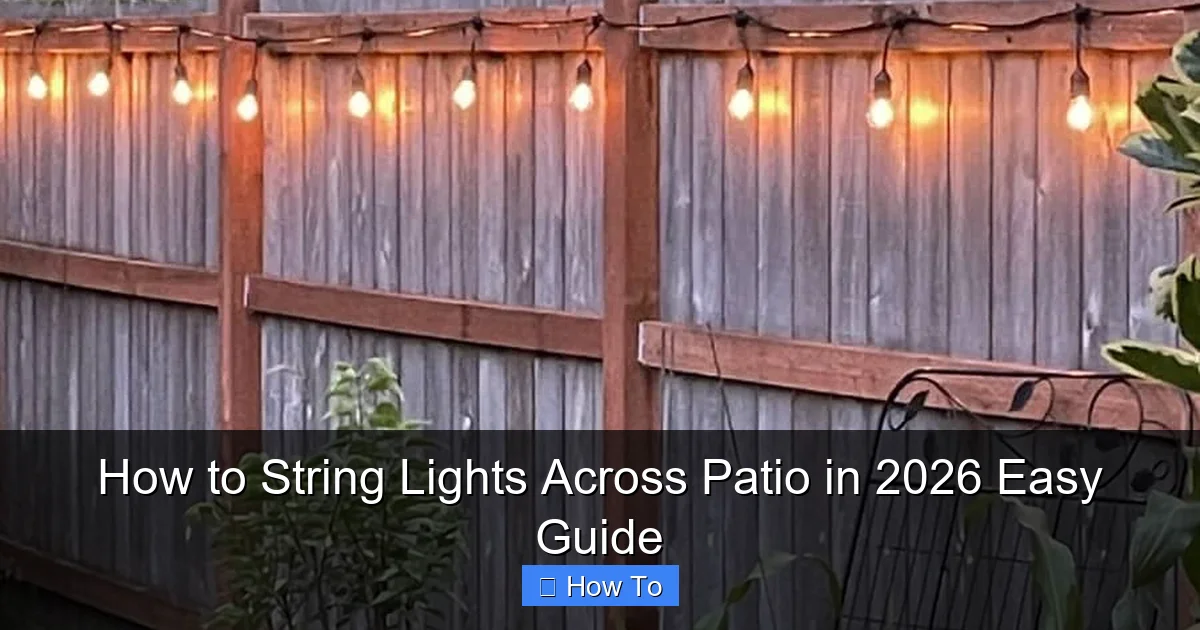
Featured image for how to string lights across patio
Image source: jessicawellinginteriors.com
Transform your patio into a stunning nighttime retreat by securely stringing lights along railings, posts, or overhead wires using weather-resistant fixtures and proper tension. This 2026 guide reveals the easiest, safest methods—no electrician needed—so you can create a warm, inviting glow in under an hour. From layout planning to plug-free solar options, achieve professional results with minimal effort.
“`html
How to String Lights Across Patio in 2026 Easy Guide
Key Takeaways
- Plan your layout first: Sketch light placement for balanced coverage and minimal cord clutter.
- Use weatherproof lights: Ensure all fixtures are rated for outdoor use in 2026 conditions.
- Secure with tension: Maintain even sag-free lines using adjustable hooks or turnbuckles.
- Measure twice, install once: Confirm spacing and length before mounting hardware to avoid rework.
- Hide cords creatively: Conceal wires under railings or with cord covers for a clean look.
- Test before finalizing: Check connections and brightness prior to permanent installation.
- Add smart controls: Use app or voice-controlled dimmers for effortless ambiance management.
Why This Matters / Understanding the Problem
Remember that one summer evening when you sat outside, the sky was turning pink, and you thought, “This would be perfect with some twinkling lights”? But then you looked around—no hooks, no poles, no idea where to even start. That’s the moment most of us realize: how to string lights across patio in 2026 easy guide isn’t just a nice-to-have. It’s a game-changer for outdoor living.
Patio string lights aren’t just for holidays anymore. They’re year-round mood boosters, turning your backyard into a cozy, inviting space for dinner parties, late-night chats, or solo stargazing. But here’s the catch: doing it wrong can lead to sagging wires, broken fixtures, or even electrical hazards. The good news? With the right approach, it’s simpler than you think—and totally worth the effort.
Whether you’ve got a small balcony or a sprawling backyard, this how to string lights across patio in 2026 easy guide walks you through every step, from planning to plugging in. No contractor needed. No guesswork. Just a warm, glowing space you’ll love.
What You Need
Before you start, gather your tools and materials. Don’t worry—most of this you might already have lying around. Here’s your checklist:
- Outdoor-rated string lights (LEDs are best—energy-efficient, durable, and safe)
- Measuring tape (to plan your layout)
- Drill & drill bits (for concrete, wood, or stucco, depending on your patio)
- Eye hooks or screw-in hooks (stainless steel or galvanized for weather resistance)
- Zip ties or outdoor-rated cable clips (for temporary or renter-friendly setups)
- Extension cords (outdoor-rated) (GFCI-protected for safety)
- Timer or smart plug (optional, but a lifesaver)
- Ladder (if your patio has high walls or a roof)
- Level (to keep things straight)
- Marker or chalk (to mark hook locations)
Pro tip: Buy lights with a longer plug-to-first-bulb distance. This lets you plug in from a low, safe spot instead of dangling a cord from the roof.
Step-by-Step Guide to How to String Lights Across Patio in 2026 Easy Guide
Step 1: Plan Your Layout
Start with a rough sketch of your patio. Where are the walls? The roof? The trees? Decide how you want the lights to flow—straight lines, zigzags, a canopy, or a grid. Think about how people move through the space. You don’t want lights blocking walkways or dangling in someone’s face during a BBQ.
For a classic look, many people go with a “canopy” or “web” pattern—lights crisscrossing from one wall to another. But if you’ve got a pergola or trees, use them as natural anchor points. The key is balance: too many lines can feel chaotic; too few can look sparse.
Use your measuring tape to calculate distances between anchor points. Most string lights come in 25- to 50-foot lengths, so plan accordingly. You can always connect multiple strands (check the manufacturer’s max connection limit—usually 3–5).
For this how to string lights across patio in 2026 easy guide, I recommend starting with a simple rectangle or triangle pattern. It’s easy to adjust and looks great.
Step 2: Choose the Right Anchor Points
Anchor points are where your lights will connect. They need to be strong, weather-resistant, and safe. Here’s what works:
- Walls or eaves (use screw-in hooks or eye hooks)
- Pergola beams (screw hooks directly into wood)
- Trees (use tree-safe cable clips or zip ties—never nail into bark)
- Fences or posts (screw hooks or use existing hardware)
- Ceiling joists (if covered) (use hooks or J-hooks)
Avoid weak spots: loose siding, rotting wood, or thin vinyl trim. If you’re unsure, test with a small hook first. Better safe than sorry.
For renters or those who can’t drill, try freestanding poles (like umbrella stands with hooks) or weighted base systems. They’re not permanent but still effective.
Step 3: Mark and Install Your Hooks
Once you’ve picked your anchor points, mark them with chalk or a marker. Use your level to keep lines straight—especially if you’re going for a grid or symmetrical look. A crooked line is hard to fix later.
Now, install the hooks:
- For wood or pergola beams: Drill a pilot hole, then screw in the eye hook by hand. Don’t over-tighten.
- For concrete, brick, or stucco: Use a masonry bit to drill a hole, insert a plastic anchor, then screw in the hook.
- For metal: Self-tapping screws work, but check for rust resistance.
Space hooks 4–6 feet apart for most lights. Closer spacing prevents sagging. If you’re using heavy lights (like vintage-style Edison bulbs), go 3–4 feet apart.
Double-check each hook is secure before moving on. A loose hook can ruin your whole setup.
Step 4: String the Lights
Now the fun part—hanging the lights! Start at the plug end. This way, you can plug in as you go and avoid tangled cords.
Unroll the string lights fully (don’t leave them coiled). Then:
- Attach the first bulb or connector to the starting hook using the built-in loop or a zip tie.
- Walk the lights along your planned path, gently guiding them to the next hook.
- At each hook, loop the cord through or use a zip tie to secure it. Don’t pull too tight—allow a little slack (1–2 inches) to prevent strain.
- For long runs, connect multiple strands. Always use outdoor-rated extension cords and avoid daisy-chaining more than 3–5 strands.
If you’re going over a roof or high wall, use a ladder safely. Have someone spot you, and never stretch the cord while standing on a wobbly surface.
For this how to string lights across patio in 2026 easy guide, I like to hang the lights slightly higher than eye level (6.5–7 feet). This keeps them visible but out of the way.
Step 5: Secure and Tidy the Cords
Now that the lights are up, it’s time to clean up the mess. Loose cords are tripping hazards and look sloppy.
Use outdoor-rated cable clips or zip ties to secure cords to walls, beams, or poles. Space clips every 1–2 feet. For vertical runs (like down a wall), use a “figure 8” pattern to allow for expansion and contraction in heat.
Hide cords behind trim, under eaves, or in conduit if needed. If you’re using extension cords, run them along the ground and cover with a cord cover (or a rug, if temporary).
Pro tip: Use a smart plug or timer so your lights turn on at dusk and off at bedtime. No more running outside to plug in!
Step 6: Test and Adjust
Plug in your lights and step back. Do they look even? Are any bulbs out? Is there sagging?
If a section sags, add an extra hook in the middle or adjust the slack. If a bulb is out, check the connections. Most LED strings have shunts—tiny wires that keep the circuit going even if one bulb fails. But if several are out, the whole strand might be bad.
Use your phone’s flashlight to inspect connections. Look for frayed wires, loose plugs, or water damage. If you see any, replace the strand.
For this how to string lights across patio in 2026 easy guide, I always test at night. That’s when you really see the glow—and any flaws.
Step 7: Weatherproof and Maintain
Your lights will face sun, rain, wind, and dust. A little maintenance goes a long way.
- Check connections monthly for corrosion or looseness.
- Wipe bulbs with a dry cloth to keep them bright.
- Trim nearby branches that could scratch or tangle the wires.
- Remove leaves and debris from hooks and plugs.
If you live in a cold climate, consider storing lights in winter to extend their life. Or, choose all-weather models rated for freezing temps.
For renters or seasonal use, take them down after the season. Store in a dry, dark place—preferably in their original box or a breathable bag.
Pro Tips & Common Mistakes to Avoid
Pro Tip: Use a light meter app (like Lux Light Meter) to check brightness. Too much glow can be overwhelming. Aim for 5–10 lux for ambient lighting.
Here’s what I’ve learned the hard way:
- Mistake: Overloading circuits. Don’t plug 10 strands into one outlet. Check the wattage and stay under 80% of the circuit’s capacity.
- Mistake: Using indoor lights outside. They’re not rated for moisture or UV. Stick to outdoor-rated or damp-rated lights.
- Mistake: Tightening cords too much. This stresses the wires and bulbs. A little slack is good.
- Mistake: Ignoring GFCI protection. Always use a GFCI outlet or adapter. It cuts power if there’s a short—saving you from shocks or fires.
- Mistake: Skipping a timer. Manually plugging in lights is a pain. A $10 smart plug saves time and energy.
Warning: Never use metal hooks near power lines or in wet areas. And avoid aluminum hooks—they corrode fast in salt air.
For renters: Talk to your landlord first. Many allow removable hooks (like tension rods or adhesive clips) if you promise to patch holes later.
For large patios: Consider solar-powered lights for remote areas. No wires, no outlets—just sun and shine.
FAQs About How to String Lights Across Patio in 2026 Easy Guide
Q: Can I use regular string lights outdoors?
A: Only if they’re labeled “outdoor-rated” or “damp-rated.” Indoor lights can short out in rain or humidity. Look for an IP44 or higher rating for water resistance.
Q: How high should I hang the lights?
A: 6.5 to 7 feet is ideal. High enough to walk under, low enough to glow. If you have a roof or pergola, hang them 1–2 feet below the edge.
Q: What if I don’t have walls to attach to?
A: Use freestanding poles, umbrella stands, or trees. You can even install temporary posts with ground anchors. For a renter-friendly option, try weighted bases or adhesive hooks (just test strength first).
Q: How do I connect multiple light strands?
A: Use the built-in connectors. But never exceed the manufacturer’s max (usually 3–5 strands). For longer runs, use an outdoor-rated extension cord with a GFCI plug.
Q: Are LED lights better than incandescent?
A: 100% yes. LEDs use less power, last longer (25,000+ hours), and stay cool. Incandescent bulbs burn out fast and get hot—bad for outdoor use.
Q: Can I leave my lights up all year?
A: It depends. If they’re all-weather rated and you live in a mild climate, yes. But in areas with snow, ice, or salt, take them down in winter to prevent damage.
Q: What’s the best pattern for a small patio?
A: A simple “X” or “V” shape from corner to corner. It adds depth without clutter. Or go vertical—string lights up a wall or post to draw the eye upward.
Final Thoughts
Transforming your patio with string lights isn’t about perfection—it’s about creating a space that feels like home. Whether you’re hosting a birthday dinner or enjoying a quiet night with a book, the right lighting sets the mood.
This how to string lights across patio in 2026 easy guide isn’t just a set of steps. It’s a way to reclaim your outdoor space, one twinkle at a time. You don’t need a degree in engineering or a huge budget. Just a little planning, the right tools, and the courage to try.
So grab your lights, call a friend, and get started. The first time you plug them in and see your patio glow? That’s the moment it all clicks. And trust me—you’ll be doing it again next year.
Remember: Start simple. Test often. And never skip the GFCI. Your future self will thank you.
Now go make your patio the place everyone wants to be.
“`

