Featured image for how to string lights on a patio
Image source: oclights.com
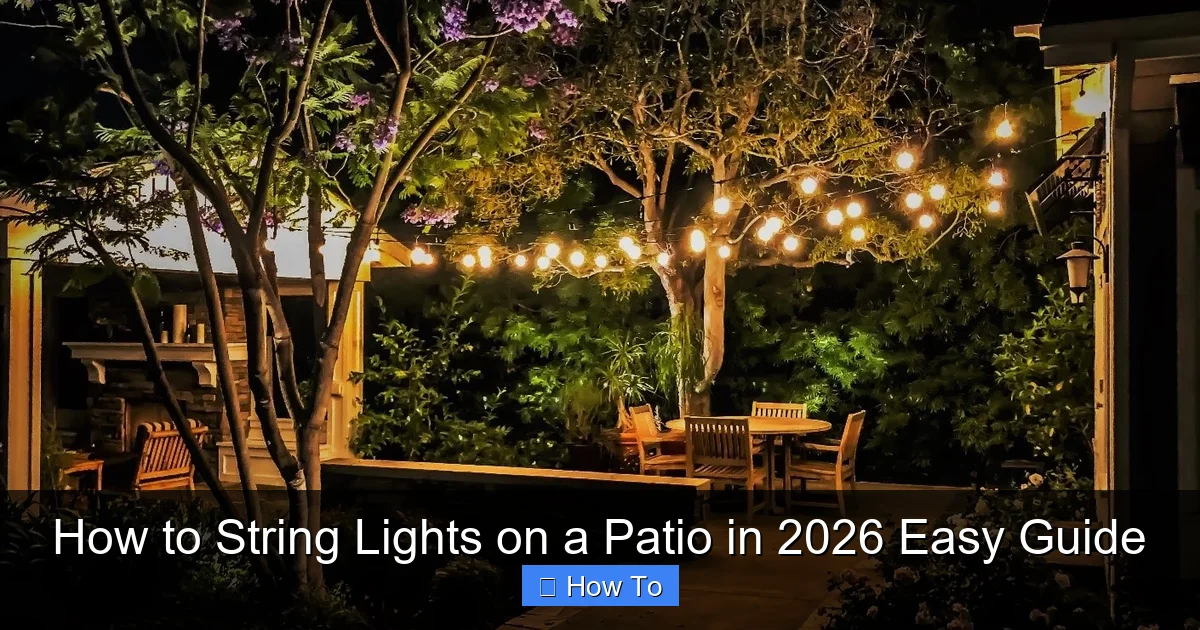
Transform your patio into a stunning nighttime retreat in 2026 with simple, secure string light installation techniques. Whether mounting on walls, pergolas, or freestanding poles, use weather-resistant lights and adjustable tension cables for a professional, droop-free look that lasts all season. With the right tools and layout planning, you can achieve a magical ambiance in under an hour.
“`html
How to String Lights on a Patio in 2026 Easy Guide
Key Takeaways
- Plan your layout first: Sketch light placement to avoid costly mistakes.
- Use durable fixtures: Choose weather-resistant hooks or clips for long-term use.
- Measure carefully: Ensure proper wire length before purchasing lights.
- Install dimmers early: Enhance ambiance with adjustable brightness options.
- Secure connections safely: Use waterproof covers to protect outdoor outlets.
- Space evenly: Maintain consistent gaps for balanced, professional-looking illumination.
Why This Matters / Understanding the Problem
Picture this: It’s a warm summer evening. You’re sipping iced tea, the grill’s still warm, and the sun has just dipped below the trees. You want to keep the party going, but your patio is too dark to see your guests’ smiles—or your own wine glass.
That’s where how to string lights on a patio in 2026 easy guide comes in. String lights aren’t just for holidays. They’re the secret sauce to turning a plain backyard into a cozy, inviting oasis. But let’s be honest: hanging them without looking like a tangled mess? That’s where most of us hit a wall.
I’ve been there. I once spent an entire Saturday trying to drape lights across my pergola, only to realize they were uneven, sagging, and one strand kept flickering like a haunted house. After trial, error, and a few YouTube rabbit holes, I cracked the code.
Now, I want to save you the frustration. Whether you’re hosting a birthday, a quiet night with your partner, or just want to enjoy your outdoor space after dark, this guide will walk you through how to string lights on a patio in 2026 easy guide—no electrician required.
“The best lighting isn’t about brightness—it’s about mood. And string lights are the mood-makers of outdoor design.”
What You Need
Before you start, gather your gear. You don’t need a toolbox full of gadgets—just a few essentials. Here’s what I always keep on hand:
- LED string lights (outdoor-rated) – Look for weatherproof, energy-efficient, and preferably dimmable. I love warm white (2700K) for that golden glow.
- Measuring tape – To plan your layout without overbuying.
- Drill with masonry and wood bits – For permanent installations. A cordless drill is a lifesaver.
- Hooks, anchors, or clips – I use stainless steel eye hooks for wood, masonry anchors for concrete, and adhesive clips for temporary setups.
- Extension cords and outdoor-rated power strips – Make sure they’re GFCI-protected for safety.
- Zip ties or cable clips – For clean, hidden wire management.
- Ladder – A sturdy, non-slip one. Safety first!
- Timer or smart plug (optional) – For hands-free on/off control.
- Gloves – To protect your hands from sharp edges or splinters.
Pro tip: Buy 10–15% more lights than you think you need. It’s better to have a little extra than to run short mid-install.
Step-by-Step Guide to How to String Lights on a Patio in 2026 Easy Guide
Step 1: Plan Your Layout (The Game-Changer)
Most people skip this step and regret it later. I used to just eyeball it—big mistake. Planning is where your lighting goes from “meh” to “wow.”
Start by sketching your patio on paper or using a free app like SketchUp Free. Mark where you want the lights: along railings, across the ceiling of a pergola, between trees, or in a crisscross pattern overhead.
Ask yourself:
- Where are the power sources?
- Will the lights block doors, windows, or walkways?
- Do I want a grid, a zigzag, or a single strand?
For a classic “floating canopy” look, I like to create a grid using 3–5 horizontal lines, spaced 2–3 feet apart vertically. This gives even coverage without looking cluttered.
Use painter’s tape to mark anchor points on the ground or walls. This lets you “see” the layout before drilling.
“I once skipped the tape test and drilled holes in the wrong spot—twice. Now I tape first. Always.”
Step 2: Choose the Right Mounting Method
Your patio’s structure decides how you’ll hang the lights. Here are the most common setups, based on what I’ve tried over the years:
For Wooden Pergolas or Fences
Use stainless steel eye hooks. They’re strong, rust-resistant, and easy to install. Drill pilot holes first (so the wood doesn’t split), then twist the hooks in by hand.
Space them 2–4 feet apart, depending on the weight of your lights. For heavier strands (like vintage Edison bulbs), go for 2 feet.
For Concrete or Brick Walls
Use masonry anchors and screws. A hammer drill with a masonry bit is your best friend here. Drill the hole, insert the anchor, and screw in the hook.
I’ve found that plastic anchors work fine for light loads, but metal ones last longer in wet climates.
For Trees or Posts
Wrap a soft rope or tree-friendly strap around the trunk, then attach an eye screw to the strap. Never nail or staple into trees—it damages the bark and can kill them.
For temporary setups (like for a party), use adhesive outdoor clips. Brands like Command or 3M make ones that stick to stucco, wood, and metal—just make sure they’re rated for outdoor use.
For No-Drill Options
Got a rental or hate drilling? Use freestanding poles (like shepherd’s hooks) or weighted bases with poles. I’ve used these for patios with no overhead structure—just place them in planters filled with sand or water for stability.
Step 3: Install the Anchors (Do It Right the First Time)
Now it’s time to drill. But don’t rush.
Start by marking your anchor points with a pencil. Double-check your layout. Then:
- Put on safety glasses and gloves.
- Use the right drill bit (wood for wood, masonry for concrete).
- Drill slowly. Let the tool do the work.
- For eye hooks, twist them in by hand until snug. Don’t overtighten—this can strip the wood or crack the anchor.
Pro tip: For pergolas, install hooks on the *underside* of the beams. This hides the hardware and keeps the look clean.
If you’re using adhesive clips, clean the surface with rubbing alcohol first. Dirt and grime kill adhesion.
“I once used cheap adhesive clips on a rainy night. The lights fell—and so did my pride. Invest in quality clips.”
Step 4: Test Your Lights Before Hanging
This is the step everyone forgets—and regrets.
Plug in your lights and run them along the ground. Check for:
- Dead bulbs
- Flickering strands
- Shorts or exposed wires
Replace any faulty strands. Nothing ruins a mood like a half-lit patio.
Also, test the length. Drape the lights along your planned path. Do they reach all the way? Do you need an extension cord or a second power source?
I once hung lights only to realize they were 6 inches short. Had to redo the whole thing. Learn from my pain.
Step 5: Hang the Lights (The Fun Part)
Now, the payoff.
Start at the power source. Hang the first hook, then gently drape the lights over each anchor. Don’t pull too tight—this can strain the wires and cause sagging over time.
For a grid pattern:
- Hang the first horizontal line (closest to the power source).
- Run the lights to the next hook, then loop back to the first row, creating a “ladder” effect.
- Repeat until you’ve covered the area.
For a zigzag pattern:
- Start at one corner, zigzagging across the patio.
- Use a second strand for the return path, or loop the same strand back (if it has a plug on both ends).
Keep the cord slack. A little dip between hooks looks intentional—too tight looks like a clothesline.
Step 6: Manage the Cords (No One Likes a Tangle)
This is where your patio goes from “nice” to “magazine-worthy.”
Use zip ties or cable clips to bundle cords together. Run them along beams, under railings, or behind plants. I like to use black zip ties—they’re less visible.
For extension cords:
- Keep them off the ground to avoid tripping.
- Use cord covers or bury them under mulch (if safe).
- Plug into a GFCI outlet or power strip—this protects against electric shock in wet weather.
Pro tip: Use a smart plug with an app or voice control (like Alexa or Google Home). Now you can turn the lights on with your phone or say, “Hey Google, patio lights on.”
Step 7: Add the Finishing Touches
You’re almost done. Now, refine the look.
- Trim excess zip ties with scissors for a clean finish.
- Hide power strips in planters or under benches.
- Add dimmers for mood control. I love the Lutron Aurora—it’s a wireless remote that works with any dimmable lights.
- Use timers so lights turn on at sunset and off at bedtime. No more forgetting to unplug!
Step back and admire your work. The how to string lights on a patio in 2026 easy guide is complete—and it looks amazing.
Pro Tips & Common Mistakes to Avoid
After years of trial and error, here’s what I’ve learned:
“Don’t use indoor lights outside. I learned this the hard way—rain shorted them out, and I had to replace the whole set.”
- Use LED lights – They last 25,000+ hours, use 80% less energy, and stay cool to the touch.
- Check the IP rating – For outdoor use, look for IP44 or higher (resists rain and dust).
- Don’t overload circuits – Most outdoor outlets handle 15 amps. If you’re running multiple strands, use a power strip with overload protection.
- Space lights evenly – Uneven spacing looks sloppy. Use your measuring tape!
- Avoid sharp turns – Bending lights at 90-degree angles can break wires inside.
- Think about maintenance – Use lights with replaceable bulbs. Vintage-style strands with sealed bulbs are a pain when one dies.
- Consider solar options – Great for remote areas, but they’re dimmer and less reliable in winter.
Common mistakes I see:
- Hanging lights too low – They should be at least 7 feet above the ground to avoid head bumps.
- Using nails or staples – These can pierce wires and cause shorts. Use hooks or clips instead.
- Ignoring weather – Wind can snap lights. Use heavier-duty strands for windy areas.
- Forgetting the exit – Make sure cords don’t block doors or stairs.
“I once hung lights across my patio door. My dog ran through and pulled them down. Now I plan for foot traffic.”
FAQs About How to String Lights on a Patio in 2026 Easy Guide
Q: Can I leave string lights up all year?
A: It depends. If they’re rated for outdoor use and you live in a mild climate, yes. But in areas with heavy rain, snow, or wind, I recommend taking them down in winter. UV rays and moisture can degrade wires and connectors. I store mine in a dry bin with silica gel packs to prevent mold.
Q: How do I hide the cords?
A: Use zip ties to run them along beams or railings. Tuck them behind plants or furniture. For ground-level cords, use cord covers or bury them under mulch (if not a tripping hazard). I also love using planters with hollow bases—just feed the cord through.
Q: What if I don’t have a power source nearby?
A: Use a battery-powered strand or solar lights. They’re less bright but perfect for ambiance. Or, run a long outdoor extension cord from your house (just keep it off the ground).
Q: How many lights do I need?
A: Measure your patio’s perimeter or grid area. For a 12×12 ft patio with a grid, I use 4–6 strands of 25-foot lights. Add 10% extra for loops and slack. When in doubt, buy one more strand.
Q: Can I connect multiple strands?
A: Yes, but check the manufacturer’s limit. Most LED strands can connect 2–3 together. Never exceed the amperage rating (usually 10–15 amps total).
Q: Are smart lights worth it?
A: If you love convenience, yes. I use smart plugs so I can turn the lights on from my phone or set a schedule. But they cost more and need Wi-Fi. For a simple setup, a timer works just as well.
Q: What’s the best light color for patios?
A: Warm white (2700K–3000K) is the gold standard. It’s cozy and flattering. Cool white (4000K+) feels too clinical. I avoid RGB color-changing lights—they’re fun at first, but most people end up using just white anyway.
Final Thoughts
There you have it—the real, no-fluff how to string lights on a patio in 2026 easy guide. No fancy tools, no guesswork, just clear steps that work.
Remember: It’s not about perfection. It’s about creating a space where you want to be. Whether you’re roasting marshmallows, reading a book, or just watching the stars, the right lighting makes all the difference.
Start small. Try one strand over your seating area. See how it feels. Then expand. And don’t stress if it’s not magazine-perfect. My first attempt looked like a spiderweb—but my friends still loved it.
Now go grab your lights, a cold drink, and make your patio the place to be. You’ve got this.
“The best lighting isn’t about how bright it is. It’s about how it makes you feel—and string lights? They make you feel at home.”
“`

