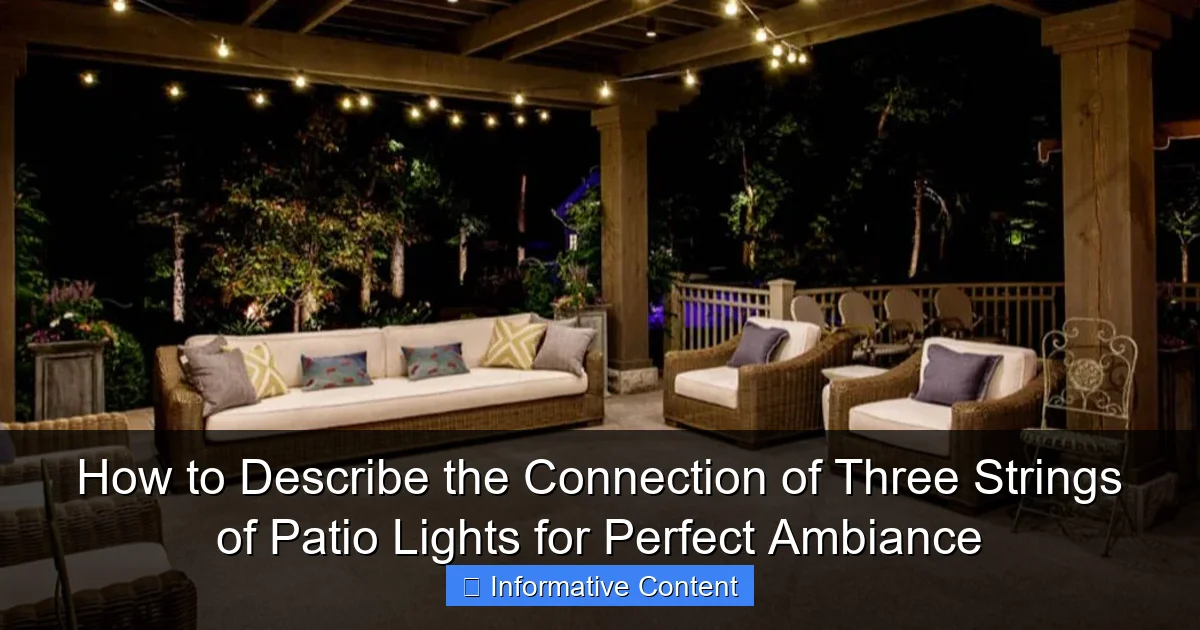
Featured image for describe the connection of three strings of patio lights
Image source: sebringdesignbuild.com
Connecting three strings of patio lights in series ensures even illumination and a seamless glow for your outdoor space, but always check for end-to-end compatibility and total wattage limits to avoid overloading the circuit. Use outdoor-rated connectors and a timer or dimmer to enhance ambiance while maintaining safety and energy efficiency.
Key Takeaways
- Plan your layout: Map light placement before connecting to ensure even coverage and avoid overloading circuits.
- Use end-to-end connectors: Link strings seamlessly with weatherproof connectors for a continuous, professional look.
- Check wattage limits: Stay within the manufacturer’s total wattage to prevent fire hazards or blown fuses.
- Test each string: Verify functionality before installation to troubleshoot faulty sections quickly.
- Secure connections: Elevate plugs off wet surfaces and use clips to prevent tugging or disconnection.
- Mix bulb types wisely: Combine warm/white LEDs for ambiance but match voltage for safe operation.
📑 Table of Contents
Understanding the Basics of Patio Light Strings
What Are Patio Light Strings?
Patio light strings, often called string lights or fairy lights, are decorative lighting solutions designed to create a warm and inviting atmosphere in outdoor spaces. These lights typically consist of a long electrical cord with evenly spaced bulbs, either incandescent or LED, that can be strung across patios, pergolas, trees, or fences. They come in various styles, including globe, Edison, and mini lights, each offering a unique visual effect. For example, globe lights give a modern, polished look, while Edison-style bulbs add a vintage charm. I remember stringing up my first set of patio lights—simple mini LEDs—and being amazed at how they transformed my dull backyard into a cozy retreat. That’s the magic of these little wonders.
Why Three Strings Matter
Using three strings of patio lights isn’t just a random choice; it’s a design principle rooted in balance and visual harmony. Think of it like layering in interior design: the first string sets the base, the second adds depth, and the third enhances the ambiance. This trio creates a fuller, more dynamic lighting effect compared to a single or even two strings. For instance, if you’re hosting a dinner party, the first string might outline the perimeter of your patio, the second could highlight a dining table, and the third might weave through nearby trees for a starry-night effect. It’s about creating zones of light that guide the eye and evoke emotion. Plus, having multiple strings gives you flexibility—you can dim some, change colors, or even sync them to music for special occasions.
Planning Your Lighting Layout
Assessing Your Space
Before you start draping lights everywhere, take a step back and assess your space. Walk around your patio at night with a flashlight to identify natural focal points—like a seating area, a water feature, or a favorite tree. Ask yourself: Where do people gather? Where do I want to draw attention? A common mistake I see is people rushing to hang lights without a plan, only to end up with a tangled mess or uneven coverage. For example, if your patio has a built-in fire pit, that’s a prime spot for the first string of lights. The second string could outline the walkway to the garden, and the third might frame a pergola or trellis. Pro tip: Sketch a rough diagram of your space and mark where each string will go. This saves time and frustration later.
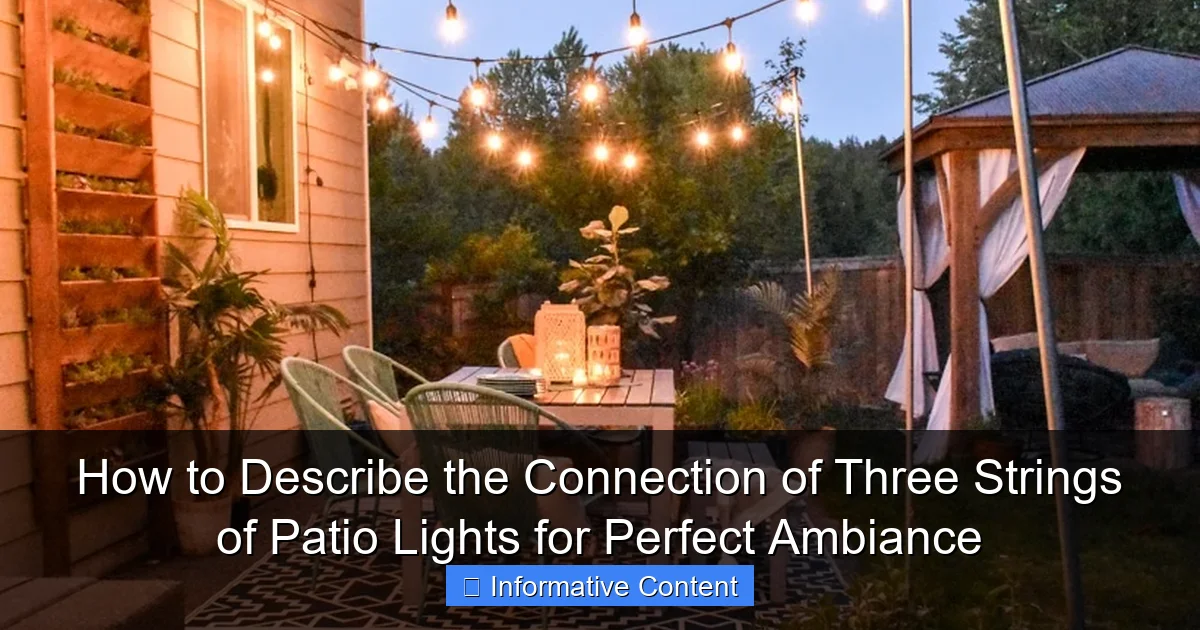
Visual guide about describe the connection of three strings of patio lights
Image source: jessicawellinginteriors.com
Choosing the Right Type of Lights
Not all patio lights are created equal, and choosing the right type is crucial for achieving your desired ambiance. Here’s a quick breakdown:
- LED Lights: Energy-efficient, long-lasting, and available in warm or cool tones. Great for year-round use. I use LED globe lights for their soft, diffused glow.
- Incandescent Lights: Offer a warm, traditional glow but use more energy and burn out faster. Perfect for vintage-themed patios.
- Smart Lights: Can be controlled via app or voice assistant, with color-changing and dimming options. Ideal for tech-savvy users who want flexibility.
- Solar-Powered Lights: Eco-friendly and easy to install, but may not be as bright or reliable in cloudy climates.
For a three-string setup, I recommend mixing and matching. For example, use warm white LEDs for the base string, color-changing smart lights for the second, and solar-powered fairy lights for the third. This creates a layered, dynamic look. Also, consider bulb spacing—wider spacing (12 inches) works for outlining, while closer spacing (6 inches) is better for ambient lighting.
Connecting the Strings: Wiring and Power Options
Understanding Electrical Safety
Safety first! When connecting three strings of patio lights, you need to think about power sources, wattage, and weatherproofing. Always check the manufacturer’s instructions for maximum string length and amperage. Most patio light strings are designed to connect end-to-end, but there’s a limit—usually 2-3 strings per outlet. Exceeding this can overload the circuit and cause a fire hazard. I learned this the hard way when my lights flickered and sparked after daisy-chaining too many strings. Now, I use a power strip with surge protection and never exceed the recommended load. Also, ensure all connections are waterproof—use silicone sealant or waterproof connectors, especially in rainy climates.
Methods for Connecting Strings
There are three main ways to connect your patio light strings:
- Daisy-Chain Connection: Plug the first string into the outlet, then connect the second to the first, and the third to the second. This is the simplest method but limits flexibility.
- Splitter or Y-Connector: Use a weatherproof splitter to connect all three strings to one outlet. This is great for symmetrical layouts, like framing a pergola.
- Separate Outlets: Run each string to its own outlet. This gives you the most control but requires more planning and may need outdoor-rated extension cords.
For example, if your patio has a central outlet, you might use a Y-connector to run one string to the left, one to the right, and one straight ahead. If you have outlets on opposite sides, separate connections work better. I once used a daisy-chain setup for a wedding reception—three strings of warm white LEDs—and it created a seamless, elegant glow. But for my home, I prefer splitters because they’re easier to manage.
Dealing with Power Constraints
Running out of outlets? No problem. Here are some solutions:
- Outdoor Extension Cords: Use heavy-duty, weather-resistant cords rated for outdoor use. Avoid cheap ones—they’re a safety hazard.
- Timer or Smart Plug: Automate your lights to turn on/off at set times. This saves energy and adds convenience.
- Low-Voltage Transformers: For long setups, consider low-voltage LED lights powered by a transformer. They’re safer and more efficient for large areas.
For instance, if your patio is far from the house, a 50-foot extension cord with a timer can power all three strings while keeping them on a schedule. I use a smart plug with Alexa—it’s handy for parties or when I forget to turn the lights off.
Installation Tips for a Seamless Look
Securing the Strings
Hanging patio lights isn’t just about plugging them in—it’s about making them look intentional and polished. Here’s how to secure your strings:
- Use Hooks or Clips: Install outdoor-rated hooks, adhesive clips, or zip ties. I prefer screw-in hooks for permanent setups and adhesive clips for temporary ones.
- Staple Guns: Use a low-voltage stapler for wooden surfaces. Be careful not to pierce the wire insulation.
- Masonry Anchors: For brick or stone, use masonry screws with plastic anchors. Pre-drill holes to avoid cracking.
- Zip Ties and Cable Clips: Great for trees or railings. Use reusable zip ties for easy adjustments.
For example, to frame a pergola, I installed screw-in hooks every 12 inches and draped the strings in a gentle “S” curve for a relaxed, organic look. For a more structured layout, like outlining a rectangular patio, I use clips every 6 inches for even spacing.
Creating Visual Flow
The key to a stunning three-string setup is creating visual flow. Think of your lights as a story—each string should lead the eye to the next. Here’s how:
- Layer Heights: Hang the first string lower (6-8 feet), the second slightly higher, and the third at the highest point (10-12 feet). This adds depth.
- Follow Natural Lines: Align strings with architectural features—rafters, railings, or tree branches. This feels intentional.
- Use Negative Space: Don’t cover every inch. Leave gaps to avoid a “Christmas tree” effect. For instance, I leave a 2-foot gap between strings for a breathable look.
- Highlight Focal Points: Use one string to draw attention to a fire pit, sculpture, or dining area. The other strings should support, not compete.
For example, in my backyard, the first string outlines the patio edge (6 feet high), the second runs along the pergola beams (8 feet), and the third drapes from a tree to the roof (10 feet). The result? A cozy, layered glow that feels natural and inviting.
Weatherproofing and Maintenance
Patio lights are exposed to the elements, so weatherproofing is essential. Here’s how to protect them:
- Seal Connections: Use silicone sealant or waterproof tape on all plug connections.
- Use GFCI Outlets: These shut off automatically if there’s a ground fault—critical for safety.
- Store Properly: When not in use, coil the strings loosely and store in a dry place. I use a plastic bin with silica gel packs to prevent moisture damage.
- Clean Regularly: Wipe bulbs with a damp cloth to remove dust and grime. Check for frayed wires or loose connections.
For instance, after a rainy season, I inspect my lights for corrosion and replace any damaged bulbs. This keeps them looking fresh and safe for years.
Creative Ideas for Three-String Setups
Themed Lighting
Why stop at warm white? Use your three strings to create a theme:
- Romantic: Soft pink and warm white LEDs. String one near the dining area, another around a gazebo, and the third through rose bushes.
- Party Mode: Color-changing smart lights. Sync them to music for a disco vibe.
- Seasonal: Orange and purple for Halloween, red and green for Christmas, or pastels for spring.
For example, I once used a three-string setup for a garden party: warm white for the base, amber for the tables, and blue for the water feature. It felt magical.
Zoning Your Patio
Use each string to define a different zone:
- String 1: Outline the seating area for conversation.
- String 2: Highlight the cooking or bar area for functionality.
- String 3: Frame the garden or pathway for visual interest.
This creates a functional yet beautiful space. I use this approach for my patio—it’s perfect for hosting or solo relaxation.
Data Table: Comparing Connection Methods
| Method | Pros | Cons | Best For |
| Daisy-Chain | Simple, minimal outlets needed | Limited flexibility, single point of failure | Straight-line layouts |
| Splitter | Symmetrical, easy to manage | Requires one central outlet | Pergolas, symmetrical designs |
| Separate Outlets | Maximum control, no daisy-chaining limits | More outlets needed, complex setup | Large patios, multi-zone layouts |
Final Thoughts: Crafting Your Perfect Ambiance
Connecting three strings of patio lights isn’t just about lighting—it’s about storytelling. Each string adds a layer to your outdoor space, guiding guests through a journey of light and shadow. Whether you’re aiming for cozy intimacy, lively celebration, or serene relaxation, the right connection method and layout can make all the difference. From choosing the perfect bulbs to securing them with care, every step shapes the ambiance you create. I’ve learned that patience and planning pay off—take the time to sketch your layout, test connections, and adjust until it feels right. And remember, there’s no single “correct” way. Your patio is an extension of your personality, so let the lights reflect that. So go ahead, experiment, and enjoy the process. Before you know it, you’ll have a space that’s not just lit, but truly alive with light and warmth. Happy stringing!
Frequently Asked Questions
How do I connect three strings of patio lights without overloading the circuit?
To safely connect three strings of patio lights, check the wattage or amperage rating on each strand and ensure the total doesn’t exceed your outdoor outlet’s capacity (usually 15–20 amps). Use a power strip with overload protection for added safety. This method helps maintain the perfect ambiance without tripping breakers.
Can I connect different lengths or brands of patio lights together?
Yes, you can connect different lengths or brands of patio lights as long as they use the same voltage and plug type. Ensure the total power draw stays within safe limits and use weatherproof connectors to protect the connections from moisture.
What’s the best way to describe the connection of three strings of patio lights for even lighting?
For even lighting, connect the three strings in a parallel layout—run them side by side or in a zigzag pattern across your patio. This avoids dark spots and creates a cohesive, inviting glow. Always secure connections with clips or hooks to prevent sagging.
Do I need a timer or dimmer when connecting three patio light strings?
Using a timer or dimmer is optional but highly recommended for convenience and ambiance. A timer automates on/off times, while a dimmer lets you adjust brightness to match the mood. Both work seamlessly with multiple connected light strings.
How can I hide the connectors when linking three patio light strings?
Hide connectors by tucking them under outdoor rugs, furniture, or using decorative covers. For a seamless look, run the lights along railings or trees where cords are less visible. This keeps the focus on your beautifully lit space.
Is it safe to leave three connected patio light strings on overnight?
It’s generally safe if the lights are LED (low heat/energy) and the circuit isn’t overloaded. However, always use a timer to turn them off after a few hours to reduce fire risk and extend bulb life. Check manufacturer guidelines for specific safety tips.

