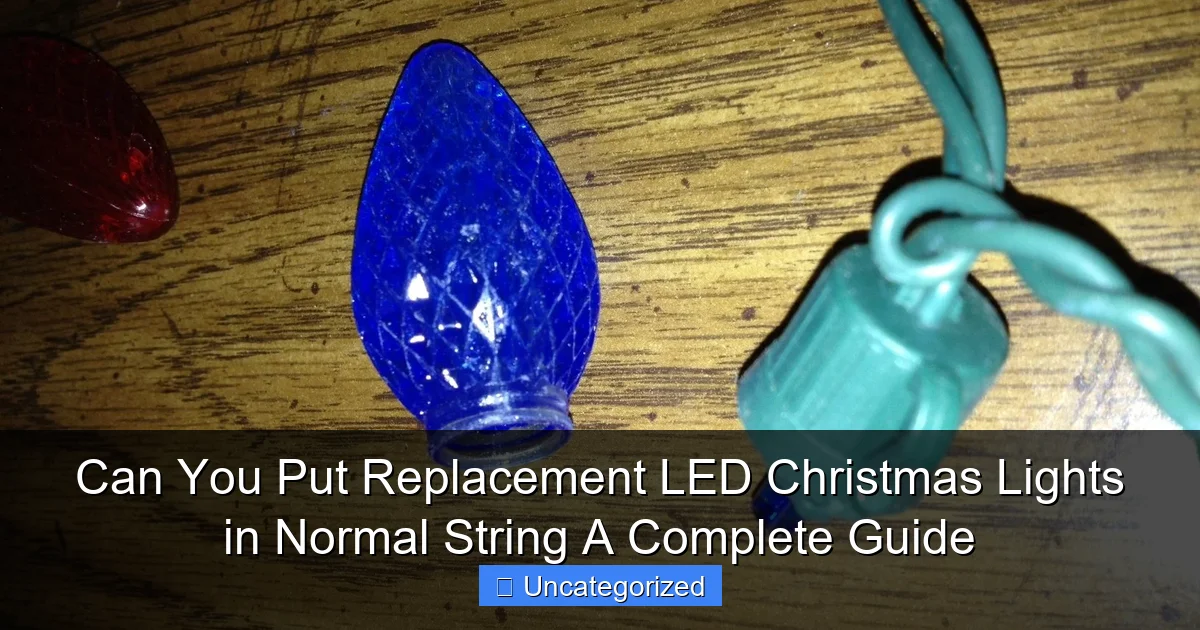
Featured image for can you put replacement led christmas lights in normal string
Image source: d3nevzfk7ii3be.cloudfront.net
Yes, you can put replacement LED Christmas lights in a normal string, provided the voltage and socket type match your original strand. Always check compatibility first—mismatched LEDs can cause flickering, damage, or fire hazards. Swapping in LEDs is a cost-effective, eco-friendly upgrade that boosts brightness and cuts energy use.
Key Takeaways
- Yes, you can replace incandescent bulbs with LED in most standard strings.
- Check voltage compatibility to avoid damaging LEDs or reducing lifespan.
- Mixing bulb types may cause uneven brightness or circuit issues.
- Use shunted sockets for LEDs if original string has shunted design.
- Test one LED first before fully converting the entire string.
- Save energy—LEDs use up to 80% less power than incandescent.
- Longer lifespan means fewer replacements and safer holiday lighting.
📑 Table of Contents
- The Magic of Holiday Lights and the Replacement Dilemma
- Understanding How Christmas Light Strings Work
- Can You Replace Incandescent Bulbs with LED Bulbs?
- Challenges and Risks of Mixing LED and Incandescent Lights
- Step-by-Step Guide: Replacing Bulbs Safely and Effectively
- When to Replace the Entire String Instead
- Conclusion: Making the Smart Choice for Your Holiday Lights
The Magic of Holiday Lights and the Replacement Dilemma
There’s something undeniably magical about the glow of Christmas lights twinkling through frosty winter nights. Whether they’re draped over the roofline, wrapped around a tree, or lining a walkway, these festive lights bring warmth and joy to the holiday season. But after years of use, even the most durable string lights eventually succumb to wear and tear. Burned-out bulbs, broken sockets, or frayed wiring can leave you with half-lit strands and a sense of holiday frustration. Many people assume the only solution is to replace the entire string—but what if you could simply swap out the faulty LED bulbs instead?
The idea of replacing individual LED Christmas lights in a standard string might sound like a simple fix, but it comes with a host of technical considerations. With the rise of LED technology, consumers are now faced with a new set of questions: Are all replacement LEDs compatible? Can you mix and match brands? Does voltage or wiring affect performance? And perhaps most importantly—can you put replacement LED Christmas lights in a normal string without risking damage, safety hazards, or a disappointing light display? This comprehensive guide will explore every aspect of the topic, helping you make informed decisions while saving money, reducing waste, and extending the life of your favorite holiday lights.
Understanding How Christmas Light Strings Work
Components of a Standard Light String
Before attempting any replacements, it’s essential to understand the anatomy of a traditional Christmas light string. Most standard strings consist of the following key components:
Visual guide about can you put replacement led christmas lights in normal string
Image source: i.ebayimg.com
- Sockets: Plastic or ceramic holders that secure the bulb and connect it to the circuit.
- Wiring: Insulated copper wires that carry electricity through the string. These are typically configured in either series or parallel circuits.
- Bulbs: The light-emitting units, traditionally incandescent but increasingly LED-based.
- Plug and End Connector: Allows the string to be plugged into a power source and daisy-chained with other strings.
- Fuse: A safety device inside the plug that prevents electrical overloads.
Understanding these parts helps clarify why not all replacements are plug-and-play, especially when mixing LED and incandescent components.
Series vs. Parallel Circuitry: The Key Difference
The way a light string is wired fundamentally affects how replacement bulbs work—or don’t work.
- Series Strings: In older incandescent strings, bulbs are wired in series. If one bulb fails, the entire circuit is broken, and the string goes dark. However, many modern series strings include “shunt resistors” that bypass the dead bulb, allowing the rest to stay lit.
- Parallel Strings: Each bulb has its own independent connection to the power line. A single bulb failure doesn’t affect the others. LED strings are almost always wired in parallel due to their low power draw and reliability.
When replacing LEDs in a normal (typically incandescent) string, the circuit type matters. For example, plugging a low-power LED into a high-voltage series circuit designed for incandescents can result in dim lighting, flickering, or even damage to the LED due to voltage spikes.
Voltage and Wattage Considerations
Standard incandescent Christmas lights typically run on 120V AC (in North America), with each bulb drawing around 5–10 watts. In contrast, LED bulbs operate at much lower wattages (0.5–1 watt) and often require internal drivers or resistors to handle the higher household voltage.
This mismatch means that simply inserting an LED into an incandescent socket doesn’t guarantee proper function. The LED may:
- Fail to light due to insufficient current
- Overheat due to voltage regulation issues
- Cause flickering or erratic behavior
For example, a 5mm LED bulb rated for 3V DC will not work reliably in a 120V AC socket without proper internal circuitry. Always check the voltage rating and AC/DC compatibility of any replacement LED before installation.
Can You Replace Incandescent Bulbs with LED Bulbs?
Technical Compatibility: The Short Answer
Yes, you can replace incandescent bulbs with LED bulbs in most normal Christmas light strings—but with important caveats. The success of the replacement depends on several factors:

Visual guide about can you put replacement led christmas lights in normal string
Image source: hr-led.com
- The type of circuit (series vs. parallel)
- The voltage and current requirements of the replacement LED
- Whether the LED is designed for retrofitting into standard sockets
- The presence of shunt resistors or bypass technology in the original string
For example, a 200-bulb C7 incandescent string wired in series with shunts can often accept LED replacements, as the shunt maintains circuit continuity. However, older strings without shunts will go dark if you remove an incandescent bulb, even if you insert a compatible LED.
Choosing the Right Replacement LEDs
Not all LED Christmas light bulbs are created equal. When selecting replacements for standard strings, look for these features:
- Socket Compatibility: Ensure the LED fits the base type (e.g., E12, E17, C7, C9). Most standard strings use E12 (candelabra) or E17 (intermediate) bases.
- Voltage Rating: Choose LEDs rated for 120V AC to match household outlets. Avoid 12V or 24V LEDs unless using a transformer.
- Wattage Equivalence: Match the LED’s wattage to the original bulb. For example, a 4W incandescent can be replaced with a 0.8W LED with similar brightness.
- Retrofit Design: Some manufacturers (like GE, Philips, and Holiday Bright Lights) offer “retrofit” LEDs specifically engineered for use in standard incandescent strings. These often include built-in rectifiers and resistors to handle AC voltage and prevent flickering.
Pro Tip: Test one LED in the string before replacing all bulbs. If it flickers or stays dim, the LED may not be compatible.
Real-World Example: Upgrading a 100-Bulb C7 String
Imagine you have a 10-year-old C7 incandescent string (100 bulbs, 120V, series-wired with shunts). You decide to replace all bulbs with LEDs to save energy. Here’s how to do it right:
- Remove one incandescent bulb and inspect the socket. Confirm it’s E17 base and clean of debris.
- Purchase 100 E17-based, 120V AC, 0.8W retrofit LEDs (e.g., “Holiday Bright Lights Retrofit LED Bulbs”).
- Install one LED and plug in the string. If it lights up steadily (no flickering), proceed.
- Replace all bulbs one by one. Avoid touching the metal contacts with bare hands to prevent static damage.
- After full replacement, check for consistent brightness and no hotspots.
Result: The string now uses only 80 watts (vs. 400 watts for incandescents), lasts 10x longer, and emits less heat—making it safer for indoor use.
Challenges and Risks of Mixing LED and Incandescent Lights
Electrical Mismatch and Dimming Issues
One of the most common problems when mixing LED and incandescent bulbs in the same string is dimming. LEDs draw significantly less current than incandescents. In a series circuit, this can cause:
- LEDs to appear dim or not light at all due to insufficient current
- Incandescent bulbs to glow faintly even when “off”
- Flickering or strobing effects as the circuit struggles to stabilize
For example, if you replace 50 of 100 bulbs in a series string with LEDs, the remaining incandescents may only receive 60–70% of normal voltage, resulting in a dull orange glow instead of bright white.
Thermal and Safety Concerns
While LEDs run cooler than incandescents, improper replacements can create new risks:
- Overheating: Some low-quality LEDs may overheat if the socket lacks proper ventilation or if the LED’s internal driver fails.
- Arcing: Poor contact between the LED base and socket can cause electrical arcing, especially in high-humidity environments.
- Fuse Blowout: In rare cases, mismatched LEDs can cause power surges that blow the string’s fuse.
Always use LEDs from reputable manufacturers and inspect sockets for corrosion or damage before installation.
Color and Brightness Inconsistencies
Even with compatible LEDs, you may notice visual inconsistencies:
- Color Temperature: Incandescents emit warm white (2700K), while LEDs can range from cool white (6000K) to warm white (2700K–3000K). Mixing types creates a patchy, uneven look.
- Brightness: A 4W incandescent is brighter than a 0.8W LED, even if both are labeled “equivalent.” This can make the string appear dim in spots.
- Directionality: LEDs emit light in a focused beam, while incandescents glow omnidirectionally. This affects how light spreads on trees or roofs.
Solution: For a uniform appearance, replace all bulbs with LEDs of the same color temperature and brightness. If partial replacement is necessary, group LEDs together (e.g., on one tree section) to minimize visual contrast.
Case Study: The “Half-LED” String Disaster
A homeowner in Colorado replaced 30 of 100 bulbs in a series string with cool-white LEDs. The result? The incandescent bulbs glowed dimly, the LEDs flickered, and the entire string emitted an eerie, strobing effect. After consulting an electrician, they learned the string lacked shunt resistors, and the low-current LEDs disrupted the series circuit. They resolved the issue by either replacing all bulbs with LEDs or reverting to incandescents.
Step-by-Step Guide: Replacing Bulbs Safely and Effectively
Tools and Materials You’ll Need
- Replacement LED bulbs (correct base, voltage, and wattage)
- Needle-nose pliers (for stubborn bulbs)
- Isopropyl alcohol and cotton swabs (to clean sockets)
- Multimeter (optional, for voltage testing)
- Work gloves (to protect hands from broken glass)
Step 1: Inspect the String
Before touching any bulbs:
- Unplug the string.
- Check for frayed wires, cracked sockets, or water damage. Discard the string if any major issues are found.
- Identify the bulb base type (E12, E17, C7, etc.) and circuit type (check the packaging or test with a bulb removal).
Step 2: Test One LED First
- Remove one incandescent bulb.
- Insert the replacement LED, ensuring it’s fully seated.
- Plug in the string. If the LED lights up steadily (no flickering), proceed.
- If the LED doesn’t light, flickers, or causes other bulbs to dim, the LED is incompatible. Try a different brand or model.
Step 3: Clean the Sockets
Dirty or corroded sockets can prevent proper contact. Use isopropyl alcohol and a cotton swab to clean:
- The inside of each socket
- The metal contacts on the bulb base
Allow sockets to dry completely before inserting LEDs.
Step 4: Replace Bulbs Gradually
Work in sections to avoid confusion:
- Replace 10–20 bulbs, then test the string.
- If successful, continue with the next section.
- Use a marker to label the string (e.g., “LEDs replaced: 1–50”) to track progress.
Step 5: Final Inspection and Safety Check
- Ensure all LEDs are secure and facing the same direction (for uniform light).
- Check for hotspots or flickering. Replace any faulty LEDs immediately.
- Inspect the plug and end connector for signs of overheating.
- Use a surge protector when plugging in the string.
Pro Tips for Longevity
- Store strings in a cool, dry place to prevent socket corrosion.
- Use LED-compatible timers or smart plugs to extend bulb life.
- Never exceed the manufacturer’s maximum string limit (e.g., 3–5 strings per outlet).
When to Replace the Entire String Instead
Signs It’s Time to Retire the String
While bulb replacement is a cost-effective option, there are situations where replacing the entire string is the smarter choice:
- Frayed or Damaged Wiring: Exposed wires pose a fire hazard.
- Cracked or Melting Sockets: Often a sign of overheating or age.
- No Shunt Resistors: Older series strings without shunts will fail if you remove any bulb—even for replacement.
- Frequent Bulb Failures: If multiple bulbs burn out annually, the string’s wiring may be degrading.
- Outdated Plug Type: Strings with non-polarized plugs or missing fuses don’t meet modern safety standards.
Cost-Benefit Analysis: Replacement vs. New String
Consider the following factors when deciding:
- Cost: 100 retrofit LEDs cost $20–$30. A new 100-bulb LED string costs $25–$40. If you need to replace more than 50% of bulbs, a new string may be more economical.
- Time: Replacing 100 bulbs takes 1–2 hours. A new string can be installed in 10 minutes.
- Energy Efficiency: New LED strings are often 20–30% more efficient than retrofitted ones due to optimized circuitry.
- Warranty: New strings typically come with 3–5 year warranties. Retrofitted strings have no warranty.
Data Table: Replacement vs. New String Comparison
| Factor | Retrofit LEDs | New LED String |
|---|---|---|
| Cost (100 bulbs) | $20–$30 | $25–$40 |
| Installation Time | 1–2 hours | 5–10 minutes |
| Energy Use | 80 watts | 60–70 watts |
| Lifespan | 25,000 hours (LEDs) | 50,000 hours (string) |
| Warranty | None | 3–5 years |
| Best For | Partial replacements, vintage strings | Full upgrades, damaged wiring |
Eco-Friendly Considerations
Retrofitting bulbs reduces electronic waste, but new LED strings are often more recyclable. Look for brands with take-back programs (e.g., Philips, GE) and avoid strings with non-removable LEDs.
Conclusion: Making the Smart Choice for Your Holiday Lights
The question “can you put replacement LED Christmas lights in normal string” has a nuanced answer: yes, but with conditions. With the right knowledge, tools, and compatible LEDs, you can successfully upgrade your traditional light strings to energy-efficient, long-lasting LEDs. This approach saves money, reduces waste, and preserves the nostalgic charm of vintage lights.
However, success depends on understanding your string’s circuitry, choosing high-quality retrofit LEDs, and addressing potential issues like dimming, flickering, and safety hazards. When in doubt, start with a test bulb and prioritize safety over convenience. For severely damaged or outdated strings, replacement may be the wiser—and safer—choice.
Ultimately, the holiday season is about joy, not frustration. Whether you’re retrofitting a cherished family string or installing a brand-new LED display, the goal is the same: to create a warm, inviting atmosphere that brings people together. By making informed decisions about your Christmas lights, you can enjoy a brighter, more sustainable, and stress-free holiday for years to come. So go ahead—light up the night, one LED at a time.
Frequently Asked Questions
Can you put replacement LED Christmas lights in a normal string?
Yes, you can use replacement LED Christmas lights in a normal string, as long as the voltage, wattage, and bulb base type (e.g., E12, E17) match the original string’s specifications. Always check the manufacturer’s guidelines to ensure compatibility and avoid overloading the circuit.
Are LED replacement bulbs safe for older incandescent light strings?
LED replacement bulbs are generally safe for older incandescent strings if they match the required voltage and base size. However, mixing LED and incandescent bulbs on the same string can cause uneven brightness or flickering due to different power draws.
What happens if I use non-LED replacement bulbs in an LED string?
Using non-LED replacement bulbs in an LED string can damage the wiring or controller, as incandescent bulbs draw more power and generate excess heat. Stick to LED replacements to maintain the efficiency and lifespan of your LED string lights.
Do replacement LED Christmas lights work with all string light brands?
Most replacement LED Christmas lights are universal, but some brands use proprietary sockets or voltages. Verify the bulb shape, base type, and voltage (usually 2.5V or 3V) to ensure they fit your specific string light model.
Can I replace individual bulbs or must I change the whole string?
You can replace individual bulbs if the string uses removable bulbs and the replacement matches the original specs. For integrated LED strings (non-removable), the entire string must be replaced if a section fails.
Why do my replacement LED Christmas lights flicker or not light up?
Flickering or failure to light is often caused by mismatched voltage, loose bulb connections, or a damaged socket. Test the bulb in another string or check for corrosion in the socket to troubleshoot the issue.

