Featured image for can you shorten a string of led christmas lights
Image source: storage.googleapis.com
Yes, you can shorten a string of LED Christmas lights—but only if they’re designed for it. Look for cut marks or modular connectors on the wiring, as these indicate safe trimming points; never cut freely, or you risk damaging the circuit. Always disconnect power first and follow manufacturer guidelines to avoid hazards and ensure your custom-length strand shines safely all season.
Key Takeaways
- Always check manufacturer guidelines before modifying LED light strings to avoid voiding warranties or causing hazards.
- Use only compatible connectors when shortening to maintain waterproofing and electrical safety.
- Cut at marked points only to prevent damaging circuits or creating fire risks.
- Test lights after shortening to ensure proper functionality and identify wiring errors.
- Avoid overloading circuits by verifying wattage limits post-modification for safe operation.
- Insulate exposed wires properly with heat-shrink tubing or electrical tape to prevent shorts.
📑 Table of Contents
- Understanding LED Christmas Lights and Their Design
- Can You Shorten a String of LED Christmas Lights? The Short Answer
- Step-by-Step Guide to Safely Shortening LED Christmas Lights
- Common Mistakes and How to Avoid Them
- Alternative Solutions When Shortening Isn’t Safe
- Data Table: LED String Shortening Compatibility by Type
- Conclusion: Safety First When Shortening LED Lights
Understanding LED Christmas Lights and Their Design
How LED Christmas Lights Differ from Traditional Incandescent Lights
Before attempting to modify any string of lights, it’s essential to understand the fundamental differences between LED (Light Emitting Diode) and traditional incandescent Christmas lights. Unlike incandescent bulbs, which produce light by heating a filament until it glows, LEDs rely on semiconductor technology to generate light. This makes them more energy-efficient, longer-lasting, and cooler to the touch. A typical LED string uses a series circuit or a combination of series-parallel configurations, where each LED is connected in a specific electrical path. Because of this, cutting or altering the string can disrupt the circuit, potentially causing the entire string to go dark or creating safety hazards.
Another key difference lies in the power supply and voltage regulation. LED lights often operate on lower voltages (12V, 24V, or 31V) compared to the standard 120V used by incandescent strings. Many LED sets use internal resistors or drivers to maintain consistent brightness and prevent overcurrent. These components are carefully calibrated to the original length and number of bulbs. When you shorten a string, you alter the total resistance and current load, which can lead to dimming, flickering, or even damage to the remaining LEDs. Understanding these design nuances is the first step toward determining whether and how you can safely shorten a string of LED Christmas lights.
Common Circuit Configurations in LED Light Strings
LED Christmas lights come in several circuit configurations, each with different implications for modification:
- Series Circuit: In this setup, all LEDs are connected end-to-end. Cutting one part breaks the entire circuit, so the rest of the lights won’t work. Series strings are common in older or simpler LED sets and are generally not safe to shorten.
- Parallel Circuit: Each LED or group of LEDs has its own independent circuit. This allows some sections to remain lit even if others are disconnected. However, true parallel LED strings are rare in consumer-grade holiday lights due to increased wiring complexity.
- Series-Parallel (Multi-String) Design: Most modern LED Christmas lights use this hybrid approach. The string is divided into multiple smaller sections (e.g., 10-20 LEDs), each wired in series, and these sections are connected in parallel. This design allows for partial functionality if one section fails. Crucially, it also makes shortening more feasible—but only if done correctly at the right junctions.
For example, a 100-LED string might be split into 10 groups of 10 LEDs in series, with each group connected in parallel to the main power line. If you identify the end of one of these groups, you can safely cut there and cap the wires, leaving the remaining 90 LEDs fully functional. However, cutting in the middle of a series group will disable that entire group and possibly affect voltage distribution to others.
Can You Shorten a String of LED Christmas Lights? The Short Answer
Yes, But With Critical Conditions
So, can you shorten a string of LED Christmas lights? The short answer is yes—but only under specific conditions and with careful attention to circuit design, wiring, and safety. Unlike incandescent strings, which can sometimes be cut and re-soldered with minimal risk, LED strings require a deeper understanding of their internal wiring and power requirements. Blindly cutting a string without checking its configuration can result in total failure, fire hazards, or damage to your home’s electrical system.
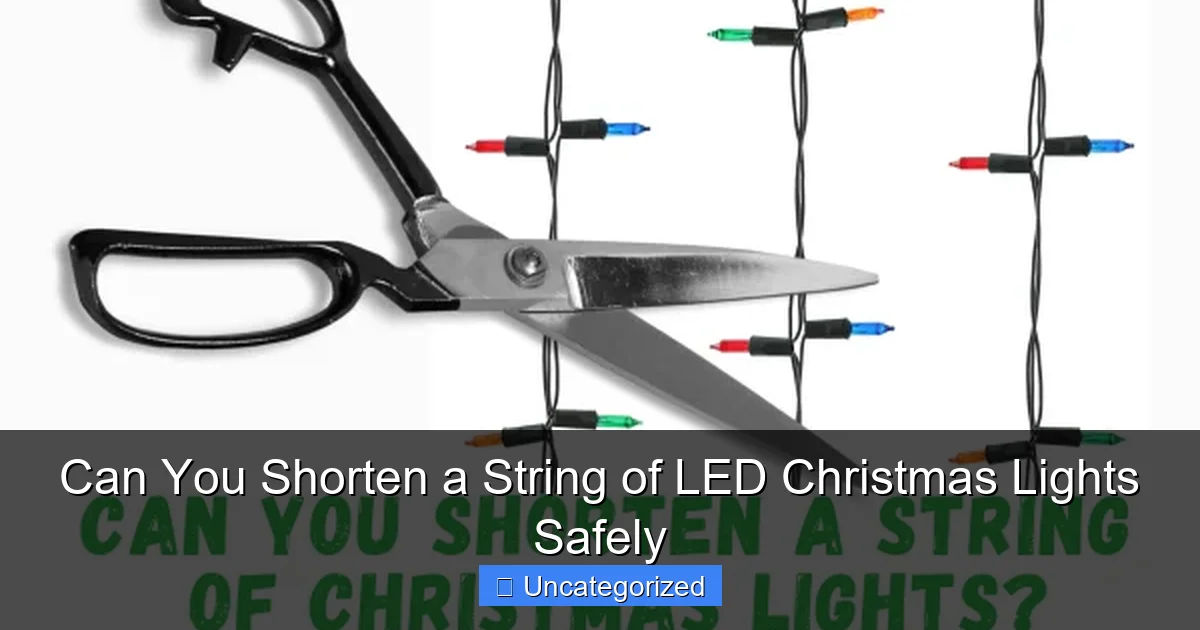
Visual guide about can you shorten a string of led christmas lights
Image source: assets.cdn.filesafe.space
Not all LED strings are created equal. Some are explicitly designed for modularity and come with built-in connectors or end-to-end splicing points. These are the safest to shorten. Others are sealed units with no visible junctions, making them unsuitable for modification. The key is to inspect the string before you cut. Look for:
- Visible wire junctions or connection points between LED groups
- Manufacturer labels indicating “cuttable” or “modular” design
- Extra wire length or connectors at both ends (common in end-to-end strings)
If none of these features are present, the string likely uses a continuous series circuit and should not be altered.
Why Shortening LED Lights Is Riskier Than It Seems
Many people assume that shortening a light string is as simple as cutting off the extra length and taping the ends. This is a dangerous misconception. LED strings are precision-engineered to operate at specific voltages and currents. When you remove LEDs, you change the load on the power supply. In a series circuit, this can cause the remaining LEDs to receive higher voltage than intended, leading to:
- Overvoltage: Excess voltage can burn out LEDs, shorten their lifespan, or cause overheating
- Flickering or Dimming: Improper current distribution may result in inconsistent brightness
- Short Circuits: Exposed wires or poor insulation can create sparks or fire hazards
For instance, a 120V LED string designed for 50 bulbs might use a series of 40 LEDs (each ~3V) to reach the required voltage. If you cut it down to 30 LEDs, the voltage per LED increases to 4V—well beyond the safe operating range. This can cause rapid failure of the remaining bulbs. Even in parallel or series-parallel designs, improper cutting can disrupt the balance, leading to similar issues.
Step-by-Step Guide to Safely Shortening LED Christmas Lights
Step 1: Identify the Circuit Type and Cutting Points
Before touching any wire, examine the light string closely. Start by turning it on and observing how the lights behave. If one bulb goes out and the rest remain lit, it’s likely a parallel or series-parallel design. If the whole string goes dark, it’s probably a series circuit and should not be cut.
Visual guide about can you shorten a string of led christmas lights
Image source: christmas-light-source.com
Next, look for physical indicators of modularity:
- Junctions where wires split or connect
- Connectors or plugs between LED groups
- Labels like “Cut Here” or “End of Section” (some premium brands include these)
For example, a GE Energy Efficient LED string might have 10 groups of 10 LEDs, with a small plastic connector between each group. These are safe cutting points. Use a multimeter to verify voltage and continuity if you’re unsure. Measure the voltage across one group—if it’s 12V or 24V, you’re likely at a parallel junction.
Step 2: Prepare the Tools and Workspace
You’ll need the following tools:
- Wire cutters (precision flush cutters work best)
- Wire strippers
- Electrical tape or heat-shrink tubing
- Multimeter (to test voltage and continuity)
- Heat gun (if using heat-shrink tubing)
- Insulated gloves (for safety)
Work on a clean, dry surface away from moisture. Ensure the lights are unplugged before you begin. Lay the string out straight to avoid kinks or stress on the wires.
Step 3: Cut at the Correct Junction
Using your cutters, snip the wires at the identified junction. For series-parallel strings, this is typically between two groups of LEDs. Cut only one wire (usually the positive or neutral line) to avoid shorting the circuit. For example, if you see two wires running between Group 5 and Group 6, cut the red (positive) wire only.
After cutting, strip about 1/2 inch of insulation from the cut ends. Use the multimeter to confirm no voltage is present before proceeding.
Step 4: Insulate and Protect the Exposed Wires
Proper insulation is crucial to prevent short circuits. Follow these steps:
- Twist the exposed ends together if you plan to reuse them (e.g., for a custom connector)
- Cover each cut end with electrical tape, wrapping tightly from the insulation to the wire
- For a more durable seal, slide heat-shrink tubing over the wire before cutting, then shrink it with a heat gun
- Alternatively, use waterproof wire caps (ideal for outdoor lights)
Never leave exposed wires unprotected. Moisture, dust, or accidental contact can cause sparks or fire.
Step 5: Test the Shortened String
Before installing the modified string, test it thoroughly:
- Plug it in briefly to check for consistent brightness
- Look for flickering, dimming, or overheating
- Use a multimeter to verify the voltage at the end of the string matches the original design
If everything works, proceed to installation. If not, unplug immediately and recheck your cuts and insulation.
Common Mistakes and How to Avoid Them
Cutting in the Middle of a Series Group
One of the most common errors is cutting a wire in the middle of a series-connected LED group. This breaks the circuit for that entire group, rendering it useless. In a 10-bulb series group, cutting between bulb 5 and 6 leaves both halves unlit. Always cut only at parallel junctions—the points where groups connect to the main power line.
Tip: Count the LEDs between junctions. If there are 10, 15, or 20 bulbs between connectors, you’re at a safe cutting point. If the number varies or there are no connectors, assume it’s a continuous series circuit.
Ignoring Voltage and Current Requirements
LEDs are sensitive to voltage fluctuations. Removing too many bulbs can cause overvoltage, while leaving too many can lead to undervoltage. To avoid this:
- Never shorten a string by more than 20-30% unless the manufacturer specifies it’s safe
- Use a resistor calculator (available online) to determine if you need to add a balancing resistor
- For large modifications, consider using a voltage regulator or driver
For example, if you shorten a 50-bulb string to 30 bulbs, calculate the new voltage per LED. If it exceeds the manufacturer’s rating (usually 3.0–3.4V), add a resistor in series to drop the excess voltage.
Using Inadequate Insulation
Electrical tape degrades over time, especially in outdoor environments. For long-term safety, use:
- Heat-shrink tubing (best for durability and moisture resistance)
- Waterproof wire nuts (rated for outdoor use)
- Silicone sealant over tape (for extra protection)
Never rely on tape alone for permanent installations. A single exposed wire can create a fire hazard.
Overloading the Power Supply
When you shorten a string, you reduce the total load on the power supply. While this might seem harmless, it can cause the power supply to operate inefficiently or overheat. Always:
- Check the power supply’s minimum load requirement (listed on the label)
- Ensure the shortened string meets this requirement
- If not, add a dummy load (e.g., a resistor) to simulate the original load
Alternative Solutions When Shortening Isn’t Safe
Using End-to-End Connectors
If your LED string isn’t cuttable, consider using end-to-end connectors to create a custom length. Many brands (e.g., Philips, Twinkly) sell modular LED strings with male/female connectors. You can purchase multiple shorter strings and link them as needed. For example, buy three 25-bulb strings instead of one 75-bulb string. This approach is safer, reversible, and often cheaper than modifying a single string.
Coiling and Hiding Excess Length
Sometimes, the simplest solution is to coil the extra length and hide it behind decorations or under tree branches. Use zip ties or light clips to secure the coil. This keeps the string intact and eliminates modification risks. For outdoor use, tuck the coil in a waterproof container or behind a bush.
Buying Pre-Shortened or Custom-Length Strings
Many retailers now offer LED strings in various lengths (e.g., 10, 25, 50, 75, 100 bulbs). Instead of modifying a long string, buy the exact length you need. Look for “cuttable” or “modular” options with clear junction points. Brands like Brizled and Holiday Brights offer strings with labeled cutting points.
Using LED Light Clips or Tracks
For precise placement, use LED light clips or tracks. These allow you to install lights without stretching or bunching. For example, if you have a 10-foot string but only need 7 feet, use clips to secure the first 7 feet and hide the rest.
Data Table: LED String Shortening Compatibility by Type
| LED String Type | Circuit Design | Safe to Shorten? | Cutting Points | Risks if Modified Incorrectly |
|---|---|---|---|---|
| Series-Parallel (Modular) | Groups of 10-20 LEDs in series, connected in parallel | ✅ Yes (at junctions) | Between groups, at connectors | Overvoltage, flickering, fire hazard |
| Pure Series | All LEDs in a single series chain | ❌ No | None | Total failure, overheating |
| End-to-End (Plug-in) | Multiple strings linked by connectors | ✅ Yes (remove entire sections) | At connectors | Short circuit if wires exposed |
| Sealed/Integrated | No visible junctions or connectors | ❌ No | None | Irreversible damage, safety hazards |
| Smart/Color-Changing | Series-parallel with controller | ⚠️ Only if labeled “cuttable” | Manufacturer-specified points | Controller malfunction, data loss |
Conclusion: Safety First When Shortening LED Lights
Shortening a string of LED Christmas lights is possible, but it’s not a DIY project for the faint of heart. The process requires a solid understanding of circuit design, proper tools, and meticulous attention to safety. While modular, series-parallel strings can be shortened at designated junctions, pure series or sealed units should never be altered. The risks—ranging from burned-out LEDs to electrical fires—far outweigh the convenience of a shorter string.
When in doubt, opt for safer alternatives: use end-to-end connectors, coil excess length, or purchase pre-sized strings. If you do proceed with modification, follow the steps outlined above, test thoroughly, and prioritize insulation and voltage balance. Remember, the goal is to enjoy a beautiful, safe holiday display—not to compromise safety for a few feet of wire. By respecting the technology and design of LED lights, you can create a stunning, hazard-free decoration that lasts for years to come.
Ultimately, the question isn’t just can you shorten LED Christmas lights, but should you. With the right knowledge and precautions, the answer can be yes. But without them, it’s a resounding no. Stay safe, stay informed, and happy decorating!
Frequently Asked Questions
Can you shorten a string of LED Christmas lights without damaging them?
Yes, you can safely shorten a string of LED Christmas lights if done carefully. Always cut at designated cut points (usually marked on the wiring) and seal the exposed wire to prevent short circuits or moisture damage.
Where should I cut a string of LED Christmas lights to shorten it?
Look for cut marks (often a small line or label on the wiring) between LEDs or at the end of a light section. Cutting here ensures you don’t disrupt the circuit or leave live wires exposed.
Is it safe to shorten a string of LED Christmas lights yourself?
It’s safe if you follow precautions: unplug the lights, use sharp wire cutters, and insulate the cut end with electrical tape or heat-shrink tubing. Avoid cutting non-marked areas to prevent electrical hazards.
Can shortening LED Christmas lights affect their brightness or performance?
If cut correctly at the designated points, the remaining lights will function normally. Improper cuts can cause voltage drops or burn out the remaining LEDs due to circuit damage.
What tools do I need to shorten a string of LED Christmas lights?
You’ll need wire cutters, electrical tape or heat-shrink tubing, and a multimeter (optional, to test connections). Always unplug the lights before working on them for safety.
Can you shorten a string of LED Christmas lights with a plug on both ends?
Yes, but you must cut only one end (near the plug) and seal the other end properly. Ensure the remaining plug is functional and the cut doesn’t compromise the circuit’s integrity.

