Featured image for hang heavy light string from metal patio cover
Image source: i.pinimg.com
Securely hanging heavy light strings from a metal patio cover starts with using the right hardware—opt for heavy-duty S-hooks, screw-in eye bolts, or stainless steel cable clamps designed to support significant weight. Always anchor lights to structural supports, not flimsy trim, and use insulated wiring or protective conduit to prevent electrical hazards and metal-on-wire damage. Prioritize safety with load-rated components and weather-resistant materials to ensure a stunning, long-lasting outdoor display.
Key Takeaways
- Inspect your patio cover for rust, weak spots, or structural damage before hanging.
- Use heavy-duty hooks or clips rated for outdoor use and weight capacity.
- Distribute weight evenly across multiple anchor points to prevent sagging or damage.
- Secure wires with zip ties or cable clips to avoid tripping hazards.
- Test stability by gently tugging lights before finalizing installation.
- Opt for LED lights to reduce weight and heat on metal structures.
📑 Table of Contents
- How to Hang Heavy Light String from Metal Patio Cover Safely
- Understanding Your Metal Patio Cover: What You’re Working With
- Choosing the Right Hardware for Heavy Light Strings
- Step-by-Step Installation Guide: From Planning to Power
- Weatherproofing and Long-Term Maintenance
- Creative Solutions and Troubleshooting Common Issues
- Data Table: Recommended Hardware for Different Scenarios
- Final Thoughts: Enjoy Your Glowing Patio
How to Hang Heavy Light String from Metal Patio Cover Safely
Picture this: It’s a warm summer evening, and you’re lounging on your patio, sipping a cool drink, when the sun starts to dip below the horizon. You flip a switch, and suddenly, the space is transformed—glowing with the soft, golden light of string lights. There’s something magical about that moment. But if you’ve ever tried to hang heavy light string from a metal patio cover, you know it’s not always smooth sailing. The last thing you want is for your beautiful setup to come crashing down—literally—because the hardware couldn’t handle the weight. I’ve been there: lights dangling precariously, hooks pulling out of the metal, and a mild panic as I scramble to fix it before guests arrive. It’s frustrating, but it doesn’t have to be that way.
Whether you’re creating a cozy ambiance for entertaining, adding safety lighting for nighttime use, or just trying to enjoy your outdoor space after dark, hanging lights from a metal patio cover should be easy and safe. The good news? With the right tools, techniques, and a little planning, you can secure your lights without damaging your patio structure or risking a fall. In this guide, I’ll walk you through everything you need to know—from assessing your patio’s structure to choosing the right hardware and installing lights that stay put. No more wobbly hooks or sagging strands. Just a beautifully lit patio that feels like a personal retreat.
Understanding Your Metal Patio Cover: What You’re Working With
Before you even think about drilling or clipping anything, it’s crucial to understand what kind of metal patio cover you have. Not all metal is the same, and the type, thickness, and design of your cover will determine what kind of hardware and installation method will work best. Skipping this step is like trying to bake a cake without checking if you have eggs—you might end up with a mess.
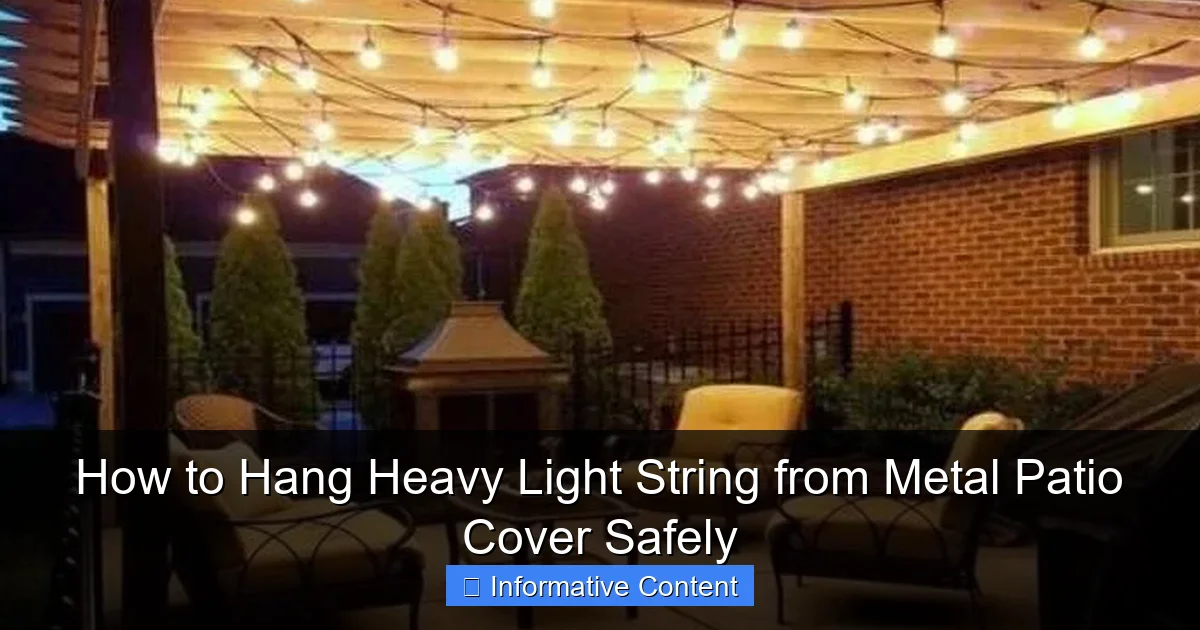
Visual guide about hang heavy light string from metal patio cover
Image source: oillampman.com
Types of Metal Patio Covers
Most metal patio covers fall into one of these categories:
- Aluminum: Lightweight, rust-resistant, and common in modern homes. Great for coastal areas but can be less rigid than steel.
- Steel: Stronger and more durable, but prone to rust if not properly coated. Often found in older or industrial-style patios.
- Galvanized Steel: Steel coated with zinc to resist corrosion. A solid middle ground between strength and longevity.
- Corrugated Metal Panels: Wavy, ribbed sheets used for roofing. These are strong but require special fasteners to avoid leaks.
For example, I once tried to hang lights on a thin aluminum cover using standard screws—big mistake. The metal flexed under the weight, and after a few days, the screws started pulling out. I had to switch to a more flexible mounting system (more on that later). The key takeaway? Know your material.
Assessing Load Capacity and Structure
Not every part of your patio cover is designed to hold weight. The main beams or rafters are usually the strongest, while the roof panels themselves may be thin and meant only to shed water. Here’s what to check:
- Look for structural supports: These are usually thicker metal beams running across the ceiling or roofline. They’re your safest bet for hanging heavier lights.
- Avoid roof seams or overlaps: These areas are weaker and more prone to leaks if punctured.
- Check for existing damage: Rust, dents, or warping can weaken the metal. Don’t hang anything heavy on compromised sections.
Pro tip: Use a stud finder (yes, they work on metal) or tap the surface gently with a screwdriver handle. A solid, deep sound usually means you’re on a support beam. A hollow, tinny sound? Probably just a panel.
Choosing the Right Hardware for Heavy Light Strings
Now that you know your patio’s structure, it’s time to pick the right hardware. This is where many people go wrong—they grab a bag of random hooks from the hardware store and hope for the best. But when you’re hanging a heavy light string from a metal patio cover, the wrong hardware can mean sagging lights, damaged metal, or even a safety hazard. The goal is to distribute the weight evenly and avoid puncturing or stressing the metal unnecessarily.
Best Fasteners for Metal Surfaces
Here are the most reliable options, depending on your needs:
- Self-Tapping Metal Screws: These are designed to drill into metal without pre-drilling. Use them on thicker steel or galvanized covers. Choose stainless steel or coated screws to prevent rust. Best for permanent installations or very heavy strings (over 20 lbs).
- Sheet Metal Screws: Slightly different from self-tappers—they need a pilot hole but offer a more secure hold. Ideal for aluminum or thinner steel.
- Magnetic Hooks or Clips: These are a game-changer for lightweight to medium strings. Strong neodymium magnets can hold 10–30 lbs, depending on size. No drilling needed, and they’re perfect for seasonal setups. Just make sure your metal is magnetic (steel, not aluminum).
- Adhesive-Backed Metal Hooks: Look for industrial-strength options (e.g., 3M VHB tape). These work well on clean, smooth metal and can hold 5–15 lbs. Great for temporary or renter-friendly setups.
- Wire Rope Clamps or Cable Grip Hangers: For long spans or heavy-duty installations, use wire rope with clamps. These distribute weight along the entire length of the string, not just at anchor points.
Weight Considerations and Spacing
How much weight are we talking? A typical heavy light string (e.g., 50 ft of commercial-grade Edison bulbs) can weigh 10–25 lbs, not including the weight of the cord, plugs, or any added decorations. Here’s a quick rule of thumb:
- Under 10 lbs: Adhesive hooks, small magnetic clips, or light-duty screws.
- 10–20 lbs: Magnetic hooks (medium size), sheet metal screws, or wire rope systems.
- Over 20 lbs: Self-tapping screws, heavy-duty magnetic mounts, or professional cable systems.
Spacing is just as important. Don’t hang the entire weight on two or three hooks. For a 50-ft string, use at least 5–7 anchor points (every 8–10 ft). This prevents sagging and reduces stress on each fastener. I once spaced my hooks 20 ft apart—my lights looked like a frown by week two.
Step-by-Step Installation Guide: From Planning to Power
Now comes the fun part: actually hanging the lights. But before you start drilling or clipping, let’s go through a clear, step-by-step process to ensure a safe, clean installation. I’ll walk you through my own method, which I’ve refined after years of trial and error (and a few near-disasters).
Step 1: Plan Your Layout and Measure
Grab a measuring tape and sketch your patio. Decide where you want the lights to run—along the edges, in a grid, or in a zigzag pattern. Measure the distance between anchor points. For example:
- If your patio is 16 ft wide, and you want hooks every 8 ft, you’ll need 3 hooks per side.
- For a 20-ft-long string, space anchors at 0 ft, 8 ft, 16 ft, and 20 ft (with the end hook).
Use painter’s tape to mark the spots temporarily. Step back and check the layout from different angles. Does it look balanced? Will the lights interfere with doors or furniture? Make adjustments before committing.
Step 2: Prepare the Metal Surface
Clean the areas where you’ll install hardware. Use a degreaser or rubbing alcohol to remove dust, oil, or oxidation. For adhesive hooks, this step is crucial—dirt can weaken the bond. If you’re using screws, wipe the area dry and let it air for a minute.
Step 3: Install the Hardware
Follow these tips based on your chosen method:
- For screws: Pre-drill a pilot hole (especially for aluminum) to prevent splitting. Use a drill with a metal bit. Screw in the hook or anchor until snug—don’t overtighten, or you could strip the metal.
- For magnetic hooks: Wipe the metal, then press the magnet firmly. Test it by tugging gently before hanging the lights.
- For adhesive hooks: Press and hold for 30 seconds. Wait 24 hours before hanging heavy loads (even if the package says 1 hour—trust me, wait).
Pro tip: Use a level to make sure hooks are aligned. Crooked hooks = crooked lights = instant regret.
Step 4: Hang the Lights
Start at one end and work your way to the other. For heavy strings, have a helper hold the middle section to avoid dragging the full weight across the hooks. Loop the light cord through each hook or clip, leaving a small “sag” (about 1–2 inches) between points to prevent tension on the bulbs.
For extra security, use cable ties to bundle the cord to the hooks. This prevents wind from yanking the lights loose. But don’t over-tighten—you don’t want to damage the insulation.
Step 5: Connect and Test
Once all lights are up, connect them to the power source. Use an outdoor-rated extension cord and a GFCI outlet (or a GFCI adapter) for safety. Turn them on and check for:
- Even brightness (no dim sections)
- Proper sag (no tight lines)
- Secure hooks (no wobbling)
If anything looks off, adjust now before it becomes a bigger issue.
Weatherproofing and Long-Term Maintenance
Your lights are up—great! But if you want them to last more than one season, you need to protect them from the elements. Wind, rain, and temperature changes can loosen hardware, corrode metal, and damage cords. Here’s how to keep your setup safe and functional year after year.
Protecting Hardware from Rust and Corrosion
Even stainless steel or coated screws can rust over time, especially in humid or salty environments. To prevent this:
- Apply a silicone sealant: After installing screws, dab a small amount of clear silicone caulk around the base to create a watertight seal.
- Use rubber washers: Place a rubber or neoprene washer between the hook and the metal. This reduces friction and keeps moisture out.
- Inspect annually: Once a year, check all hardware for rust, loosening, or wear. Tighten screws, replace corroded hooks, and reapply sealant as needed.
I learned this the hard way when a winter storm loosened a hook that had rusted through. A $5 tube of silicone could’ve saved me a weekend of repairs.
Safeguarding Light Cords and Connections
Water and electricity don’t mix. To keep your lights safe:
- Use outdoor-rated cords: Look for “SJTW” or “SJTOW” labels—these are designed for outdoor use.
- Elevate connections: Don’t let plugs or extension cords sit on the ground. Use a weatherproof outlet box or a cord hanger to keep them dry.
- Apply dielectric grease: This non-conductive grease repels moisture and prevents corrosion on plug contacts. A tiny dab goes a long way.
Seasonal Removal and Storage (If Needed)
If you live in an area with harsh winters or high winds, consider removing the lights seasonally. To avoid damage:
- Unplug and remove bulbs: This reduces weight and prevents breakage.
- Coil cords loosely: Avoid tight kinks. Store in a dry, temperature-controlled space.
- Label hardware: Keep hooks, screws, and clips in a labeled bag so you can reinstall quickly next season.
For year-round installations, just make sure your hardware is rated for continuous outdoor exposure.
Creative Solutions and Troubleshooting Common Issues
Even with the best planning, you might run into challenges. Maybe your patio cover is too thin for screws, or the wind keeps blowing your lights down. Here are some creative fixes and solutions I’ve discovered over the years.
Alternative Mounting Methods
If traditional hardware isn’t an option, try these:
- Clamp-on hooks: These attach to the edge of the patio cover (like a gutter) without drilling. Great for corrugated metal.
- Zip ties with adhesive pads: Use heavy-duty zip ties to secure lights to structural beams, then attach the ties to adhesive-backed hooks.
- Overhead cable systems: Run a stainless steel cable across the patio and hang lights from it. This works for very heavy or long strings.
I once used a cable system for a 100-ft string of market lights. It looked like a café in Paris—and held up through two hurricanes.
Fixing Sagging or Loose Lights
Got sagging? Don’t panic. Here’s how to fix it:
- Re-space the hooks: Move them closer together (every 5–6 ft instead of 8–10 ft).
- Add tensioners: Use turnbuckles or spring clips to tighten the line.
- Use a support wire: Run a thin wire along the length of the string and attach it to the hooks. The wire carries the weight; the lights just hang from it.
For loose hooks, remove them, fill the hole with epoxy or a metal sleeve, then reinstall. Or switch to a stronger fastener (e.g., from adhesive to magnetic).
Dealing with Wind and Movement
Wind can be a nightmare for outdoor lights. To reduce movement:
- Use flexible cords: Rubber-coated cords handle wind better than plastic.
- Add wind clips: Small rubber clips (like those used for tarps) can secure the cord to the hooks without damaging it.
- Install in a zigzag or “wave” pattern: This absorbs wind better than straight lines.
Data Table: Recommended Hardware for Different Scenarios
| Scenario | Recommended Hardware | Weight Capacity | Best For | Notes |
|---|---|---|---|---|
| Light string (under 10 lbs), aluminum cover | 3M VHB adhesive hooks | 5–15 lbs | Temporary or renter-friendly setups | Clean surface thoroughly; wait 24 hrs before loading |
| Medium string (10–20 lbs), steel cover | Medium magnetic hooks (20-lb rated) | 15–25 lbs | Year-round use; no drilling | Only works on magnetic metal (steel, not aluminum) |
| Heavy string (20+ lbs), galvanized steel | Stainless steel self-tapping screws + hooks | 30+ lbs | Permanent installations | Use rubber washers to prevent leaks |
| Corrugated metal roof | Clamp-on gutter hooks | 10–20 lbs | Edge mounting; no roof penetration | Ensure clamps fit the panel thickness |
| Long span (50+ ft), high wind area | Stainless steel cable + turnbuckles | 50+ lbs | Commercial or heavy-duty use | Requires professional installation for safety |
Final Thoughts: Enjoy Your Glowing Patio
Hanging a heavy light string from a metal patio cover doesn’t have to be a stressful, DIY nightmare. With the right approach—understanding your patio’s structure, choosing the right hardware, and planning for weather and maintenance—you can create a stunning, safe outdoor lighting setup that lasts. I’ve gone from panic-stricken installations to confident, professional-looking results, and you can too.
The key is to work with your patio’s design, not against it. Use the strong beams for heavy loads, avoid weak spots, and always prioritize safety over convenience. And remember: a little extra effort upfront (like waiting 24 hours for adhesive to cure or spacing hooks closer together) pays off in long-term reliability.
So go ahead—string those lights, invite your friends over, and enjoy your patio like never before. Whether it’s a quiet night with a book or a lively gathering under the stars, your glowing patio will be the backdrop to countless memories. Just don’t forget to turn them off before bed. (I’ve left mine on all night more times than I’d admit.)
Frequently Asked Questions
How do I hang heavy light string from metal patio cover without damaging it?
Use non-invasive methods like adjustable steel hooks or magnetic mounts designed for metal surfaces. These options securely hold heavy light strings without drilling or scratching the patio cover.
What’s the safest way to hang heavy light strings on a metal patio cover?
Distribute weight evenly using multiple anchor points (e.g., S-hooks or cable ties) to avoid stress on one spot. Always check the load capacity of your hardware to match the weight of your lights.
Can I use adhesive hooks to hang heavy light string from metal patio cover?
Adhesive hooks are not recommended for heavy light strings, as they may fail over time. Opt for metal-rated hooks or clamps for a safer, longer-lasting hold.
How do I prevent sagging when hanging long, heavy light strings?
Install intermediate support hooks every 2–3 feet to maintain tension. Use weather-resistant wire or zip ties to reinforce connections along the metal patio cover’s beams.
Do I need special hardware to hang heavy lights from a metal patio cover?
Yes, use corrosion-resistant hardware like stainless steel hooks or UV-resistant plastic clamps. These materials withstand outdoor conditions and support heavy light strings effectively.
How do I hang heavy light string from metal patio cover if I can’t drill holes?
Try adjustable pipe clamps or magnetic hooks for a no-drill solution. Both options grip metal securely and can be repositioned without leaving permanent marks.

