
Featured image for hang patio string lights
Image source: sengerson.com
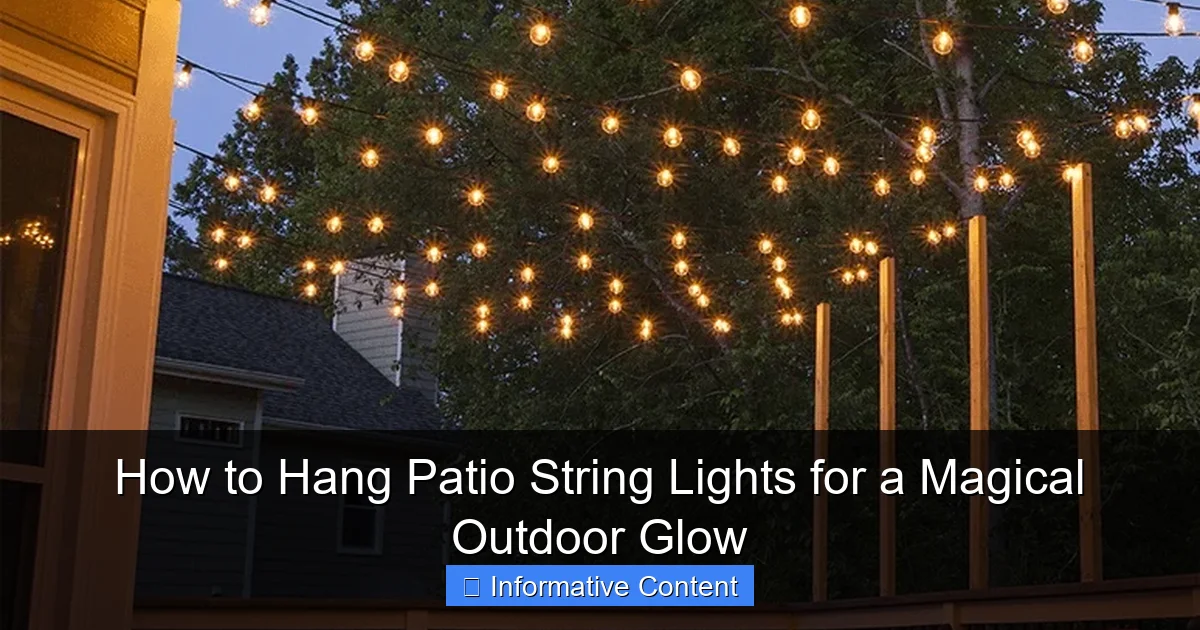
Transform your outdoor space into a magical retreat by hanging patio string lights with strategic placement and secure mounting. Use hooks, zip ties, or specialized clips to create even, droop-free lines that highlight key areas like seating zones or pathways—safety and spacing are key for a professional glow.
Key Takeaways
- Plan your layout first: Sketch the area to determine light placement and power sources.
- Choose the right lights: Opt for weather-resistant, LED string lights for durability and energy efficiency.
- Secure with proper hardware: Use hooks, clips, or cables to avoid damaging walls or trees.
- Test lights before hanging: Ensure all bulbs work to avoid rehanging later.
- Keep spacing even: Maintain consistent gaps between bulbs for a balanced, professional look.
- Use a timer or dimmer: Automate lighting for convenience and adjust brightness as needed.
📑 Table of Contents
- How to Hang Patio String Lights for a Magical Outdoor Glow
- 1. Planning Your Patio String Light Setup
- 2. Choosing the Right Patio String Lights
- 3. Installation Methods and Tools
- 4. Creative Design Ideas and Patterns
- 5. Safety, Maintenance, and Troubleshooting
- 6. Data Table: Comparing Popular Patio String Light Options
- Final Thoughts: Your Outdoor Oasis Awaits
How to Hang Patio String Lights for a Magical Outdoor Glow
There’s something undeniably magical about the soft, warm glow of patio string lights. Whether you’re hosting a summer barbecue, enjoying a quiet evening under the stars, or creating a romantic ambiance for a date night, these lights can transform your outdoor space into a cozy, inviting haven. I remember the first time I hung string lights in my backyard. I was skeptical—would they really make that much of a difference? Spoiler: they did. The transformation was instant. The space felt warmer, more welcoming, and honestly, a little bit like a fairytale.
But here’s the thing: hanging patio string lights isn’t as simple as just draping them across trees or poles. Done poorly, they can look messy, saggy, or even unsafe. Done right, they create a seamless, enchanting atmosphere that elevates your outdoor experience. Whether you’re a DIY novice or a seasoned pro, this guide will walk you through every step—from planning and choosing the right lights to installation and creative design ideas. By the end, you’ll have all the tools (and confidence) you need to create that magical outdoor glow you’ve always dreamed of.
1. Planning Your Patio String Light Setup
Before you start drilling holes or untangling lights, take a step back and plan your setup. A little foresight saves time, effort, and frustration down the line. Think of this as the blueprint phase—where you decide where the lights will go, how they’ll connect, and what kind of ambiance you’re aiming for.
Visual guide about hang patio string lights
Image source: kanglight.com
Assess Your Space and Layout
Start by measuring your patio, deck, or backyard area. Note the distances between potential anchor points—trees, walls, pergolas, railings, or posts. This helps you determine how many strands of lights you’ll need and whether you’ll require extension cords or power sources. For example, if you have a 20-foot gap between two trees, you’ll need either a single long strand or two shorter ones connected with a weatherproof extension cord.
Walk around your space at night with a flashlight. This simulates how the area will look once the lights are on. Pay attention to dark corners, seating areas, and pathways. You want to ensure even coverage without overdoing it. Too many lights can feel overwhelming; too few can leave your space feeling dim and disconnected.
Determine the Power Source
Most patio string lights are plug-in, so you’ll need access to an outdoor electrical outlet. If your patio is far from a power source, consider using a heavy-duty outdoor extension cord or a portable battery-powered option. Battery-powered lights are great for temporary setups or areas without easy access to power, but they may not last as long as wired ones.
Pro tip: Always check the wattage of your lights and make sure your extension cord or power strip can handle the load. Overloading a circuit can be a fire hazard, especially outdoors where moisture is a factor.
Sketch a Simple Design
Grab a piece of paper or use a free design app to sketch your layout. Decide on the pattern: zigzag, canopy, crisscross, or a simple line. For example, if you have a pergola, a crisscross pattern can create a starry-sky effect. If you’re working with a narrow deck, a single line along the railing might be all you need.
Include notes on where you’ll attach the lights—screws, hooks, zip ties, or adhesive clips—and how you’ll manage cords to keep them out of the way. Planning now means fewer surprises during installation.
2. Choosing the Right Patio String Lights
Not all string lights are created equal. With so many options available, it’s easy to get overwhelmed. But don’t worry—I’ve tested a bunch, and here’s what you need to know to pick the perfect ones for your space.
Types of Lights: Incandescent vs. LED
Incandescent lights give off a warm, nostalgic glow that many people love. They’re often cheaper upfront, but they use more energy, generate heat, and don’t last as long—usually 1,000 to 2,000 hours. I used these for years, but they burned out faster than I’d like, especially in humid climates.
LED lights, on the other hand, are energy-efficient, cool to the touch, and can last up to 25,000 hours. They come in warm white (similar to incandescent) and cool white (brighter, more modern). Some even have color options or twinkle effects. Yes, they cost more upfront, but they save money in the long run and are safer for outdoor use.
Bulb Shape and Spacing
Bulbs come in various shapes: globe, Edison (filament), mini, or lantern-style. Globe bulbs give a soft, diffused light—great for a cozy feel. Edison bulbs have that vintage, industrial look. Mini bulbs are subtle and work well for delicate designs.
Spacing matters too. Lights spaced 2-3 inches apart create a dense, twinkly effect. Wider spacing (6+ inches) gives a more open, minimalist look. For example, I used 2-inch spaced globe LEDs on my pergola, and it feels like a cloud of fireflies. For a bistro-style look, go with wider spacing.
Weather Resistance and Durability
Outdoor lights need to withstand rain, wind, and temperature changes. Look for lights with an IP rating of IP44 or higher (IP65 is ideal). This means they’re protected against splashing water and dust. Avoid lights labeled “indoor only”—they won’t last long outside.
Check the wire gauge too. Thicker wires (16-18 gauge) are more durable and less likely to kink or break. I once bought cheap lights with thin wires—within a month, the insulation cracked in the sun. Lesson learned: spend a little more for quality.
Smart and Dimmable Options
If you want extra control, consider smart lights. These connect to an app or voice assistant (like Alexa or Google Home) so you can turn them on/off, adjust brightness, or change colors remotely. Dimmable lights are great for setting the mood—bright for parties, soft for quiet nights.
Just remember: smart lights need a power source and a stable Wi-Fi connection. If your backyard is far from your router, you might need a Wi-Fi extender.
3. Installation Methods and Tools
Now for the fun part: putting up the lights! The method you choose depends on your space, the type of lights, and how permanent you want the setup to be. Here are the most common and effective techniques.
Using Screw Hooks or Eye Bolts
This is the most secure method for permanent installations. Screw hooks (or eye bolts) go into wood, pergolas, or sturdy walls. Use stainless steel or galvanized hooks to resist rust. For wood, pre-drill holes to avoid splitting. For masonry, use masonry anchors and screws.
Example: I installed eye bolts on my pergola beams. I spaced them 4 feet apart and used S-hooks to attach the lights. The result? A clean, taut line that doesn’t sag—even in wind.
Pro tip: Leave a little slack in the lights so they can move slightly in the breeze. Tight lines can snap during storms.
Zip Ties and Adhesive Clips
For a temporary or renter-friendly setup, zip ties and adhesive clips are lifesavers. Use heavy-duty outdoor zip ties for railings, fences, or thin poles. They’re strong and easy to remove. Adhesive clips (like Command Outdoor Hooks) work on smooth surfaces like stucco, siding, or glass. Just clean the surface first and follow the weight limits.
Caution: Adhesive clips can fail in extreme heat or cold. I once had a clip fall off during a heatwave—lesson: check them every few weeks.
Fishing Line or Wire Support
For large open spaces (like between trees), use a fishing line or galvanized wire as a support. Run the line between anchor points, then hang the lights from it with S-hooks or clips. This prevents sagging and gives a professional look.
How I did it: I ran a 50-lb test fishing line between two trees, then clipped my lights to it. The line is nearly invisible at night, and the lights float like stars. Just make sure the line is tight and secure.
Using Existing Structures
Don’t overlook what’s already there. Railings, eaves, gutters, and even furniture can be anchor points. Wrap lights around a railing or drape them from a gutter. For a whimsical touch, hang them from a swing set or umbrella.
One summer, I draped lights from my patio umbrella to the ground, creating a “light tent” effect. It was perfect for kids’ sleepovers and felt like a secret hideout.
4. Creative Design Ideas and Patterns
Once you’ve got the basics down, it’s time to get creative. The way you arrange your lights can completely change the vibe of your space. Here are some of my favorite designs—tried and tested in real backyards.
The Canopy (or “Starry Sky”) Effect
Perfect for pergolas or covered patios. Hang the lights in a crisscross or grid pattern overhead. Use a fishing line or wire grid as a base, then attach the lights at intersections. The result? A magical ceiling of light.
Tip: Vary the heights slightly for a more organic, natural look. I used this design for a friend’s wedding reception, and everyone said it felt like dining under the stars.
Zigzag or “V” Pattern
Ideal for open patios or between two walls. Run the lights diagonally from one anchor point to another, creating a zigzag or “V” shape. This works great for highlighting pathways or seating areas.
Example: I zigzagged lights from my house to a tree, then to a post. It created a natural “tunnel” effect that guided guests to the backyard.
Linear or “Bistro” Style
Simple and elegant. Hang lights in straight lines along a railing, fence, or pergola beam. This is great for small spaces or if you want a minimalist look. Add lanterns or planters for extra charm.
I used this style on my narrow deck. The clean lines made the space feel bigger and more open.
Layered Lighting
Combine multiple light types for depth. For example, hang string lights overhead, add lanterns on tables, and use solar path lights along the walkway. This creates a dynamic, inviting space.
One of my favorite setups: globe lights in the trees, Edison bulbs on the pergola, and fairy lights in glass jars on the table. It felt like a cozy outdoor lounge.
Seasonal Themes
Change your lights with the seasons! Use warm white in fall and winter, add colored bulbs for holidays, or switch to pastels in spring. I love using red and green for Christmas and pink and white for Valentine’s Day.
Bonus: Some smart lights let you program seasonal scenes—no need to change bulbs manually.
5. Safety, Maintenance, and Troubleshooting
Beautiful lights are great, but safety and longevity matter too. A few simple habits will keep your setup looking great year after year.
Electrical Safety
Always use outdoor-rated extension cords and power strips. Keep connections off the ground to avoid water damage. Use GFCI (Ground Fault Circuit Interrupter) outlets—they cut power if there’s a fault, preventing shocks.
Never overload a circuit. If you’re using multiple strands, check the total wattage and make sure it’s within the outlet’s capacity. I once blew a breaker by plugging in too many lights—lesson: use a power strip with surge protection.
Weatherproofing Connections
Outdoor plugs and connectors are vulnerable to moisture. Use waterproof electrical tape or silicone sealant on joints. For extra protection, place connections in a waterproof junction box or under an eave.
I keep my extension cord plug in a plastic container with a lid when not in use. It stays dry and lasts longer.
Regular Maintenance
Check your lights monthly. Look for frayed wires, loose connections, or burnt-out bulbs. Replace damaged strands promptly. Clean bulbs with a damp cloth to remove dust and cobwebs—this keeps them bright.
At the end of each season, take down the lights, check for damage, and store them in a cool, dry place. I use labeled bins so I can find them easily next year.
Troubleshooting Common Issues
- Sagging lights: Add more anchor points or use a support wire.
- Blown bulbs: Test each bulb with a light tester. Replace with the same type and voltage.
- Flickering: Check connections and tighten loose plugs.
- Adhesive clips failing: Switch to screw hooks or use outdoor-rated double-sided tape.
6. Data Table: Comparing Popular Patio String Light Options
Here’s a quick comparison of some top-rated patio string lights based on real-world testing and user reviews. This table covers price, durability, brightness, and key features to help you choose.
| Brand & Model | Type | Length | Bulb Spacing | Weather Resistance | Smart Features | Price (approx.) |
|---|---|---|---|---|---|---|
| Brightech Ambience Pro | LED Edison | 48 ft | 3 in | IP65 | None | $50 |
| Twinkle Star Globe | LED Globe | 25 ft | 2 in | IP44 | Remote dimmer | $35 |
| GE Color Effects | LED RGB | 24 ft | 3 in | IP65 | App control, 16 colors | $75 |
| Minetom Solar String | Solar LED | 33 ft | 2 in | IP65 | Solar-powered, auto on/off | $30 |
| Philips Hue Outdoor | LED Smart | 25 ft | 3 in | IP65 | Voice control, scenes, dimming | $100 |
This table gives you a snapshot, but remember: the best lights for you depend on your space, budget, and style. I personally love the Brightech Ambience Pro for its warm glow and durability—it’s survived three winters with no issues.
Final Thoughts: Your Outdoor Oasis Awaits
Hanging patio string lights isn’t just about adding light—it’s about creating a feeling. A place where memories are made, conversations flow, and the outside world fades away. Whether you go for a simple line along the railing or a full canopy of stars, the process should be fun, not stressful.
Remember: start with a plan, choose quality lights, and don’t be afraid to experiment. Some of my favorite setups came from happy accidents—like the time I draped lights over a tree branch just to see what happened. It ended up being the centerpiece of my backyard.
And don’t forget to enjoy the glow. Turn off the inside lights, pour yourself a drink, and sit outside for a few minutes. That’s when you’ll see the magic. The soft light, the gentle sway of the bulbs, the way shadows dance on the walls—it’s not just decoration. It’s transformation.
So go ahead. Grab your lights, your tools, and your courage. Your magical outdoor glow is just a few hooks, clips, and strands away.
Frequently Asked Questions
How do I hang patio string lights without drilling holes?
Use adhesive hooks, removable mounting strips, or tension rods between railings or trees. These damage-free solutions work well for renters or delicate surfaces while still providing sturdy support for string lights.
What’s the best way to hang patio string lights for a balanced look?
Plan your layout by measuring the area first, then space hooks or anchors evenly to avoid sagging. For a grid or zigzag pattern, use a guide rope to maintain consistent spacing between bulbs.
Can I hang string lights on a patio with no nearby power source?
Yes! Use solar-powered string lights or battery-operated LED sets with a timer. Both options offer flexibility and eliminate the need for extension cords or outdoor outlets.
How do I secure patio string lights in windy areas?
Opt for weather-resistant lights and reinforce connections with zip ties or twist ties. Avoid loose loops, and anchor the cord to sturdy structures like pergolas or railings to reduce swaying.
How many patio string lights do I need to cover my space?
Measure the perimeter or layout area and add 10–15% extra for draping or overlap. For example, a 20-foot span would require a 22–24 foot string light strand for optimal coverage.
Can I connect multiple patio string lights together?
Most commercial string lights can be connected end-to-end, but check the manufacturer’s wattage limit. Use outdoor-rated extension cords and avoid overloading circuits for safety.

