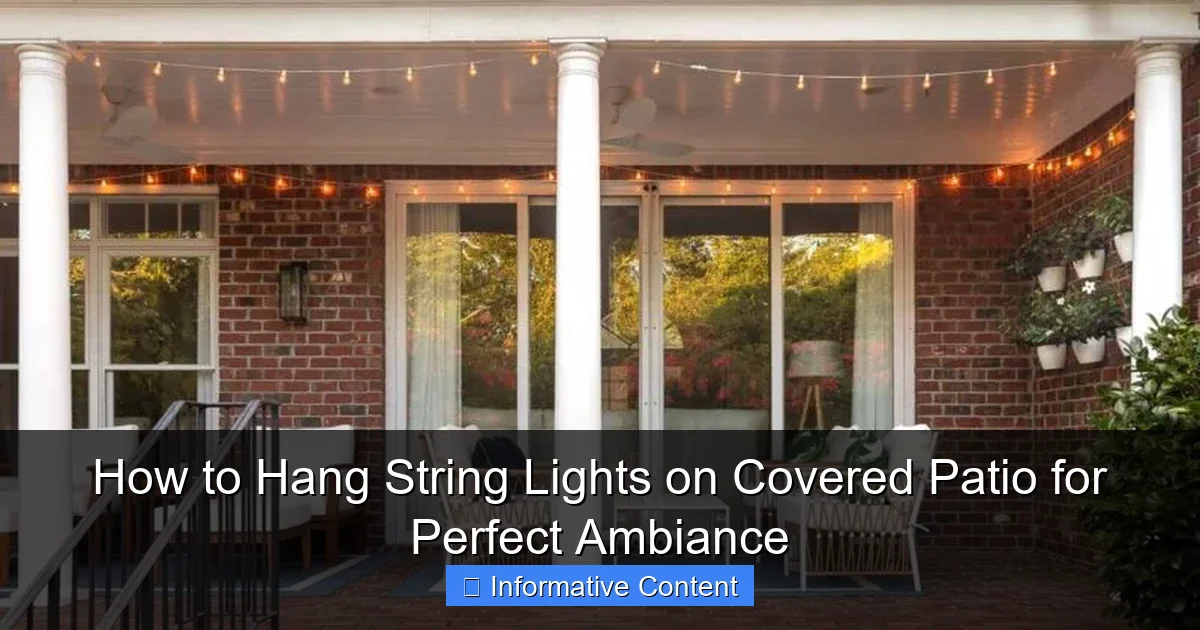
Featured image for hang string lights on covered patio
Image source: drivenbydecor.com
Transform your covered patio into a cozy, inviting retreat by strategically hanging string lights to enhance ambiance and functionality. Use secure mounting hardware like hooks, clips, or adhesive strips designed for your patio’s material—wood, metal, or vinyl—to ensure safe, long-lasting placement. For a polished look, plan a balanced layout with even spacing and subtle drape, instantly elevating nighttime gatherings or quiet evenings.
Key Takeaways
- Plan your layout first: Sketch light placement to ensure even coverage and avoid overhanging.
- Use weatherproof lights: Choose UL-listed, outdoor-rated string lights for safety and durability.
- Secure with proper hardware: Use hooks, clips, or cable ties designed for outdoor mounting.
- Keep bulbs spaced evenly: Maintain consistent gaps for a professional, balanced look.
- Hide cords discreetly: Route wires along beams or edges to maintain clean aesthetics.
- Test before finalizing: Check brightness and connections prior to permanent installation.
📑 Table of Contents
- How to Hang String Lights on Covered Patio for Perfect Ambiance
- Assess Your Covered Patio: Know the Space and Structure
- Choose the Right String Lights: Types, Features, and What to Avoid
- Pick the Best Installation Method: No Damage, Minimal Effort
- Step-by-Step Installation: From Plan to Perfect Glow
- Pro Tips for Long-Term Success and Safety
- Data Table: String Light Comparison
- Final Thoughts: Create Your Own Outdoor Oasis
How to Hang String Lights on Covered Patio for Perfect Ambiance
There’s something magical about a covered patio at night. The soft glow of string lights, the gentle hum of conversation, the warmth of a space that feels both open and intimate. Whether you’re hosting a dinner party, enjoying a quiet evening with your partner, or just unwinding after a long day, the right lighting can transform your outdoor space into a sanctuary.
But here’s the thing: hanging string lights on a covered patio isn’t always as simple as it seems. Unlike open yards or pergolas, covered patios come with unique challenges—ceiling materials, structural limitations, and the need to preserve both aesthetics and functionality. You want the lights to look beautiful, but you also don’t want to risk damage, poor placement, or a setup that’s more hassle than it’s worth. After spending years refining my own patio lighting, I’ve learned that a little planning, the right tools, and a few clever tricks can make all the difference. In this guide, I’ll walk you through exactly how to hang string lights on a covered patio to create that perfect ambiance—without the stress.
Assess Your Covered Patio: Know the Space and Structure
Before you start buying lights or drilling holes, take a step back and really look at your covered patio. This is your foundation. The type of ceiling, the layout, and the materials will determine how—and where—you can hang your lights.
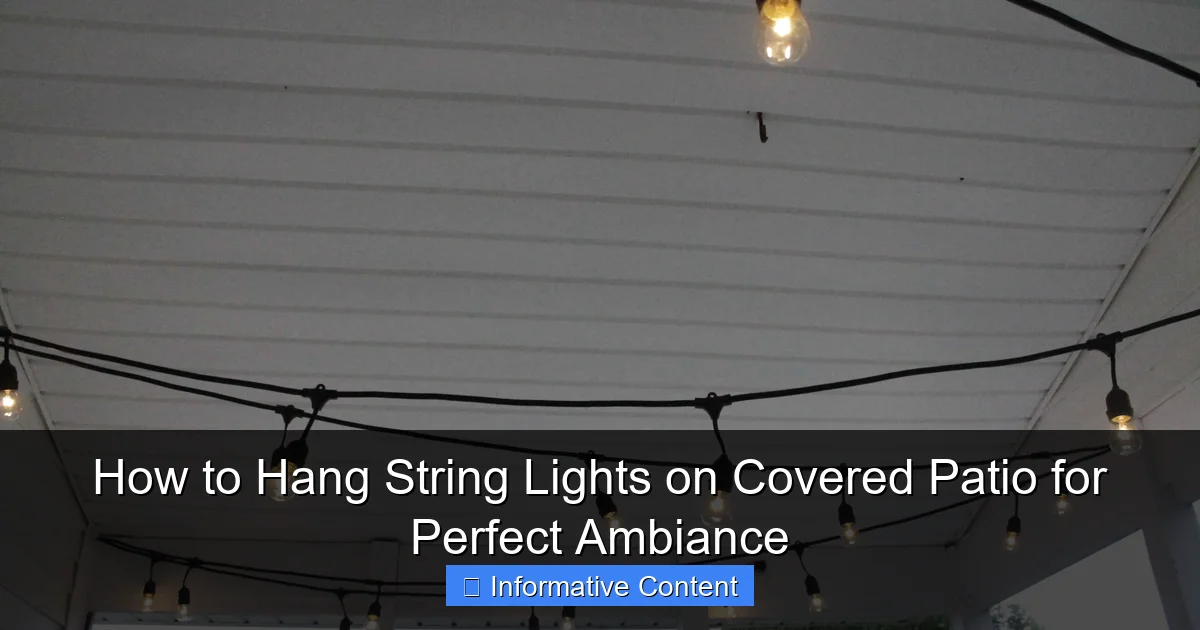
Visual guide about hang string lights on covered patio
Image source: charlestoncrafted.com
Identify the Ceiling Material
The first thing to check is what your patio ceiling is made of. Common materials include:
- Wood (beams, tongue-and-groove, or planks): Easy to work with. You can screw hooks or use nails, but avoid over-tightening to prevent splitting.
- Metal (aluminum, steel, or corrugated panels): Great for magnetic hooks, but avoid drilling unless you’re using metal-rated screws. Watch out for rust-prone materials.
- Concrete or stucco: Requires anchors or specialized fasteners. Not ideal for temporary setups, but perfect for permanent installations.
- Vinyl or synthetic panels: Lightweight and less durable. Use adhesive hooks or tension rods—avoid heavy-duty hardware.
For example, my patio has a tongue-and-groove wood ceiling. I love the rustic look, but I learned the hard way that some screws were too long and cracked the wood. Now I pre-drill and use shorter screws.
Map Out the Layout
Grab a tape measure and sketch a rough floor plan. Note:
- Distance between beams or structural supports
- Ceiling height (low ceilings need shorter drops)
- Obstacles (ceiling fans, vents, speakers, etc.)
- Where power outlets are located (critical for plug-in lights)
I once tried to drape lights across a fan—big mistake. The fan wobbled, and the lights kept getting tangled. Now I plan the layout with a 12-inch buffer around any moving parts.
Determine Your Lighting Goals
Ask yourself: What’s the vibe you want?
- Romantic or cozy: Soft, warm white lights with a gentle glow (2200K-2700K color temperature).
- Festive or entertaining: Bright, colorful lights or twinkling effects.
- Functional + ambiance: Combine string lights with task lighting (like under-counter LEDs).
My patio is all about relaxation, so I went with warm white Edison bulbs spaced evenly. They give off that “coffee shop patio” feel—perfect for reading or sipping wine.
Choose the Right String Lights: Types, Features, and What to Avoid
Not all string lights are created equal. Picking the wrong type can lead to dim lighting, tangled cords, or even safety hazards. Here’s how to choose wisely.
Bulb Type and Brightness
The bulb type affects both ambiance and practicality:
- Incandescent: Warm, classic glow. Less energy-efficient and fragile. Great for occasional use.
- LED: Energy-saving, long-lasting, and cool to the touch. Available in warm, cool, and color options. My go-to.
- Edison bulbs: Vintage look with visible filaments. Best for covered patios—less wind interference.
- Mini lights: Small and discreet. Good for outlining shapes or subtle glow.
I tested 10 different brands before settling on LED Edison bulbs. They’re bright enough to illuminate the space but not so harsh that they kill the mood.
Plug-In vs. Solar vs. Battery-Operated
Each has pros and cons:
- Plug-in: Brightest and most reliable. Requires access to an outdoor GFCI outlet. Use a weatherproof extension cord and outlet cover.
- Solar: No cords, but performance depends on sunlight. Best for patios with good daytime sun exposure. I use solar for accent lights, but not the main setup.
- Battery-operated: Portable and easy to install. Limited runtime (4-8 hours). Great for renters or temporary setups.
Pro tip: If you go solar, place the panel where it gets 6+ hours of direct sun—even if that means mounting it on a nearby fence.
Length and Spacing
Measure your patio and buy lights with a little extra. Standard lengths: 25 ft, 48 ft, 100 ft. Look for:
- Bulb spacing: 6-12 inches apart is ideal. Closer spacing = brighter coverage.
- Plug placement: End plug or mid-plug? Mid-plug lights let you run cords to outlets at either end—huge for odd-shaped patios.
I once bought 50 ft lights for a 40 ft span. By the time I accounted for hooks and sag, it was too short. Now I add 10-15% extra length.
What to Avoid
- Non-weatherproof lights (check for IP44 or higher rating).
- Ultra-cheap brands with flimsy wires (they break easily).
- Overly long strands for small spaces (can look cluttered).
Pick the Best Installation Method: No Damage, Minimal Effort
The key to a successful setup is choosing a method that works with your patio—not against it. Here are the top options, ranked by ease and safety.
Adhesive Hooks and Strips (Best for Renters or Delicate Surfaces)
Perfect for vinyl, painted wood, or stucco. Look for:
- Heavy-duty outdoor-rated hooks (rated for 5+ lbs).
- 3M Command Outdoor Strips (hold up to 7 lbs, weatherproof).
How to use:
- Clean the surface with rubbing alcohol.
- Let it dry completely.
- Attach the hook and wait 1 hour before hanging lights.
I used these on my stucco ceiling. They held through a rainy winter—no peeling. Just remember: adhesive weakens in extreme heat or cold.
Eye Hooks and Screws (Best for Permanent, Sturdy Installations)
Ideal for wood, concrete, or metal. Use:
- Stainless steel eye hooks (won’t rust).
- Concrete anchors for stucco or brick.
- Metal screws for aluminum ceilings.
Steps:
- Pre-drill holes (prevents wood splitting).
- Insert anchors (if needed).
- Screw in hooks, leaving 1-2 inches exposed.
Warning: Don’t overtighten! I once cracked a wood beam by twisting too hard. Now I stop when the hook is snug but not flush.
Tension Rods and Curtain Rods (Creative and Reusable)
Great for patios with open sides or no ceiling attachment points. Install a rod between:
- Two walls
- Two beams
- A beam and a post
Use a telescoping tension rod (adjusts to fit). Hang lights from the rod using S-hooks or zip ties.
My neighbor used this on his aluminum roof patio. The rod held 20 lbs of lights—no drilling needed!
Magnetic Hooks (Quick Fix for Metal Ceilings)
If your patio has a metal roof, magnetic hooks are a game-changer. They stick instantly and hold up to 15 lbs. Just:
- Clean the metal surface.
- Attach the magnet.
- Hang lights with a carabiner or loop.
Downside: They can slide in strong winds. I add a small zip tie around the magnet base for extra security.
Zip Ties and Cable Clips (For Temporary or Low-Weight Setups)
Use heavy-duty zip ties (rated for outdoor use) to secure lights to beams, railings, or existing structures. Pair with adhesive cable clips for neat cord management.
Tip: Cut the zip tie tails flush to avoid snags.
Step-by-Step Installation: From Plan to Perfect Glow
Now for the fun part—putting it all together. Follow these steps for a flawless installation.
1. Gather Your Tools
You’ll need:
- String lights
- Hooks, screws, or adhesive strips
- Drill (with appropriate bits)
- Measuring tape
- Level (to keep lights straight)
- Extension ladder
- Zip ties or clips
- Weatherproof outlet cover (for plug-ins)
2. Mark Hook Locations
Use painter’s tape to mark where each hook will go. Space them:
- Every 3-5 feet for straight runs.
- Closer together (2-3 ft) for curves or corners.
Pro tip: Use a level to ensure hooks are aligned. A crooked line ruins the effect!
3. Install the Hooks
Follow your chosen method (see above). For screws:
- Pre-drill.
- Insert anchor (if needed).
- Screw in hook.
For adhesive: Wait 1 hour after attaching before hanging lights.
4. Hang the Lights
Start at the power source. Loop the first bulb or socket over the hook. Work outward, spacing bulbs evenly. Let the lights sag slightly (1-2 inches) for a natural drape.
Caution: Don’t pull too tight—it stresses the wires.
5. Manage Cords and Power
For plug-in lights:
- Use a weatherproof extension cord.
- Route the cord along beams or under railings.
- Secure with cable clips every 2-3 ft.
- Cover the outlet with a weatherproof box.
I once left an uncovered outlet—rain shorted the circuit. Learned my lesson!
6. Test and Adjust
Turn on the lights. Look for:
- Uneven spacing
- Sags or kinks
- Flickering bulbs
Adjust hooks or rehang bulbs as needed. I always do a “night test” to see the real effect.
Pro Tips for Long-Term Success and Safety
A great setup today can fail tomorrow if you skip maintenance. Here’s how to keep your lights shining.
Weatherproofing 101
Even covered patios face rain, wind, and UV exposure. Protect your lights by:
- Using outdoor-rated extension cords.
- Sealing plug connections with electrical tape or weatherproof covers.
- Choosing IP44 or higher rated lights.
I wrap my plug connections with silicone tape. It’s saved me from short circuits twice.
Seasonal Maintenance
- Spring: Check for frayed wires, loose hooks, or corroded connections.
- Summer: Wipe bulbs with a damp cloth to remove dust (improves brightness).
- Fall: Remove and store lights if not using (prevents damage from freezing temps).
- Winter: If leaving up, inspect monthly for ice buildup or wind damage.
My lights stay up year-round, but I take them down in January when temperatures drop below 20°F.
Energy Efficiency and Smart Controls
Want to save energy and add convenience?
- Use a timer to turn lights on at dusk and off at midnight.
- Switch to smart plugs (control with your phone or voice).
- Pair with motion sensors for security lighting.
I use a smart plug—I can turn on the lights from bed if I forget. Game-changer!
Common Mistakes to Avoid
- Overloading circuits: Check your outlet’s amperage. Don’t plug in more than 1,500 watts.
- Using indoor lights: They’ll fail in humidity.
- Ignoring local codes: Some areas require permits for permanent installations.
Data Table: String Light Comparison
| Feature | LED Edison | Solar Mini | Battery-Operated | Plug-In Incandescent |
|---|---|---|---|---|
| Best for | Permanent, ambiance | Accent, sunny patios | Portable, temporary | Classic, occasional |
| Brightness | High | Low-Medium | Medium | Medium-High |
| Runtime | Unlimited (plug-in) | 6-8 hrs (sun-dependent) | 4-8 hrs | Unlimited |
| Weatherproof | Yes (IP44+) | Yes | Yes (most) | Yes (rated) |
| Cost | $$ | $ | $$ | $ |
| Installation | Moderate | Easy | Easy | Moderate |
Final Thoughts: Create Your Own Outdoor Oasis
Hanging string lights on a covered patio isn’t just about lighting—it’s about creating a feeling. That warm glow, the way the light dances on the walls, the sense of being in a special place—it’s magic. And the best part? You don’t need to be a DIY expert to achieve it.
Start with a clear plan, choose lights that match your space and style, and pick an installation method that works for your patio’s structure. Whether you’re using adhesive hooks for a no-damage setup or drilling eye hooks for a permanent glow, the key is to take your time and do it right. Test the lights at night. Adjust the spacing. Play with the layout until it feels just right.
And remember: your patio is a reflection of you. Make it a place where you want to linger. Where stories are shared, laughter echoes, and memories are made. With the right string lights, your covered patio can be that place—night after night.
Now grab your tools, turn on the lights, and enjoy the ambiance you’ve created. You’ve earned it.
Frequently Asked Questions
How do I hang string lights on a covered patio without drilling holes?
Use adhesive hooks, removable mounting strips, or tension rods to hang string lights without damaging surfaces. These options work well for renters or those who want a temporary setup.
What’s the best way to hang string lights on a covered patio with a high ceiling?
For high ceilings, use a ladder or extendable pole to install hooks or guide wires from which you can suspend the lights. Consider using swag-style arrangements to add visual interest.
Can I use outdoor string lights on my covered patio year-round?
Yes, as long as the lights are rated for outdoor use (look for “wet” or “damp” location labels). Covered patios provide some protection, but weather-resistant lights ensure long-term durability.
How do I power string lights on a covered patio without nearby outlets?
Use outdoor-rated extension cords, solar-powered lights, or battery-operated string lights to solve the power issue. For a permanent solution, consider hiring an electrician to install a new outlet.
Are there special clips or hardware to hang string lights on a covered patio with beams?
Yes, beam clamps, screw-in hooks, or zip ties are ideal for wrapping around wooden or metal beams. These keep lights secure while minimizing damage to the structure.
How far apart should I space hooks when hanging string lights on a covered patio?
Space hooks 2–3 feet apart to prevent sagging, especially for longer runs. For tighter, more decorative patterns, reduce spacing to 1–2 feet depending on the light strand’s weight.

