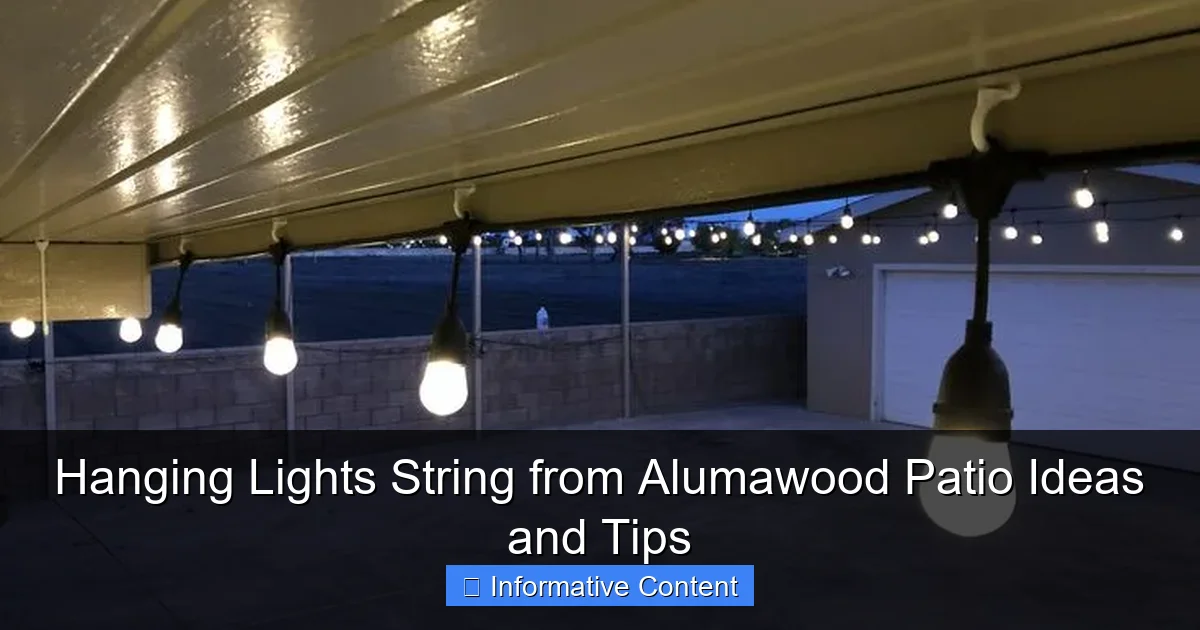
Featured image for hanging lights string from alumawood patio
Image source: i.pinimg.com
Transform your alumawood patio into a stunning nighttime retreat by expertly hanging string lights for ambiance and functionality. Use durable, weather-resistant lights and secure mounting clips designed for alumawood to ensure safety, longevity, and a polished look that enhances any outdoor space.
Key Takeaways
- Plan spacing: Measure distances evenly for balanced, professional-looking light distribution.
- Use rated fixtures: Choose weather-resistant string lights for long-term outdoor durability.
- Anchor securely: Install sturdy hooks or eye bolts into alumawood beams for safety.
- Hide cords smartly: Tuck wires along beams or use clips for a clean appearance.
- Layer lighting: Combine string lights with task or accent lights for ambiance.
- Check power access: Ensure outlets are nearby or use solar-powered options.
📑 Table of Contents
- Why Hanging String Lights on an Alumawood Patio Transforms Your Outdoor Space
- Understanding Your Alumawood Patio: The Foundation for Success
- Planning Your String Light Layout: Design Meets Function
- Choosing the Right Hardware: What Works (and What Doesn’t)
- Installation Step-by-Step: From Outlet to Ambiance
- Creative Ideas and Pro Tips for Maximum Impact
- Common Mistakes and How to Avoid Them
Why Hanging String Lights on an Alumawood Patio Transforms Your Outdoor Space
Imagine this: it’s a warm summer evening. You’re outside on your patio, a cool drink in hand, surrounded by the soft glow of string lights. The air is still, the stars are out, and your Alumawood patio—with its clean lines and modern look—feels like an extension of your home. There’s something magical about that moment, isn’t there? And it’s not just about aesthetics. Hanging lights string from Alumawood patio isn’t just a trend; it’s a way to make your outdoor space more inviting, functional, and enjoyable.
But let’s be honest—hanging lights on an Alumawood patio isn’t as simple as tossing a string of bulbs over a beam and calling it a day. Alumawood is a lightweight, aluminum-based material designed to mimic wood without the maintenance. It’s strong, weather-resistant, and perfect for patios. But it’s also not as forgiving as real wood when it comes to drilling, clamping, or securing anything heavy. That’s why knowing how to hang string lights properly—without damaging the structure or creating a safety hazard—is key. In this guide, I’ll walk you through everything you need to know: from planning your layout to choosing the right hardware and even troubleshooting common pitfalls. Whether you’re going for a cozy bistro vibe or a full-blown party atmosphere, you’ll find practical, real-world tips to make it happen.
Understanding Your Alumawood Patio: The Foundation for Success
Before you grab your lights and ladder, it’s important to understand what makes an Alumawood patio unique. This knowledge will help you avoid costly mistakes and ensure your lighting setup is safe and long-lasting.
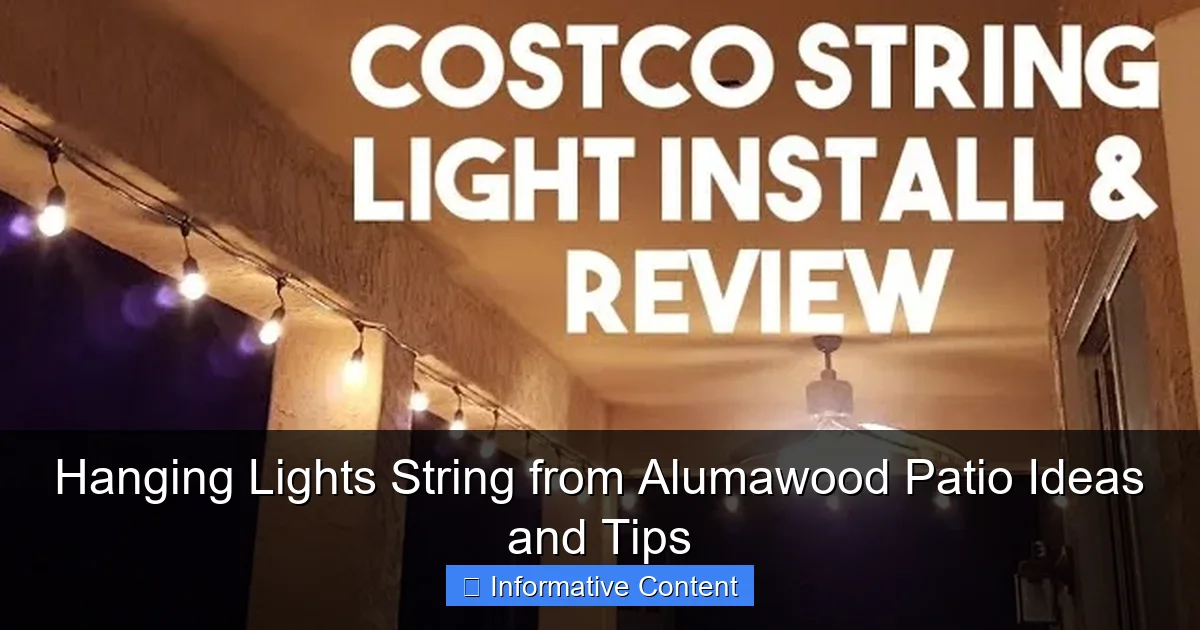
Visual guide about hanging lights string from alumawood patio
Image source: i.ytimg.com
What Is Alumawood, and Why Does It Matter?
Alumawood is a composite material made of aluminum with a wood-grain finish. It’s often used for patio covers, pergolas, and awnings because it’s lightweight, rust-resistant, and requires zero staining or sealing. Unlike real wood, it won’t warp, rot, or attract pests. But here’s the catch: Alumawood is hollow in many areas, especially in beams and rafters. That means it can’t support heavy loads without proper reinforcement.
For example, I once tried hanging a heavy chandelier from an Alumawood rafter using standard wood screws. Within a month, the screws started pulling out—because the material just didn’t have the structural integrity to hold that weight. Lesson learned: you need the right hardware, and you need to know where the structural supports are.
Identify the Structural Elements
Most Alumawood patios have a grid of beams and rafters. The main beams (usually thicker and spaced farther apart) are attached to the house or support posts and are designed to carry weight. The smaller rafters (closer together, often 12–16 inches apart) are for shade and aesthetics, not load-bearing.
- Use a stud finder or tap gently with a hammer to locate solid sections (they’ll sound dull, not hollow).
- Mark the main beams with painter’s tape so you know where to anchor your lights.
- If you’re unsure, check the original construction plans or consult the installer.
Pro tip: If your patio has a solid ceiling (not open rafters), you’re in luck—you can use ceiling-mounted hooks or clips. But if it’s open-beam, you’ll need to work with the rafters carefully.
Check Local Codes and Electrical Safety
Before you start, make sure your setup complies with local electrical codes. Outdoor lighting must be:
- UL-listed for wet or damp locations.
- Connected to a GFCI (Ground Fault Circuit Interrupter) outlet.
- Properly rated for the total wattage of your lights.
Even if you’re using low-voltage LED string lights, safety comes first. I once saw a neighbor’s setup catch fire because they used indoor-rated lights with a long extension cord in the rain. Don’t let that be you.
Planning Your String Light Layout: Design Meets Function
Now that you understand your patio’s structure, it’s time to plan your lighting design. A good layout balances beauty, practicality, and safety. Think of it like painting—you need a sketch before the brush hits the canvas.
Choose the Right Light Style for Your Vibe
Not all string lights are created equal. Your choice will depend on the mood you want to create:
- Bistro lights (Edison bulbs): Warm, vintage glow. Perfect for intimate dinners or a romantic feel.
- Mini fairy lights: Delicate and sparkly. Great for a whimsical, magical look—ideal for weddings or parties.
- LED rope lights: Bright, even glow. Better for task lighting or illuminating pathways.
- Twinkling or color-changing lights: Fun for events, but avoid them for everyday use if you want a relaxed vibe.
I personally love a mix: bistro lights over the seating area for ambiance, and subtle rope lights along the edge for safety. It’s like having two layers of lighting—functional and atmospheric.
Measure Your Space and Calculate Needs
Grab a tape measure and note the following:
- Total linear feet of your patio (length x width).
- Distance between rafters or beams.
- Height of the ceiling (if applicable).
- Location of power outlets.
Here’s a quick example: If your patio is 20 feet long and 12 feet wide, and your rafters are 16 inches apart, you’ll need about 18 rafters to span the width. That means 18 anchor points. If you plan to run lights along the perimeter, that’s 20 + 12 + 20 + 12 = 64 feet of lights. But if you want a crisscross or zigzag pattern, you’ll need more—maybe 80–100 feet.
Pro tip: Buy 10–20% extra to account for mistakes or future expansion. You don’t want to run out halfway through.
Sketch a Simple Diagram
Use a notebook or free design app (like SketchUp Free or Canva) to draw your patio and mark:
- Where the lights will hang.
- Anchor points (hooks, clips, etc.).
- Where the power cord will run.
- Any obstacles (fans, vents, plants).
This step saved me hours of trial and error. I once installed lights without a plan and ended up with a tangled mess—lights too close in one area, too far in another. A simple sketch helps you visualize balance and avoid “light gaps.”
Choosing the Right Hardware: What Works (and What Doesn’t)
This is where most people go wrong. Using the wrong clips, hooks, or fasteners can damage your Alumawood, create fire hazards, or cause your lights to sag and fall. Let’s break down the best options.
Best Clips and Hooks for Alumawood
Here are the top choices, ranked by effectiveness and safety:
- Aluminum-compatible S-hooks: Made of stainless steel or coated aluminum. They won’t rust and fit snugly over rafters. I use these for bistro lights—they hold up to 20 lbs each.
- Adhesive-backed outdoor clips: Use only on smooth, flat surfaces (like solid Alumawood ceilings). Avoid on rough or textured areas. I’ve had mixed results—some stay put for years, others fall off in heat.
- Adjustable cable ties (zip ties): Use UV-resistant, outdoor-rated ties. Wrap around rafters and snug them down. Cut the tails flush so they don’t snag clothes.
- Ceiling-mounted screw hooks: For solid Alumawood ceilings, use self-tapping aluminum screws with a rubber washer. Drill a pilot hole first to prevent cracking.
- Permanent eye bolts: Best for heavy-duty setups. Install into main beams, not rafters. Use a torque wrench to avoid over-tightening.
Avoid regular wood screws or nails—they’ll chew up the aluminum and loosen over time. I learned this the hard way when a screw pulled out during a windstorm, taking a light with it.
Weight Limits and Spacing
Never hang more than 10–15 lbs per anchor point on Alumawood rafters. For main beams, you can go up to 50 lbs if properly secured. Here’s a rule of thumb:
- Standard 25-foot string light: 2–3 lbs.
- Heavy-duty LED rope light: 5–7 lbs.
- Decorative chandelier: 10–20 lbs (requires main beam support).
Spacing: For even coverage, place anchor points every 12–24 inches. Closer spacing = more light, less sagging. I recommend 16 inches for bistro lights and 12 inches for fairy lights.
Protecting Your Alumawood
Always use rubber or silicone washers between metal hardware and Alumawood to prevent scratching and corrosion. If using adhesive clips, clean the surface with isopropyl alcohol first for maximum grip. And never overtighten—snug is enough.
Installation Step-by-Step: From Outlet to Ambiance
Now comes the fun part: installing your lights. Follow these steps for a safe, professional-looking result.
Step 1: Gather Your Tools
You’ll need:
- String lights (outdoor-rated).
- Anchor points (S-hooks, clips, eye bolts).
- Drill with pilot bit (if using screws).
- Measuring tape and level.
- Ladder (preferably a sturdy step ladder or extension ladder with a stabilizer).
- Extension cord (outdoor-rated, GFCI-protected).
- Rubber washers or grommets.
I keep a “light hanging kit” in my garage with all these items—it saves so much time when I want to switch up my setup.
Step 2: Start at the Power Source
Begin by plugging in your extension cord and running it to the first anchor point. Use cable clips or zip ties to secure the cord along the edge of the patio (not across walkways). This prevents tripping and keeps things tidy.
Plug in your lights and test them before hanging. Nothing’s worse than finding a dead section after you’ve installed everything.
Step 3: Install Anchor Points
For S-hooks: Open the hook slightly with pliers and slide it over the rafter. Close it gently so it grips securely.
For adhesive clips: Press firmly for 30 seconds. Wait 24 hours before hanging lights (if possible).
For screw hooks: Drill a 1/8” pilot hole, then screw in the hook with a rubber washer. Don’t over-tighten!
Use a level to ensure hooks are aligned. Crooked lights look sloppy.
Step 4: Hang the Lights
Start at the power source and work outward. Drape the lights over the hooks, leaving a slight sag (not too tight). This prevents stress on the wires and looks more natural.
For crisscross patterns: Use a second set of hooks or a cable system. I use thin, UV-resistant wire to create a grid—it’s nearly invisible at night.
Step 5: Secure and Conceal Cords
Use cord covers (available at hardware stores) to hide wires along walls or beams. For a seamless look, paint them to match your Alumawood. Or, run cords through hollow beams (if accessible).
Pro tip: Leave a small loop near the outlet for expansion. If you add more lights later, you won’t need a new cord.
Creative Ideas and Pro Tips for Maximum Impact
Now that you’ve got the basics, let’s elevate your setup with some creative ideas and insider tricks.
Idea 1: Layered Lighting
Combine different light types for depth:
- Overhead: Bistro lights for ambient glow.
- Perimeter: Rope lights along the edge for safety.
- Accent: Spotlights on plants or art.
I once added solar-powered ground lights to my patio—it created a “floating” effect that wowed my guests.
Idea 2: Themed Designs
Match your lights to the season:
- Summer: White bistro lights with citronella candles.
- Fall: Orange twinkle lights + string pumpkins.
- Winter: Warm white lights + red ribbon.
Changeable clip systems make it easy to switch themes without reinstalling.
Pro Tips from the Field
- Use a timer or smart plug to automate lights (no more forgetting to turn them off).
- For windy areas, add extra clips every 8–10 feet to prevent flapping.
- Store lights in a breathable bag (not plastic) to avoid moisture buildup.
- If your lights flicker, check for loose connections or damaged wires—don’t ignore it.
One of my favorite hacks: I use magnetic clips on the metal support posts. They hold strong, look clean, and are easy to remove when I want to clean the patio.
Common Mistakes and How to Avoid Them
Even seasoned DIYers make these errors. Here’s how to dodge them.
Mistake 1: Overloading Rafters
Don’t hang heavy lights or multiple strings from one rafter. Spread the weight across main beams or use a cable system. I once saw a friend’s entire light setup collapse because he hung a chandelier from a single rafter—lesson learned for all of us.
Mistake 2: Using Indoor Lights
Outdoor lights have thicker insulation, UV protection, and waterproof seals. Indoor lights can overheat or short out. Always check the label: “Wet Location” or “Damp Location” is a must.
Mistake 3: Ignoring Weather
Alumawood expands and contracts with temperature. In summer, leave a little slack in your lights. In winter, tighten slightly to prevent sagging. And never leave lights up during hurricanes or severe storms.
Mistake 4: Poor Cord Management
Exposed cords are a tripping hazard and an eyesore. Use cord covers, tuck them under trim, or run them through beams. I use colored zip ties to match the patio—no one notices them.
| Issue | Cause | Solution |
|---|---|---|
| Lights sag too much | Anchor points too far apart | Add clips every 12 inches |
| Flickering lights | Loose connection or damaged wire | Inspect and replace faulty sections |
| Hardware rusting | Using non-stainless steel | Switch to stainless steel or aluminum |
| Alumawood scratches | Metal-on-metal contact | Use rubber washers |
Hanging lights string from Alumawood patio isn’t just about adding light—it’s about creating a space where memories happen. Whether you’re hosting a dinner party, reading a book, or just enjoying a quiet night, the right lighting transforms your patio into an extension of your home. By understanding your Alumawood structure, planning your layout, choosing the right hardware, and avoiding common mistakes, you’ll build a setup that’s safe, beautiful, and built to last. So grab your lights, follow these tips, and let your patio shine. After all, the best moments happen under a little light and a lot of stars.
Frequently Asked Questions
How do I hang string lights on an Alumawood patio without damaging it?
Use removable hooks, adhesive clips, or magnetic mounts designed for metal surfaces to avoid drilling into your Alumawood patio structure. These options provide secure hold while preserving the integrity of the material. Always check weight limits to ensure safety.
What type of string lights work best for an Alumawood patio?
LED string lights are ideal due to their durability, low heat output, and energy efficiency. Opt for weather-resistant or commercial-grade lights to withstand outdoor conditions and complement your hanging lights string from Alumawood patio setup.
Can I install string lights on an Alumawood patio without professional help?
Yes, many homeowners DIY their hanging lights string from Alumawood patio using plug-and-play kits or tension wire systems. Just follow manufacturer instructions and plan your layout for even spacing and power access.
How far apart should I space the hooks for string lights on an Alumawood patio?
Space hooks or clips 18–24 inches apart to prevent sagging, especially for heavier lights. Adjust based on your light string’s weight and desired aesthetic (tight for a dense glow, farther for a relaxed look).
What’s the best way to power string lights on an Alumawood patio?
Use outdoor-rated extension cords or hardwire the lights to a GFCI outlet for a permanent setup. Conceal cords along the patio’s beams or edges for a clean, safe installation.
How do I style string lights for a cozy Alumawood patio atmosphere?
Create a canopy effect by crisscrossing lights overhead or wrap them around beams for a layered look. Combine with dimmers or warm-toned bulbs to enhance the ambiance.

