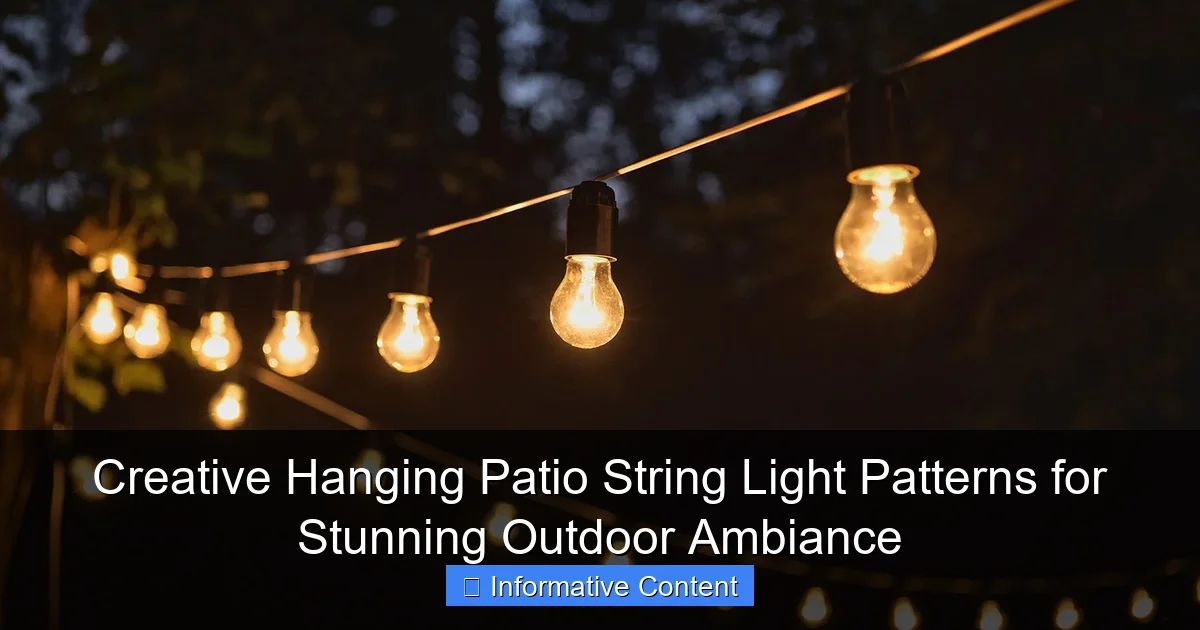
Featured image for hanging patio string light patterns
Image source: uplightrentals.com
Transform your outdoor space with creative hanging patio string light patterns that instantly elevate ambiance and style. From geometric grids to cascading canopies, these eye-catching designs blend functionality with artistry, turning patios into enchanting retreats. Perfect for entertaining or relaxing, strategic lighting layouts enhance mood and extend usability long after sunset.
Key Takeaways
- Plan your layout: Sketch designs before hanging to ensure balanced spacing and visual appeal.
- Mix patterns creatively: Combine zigzags, waves, and clusters for dynamic, layered lighting effects.
- Use anchors wisely: Secure lights to sturdy structures to prevent sagging or damage over time.
- Highlight key areas: Frame seating, dining, or garden features to enhance ambiance and functionality.
- Opt for dimmers: Adjust brightness to match moods, from cozy to festive, effortlessly.
- Weatherproof connections: Protect plugs and joints to ensure safety and longevity in outdoor settings.
📑 Table of Contents
- Why Hanging Patio String Light Patterns Matter
- Choosing the Right String Lights for Your Patio
- Classic and Timeless Hanging Patterns
- Creative and Unique Hanging Patterns
- Advanced Techniques for a Professional Look
- Installation Tips and Safety Considerations
- Data Table: Comparing Hanging Patterns
- Bringing It All Together: Your Perfect Patio Lighting
Why Hanging Patio String Light Patterns Matter
Imagine this: it’s a warm summer evening, the sun has dipped below the horizon, and the first stars are twinkling above. You’re sitting on your patio, a cold drink in hand, and all around you, soft, golden light dances through the air. That’s the magic of hanging patio string light patterns—they transform a simple outdoor space into a cozy, inviting retreat. Whether you’re hosting a dinner party, enjoying a quiet night with your family, or just want to unwind after a long day, the right lighting can make all the difference.
But it’s not just about throwing up a few strings and calling it a day. The *way* you hang your patio lights can elevate your space from “meh” to “magical.” The pattern you choose affects everything: the mood, the functionality, and even the perceived size of your patio. From classic zigzags to intricate crisscross designs, the possibilities are endless. And the best part? You don’t need to be an electrician or a design pro to get it right. With a little planning and some creative flair, you can create a stunning outdoor ambiance that feels both intentional and effortless.
Choosing the Right String Lights for Your Patio
Before you start hanging lights, it’s crucial to pick the right type for your space. Not all string lights are created equal, and the wrong choice can leave you with dim, uneven lighting or a setup that feels chaotic. Here’s what to consider:
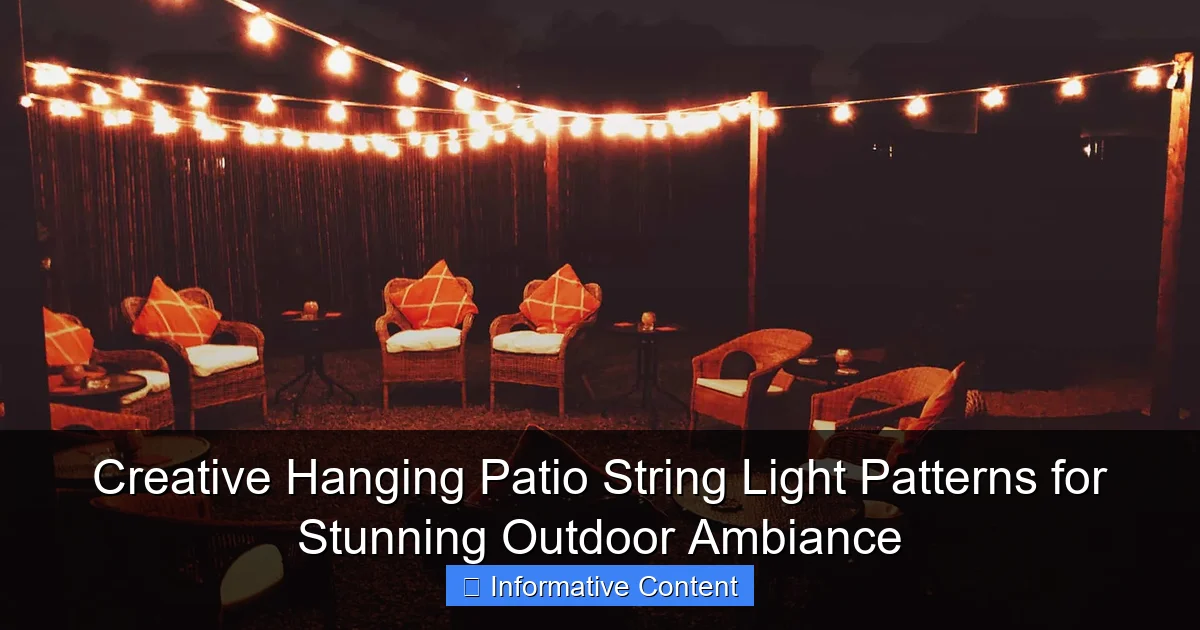
Visual guide about hanging patio string light patterns
Image source: backyard.exmark.com
Bulb Type: LED vs. Incandescent
LED lights are the clear winner for most patios. They’re energy-efficient, last longer (often 25,000+ hours), and come in a range of colors and styles. Plus, they don’t get as hot as incandescent bulbs, making them safer for outdoor use. That said, if you love the warm, vintage glow of incandescent lights, go for it—just be prepared to replace them more often and keep an eye on energy costs.
Brightness and Spacing
Think about how bright you want your patio to be. For a cozy, intimate vibe, opt for lower-lumen bulbs spaced farther apart (12–18 inches). If you need more functional lighting (say, for cooking or reading), go for higher-lumen bulbs spaced closer together (6–12 inches). Pro tip: buy a few extra bulbs or a spare set. You’ll thank yourself if one burns out mid-season.
Color Temperature: Warm vs. Cool
This is a personal preference, but it makes a big difference. Warm white lights (2700K–3000K) create a relaxing, inviting atmosphere—perfect for evenings. Cool white (4000K–5000K) feels brighter and more energizing, which might work for a poolside party. Some lights even let you switch between warm and cool, giving you flexibility.
Weather Resistance and Durability
Since your lights will be outdoors, look for an IP44 or higher rating for water resistance. If you live in a windy area, choose lights with sturdy cords and secure connectors. And if you’re hanging them over a pool or near water features, make sure they’re safe for damp locations.
Example: My neighbor once bought cheap, non-weatherproof lights for her patio. After one rainstorm, half the bulbs stopped working, and she had to start over. Save yourself the hassle—invest in quality from the start.
Classic and Timeless Hanging Patterns
Some patterns never go out of style because they’re simple, effective, and easy to pull off. These are the go-to choices for most patios, and for good reason: they work. Let’s break down a few of the most popular designs.
The Zigzag (or “V-Pattern”)
This is the classic “crisscross” you’ve probably seen in countless outdoor spaces. To create it, start at one corner of your patio and run a string of lights diagonally to the opposite corner. Then, go back the other way, forming a zigzag pattern. Repeat this across the entire area, spacing each “V” about 2–3 feet apart.
- Pros: Covers a lot of ground, creates a dynamic look, and is super easy to install.
- Cons: Can feel repetitive if overdone, and might not work in very small patios.
Tip: For a more organic look, vary the spacing slightly instead of keeping it perfectly uniform. It’ll feel more natural and less “grid-like.”
The Canopy (or “Tent” Pattern)
Imagine a tent made of light. To achieve this, hang a central anchor point (like a pergola beam or a tall pole) and run strings of lights from it to the edges of your patio. The result is a soft, glowing canopy overhead. This works especially well under pergolas or gazebos.
- Pros: Creates a dramatic, cozy effect and is great for defining a space.
- Cons: Requires a central anchor point, which might not be available in all patios.
Real-world example: My friend Sarah used this pattern under her pergola and said it made her patio feel like a “secret garden.” Guests always comment on how magical it looks at night.
The Parallel Rows
Simple and elegant, this pattern involves running parallel strings of lights from one side of your patio to the other. It’s perfect for rectangular patios and works well with a pergola, fence, or even between trees. Space the rows 2–4 feet apart, depending on how much light you want.
- Pros: Easy to install, creates a clean, modern look, and works in almost any space.
- Cons: Can feel too uniform if not paired with other design elements.
Pro tip: Add a slight curve or wave to each row (instead of a straight line) to make it feel more organic and less rigid.
Creative and Unique Hanging Patterns
If you’re ready to go beyond the basics, these creative patterns will help you stand out. They’re a bit more involved, but the results are worth it. Think of these as the “statement pieces” of outdoor lighting.
The Grid (or “Checkerboard”) Pattern
This is a step up from parallel rows. Instead of just horizontal or vertical lines, you create a grid by adding perpendicular strings. Start with parallel rows, then add a second set of strings running at a 90-degree angle. The result is a checkerboard of light that feels structured but still inviting.
- Pros: Covers the space evenly, creates a unique visual, and is great for larger patios.
- Cons: Requires more lights and careful planning to avoid tangles.
Tip: Use different-colored lights for the horizontal and vertical strings (like warm white for horizontal and soft amber for vertical) to add depth and interest.
The Swag Pattern
For a more relaxed, bohemian vibe, try the swag pattern. Instead of tight, straight lines, let the lights drape in gentle curves between anchor points. This works especially well in irregularly shaped patios or spaces with trees.
- Pros: Feels organic and whimsical, great for small patios or cozy nooks.
- Cons: Might not provide enough light for functional tasks (like cooking or reading).
Real-world example: I once saw this pattern at a friend’s rooftop patio in Brooklyn. The lights were hung between the fire escape and the railing, creating a soft, flowing canopy. It felt like a secret hideaway—perfect for a quiet night with a book.
The Spiral (or “Helix”) Pattern
This one’s a showstopper. Start at one corner and spiral the lights inward, creating a helix-like pattern. It’s a bit trickier to execute, but the result is a dynamic, eye-catching design that feels almost like art.
- Pros: Creates a dramatic focal point, works well in circular or square patios.
- Cons: Can feel overwhelming in small spaces, and requires precise spacing.
Tip: Use a single, continuous string of lights to avoid visible connectors. It’ll make the spiral look seamless and more polished.
Advanced Techniques for a Professional Look
Want to take your lighting to the next level? These advanced techniques will help you achieve a polished, professional look—no designer required. The key is in the details.
Layering Lights for Depth
Instead of relying on just one layer of lights, try combining different patterns. For example, hang a grid pattern overhead and add a few swag lights along the edges. Or, pair a canopy pattern with parallel rows for a multi-dimensional effect.
- Why it works: Layering creates depth and prevents the space from feeling flat or one-dimensional.
- Pro tip: Use dimmer switches or smart bulbs to control the brightness of each layer. This lets you adjust the ambiance depending on the occasion.
Using Different Light Types Together
Mixing light types (like string lights, lanterns, and fairy lights) can add texture and interest. For example, hang a canopy of warm white string lights and add clusters of fairy lights in the corners. Or, place solar-powered lanterns along the edges for a soft glow.
- Why it works: Different light types create different effects—string lights for ambient glow, lanterns for task lighting, fairy lights for sparkle.
- Caution: Avoid going overboard. Stick to 2–3 light types max to keep the design cohesive.
Adding Accents with Light
Don’t forget the edges! Use lights to highlight architectural features, plants, or furniture. Wrap string lights around a tree trunk, run them along a fence, or place them in planters for a soft glow.
- Why it works: Accent lighting draws the eye and makes the space feel more intentional.
- Example: A friend of mine wrapped lights around the base of her patio umbrella. At night, it looked like the umbrella was floating on a pool of light—so cool!
Installation Tips and Safety Considerations
Even the best design won’t shine if it’s poorly installed. Here are some practical tips to ensure your lights are safe, secure, and long-lasting.
Planning Your Layout
Before you start hanging, sketch a rough layout. Measure your patio, note anchor points (like beams, poles, or trees), and plan your pattern. This helps you avoid running out of lights or having to redo sections.
- Pro tip: Use painter’s tape to mark anchor points and test the layout during the day. You’ll spot potential issues before they become problems.
Choosing the Right Anchors
Not all anchor points are created equal. For permanent installations, use screw-in hooks, eye bolts, or heavy-duty adhesive clips. For temporary setups, try suction cups, zip ties, or even bungee cords.
- Caution: Avoid nails or staples—they can damage surfaces and aren’t as secure.
Weatherproofing and Safety
Always use outdoor-rated lights and extension cords. If you’re connecting multiple strings, use a power strip with surge protection. And never overload a single outlet—stick to the manufacturer’s guidelines.
- Real-world example: A neighbor once daisy-chained 10 strings on one outlet. The circuit tripped, and half the bulbs blew. Now he uses a power strip with a built-in timer—much safer and more convenient.
Maintenance and Storage
To extend the life of your lights, unplug them during storms or extreme weather. When the season’s over, store them properly: coil them loosely, avoid kinks, and keep them in a dry, temperature-controlled space.
- Pro tip: Wrap each string around a piece of cardboard or a plastic reel to prevent tangles.
Data Table: Comparing Hanging Patterns
| Pattern | Best For | Difficulty Level | Light Coverage | Visual Impact |
|---|---|---|---|---|
| Zigzag | Large patios, pergolas | Easy | High | Medium |
| Canopy | Pergolas, gazebos | Medium | Medium | High |
| Parallel Rows | Rectangular patios | Easy | Medium | Medium |
| Grid | Large, open patios | Hard | High | High |
| Swag | Small patios, nooks | Easy | Low | High |
| Spiral | Circular patios | Hard | Medium | Very High |
Bringing It All Together: Your Perfect Patio Lighting
At the end of the day, the best hanging patio string light patterns are the ones that feel right for *you*. Whether you go for a simple zigzag or an elaborate spiral, the goal is to create a space where you love to spend time. Don’t be afraid to experiment, mix patterns, or add your own personal touch. After all, your patio is an extension of your home—it should reflect your style and make you feel good.
Remember, lighting is more than just function. It’s about creating moments: a romantic dinner under the canopy, a game night with friends under the grid, or a quiet evening with a book under the swag lights. With a little creativity and the right approach, your patio can be the highlight of your home—day or night.
So grab your lights, sketch a layout, and start hanging. The perfect outdoor ambiance is just a few strings away.
Frequently Asked Questions
What are the most popular hanging patio string light patterns?
Popular patterns include zigzag, canopy, and grid layouts, which create visual depth and even illumination. These hanging patio string light patterns work well for defining spaces or highlighting outdoor features like pergolas.
How do I create a zigzag pattern with patio string lights?
Start by anchoring lights to a central point, then run them diagonally across your patio in a repeating “V” shape. Secure with hooks or clips to maintain tension and avoid sagging.
Can I use hanging patio string light patterns for small spaces?
Yes! Opt for compact patterns like crisscross or spiral designs to maximize light without overcrowding. These hanging patio string light patterns enhance intimacy in cozy patios or balconies.
What’s the best way to hang string lights in a canopy pattern?
Stretch lights horizontally between two anchor points, then layer rows vertically to form a draped effect. This pattern mimics a starry sky and works perfectly under pergolas or trees.
How do I prevent my string lights from sagging in a grid pattern?
Use sturdy support poles or tension cables at each grid intersection, and leave slight slack (about 1 inch per foot) for natural movement. This ensures a clean, professional look.
Are there weather-resistant string lights for creative outdoor patterns?
Yes, look for IP65-rated LED string lights with durable, UV-resistant wiring. These withstand rain and sun while maintaining brightness for any hanging patio string light pattern.

