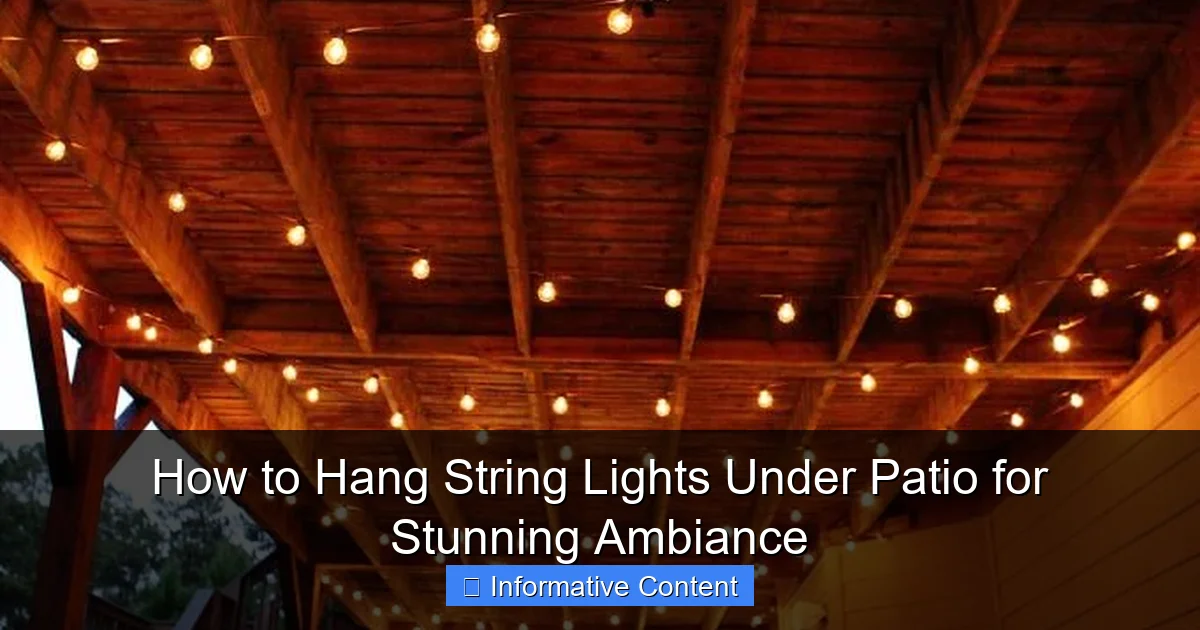
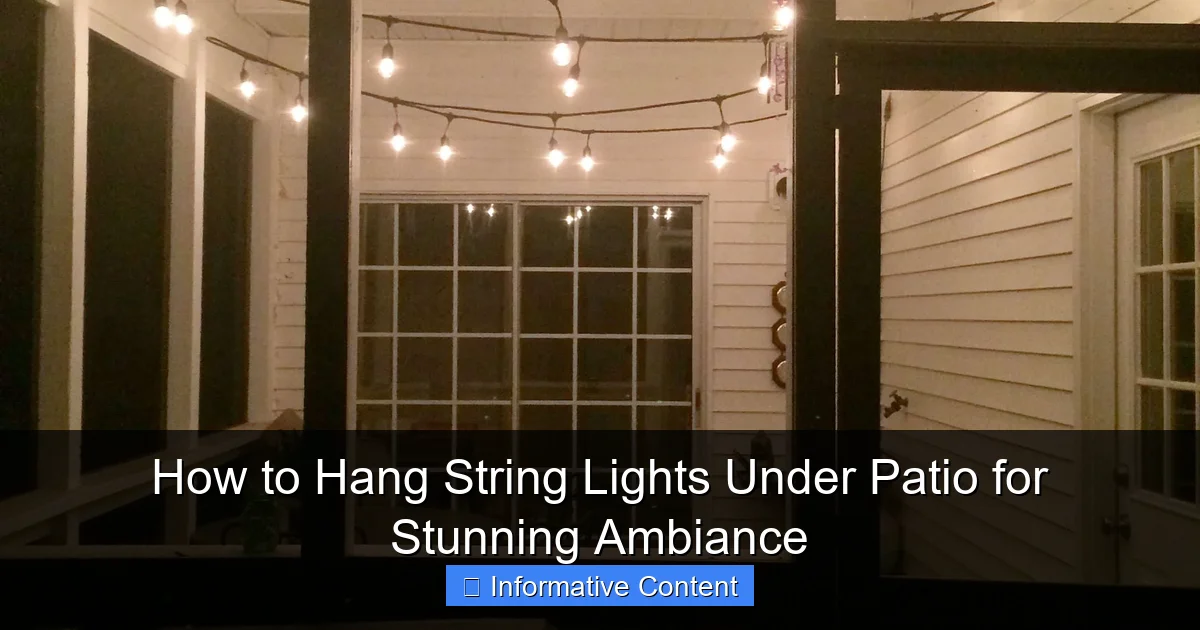
Featured image for hanging string lights under patio
Image source: i.pinimg.com
Transform your patio into a captivating nighttime retreat by strategically hanging string lights to enhance ambiance and functionality. Use secure mounting hardware and weather-resistant fixtures to ensure a safe, long-lasting installation that withstands the elements while casting a warm, inviting glow.
Key Takeaways
- Plan your layout first: Sketch light placement for balanced, even coverage.
- Use weatherproof lights: Choose UL-rated outdoor lights for durability.
- Secure with hooks or clips: Install sturdy anchors to avoid sagging.
- Hide cords discreetly: Tuck wires under beams or use cord covers.
- Layer with dimmers: Adjust brightness for perfect ambiance control.
- Space bulbs evenly: Maintain 6–8 inches between bulbs for ideal glow.
- Test before finalizing: Check connections and brightness before full install.
📑 Table of Contents
- Why Hanging String Lights Under Patio Is a Game-Changer
- Planning Your Patio String Light Layout
- Choosing the Right String Lights and Hardware
- Step-by-Step Guide to Hanging String Lights Under Patio
- Creative Ideas and Design Tips for Maximum Impact
- Maintenance, Safety, and Long-Term Care
- Real-World Examples and Cost Comparison
- Final Thoughts: Light Up Your Life—Literally
Why Hanging String Lights Under Patio Is a Game-Changer
Picture this: you’re sitting under your patio after a long day, sipping a cold drink, and the sky slowly turns from orange to deep blue. Now imagine soft, warm glows of string lights gently swaying above you, casting a cozy, magical light over your outdoor space. That’s not just a dream—it’s a simple DIY project that can transform your patio into an inviting oasis. Whether you’re hosting a summer barbecue, enjoying a quiet evening with a book, or sharing stories with friends, hanging string lights under patio adds instant ambiance and charm.
But let’s be honest—getting it right isn’t always as easy as it looks. I’ve made my fair share of mistakes: tangled wires, sagging strings, lights that barely lasted a season. The good news? With the right tools, planning, and a few pro tips, you can create a lighting setup that’s not only beautiful but durable and safe. This guide walks you through every step, from planning your layout to choosing the right hardware, so your patio becomes the envy of the neighborhood—without the headaches.
Planning Your Patio String Light Layout
Measure Your Space and Define the Area
Before you buy a single light, take out a measuring tape and map out your patio. How wide and deep is your space? Are there overhangs, beams, or railings you can use as anchor points? I once tried to hang lights on a large L-shaped patio without measuring first—result? A lopsided, droopy mess. Lesson learned: always measure.
Visual guide about hanging string lights under patio
Image source: charlestoncrafted.com
Use painter’s tape to mark where you want the lights to start and end. This visual guide helps you see how the layout will look and makes it easier to plan the number of strands you’ll need. If your patio is 15 feet wide, for example, you’ll want lights that cover that distance—or plan for multiple strands connected with extension cords.
Choose Your Lighting Pattern
There’s no one-size-fits-all approach. Your pattern depends on your patio’s shape, size, and how you use it. Here are three popular options:
- Straight Lines: Simple and clean. Run lights parallel to your house or across the width of the patio. Great for narrow or small spaces.
- Grid or Crisscross: Create a web-like effect by running lights both horizontally and vertically. Ideal for larger patios or gazebos. Gives a “canopy” feel.
- Zigzag or Diagonal: Adds visual interest and works well in irregularly shaped areas. Helps distribute light more evenly.
For a 12×16 ft patio, a crisscross grid with lights every 4 feet creates a balanced, inviting glow. I used this pattern in my own backyard and loved how it lit up the entire space without dark corners.
Consider Light Spacing and Height
Too close, and it feels like a carnival. Too far, and the effect is lost. Aim for lights spaced 18–24 inches apart. This gives enough coverage without overwhelming the space.
Height matters too. Hang lights at least 7–8 feet above the ground to avoid head bumps and ensure even lighting. If you’re using a sloped roof or pergola, adjust so the lowest point is still above eye level. Use a ladder or extendable pole to test height before committing.
Choosing the Right String Lights and Hardware
Types of String Lights: Pros and Cons
Not all string lights are created equal. Here’s a quick breakdown of the most common types:
- Incandescent (Vintage): Warm, soft glow. Classic look. Downside: Less energy-efficient, shorter lifespan.
- LED (Modern): Bright, energy-saving, long-lasting. Available in warm white, cool white, color, and color-changing options. Downside: Some cheaper LEDs can look harsh if not diffused.
- Solar-Powered: Eco-friendly, no wiring needed. Great for off-grid areas. Downside: Dimmer, less reliable in cloudy climates.
- Smart Lights: Control via app or voice (e.g., Alexa, Google Home). Can change color, brightness, and set schedules. Downside: More expensive, requires Wi-Fi or Bluetooth.
For most patios, I recommend warm white LED string lights. They’re bright enough to see, energy-efficient, and give that cozy, inviting glow. I use a 48-foot strand with 240 warm white LEDs—perfect for my 12×16 ft space with a few extra feet for connections.
Essential Hardware for Secure Installation
Don’t skip the hardware—it’s what keeps your lights from sagging or falling. Here’s what you’ll need:
- Eye Screws or Hooks: Use stainless steel or galvanized steel to resist rust. Install into wood beams, eaves, or railings. For concrete or brick, use masonry anchors.
- Turnbuckles: These adjustable tensioners let you tighten the wire or string, preventing sag. A game-changer for long runs.
- Outdoor Extension Cords: Choose weather-resistant, grounded cords. Avoid daisy-chaining more than 3 strands unless the manufacturer allows it.
- Zip Ties or Cable Clips: Use UV-resistant plastic clips to secure wires along beams or railings. Avoid metal clips—they can damage wires over time.
- Light Hangers or Clips: Specialized clips that attach directly to the light sockets. Prevents stress on the wires.
I once used regular screws and zip ties—after one rainy season, half the lights were dangling. Switching to stainless steel eye hooks and turnbuckles made all the difference. Now, my lights stay taut and secure, even in strong winds.
Power Source and Safety Considerations
Always plug your lights into a GFCI (Ground Fault Circuit Interrupter) outlet. This shuts off power if it detects a short or moisture—critical for outdoor safety. If your patio doesn’t have a GFCI outlet, install one or use a GFCI-protected power strip.
Avoid overloading circuits. Most outdoor outlets support up to 15 amps. A single LED string draws about 0.1–0.2 amps, so you can run 10–15 strands safely. But check your local electrical code and manufacturer guidelines.
For solar lights, place the solar panel in a spot that gets at least 6 hours of direct sunlight. South-facing areas work best. I mounted mine on the roof edge—works perfectly, even in winter.
Step-by-Step Guide to Hanging String Lights Under Patio
Step 1: Install Anchor Points
Start by marking where you’ll place your eye screws or hooks. Use a pencil and level to ensure they’re aligned. For a grid pattern, mark points every 4–6 feet along the perimeter and cross-beams.
Drill pilot holes slightly smaller than the screw diameter to prevent wood from splitting. Then, screw in the eye hooks by hand or with a screwdriver. For masonry, use a hammer drill and masonry anchors.
Pro tip: Install turnbuckles at the end points of long runs. This lets you tighten the wire later and prevents sag.
Step 2: Run a Support Wire (Optional but Recommended)
For longer spans (over 15 feet), I highly recommend running a stainless steel support wire between anchor points. This supports the weight of the lights and prevents drooping.
Use wire rope (1/16” to 1/8” diameter) and attach it to turnbuckles at both ends. Tighten until the wire is taut but not overly strained. Then, clip your string lights to the wire using S-hooks or zip ties.
I used this method on a 20-foot span between my house and pergola. Without the wire, the lights would have sagged by 6 inches. With it? Perfectly level.
Step 3: Attach the String Lights
Unroll your lights and lay them out on the ground first. Check for broken bulbs or damaged wires. Plug in a section to test—better to fix issues now than after installation.
Start at the power source and work outward. Use light hangers or clips every 12–18 inches to secure the lights to the support wire or directly to anchor points. For grid patterns, run one direction first (e.g., horizontal), then the other (vertical), crossing at the anchor points.
Don’t stretch the lights too tight—this can damage the wires. Leave a little slack for expansion and contraction due to temperature changes.
Step 4: Connect Multiple Strands Safely
If using multiple strands, connect them end-to-end using manufacturer-approved connectors. Never splice wires unless you’re experienced with outdoor electrical work.
Use outdoor-rated extension cords to reach the outlet. Route cords along beams or railings, securing with zip ties or clips. Avoid placing cords where people walk—tripping hazard!
For a clean look, I run my cords behind the gutter and down the downspout to the outlet. It’s hidden from view and protected from rain.
Step 5: Test and Adjust
Plug in the lights and walk around the patio. Check for dark spots, glare, or sagging. Use turnbuckles to adjust tension. If a section is too bright, add a sheer curtain or plant to diffuse the light.
Make sure the lights are evenly spaced and don’t dangle into walkways. Safety first!
Creative Ideas and Design Tips for Maximum Impact
Layer Your Lighting
String lights alone can feel flat. Layer them with other light sources for depth:
- Add path lights along walkways.
- Use floor lamps or table lanterns for task lighting.
- Hang lanterns from the same support wire for a rustic touch.
I added solar-powered lanterns between my string lights—looks like a fairy-tale garden at night.
Use Dimmers and Timers
Install a dimmer switch to adjust brightness. Perfect for setting the mood—bright for dinner, soft for stargazing. Many smart plugs and timers let you schedule when lights turn on/off. No more running outside to flip the switch!
I set my lights to turn on at dusk and off at 11 PM. Saves energy and adds convenience.
Incorporate Nature
Weave lights through tree branches, drape them over a pergola, or wrap them around a trellis. This blends the lights into the landscape and creates a more organic feel.
One summer, I draped lights over a jasmine-covered arbor—the scent and glow together were pure magic.
Color and Theme Ideas
- Warm White: Timeless, elegant. Works with any decor.
- Multicolor: Fun for parties or holidays. Use sparingly to avoid a carnival look.
- Frosted or Globe Lights: Softer glow, less harsh than clear bulbs.
- Edison-Style Bulbs: Vintage charm. Great for rustic or industrial patios.
I switch to colored lights for birthdays and holidays, but always go back to warm white for everyday use.
Maintenance, Safety, and Long-Term Care
Seasonal Care and Storage
Inspect your lights each season. Look for:
- Frayed wires
- Corroded connectors
- Broken bulbs
Replace damaged sections immediately. For long-term storage, unplug and remove lights after winter. Store in a dry, cool place. I use labeled bins to keep strands tangle-free.
Weatherproofing Tips
Even outdoor-rated lights need protection:
- Use weatherproof covers for outlets and connections.
- Seal wire splices with electrical tape or heat-shrink tubing.
- Trim overhanging branches that could fall on lights during storms.
After a bad storm, I found one of my connections exposed. A quick fix with a waterproof box saved the whole setup.
When to Replace vs. Repair
If more than 20% of bulbs are out or the wire is damaged, it’s time to replace the strand. For minor issues—like a broken bulb—replace it or use a bulb repair tool.
LEDs last 25,000–50,000 hours. If your lights are older than 5 years and dimming, consider upgrading to newer, more efficient models.
Real-World Examples and Cost Comparison
Here’s a quick look at different setups and their estimated costs (as of 2024):
| Setup Type | Materials Needed | Estimated Cost | Best For |
|---|---|---|---|
| Basic Straight Lines | 2x 25-ft LED strands, 6 eye hooks, zip ties, GFCI outlet | $50–$75 | Small patios, beginners |
| Grid with Support Wire | 4x 25-ft strands, 12 eye hooks, turnbuckles, 20-ft wire rope, clips | $120–$180 | Medium to large patios |
| Smart Color-Changing | Smart LED strands, Wi-Fi hub, app-controlled timer, waterproof box | $200–$350 | Tech-savvy users, parties |
| Solar-Powered | 2x solar string lights, solar panel, mounting kit | $60–$100 | Off-grid areas, eco-friendly homes |
My personal setup? The grid with support wire. Cost about $150, but it’s held up for 4 years with minimal maintenance. Worth every penny.
Final Thoughts: Light Up Your Life—Literally
Hanging string lights under your patio isn’t just about lighting—it’s about creating a feeling. A place where memories are made, laughter echoes, and quiet moments feel special. It’s one of those small upgrades that make a huge difference in how you enjoy your home.
You don’t need to be an electrician or DIY expert. With careful planning, the right tools, and a little patience, you can achieve a stunning ambiance that lasts for years. Whether you go simple or elaborate, the key is to make it yours. Add your favorite colors, weave in nature, or layer in other lights—make it a reflection of your style.
And remember: safety first, but don’t overthink it. I’ve seen people spend weeks agonizing over every detail. Just start. Hang a few lights. See how it feels. Adjust as you go. The best part? Every time you step outside and see that soft glow, you’ll know you did it—and it was worth it.
So grab your ladder, pick your lights, and get started. Your patio is waiting to shine.
Frequently Asked Questions
How do I hang string lights under a patio without drilling holes?
Use adhesive hooks, tension rods, or magnetic mounts designed for outdoor use. These options securely hold string lights while preserving your patio structure—perfect for renters or minimal-damage setups.
What’s the best way to hang string lights under a patio for even spacing?
Measure and mark hook placements every 2-3 feet for uniform light distribution. Use a laser level to align hooks, ensuring your string lights hang straight and avoid sagging.
Can I leave string lights under my patio in all weather conditions?
Only use lights rated for outdoor/wet environments (check packaging for IP65 or higher). Always unplug during storms, and opt for LED bulbs to reduce heat and energy use.
How do I hide the cords when hanging string lights under a patio?
Run cords along beams or railings using cord clips or conduit channels. For a seamless look, choose lights with green or brown wires that blend with your patio’s color scheme.
How many string lights do I need for my patio?
Measure the perimeter or grid pattern you plan to create, then add 10-15% extra for slack. For a 20-foot patio edge, two 24-foot string light strands typically suffice.
Are solar-powered string lights good for under a patio?
Yes, if the patio receives indirect sunlight. Solar lights charge best under translucent covers or near skylights, offering energy-free ambiance without wiring constraints.

