Featured image for outdoor patio string lights on columns
Image source: jessicawellinginteriors.com
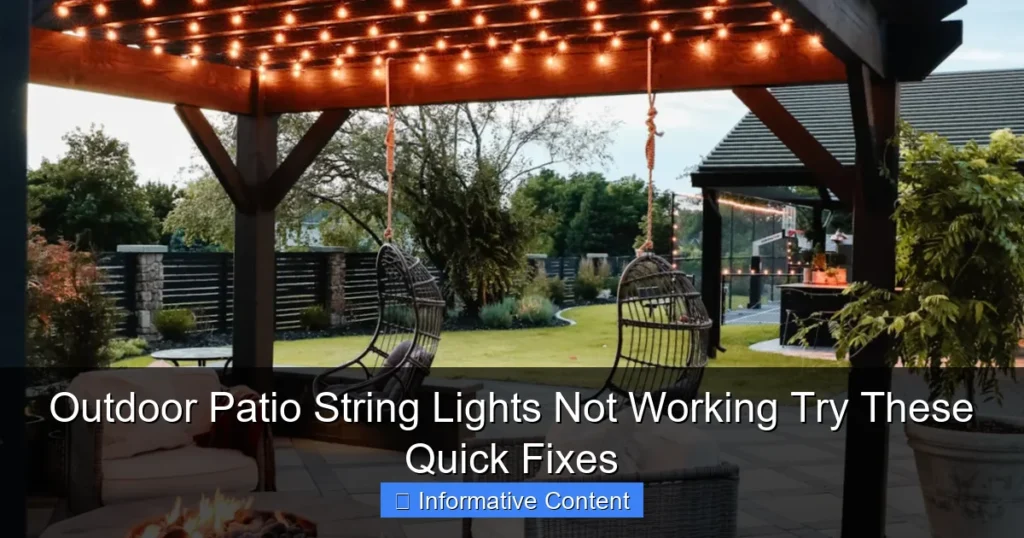
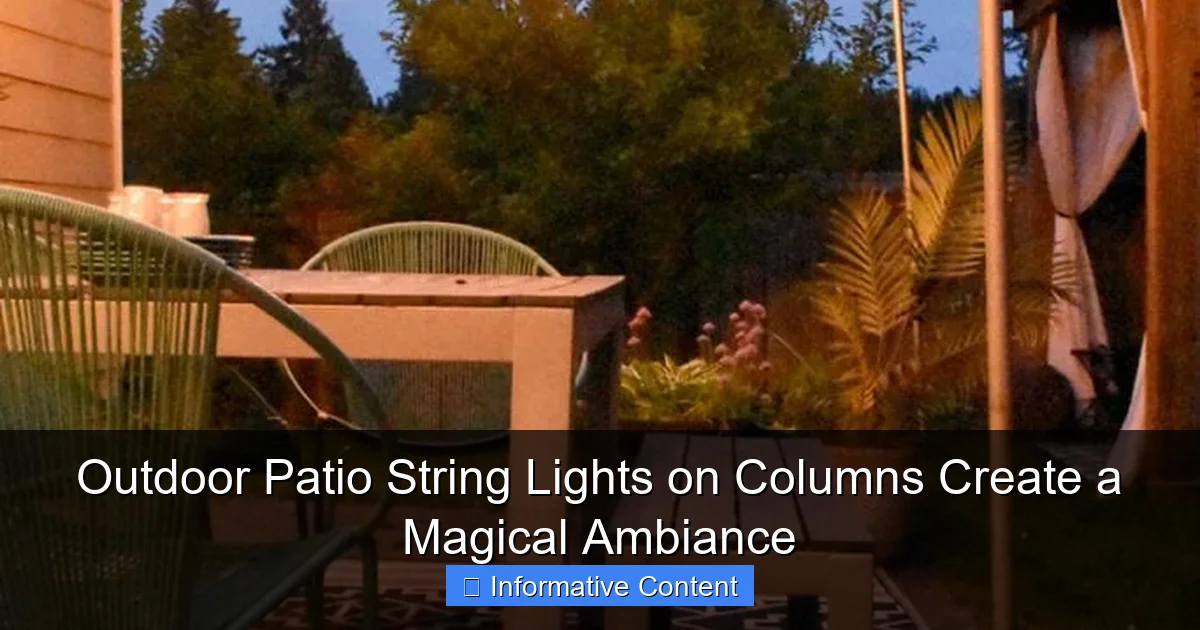
Outdoor patio string lights on columns instantly transform your backyard into a captivating retreat, blending elegant design with warm, ambient illumination. Perfect for entertaining or relaxing, these lights highlight architectural features while casting a soft, inviting glow that enhances any outdoor space.
Key Takeaways
- Install lights at dusk: Maximize ambiance by timing installation with natural light transitions.
- Choose weatherproof bulbs: Ensure durability with IP65-rated or higher for outdoor safety.
- Space bulbs evenly: Maintain 6–12 inch gaps for balanced, professional-looking illumination.
- Mix heights creatively: Vary string heights on columns for dynamic depth and visual interest.
- Use warm white tones: Opt for 2700K–3000K bulbs to enhance coziness and elegance.
- Anchor strings securely: Prevent sagging with stainless steel hooks or tension cables.
📑 Table of Contents
- The Magic of Outdoor Patio String Lights on Columns
- Why String Lights on Columns Are a Game-Changer
- Choosing the Right String Lights for Your Columns
- Installation Tips: How to Hang Lights Without the Headache
- Styling Your Patio: Beyond the Basics
- Common Mistakes to Avoid (And How to Fix Them)
- Real-Life Examples and Inspiration
- Conclusion: Light Up Your Nights
The Magic of Outdoor Patio String Lights on Columns
There’s something undeniably magical about stepping onto your patio as the sun sets, and the soft glow of outdoor patio string lights on columns begins to twinkle above. It’s not just the light itself, but the way it transforms your outdoor space into a cozy, inviting sanctuary. Whether you’re hosting a summer barbecue, enjoying a quiet evening with a book, or sharing a romantic dinner under the stars, these lights add a layer of warmth and charm that’s hard to replicate with any other decor. I remember the first time I strung up lights on my backyard columns—it felt like I was unwrapping a gift to my home, one that kept giving every single night.
But let’s be real: it’s not always as simple as hanging a few bulbs and calling it a day. From choosing the right type of lights to figuring out the best way to install them without damaging your columns or creating a tangled mess, there’s a lot to consider. That’s why I’m here to share my personal experiences, hard-won tips, and practical advice to help you create the perfect ambiance. Whether you’re a seasoned DIYer or a first-time decorator, this guide will walk you through everything you need to know about using outdoor patio string lights on columns to turn your outdoor space into a magical retreat.
Why String Lights on Columns Are a Game-Changer
The Aesthetic Appeal
There’s a reason string lights have become a staple in outdoor design—they’re versatile, affordable, and instantly elevate the mood of any space. When you mount them on columns, you’re not just adding light; you’re creating a focal point that draws the eye upward and adds vertical interest to your patio. Think of it like framing a painting: the columns become the border, and the lights are the artwork.
For example, I once visited a friend who had a narrow backyard with two tall brick columns flanking her patio. She ran warm white Edison-style bulbs from one column to the other in a gentle zigzag pattern. The effect was stunning—it made the space feel larger, more intimate, and incredibly inviting. The columns, which had previously just been structural elements, now felt like part of the decor.
Functional Benefits
Beyond looks, outdoor patio string lights on columns offer real practical benefits. They provide ambient lighting that’s perfect for evening entertaining, making it easier to see (and be seen) without harsh overhead fixtures. They also extend the usability of your patio into the night, which is a huge win if you live in a climate with long summer days.
One thing I’ve noticed is that column-mounted lights tend to be more effective than ground-level lighting. Since they’re elevated, they cast a broader, more even glow across the space. Plus, they’re less likely to get knocked over by pets or guests—something I learned the hard way when my dog knocked over a floor lamp during a party!
Cost-Effective Ambiance
Compared to built-in lighting or professional installations, string lights are a budget-friendly option. You can create a high-end look without spending hundreds of dollars. I once spent under $50 on a set of 48-foot LED string lights and a few hooks, and the transformation was incredible. It’s proof that you don’t need a big budget to make a big impact.
Choosing the Right String Lights for Your Columns
Types of Bulbs: LED vs. Incandescent
When shopping for outdoor patio string lights on columns, you’ll typically choose between LED and incandescent bulbs. Here’s my take:
- LED bulbs: Energy-efficient, long-lasting (up to 25,000 hours), and cool to the touch. They’re perfect for year-round use and come in a variety of colors and styles. The downside? They can be pricier upfront, but the energy savings pay off over time.
- Incandescent bulbs: Warm, classic glow that many people love for its nostalgic vibe. They’re usually cheaper but burn out faster and use more energy. I used them for years but switched to LED after one too many bulb replacements.
For example, I have a set of vintage-style Edison bulbs with exposed filaments. They give off a warm, golden light that’s perfect for summer evenings, but I only use them for special occasions because they’re incandescent. For everyday use, I rely on energy-efficient LED string lights with a similar aesthetic.
Color Temperature Matters
Not all “white” light is created equal. The color temperature (measured in Kelvin) affects the mood of your space:
- 2700K–3000K: Warm white—creates a cozy, intimate atmosphere. Ideal for patios and dining areas.
- 4000K–5000K: Cool white—brighter and more energizing. Better for task lighting (e.g., outdoor kitchens).
- Multicolor or RGB: Great for parties or themed events, but can feel gimmicky if overused. I keep a set of color-changing LEDs for holidays and switch back to warm white for everyday.
Length, Spacing, and Connectivity
Before you buy, measure the distance between your columns and decide how many strands you’ll need. Here are some tips:
- For columns 10–15 feet apart, a single 24–48-foot strand usually works.
- If you want a “draped” look, add extra length (e.g., a 48-foot strand for a 12-foot span).
- Look for lights with end-to-end connectors if you need to cover a longer distance. Just don’t exceed the manufacturer’s recommended number of connected strands—this can cause overheating.
Pro tip: I once bought lights that were too short and had to buy a second set, which doubled my cost. Now I always add 10–20% extra length to account for curves or slack.
Weather Resistance
Since these lights will be outdoors, weather resistance is non-negotiable. Look for:
- IP65 or higher waterproof rating (protects against rain and dust).
- UV-resistant wires and bulbs (prevents yellowing and cracking from sun exposure).
- Heavy-duty sockets (cheap plastic sockets crack in cold weather).
Installation Tips: How to Hang Lights Without the Headache
Assess Your Column Material
The first step is understanding what you’re working with. Columns can be made of wood, brick, stucco, metal, or even vinyl, and each requires a different approach:
- Wood columns: Easy to work with. Use cup hooks or screw-in eye bolts for a secure hold. Avoid nails—they can split the wood over time.
- Brick or stone: Use masonry anchors or heavy-duty adhesive hooks (like Command Outdoor Strips). Drilling into brick is possible but requires a masonry bit and patience.
- Metal columns: Magnetic hooks work great for steel. For aluminum, use adhesive hooks or small clamps.
- Vinyl or stucco: Stick with adhesive hooks or removable clips. Avoid drilling—it can crack the surface.
I once tried to hang lights on a stucco column with nails. Not only did it damage the surface, but the lights kept falling off in the wind. Lesson learned: always check the material before you start!
Tools and Supplies You’ll Need
- Measuring tape
- Drill (if needed)
- Masonry bit (for brick)
- Cup hooks, eye bolts, or adhesive hooks
- Zip ties (for securing loose wires)
- Extension ladder (for tall columns)
- Work gloves (to protect your hands)
Step-by-Step Installation
Here’s how I install outdoor patio string lights on columns without losing my mind:
- Plan your layout: Decide if you want a straight line, zigzag, or crisscross pattern. Use painter’s tape to mark hook positions.
- Install hooks: For wood, screw in cup hooks at equal heights. For brick, use a drill to create pilot holes, then insert masonry anchors and hooks.
- Hang the lights: Start at one end and work your way to the other. Leave a little slack in the middle for a draped effect.
- Secure the wires: Use zip ties to attach loose wires to the column or hooks. This prevents sagging and wind damage.
- Test the lights: Plug them in and check for dark spots. Adjust the tension or add more hooks if needed.
One thing that saved me during a recent installation was using a ladder stabilizer. It attaches to the top of your ladder and rests against the column, giving you more stability. Trust me, it’s worth the $20 investment!
Creative Hanging Ideas
- Zigzag pattern: Great for long columns. Creates visual interest and spreads light evenly.
- Crisscross (X-shape): Perfect for square or rectangular patios. Gives a festive, market-like vibe.
- Double strand: Run two rows of lights (e.g., one at eye level, one higher up) for a layered look.
Styling Your Patio: Beyond the Basics
Layering with Other Lighting
String lights are just one piece of the puzzle. To create a truly magical ambiance, layer them with other light sources:
- Path lights: Line walkways with solar-powered stakes.
- Table lanterns: Place on dining tables or side tables for task lighting.
- Uplighting: Shine LED spotlights at the base of columns to highlight their texture.
I love the effect of combining string lights with flickering candles in glass jars. It adds depth and warmth, especially during evening gatherings.
Complementing Your Decor
The style of your lights should match your patio’s aesthetic:
- Bohemian: Mix colorful bulbs with tassels or macrame.
- Farmhouse: Use vintage-style Edison bulbs with black or bronze fixtures.
- Modern: Opt for sleek, minimalist designs with warm white LEDs.
- Tropical: Add palm-leaf or flamingo-shaped bulbs for a playful touch.
Seasonal Adjustments
Don’t be afraid to change things up! I like to swap out my lights with the seasons:
- Summer: Warm white or soft yellow for a cozy vibe.
- Fall: Amber or orange bulbs to match the autumn leaves.
- Winter: Cool white or blue for a frosty, holiday feel.
- Spring: Pastel colors or clear bulbs with floral accents.
Common Mistakes to Avoid (And How to Fix Them)
Overloading the Circuit
It’s tempting to connect 10 strands of lights and call it a day, but most outlets can only handle 5–7 strands of LED lights. Exceeding this can trip your breaker or even cause a fire. Always check the manufacturer’s guidelines and use a power strip with surge protection if you need extra outlets.
Ignoring the Wind Factor
Wind is the enemy of outdoor lights. If your strings are too tight, they can snap. If they’re too loose, they’ll sway and tangle. The sweet spot? A slight sag in the middle (about 6–12 inches). Use zip ties to secure the ends and prevent excessive movement.
Using the Wrong Hooks
I once used regular picture hooks on a brick column, and the lights fell off during a storm. Now I swear by heavy-duty masonry anchors or outdoor adhesive strips. They’re more expensive, but they’re worth it for peace of mind.
Forgetting About Maintenance
Outdoor lights need upkeep. Check them every few months for:
- Frayed wires
- Burnt-out bulbs
- Corroded sockets
- Loose hooks
Replace damaged parts immediately—it’s easier (and safer) than waiting until everything fails.
Real-Life Examples and Inspiration
Table: Popular String Light Styles for Columns
| Style | Best For | Pros | Cons |
|---|---|---|---|
| Edison Bulbs | Vintage, farmhouse, or rustic patios | Warm, nostalgic glow; stylish filament design | Higher energy use (if incandescent); bulbs can be fragile |
| LED Globe Lights | Modern, minimalist spaces | Energy-efficient; uniform light distribution | Can feel “cold” if color temperature is too high |
| Twinkling Fairy Lights | Romantic or whimsical settings | Soft, magical effect; great for small spaces | Less effective in large patios; can be hard to see in daylight |
| Colored RGB Lights | Parties or themed events | Fun, customizable colors; remote-controlled | Overwhelming for everyday use; shorter lifespan |
Case Study: A Backyard Transformation
A friend of mine, Sarah, had a drab concrete patio with two plain columns. She wanted to make it feel more like a “destination” for evening gatherings. Here’s what she did:
- Installed warm white LED string lights in a crisscross pattern between the columns.
- Added solar-powered path lights along the walkway.
- Placed a few lanterns on her dining table.
- Used removable hooks so she could take the lights down in winter.
The result? Her patio now feels like a cozy outdoor living room. She told me it’s her favorite place to unwind after work.
DIY vs. Pre-Assembled Kits
If you’re short on time, pre-assembled kits can save you hours of work. I recently used a “column light kit” that came with hooks, lights, and instructions. It was perfect for a quick upgrade. But if you’re a DIY enthusiast (like me), building your own setup lets you customize every detail.
Conclusion: Light Up Your Nights
There’s no denying it: outdoor patio string lights on columns are one of the easiest, most impactful ways to transform your outdoor space. They’re affordable, versatile, and—when done right—can make your patio feel like a magical retreat every single night. Whether you’re going for a rustic, modern, or whimsical look, the right lights can set the tone for unforgettable evenings with family and friends.
The key is to take your time with the planning and installation. Measure twice, hang once. Choose lights that match your style and the needs of your space. Don’t be afraid to experiment with patterns, colors, and layering. And most importantly—have fun with it! After all, this isn’t just about lighting a space. It’s about creating memories under the stars, one twinkling bulb at a time.
So go ahead, grab your hooks and your favorite strand of lights, and get to work. Your magical patio awaits.
Frequently Asked Questions
How do I install outdoor patio string lights on columns without damaging them?
Use removable hooks, adhesive clips, or wrap lights around the column base to avoid drilling. This method keeps your columns intact while securing the lights safely for a magical ambiance.
What type of outdoor patio string lights on columns are weather-resistant?
Look for LED string lights with an IP65 or higher waterproof rating, designed to withstand rain, wind, and UV exposure. These are ideal for year-round use on columns.
Can I use solar-powered string lights for columns on my patio?
Yes, solar-powered lights are a great eco-friendly option for column installations. Just ensure the solar panel gets direct sunlight during the day for optimal performance.
How do I hide the wires when hanging string lights on columns?
Use cable clips or raceways in matching colors to blend wires into the column surface. Alternatively, route cords behind plants or furniture for a clean, seamless look.
What spacing works best for outdoor patio string lights on columns?
Space lights 6–8 inches apart along the column for balanced illumination. Adjust based on bulb size and column height to create even, inviting coverage.
Are outdoor patio string lights on columns safe for wooden or painted surfaces?
Yes, if you use low-heat LED bulbs and avoid over-tightening wires. LED lights stay cool and won’t damage finishes, making them safe for most surfaces.