Featured image for outdoor string light poles for patio
Image source: i.pinimg.com
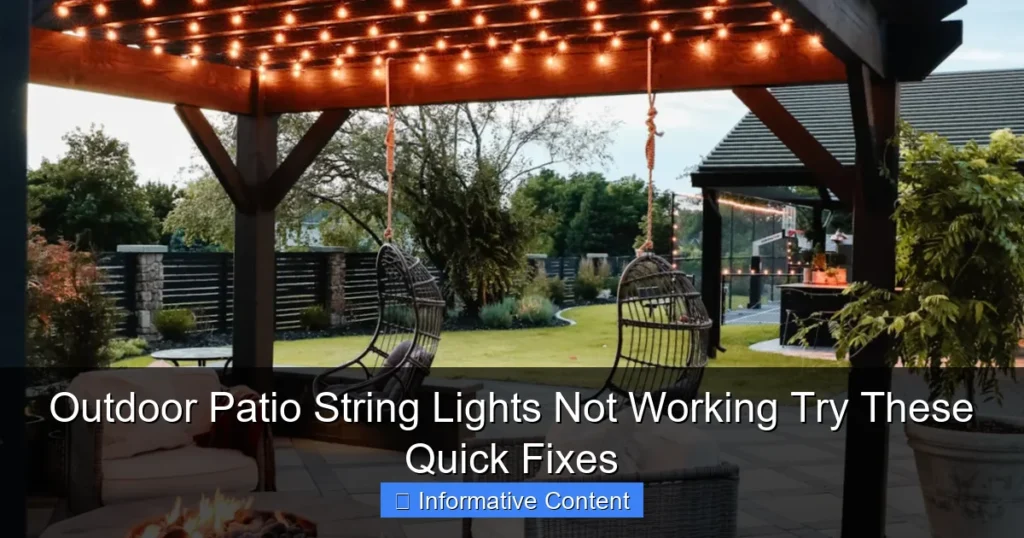
Outdoor string light poles for patio instantly transform your outdoor space into a warm, inviting retreat with minimal effort. Sturdy, weather-resistant designs ensure reliable support for your lights while enhancing your patio’s ambiance year-round. Perfect for entertaining or cozy nights, these poles blend function and style for unforgettable outdoor lighting.
Key Takeaways
- Choose weather-resistant materials: Opt for rust-proof metals or treated wood for long-lasting durability.
- Height matters: Install poles 7–9 feet high for optimal light spread and safety.
- Secure installation: Anchor poles in concrete or use weighted bases to prevent tipping.
- Space poles evenly: Place 10–12 feet apart to avoid sagging and ensure uniform lighting.
- Mix functionality and style: Pick designs that complement your patio’s aesthetic while serving practical needs.
- Use adjustable poles: Allow for flexible light positioning and easy maintenance.
📑 Table of Contents
- Why Outdoor String Light Poles for Patio Are a Game-Changer
- Understanding Outdoor String Light Poles: Types and Materials
- Choosing the Right Height, Spacing, and Layout
- Installation Tips: From Beginner to Pro
- Maintenance and Longevity: Keeping Your Lights Glowing
- Top Products and Budget-Friendly Options
- Conclusion: Light Up Your Life (Literally)
Why Outdoor String Light Poles for Patio Are a Game-Changer
Imagine this: it’s a warm summer evening, the sun has just dipped below the horizon, and the soft glow of string lights dances above your patio. Laughter fills the air, glasses clink, and the mood is set—perfect, right? That magic doesn’t happen by accident. For me, it started with a simple upgrade: adding outdoor string light poles for patio to my backyard. Before that, I’d tried hanging lights from trees, fences, and even gutters, but nothing quite gave me the even, elegant illumination I craved. The lights would sag, tangle, or just look… off. Then I discovered dedicated poles, and suddenly, my outdoor space transformed.
These poles aren’t just functional—they’re the unsung heroes of backyard ambiance. Whether you’re hosting a dinner party, enjoying a quiet night with a book, or simply wanting to extend your outdoor time past dusk, the right string light poles elevate your space. They provide stability, prevent sagging, and create a professional, polished look. But with so many options out there, how do you choose? In this guide, I’ll walk you through everything I’ve learned—what works, what doesn’t, and how to pick the perfect setup for your patio.
Understanding Outdoor String Light Poles: Types and Materials
Types of String Light Poles
When I first started researching poles, I was surprised by how many types exist. Each has its own strengths, depending on your patio layout, aesthetic, and needs. Here’s a breakdown:

Visual guide about outdoor string light poles for patio
Image source: i.pinimg.com
- Freestanding poles: These are standalone units, often with a weighted base or ground stakes. They’re ideal for patios without existing structures to hang from. I use two of these on either side of my dining area—they’re easy to move and adjust if I change my layout.
- Wall-mounted poles: These attach to your home’s exterior walls, fences, or pergolas. They’re great for maximizing vertical space and creating a clean, integrated look. Just make sure your wall can support the weight.
- In-ground poles: These are permanently installed into the ground, offering maximum stability. I installed a few of these around my pool area because they can withstand wind and heavy rain. They’re a commitment, though—once they’re in, they’re not going anywhere.
- Telescoping poles: Adjustable in height, these are perfect for renters or those who like flexibility. I’ve used them for temporary setups during parties, and they’re surprisingly sturdy.
Materials Matter: Durability and Aesthetics
Not all poles are created equal when it comes to materials. Here’s what I’ve found works best:
- Stainless steel: My top pick. It’s rust-resistant, strong, and looks sleek. I have a set of stainless steel poles that still look brand new after three years, even through harsh winters.
- Aluminum: Lightweight and corrosion-resistant, but not as strong as steel. Good for lighter string lights or temporary setups.
- Wood: Offers a rustic, natural look. I’ve seen beautiful setups using cedar poles, but they require more maintenance—sealing, staining, and protection from moisture.
- Plastic or PVC: Budget-friendly and lightweight, but not ideal for heavy lights or high-wind areas. I tried these once and had to replace them after one season due to cracking.
Pro tip: Always check the weight capacity of your poles. Most string lights are lightweight, but if you’re using heavier bulbs or adding decorations (like lanterns or greenery), you’ll need stronger poles.
Choosing the Right Height, Spacing, and Layout
Height: How High Should You Go?
One of the biggest mistakes I made early on was hanging lights too low. They blocked my view, felt claustrophobic, and made it hard to walk under them. Here’s what I learned:
- 7–8 feet (2.1–2.4 meters): Ideal for most patios. This height creates a cozy, intimate feel without feeling cramped. I use this for my dining and lounge areas.
- 9–10 feet (2.7–3 meters): Great for larger spaces or if you want a more open, airy feel. I installed a few of these near my pool to avoid obstructing sightlines.
- 12+ feet (3.7+ meters): Best for high-ceilinged pergolas or large open yards. Not necessary for most patios, but worth considering if you have a spacious area.
Tip: Measure the distance from your eye level to the top of the pole. You should be able to walk under the lights comfortably without ducking.
Spacing: Avoiding the “Sag Zone”
Sagging lights are a common problem, especially with longer runs. The key is proper spacing:
- Every 10–15 feet (3–4.5 meters): This is the sweet spot for most string lights. I space my poles 12 feet apart, which keeps the lights taut and evenly lit.
- Closer spacing (6–8 feet): Use this if you’re using heavy-duty lights or live in a windy area. I did this near my windy side yard, and the lights stay put.
- Use tensioners: These small devices attach to the ends of your string lights and help maintain tension. I swear by them—they’re cheap and make a huge difference.
Layout Ideas for Maximum Impact
Your layout can make or break the ambiance. Here are some ideas I’ve tried and loved:
- Grid pattern: Create a crisscross of lights above your patio. I used this for a dinner party, and it felt like dining under a starry sky.
- Linear run: Hang lights in a straight line along the edge of your patio. Simple but effective—I use this for my lounge area.
- Canopy effect: Use multiple poles to create a “roof” of lights. I did this over my outdoor kitchen, and it’s now my favorite spot to cook at night.
- Zigzag pattern: Add visual interest by zigzagging lights between poles. I’ve used this for parties, and it adds a playful vibe.
Pro tip: Sketch your layout on paper first. Measure your patio and plan where poles will go. This saves time and avoids costly mistakes.
Installation Tips: From Beginner to Pro
Preparing Your Patio
Before you start, take stock of your patio’s condition. I learned this the hard way when I installed a pole on a cracked concrete slab—it wobbled and had to be redone. Here’s what to do:
- Check for level ground: Uneven surfaces can cause poles to lean. I use a level tool to ensure my bases are flat.
- Clear the area: Remove furniture, planters, or debris. I always do this the day before installation to avoid last-minute stress.
- Mark pole locations: Use chalk or stakes to mark where each pole will go. I’ve found this helps me visualize the layout better.
Step-by-Step Installation Guide
Here’s how I install most of my poles, whether freestanding or in-ground:
- Assemble the pole: Follow the manufacturer’s instructions. Most poles come in sections that screw together.
- Prepare the base: For freestanding poles, attach the weighted base. For in-ground poles, dig a hole about 1–2 feet deep (depending on pole height).
- Secure the pole: Place the pole in the hole and fill it with concrete (for in-ground) or attach the base (for freestanding). Use a level to ensure it’s straight.
- Attach the light hooks: Most poles have built-in hooks or loops. I add extra S-hooks for flexibility.
- Hang the lights: Start at one end and work your way to the other. Use zip ties or carabiners to secure the lights to the hooks.
Tip: If you’re using in-ground poles, let the concrete cure for at least 24 hours before hanging lights.
Dealing with Challenges
Every installation has its hiccups. Here are common issues I’ve faced—and how to solve them:
- Wobbly poles: If your pole isn’t stable, add more concrete or use a wider base. I once had to reinforce a pole with extra gravel and sand.
- Uneven lighting: If some bulbs are brighter than others, check for loose connections or faulty bulbs. I keep spare bulbs on hand for quick fixes.
- Weather damage: High winds or heavy rain can knock down poles. I always use guy wires (diagonal supports) for added stability.
Maintenance and Longevity: Keeping Your Lights Glowing
Regular Cleaning and Inspection
Outdoor poles and lights need regular care to stay in top shape. Here’s my maintenance routine:
- Monthly check: I inspect my poles every month for rust, loose bolts, or damaged wires. It takes 10 minutes and prevents bigger issues.
- Clean the bulbs: Dust and grime can dim your lights. I use a soft cloth and mild soap to clean the bulbs every few months.
- Check the wiring: Look for frayed wires or exposed connections. I had one set of lights that kept flickering—turned out a wire was chewed by a squirrel!
Seasonal Care
Different seasons bring different challenges. Here’s how I handle them:
- Winter: I remove my string lights in winter to prevent ice damage. The poles stay, but I cover them with protective caps.
- Spring: After winter, I check for corrosion (especially on metal poles) and replace any damaged parts.
- Summer: High heat can warp plastic poles. I keep my PVC poles in the shade when not in use.
- Fall: I clean up leaves and debris that can accumulate around the poles. Wet leaves can cause rot on wooden poles.
When to Replace Parts
Nothing lasts forever. Here’s when I know it’s time to replace parts:
- Poles: If they’re bent, rusted, or unstable, it’s time for new ones. I replaced my first set after 5 years—they were still functional but looked worn.
- String lights: If more than 20% of the bulbs are out or the cord is damaged, replace the whole set. I learned this after trying to fix a string that kept shorting out.
- Hooks and hardware: Replace these if they’re corroded or broken. I keep a spare kit for quick repairs.
Top Products and Budget-Friendly Options
High-End Picks for Durability
If you’re willing to invest, these are my top picks for long-lasting poles:
| Product | Material | Height | Weight Capacity | Best For |
|---|---|---|---|---|
| Outdoor Living Today 10-Foot Stainless Steel Pole | Stainless steel | 10 feet | 20 lbs | Large patios, permanent setups |
| Sunjoy 8-Foot Adjustable Pole | Aluminum | 6–8 feet | 15 lbs | Renters, flexible layouts |
| Backyard X-Scapes Cedar Pole | Cedar wood | 7 feet | 10 lbs | Rustic patios, natural aesthetics |
These poles are pricier but worth it for their durability and performance. I’ve had my stainless steel poles for 4 years, and they still look new.
Mid-Range and Budget Options
For those on a budget, these options deliver good value:
- Best Choice Products 7-Foot Freestanding Pole: Made of powder-coated steel, it’s rust-resistant and holds up to 12 lbs. I used this for a party setup, and it worked great.
- HOMCOM 6-Foot Adjustable Pole: Lightweight aluminum, easy to assemble. Good for temporary setups.
- DIY PVC poles: I’ve seen people use 3-inch PVC pipes with end caps as budget poles. Not ideal for heavy lights, but perfect for lightweight fairy lights.
Tip: Don’t sacrifice quality for price when it comes to poles—cheap poles can break or bend, costing you more in the long run.
Conclusion: Light Up Your Life (Literally)
Adding outdoor string light poles for patio to your space is one of the easiest ways to transform your backyard into a magical retreat. From choosing the right type and material to mastering the layout and installation, every step contributes to creating the perfect ambiance. I’ve shared what worked for me—and what didn’t—so you can avoid the pitfalls and focus on the fun part: enjoying your illuminated oasis.
Remember, it’s not about perfection. It’s about creating a space where you love to spend time—whether that’s hosting friends, reading a book, or just unwinding after a long day. So go ahead, pick your poles, hang those lights, and let your patio shine. The best part? The glow isn’t just in the lights—it’s in the moments you’ll create under them.
Frequently Asked Questions
What are the best outdoor string light poles for patio use?
The best outdoor string light poles for patio spaces are typically made of weather-resistant materials like stainless steel or powder-coated aluminum. Look for adjustable height options and sturdy bases to ensure stability in windy conditions.
How tall should my patio string light poles be?
Most outdoor string light poles range from 7 to 10 feet tall, ideal for creating ambient lighting without obstructing views. For larger patios, consider taller poles (up to 12 feet) to ensure even light distribution.
Can I install string light poles on uneven ground?
Yes, many outdoor string light poles for patio use come with ground stakes or weighted bases to accommodate uneven terrain. Some models also feature adjustable legs for added stability on slopes or rough surfaces.
Are these poles compatible with all types of string lights?
Most outdoor string light poles are designed to work with standard E26/E27 bulb sockets and common plug-in or solar-powered string lights. Always check the weight limit and spacing requirements to ensure compatibility.
How do I secure outdoor string light poles in windy areas?
For windy areas, opt for poles with heavy-duty ground stakes, auger anchors, or weighted bases. Some models allow you to add sandbags or concrete footings for extra stability.
Do I need professional help to install patio string light poles?
No, most outdoor string light poles for patio setups are DIY-friendly with simple assembly and no wiring required. Just follow the manufacturer’s instructions for secure anchoring and safe placement.