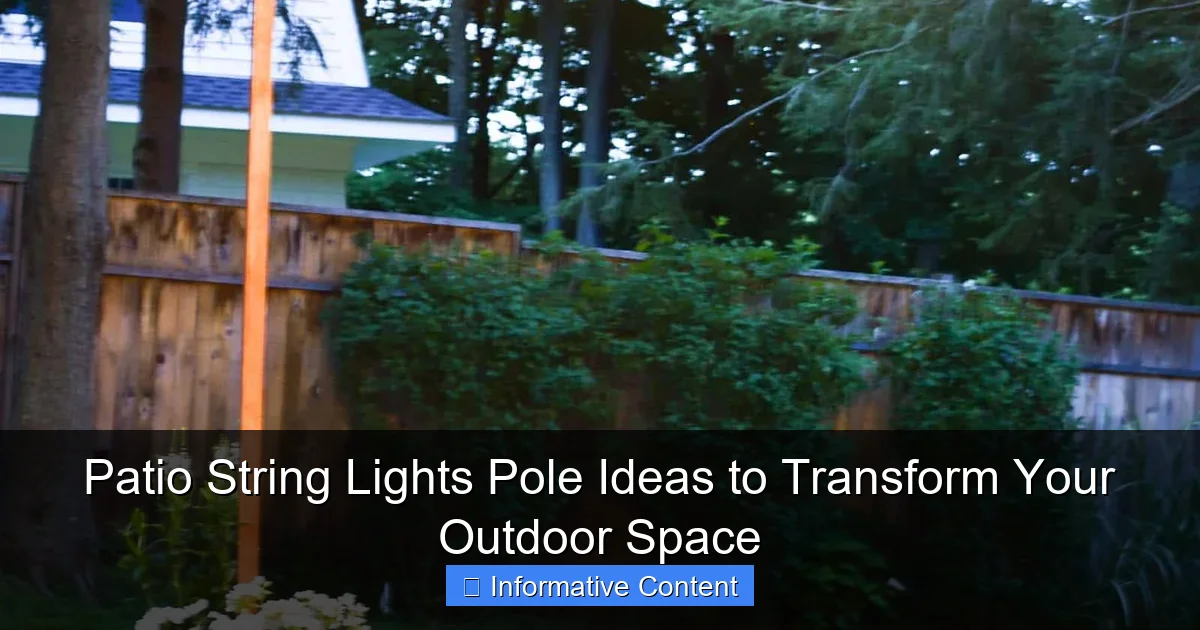
Featured image for patio string lights pole
Image source: atcharlotteshouse.com
Patio string lights poles are the ultimate game-changer for elevating your outdoor ambiance, offering both style and function. Whether you opt for sleek metal designs, rustic wooden posts, or DIY solutions, these poles provide sturdy support for dazzling light displays that transform patios, gardens, or decks into enchanting retreats. Easy to install and endlessly customizable, they’re a must-have for creating unforgettable nighttime vibes.
Key Takeaways
- Choose durable materials: Opt for weather-resistant metals or treated wood for long-lasting poles.
- Maximize height: Install poles 7–9 feet high for optimal light coverage and ambiance.
- Anchor securely: Use concrete footings or weighted bases to prevent tipping in wind.
- Mix and match: Combine poles with trees or railings for layered lighting effects.
- Space evenly: Position poles 6–8 feet apart to avoid sagging and ensure even light distribution.
- Add decorative touches: Wrap poles with vines or paint to match your patio style.
📑 Table of Contents
- Why a Patio String Lights Pole Can Transform Your Backyard
- What Is a Patio String Lights Pole and Why Do You Need One?
- Types of Patio String Lights Poles: Pros, Cons, and Best Uses
- How to Choose the Right Patio String Lights Pole for Your Space
- Creative Patio String Lights Pole Ideas (With Real Examples)
- Installation Tips: How to Set Up Your Pole Like a Pro
- Data Table: Comparing Popular Patio String Lights Poles
- Final Thoughts: Your Outdoor Space Awaits
Why a Patio String Lights Pole Can Transform Your Backyard
Picture this: It’s a warm summer evening, the sun has dipped below the horizon, and your backyard is softly illuminated by the warm glow of string lights. You’re sipping a cold drink, laughing with friends, and the atmosphere feels magical—almost like a cozy outdoor living room. That’s the power of a patio string lights pole.
For years, I struggled to create that perfect ambiance in my backyard. I tried hanging lights from trees, but they sagged or didn’t reach far enough. I even attempted to string them between the house and a distant fence, only to find them too low and in the way. Then, I discovered the game-changer: a dedicated pole system. Suddenly, my space went from dim and disorganized to a dreamy, Instagram-worthy retreat. If you’ve ever wanted to elevate your outdoor entertaining or simply enjoy a peaceful night under the stars, a patio string lights pole might be your secret weapon.
What Is a Patio String Lights Pole and Why Do You Need One?
A patio string lights pole is a freestanding or mounted structure designed specifically to support outdoor string lights. Unlike temporary solutions like leaning on trees or using flimsy hooks, these poles offer stability, height, and flexibility. They’re the backbone of a well-lit outdoor space, allowing you to create a consistent, professional-looking glow across your patio, deck, or yard.
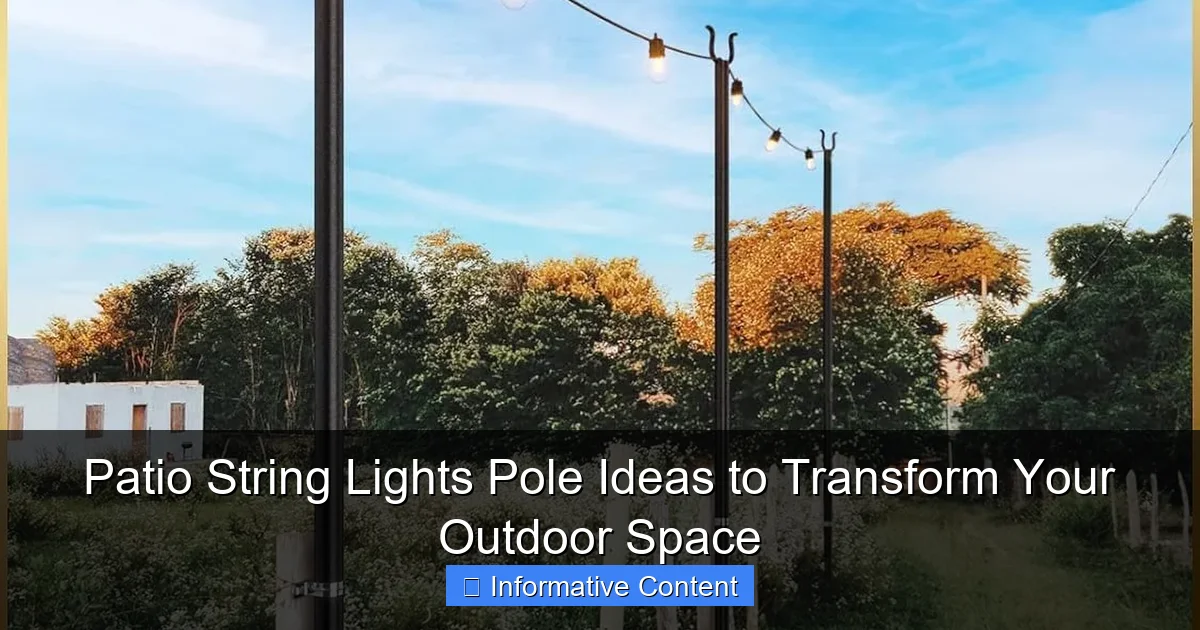
Visual guide about patio string lights pole
Image source: m.media-amazon.com
Common Problems Solved by a Dedicated Pole
- Uneven lighting: Trees and structures aren’t always spaced evenly. Poles let you control the distance and height for uniform illumination.
- Low-hanging wires: No more ducking under lights or tripping over cords. Poles keep lights safely overhead.
- Weather damage: A sturdy pole resists wind and rain better than temporary setups, extending the life of your lights.
- Design freedom: You’re not limited by existing structures. Create custom lighting zones for dining, lounging, or pathways.
I remember the first time I installed a pole in my yard. I was hosting a small gathering, and as the sun set, I turned on the lights. The transformation was instant. My guests were wowed, and I felt like I’d finally cracked the code to backyard ambiance. A patio string lights pole isn’t just functional—it’s a design statement.
Who Benefits Most?
- Entertainers: If you love hosting barbecues, dinners, or movie nights, poles create a welcoming, festive vibe.
- Couples: A cozy, dimly lit nook is perfect for romantic evenings.
- Families: Kids love the “campfire” feel, and parents appreciate the safety of well-lit spaces.
- Small-space dwellers: Even in a tiny yard or balcony, a compact pole can make a big impact.
Types of Patio String Lights Poles: Pros, Cons, and Best Uses
Not all poles are created equal. Your choice depends on your space, budget, and how permanent you want the setup to be. Let’s break down the most popular types, with real-world examples to help you decide.
Freestanding Poles (Portable or Ground-Anchored)
These are the most versatile. You can move them around or install them permanently. I use a freestanding model with a weighted base (like a sandbag or concrete-filled stand) for my patio. It’s easy to reposition if I’m rearranging furniture.
- Pros: No permanent installation, great for renters or renos. Can be moved seasonally.
- Cons: May wobble in high winds unless anchored well. Base takes up space.
- Best for: Patios, decks, or yards where you want flexibility.
- Tip: Look for poles with adjustable height (6–12 ft) to customize lighting angles.
Wall-Mounted or Roof-Mounted Poles
These attach to your house, garage, or pergola. I’ve seen them used beautifully on modern homes with flat roofs, creating a “floating” light effect. One friend mounted a pole to her pergola, turning it into a glowing canopy.
- Pros: Very stable. No floor space used. Great for long-term setups.
- Cons: Requires drilling or professional installation. Not ideal for renters.
- Best for: Permanent outdoor living areas or homes with strong structures.
- Tip: Use rust-proof brackets (stainless steel or powder-coated) to avoid corrosion.
Post-Mounted Poles (In-Ground Installation)
These are buried in concrete or set in a sleeve. My neighbor has a 10-ft aluminum pole cemented into his yard, holding a web of lights over his fire pit. It’s rock-solid, even in storms.
- Pros: Extremely durable. Handles heavy lights or multiple strands.
- Cons: Permanent. Requires digging and concrete work.
- Best for: Large yards, event spaces, or anyone wanting a lifetime solution.
- Tip: Use a concrete form tube for easy installation—just dig, set the tube, pour concrete, and insert the pole.
Telescoping or Adjustable Poles
These extend like a camera tripod. I keep one in my shed for pop-up events. It’s lightweight but surprisingly sturdy when extended to 8 ft.
- Pros: Compact for storage. Height adjustable on the fly.
- Cons: Not as strong as fixed poles. Best for lighter lights (LEDs, not incandescents).
- Best for: Renters, renos, or seasonal use.
- Tip: Pair with a weighted base (e.g., sandbag) to prevent tipping.
Decorative Poles (With Built-In Features)
Some poles double as planters, speakers, or solar lights. I’ve seen a “light tree” with branches that hold string lights and potted plants. It’s functional and artistic.
- Pros: Multi-functional. Adds aesthetic value.
- Cons: Often pricier. Limited customization.
- Best for: Design-focused spaces or small yards.
- Tip: Choose weather-resistant materials (e.g., powder-coated steel, teak) for longevity.
How to Choose the Right Patio String Lights Pole for Your Space
Choosing the perfect pole feels overwhelming, but it’s simpler than it seems. Ask yourself these key questions to narrow it down.
1. What’s Your Outdoor Space Like?
- Small patio/deck: A freestanding or wall-mounted pole (6–8 ft) avoids clutter. Example: A 7-ft aluminum pole with a slim base fits snugly in a 10×10 ft deck.
- Large yard: Post-mounted or tall freestanding poles (10+ ft) cover more ground. Example: A 12-ft steel pole with a concrete base anchors a 20-ft light span.
- No permanent structures: Telescoping or freestanding poles are your friend. Example: A 9-ft telescoping pole with sandbag base works on a gravel patio.
2. How Permanent Do You Want It?
- Renter or renos: Opt for non-permanent options (freestanding, telescoping). No drilling or digging.
- Homeowner, long-term: Post-mounted or wall-mounted poles last decades.
- Seasonal use: Telescoping or lightweight freestanding poles are easy to store.
3. What Kind of Lights Will You Use?
- Lightweight LEDs: Any pole works. Even a thin telescoping pole holds them.
- Heavy incandescent or vintage bulbs: Choose sturdy poles (steel, concrete-anchored). Example: A 1-inch-diameter steel pole supports 50 ft of Edison bulbs.
- Multiple strands: Wider poles or dual-mount designs (e.g., “Y” shape) distribute weight better.
4. What’s Your Budget?
- Under $50: Basic telescoping or freestanding poles (e.g., aluminum with plastic base).
- $50–$150: Mid-range options (stainless steel, adjustable height, weighted bases).
- $150+: Premium (custom designs, solar-integrated, decorative).
5. Aesthetic Preferences
Your pole should complement your style. I prefer sleek black metal for a modern look, but my friend loves a rustic wood-and-steel combo. Consider:
- Modern: Black or brushed metal poles.
- Rustic: Wooden or wrought iron.
- Bohemian: Colorful bases or patterned designs.
Creative Patio String Lights Pole Ideas (With Real Examples)
Ready to get inspired? Here are five stunning ways to use poles, with examples from real backyards.
1. The Classic “X” Pattern
Create an “X” by installing poles at the corners of your patio and crisscrossing lights between them. My neighbor does this over her dining area—it’s like dining under a starry sky. Pro tip: Use zip ties to secure lights at the crossing point for a clean look.
2. The Canopy Effect
Attach poles to a pergola or roof and run lights parallel to the beams. I’ve seen this in a friend’s modern backyard—lights hung like a floating ceiling, 8 ft high. It’s dramatic but cozy. Tip: Space lights 1–2 ft apart for full coverage.
3. The Zigzag or “Z” Pattern
Alternate lights between poles in a zigzag. This works well for long, narrow spaces. Example: A 30-ft patio with poles every 10 ft, lights forming a “Z” from end to end. It adds visual interest without blocking views.
4. The Circular or “Halo” Design
Use poles to create a circle around a fire pit or seating area. I did this with four poles and a central light hub—it’s perfect for intimate gatherings. Tip: Use curved hooks on poles to guide lights smoothly.
5. The Pathway or “Fence Line” Setup
Line a garden path or fence with poles 6–8 ft apart, running lights horizontally. My sister uses this to light her backyard path to the pool. It’s safe and stylish. Tip: Add low-voltage LED spotlights at the base of poles for ground illumination.
Bonus: The “Light Tree”
One of my favorite ideas: A central pole with branching arms, like a tree, holding lights and planters. I’ve seen it in a small urban yard—it’s a space-saving showstopper. Use waterproof planters to avoid damaging the pole.
Installation Tips: How to Set Up Your Pole Like a Pro
Even the best pole won’t shine if installed poorly. Here’s how to do it right, with lessons from my own trial and error.
Step 1: Plan Your Layout
- Sketch your space. Mark where poles will go (use stakes or tape).
- Measure distances. Aim for 8–12 ft between poles for even lighting.
- Consider obstacles (trees, furniture, walkways).
- Tip: Use a laser level to ensure poles are aligned.
Step 2: Prepare the Site
- Freestanding: Clear debris. Place a rubber mat under the base to protect surfaces.
- Wall-mounted: Locate studs or use heavy-duty anchors. Check for pipes/wires with a stud finder.
- Post-mounted: Dig a hole 12–18 inches deep. Use a post hole digger for accuracy.
Step 3: Install the Pole
- Freestanding: Fill the base with sand, water, or concrete. Let it cure 24–48 hours.
- Wall-mounted: Secure brackets with stainless steel screws. Tighten firmly.
- Post-mounted: Insert pole into concrete. Use a level to ensure it’s plumb. Let concrete cure 72 hours.
- Tip: For extra stability, add guy wires (tension cables) to tall poles in windy areas.
Step 4: Hang the Lights
- Use zip ties, hooks, or clips to secure lights. Avoid nails or staples—they damage cords.
- Start at one pole, working to the next. Keep tension even to prevent sagging.
- For long spans, use light clips with tension adjusters (like those for clotheslines).
- Tip: Test lights before final installation. Replace burnt-out bulbs.
Step 5: Weatherproof and Maintain
- Use outdoor-rated extension cords and weatherproof outlets.
- Inspect poles annually. Tighten bolts, check for rust, and clean debris.
- For post-mounted poles, reapply concrete sealer every 2–3 years.
Data Table: Comparing Popular Patio String Lights Poles
| Type | Height Range | Material | Installation | Price Range | Best For |
|---|---|---|---|---|---|
| Freestanding (Weighted Base) | 6–12 ft | Aluminum, Steel | No tools (base assembly) | $30–$120 | Patios, decks, renters |
| Wall-Mounted | 8–10 ft (from wall) | Steel, Stainless Steel | Drilling, brackets | $50–$150 | Homes with strong walls/pergolas |
| Post-Mounted (In-Ground) | 8–15 ft | Steel, Aluminum | Digging, concrete | $80–$200 | Large yards, permanent setups |
| Telescoping | 4–9 ft (adjustable) | Aluminum | No installation | $20–$70 | Renters, seasonal use |
| Decorative (Planter/Speaker Combo) | 6–10 ft | Steel, Wood, Composite | Freestanding or wall-mounted | $100–$300 | Small spaces, design focus |
Final Thoughts: Your Outdoor Space Awaits
A patio string lights pole isn’t just a tool—it’s a gateway to unforgettable moments. Whether you’re hosting a dinner party, enjoying a quiet night with your partner, or letting the kids stay up late under a canopy of stars, the right pole makes it all possible. I’ve seen how a simple change in lighting can turn an ordinary yard into a sanctuary.
Remember, the best pole is the one that fits your space, your style, and your needs. Start small if you’re unsure—try a freestanding or telescoping pole first. Once you see the magic, you’ll never go back. And don’t forget the little details: weatherproofing, even tension, and a layout that complements your furniture. These small choices make a big difference.
So, grab a pole, string up those lights, and let your outdoor space shine. The perfect ambiance is just a few steps away. Happy lighting!
Frequently Asked Questions
What are the best materials for a patio string lights pole?
Patio string lights poles are commonly made from durable materials like powder-coated steel, aluminum, or weather-resistant wood. These materials ensure longevity and stability, even in harsh outdoor conditions, while complementing your outdoor decor.
How tall should a patio string lights pole be for optimal lighting?
Most patio string lights poles range from 7 to 10 feet tall, providing ample height to hang lights without obstructing movement. The ideal height depends on your space—taller poles work for large patios, while shorter ones suit intimate seating areas.
Can I install a patio string lights pole on a sloped surface?
Yes, adjustable or ground-insert poles are perfect for sloped surfaces, as they can be anchored securely into the ground at an angle. For extra stability, consider using weighted bases or additional guy wires for taller poles.
Are patio string lights poles easy to assemble and move?
Most patio string lights poles feature tool-free assembly with interlocking segments or screw-on parts, making setup quick. Lightweight designs allow for easy repositioning, though heavier-duty poles may require two people to move safely.
How do I secure a patio string lights pole in windy conditions?
Use ground stakes, auger anchors, or weighted bases to stabilize your pole in windy areas. For added security, cross-bracing or tension cables can prevent swaying and protect your string lights.
Can I use a patio string lights pole for other decorations?
Absolutely! These poles are versatile and can support outdoor curtains, lanterns, or holiday decorations. Just ensure the pole’s weight capacity matches your decor to avoid overloading.

