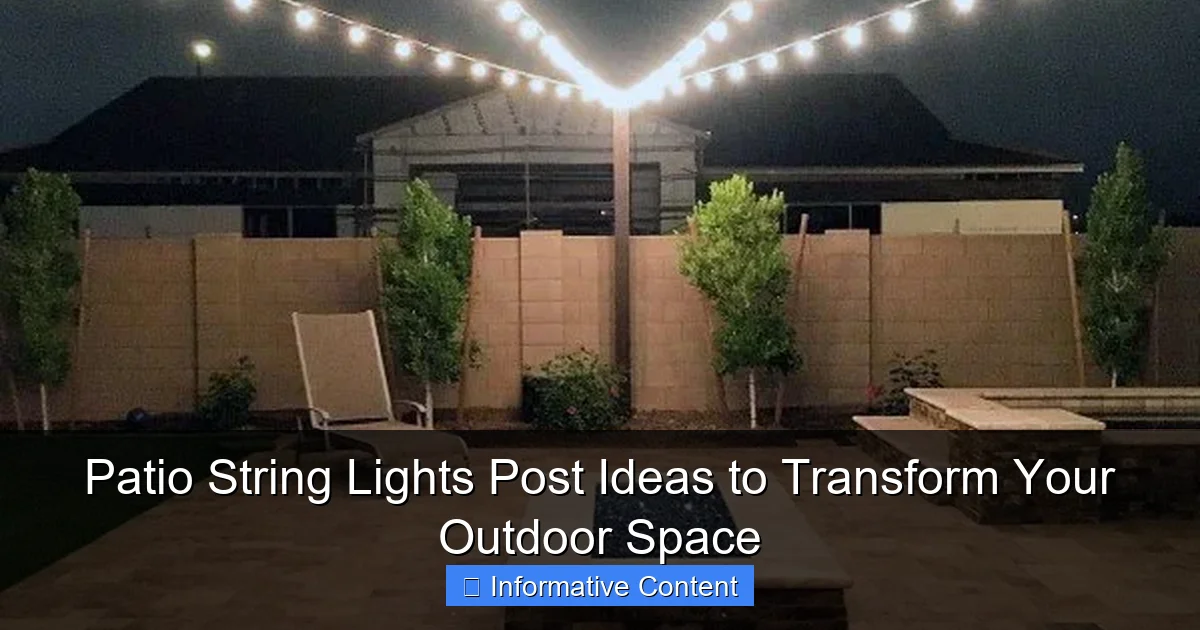
Featured image for patio string lights post
Image source: nextluxury.com
Patio string lights posts are the ultimate game-changer for creating a magical outdoor ambiance. From DIY wooden posts to sleek metal designs, these versatile lighting solutions instantly elevate your patio, garden, or deck with warm, inviting glow and customizable style—perfect for entertaining or unwinding after dark.
Key Takeaways
- Choose durable posts: Opt for weather-resistant materials like metal or treated wood for long-lasting support.
- Plan spacing wisely: Place posts 8–10 feet apart to ensure even light distribution and structural stability.
- Mix heights creatively: Vary post heights to add visual interest and dynamic lighting layers.
- Secure installation: Anchor posts deeply in concrete or use weighted bases for windy areas.
- Style with purpose: Match post design (e.g., rustic, modern) to your patio’s overall aesthetic.
- Add dual functionality: Use posts with built-in planters or shelves for extra utility and decor.
📑 Table of Contents
- Why Patio String Lights Are the Secret to a Magical Outdoor Space
- Choosing the Right Patio String Lights Post for Your Space
- Creative Patio String Lights Post Ideas (With Real-Life Inspiration)
- Installation Tips: From Beginner to Pro (Without Losing Your Mind)
- Energy Efficiency and Smart Lighting: The Future of Patio Ambiance
- Maintenance and Longevity: Keeping Your Lights Glowing for Years
- Final Thoughts: Your Patio, Your Sanctuary
Why Patio String Lights Are the Secret to a Magical Outdoor Space
There’s something undeniably enchanting about stepping onto a patio after sunset, only to be greeted by the soft, warm glow of string lights. They transform ordinary backyards into cozy retreats, perfect for unwinding, hosting gatherings, or simply enjoying a quiet cup of tea under the stars. I remember the first time I strung up lights on my own patio—what started as a simple DIY project turned into a full-blown obsession. Suddenly, my once-dull outdoor space felt like a scene from a movie: inviting, serene, and full of charm.
But here’s the thing—patio string lights aren’t just about aesthetics. They’re a functional upgrade too. They extend your outdoor living time, create zones for different activities (dining, lounging, reading), and even boost your home’s curb appeal. Whether you’re a seasoned outdoor decorator or a total beginner, the right patio string lights post setup can elevate your space in ways you might not have imagined. In this guide, we’ll dive into creative ideas, practical tips, and real-world examples to help you design a lighting scheme that’s as unique as you are.
Choosing the Right Patio String Lights Post for Your Space
Before you start hammering posts into the ground or hanging lights from trees, take a step back and think about your goals. What kind of vibe are you after? How much maintenance are you willing to handle? And, most importantly, what’s your budget? Let’s break down the key factors to consider when selecting the perfect patio string lights post system.
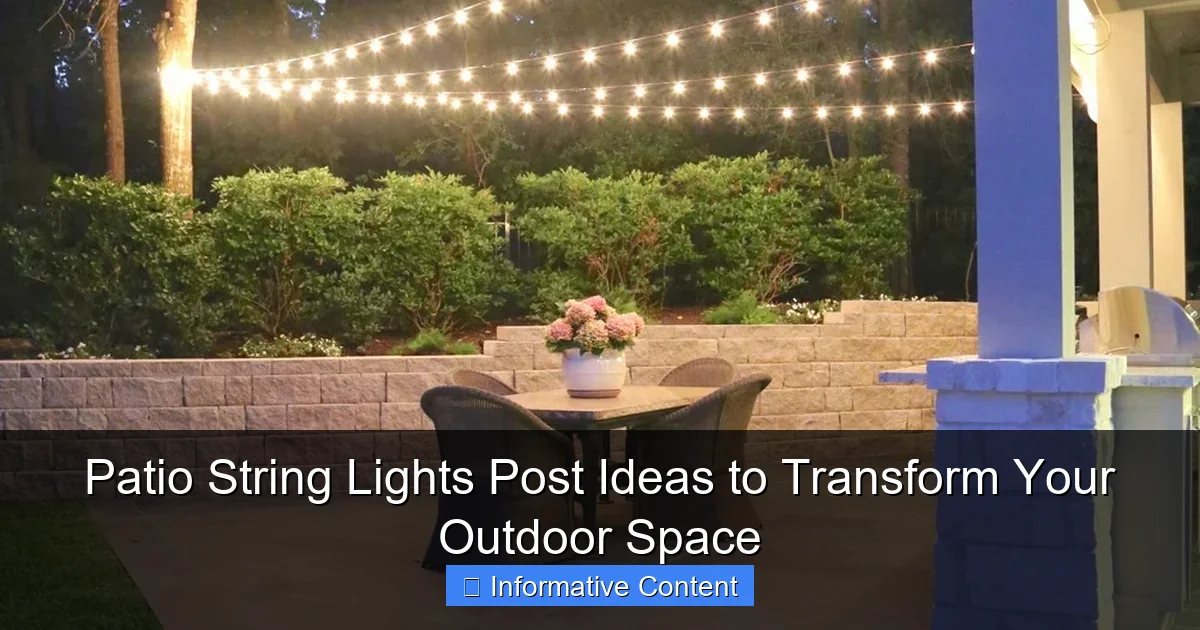
Visual guide about patio string lights post
Image source: thecreativityexchange.com
1. Material Matters: Wood, Metal, or PVC?
The material of your posts sets the tone for durability and style. Here’s a quick rundown:
- Wood (cedar, redwood, or pressure-treated pine): Offers a natural, rustic look but requires regular sealing to prevent rot. Ideal for a farmhouse or cottage-style patio.
- Metal (galvanized steel, aluminum, or wrought iron): Super sturdy and weather-resistant, but can rust if not coated properly. Great for modern or industrial spaces.
- PVC/vinyl: Low maintenance and won’t rot or rust, but can look less “premium” in high-end designs. A solid budget-friendly option.
Pro tip: If you live in a humid or rainy climate, metal or PVC posts are safer bets. For dry areas, wood can last decades with care.
2. Height and Spacing: The Golden Ratio
Too low, and your lights will feel cramped; too high, and they’ll lose their intimate glow. Aim for:
- Post height: 7–8 feet for a standard patio (8-foot ceilings indoors are a good reference).
- Spacing: 6–10 feet apart, depending on how many “zones” you want to create. Closer spacing = cozier feel; wider = more open.
Example: For a 12×16-foot patio, use three posts spaced 8 feet apart along one side. Run the lights diagonally to a corner post or tree for a dynamic effect.
3. Permanent vs. Removable: Flexibility vs. Stability
Ask yourself: Do you want lights up year-round, or just for summer? If you’re a seasonal decorator, removable options like:
- Freestanding poles with weighted bases: Easy to move and store, but less stable in wind.
- Ground sleeves: Install a metal sleeve in the ground and insert posts when needed. A happy medium between permanence and flexibility.
For year-round use, concrete footings are the gold standard. They’re rock-solid but require more effort to install.
Creative Patio String Lights Post Ideas (With Real-Life Inspiration)
Now for the fun part: design! Here are six ideas to spark your creativity, each tailored to different spaces and styles. I’ve included real-world examples to show how these setups come to life.
1. The Classic “Canopy” Effect
Hang lights in a crisscross pattern overhead, creating a “ceiling” of light. This works beautifully on patios with pergolas or between two sturdy posts.
- How to: Install posts at opposite corners of your patio. Use eye hooks to secure the lights in a grid pattern. For extra magic, add sheer curtains between the posts.
- Real-life example: A friend used this setup for a wedding reception. The lights reflected off the white tablecloths, making the entire space glow. (She later reused the same posts for her regular patio!)
2. The “Floating” Pathway
Line a walkway or deck with short posts (3–4 feet tall) to guide guests and add ambiance.
- How to: Use low-voltage LED lights to save energy. Space posts every 4–5 feet. For safety, add a tiny LED at the base of each post.
- Pro tip: If you have a stone path, embed the posts in gravel-filled holes for a seamless look.
3. The “Tree Wrap” Hybrid
Combine natural and built elements by wrapping lights around existing trees and connecting them to nearby posts.
- How to: Use zip ties or tree-friendly clips to secure lights to branches. Run the string to a post for support. Avoid wrapping too tightly—trees grow!
- Real-life example: A neighbor in my town did this with her maple tree. The lights looked like fireflies nestled in the leaves. Bonus: The tree’s shade protected the lights from sun damage.
4. The “Zoned” Lounge
Create distinct areas (dining, seating, fire pit) with different lighting styles.
- How to: Use taller posts (8+ feet) for the dining zone, shorter posts (5–6 feet) for lounging. Mix warm white lights in the dining area with colorful bulbs near the fire pit.
- Pro tip: Use dimmers to adjust brightness for different moods—bright for meals, soft for cocktails.
5. The “Floating Island”
For small patios, suspend lights from a central post to a surrounding structure (like a fence or shed).
- How to: Install a single tall post in the center. Attach lights to the post at one end and to the structure at the other. Angle the lights slightly downward for a “floating” effect.
- Real-life example: A tiny balcony in my building used this trick. The lights made the space feel twice as big!
6. The “Seasonal Switch-Up”
Use removable posts to change your lighting theme with the seasons.
- How to: Install ground sleeves in spring. In summer, add string lights. In fall, switch to lanterns or fairy lights. In winter, use icicle lights.
- Pro tip: Label your storage bins by season to avoid digging through boxes every year.
Installation Tips: From Beginner to Pro (Without Losing Your Mind)
Let’s be real—installing patio posts can feel overwhelming. But with a few smart strategies, you’ll avoid common pitfalls and save time (and frustration).
1. Plan Your Layout (Before You Dig!)
Sketch your patio to scale on paper or use a free app like SketchUp Free. Mark where posts will go, and test the spacing by laying out stakes. This saves you from realizing too late that your posts block the grill or door.
2. Tools You’ll Actually Need
- Post hole digger: Essential for digging holes (unless you’re using freestanding bases).
- Spirit level: Ensures your posts are straight. No one wants a leaning tower of lights!
- Concrete mix: For permanent installations. Use “quick-setting” mix to speed up the process.
- Measuring tape: Double-check spacing and height.
Pro tip: Rent a power auger for large projects. It’s worth the $30/day rental to avoid back pain.
3. The “Dry Run” Test
Before securing posts permanently, do a dry run:
- Place posts in holes without concrete.
- String lights loosely.
- Step back and evaluate the layout. Adjust as needed.
I skipped this once and ended up with a post blocking my sliding door. Learn from my mistake!
4. Weatherproofing for Longevity
- Seal wood posts: Use exterior-grade sealant every 2–3 years.
- Use outdoor-rated lights: Look for “UL wet location” certification.
- Protect connections: Wrap light plug junctions with waterproof tape or silicone.
Real-life example: A friend in Seattle ignored this. After a rainy winter, her lights flickered constantly. Replacing them was a pain—and expensive.
Energy Efficiency and Smart Lighting: The Future of Patio Ambiance
Let’s talk about saving money (and the planet) while you light up your patio. Modern tech has made patio string lights post systems smarter and more efficient than ever.
1. LED vs. Incandescent: The Energy Showdown
LED lights use up to 90% less energy than incandescent bulbs and last 25 times longer. Here’s how they compare:
| Feature | LED | Incandescent |
|---|---|---|
| Energy use (per 100 bulbs) | 40 watts | 400 watts |
| Lifespan | 50,000 hours | 2,000 hours |
| Heat output | Low (safe to touch) | High (can burn) |
| Cost (100-bulb string) | $25–$50 | $10–$20 |
Pro tip: The higher upfront cost of LEDs pays off in 1–2 years through energy savings.
2. Smart Controls: Lights That Think for You
Smart string lights let you:
- Schedule on/off times: Use an app to turn lights on at sunset and off at 10 PM.
- Adjust brightness: Dim for a romantic dinner or bright for a party.
- Change colors: Some models offer RGB colors for holidays or moods.
Real-life example: My cousin used smart lights for her baby’s first birthday. The lights synced to music, creating a mini dance party under the stars.
3. Solar-Powered Options: For the Eco-Conscious
Solar string lights have improved dramatically. Look for:
- Large solar panels: Ensure they get 6+ hours of sunlight.
- Li-ion batteries: Hold a charge longer than old NiMH types.
- Weatherproof ratings: IP65 or higher for rain/snow.
Pro tip: Use solar lights for accent areas (like pathways) and plug-in lights for primary zones. This balances efficiency and reliability.
Maintenance and Longevity: Keeping Your Lights Glowing for Years
Even the best patio string lights post setup needs a little TLC. Follow these tips to avoid premature failures and keep your space looking magical.
1. The Annual Check-Up
Every spring, inspect your setup:
- Posts: Look for cracks, rust, or rot. Tighten loose screws.
- Wiring: Check for frayed cords or exposed wires. Replace damaged sections.
- Bulbs: Test each string. Replace burnt-out bulbs immediately to avoid overloading the circuit.
Pro tip: Keep a “light kit” with spare bulbs, wire connectors, and waterproof tape for quick fixes.
2. Winter Storage (If You Remove Lights)
- Coil lights loosely (no tight knots!).
- Store in a dry, temperature-controlled area (not a damp garage).
- Wrap in tissue paper to prevent bulbs from scratching.
I learned this the hard way when I stored lights in a basement corner. Mice chewed through the cords. Now I use sealed plastic bins.
3. Troubleshooting Common Issues
- Flickering lights: Check for loose bulbs or damaged sockets.
- Partial string failure: One bulb out can break the circuit in older “series” strings. Use parallel-wired lights for reliability.
- Sagging wires: Add extra support clips every 3–4 feet.
Real-life example: A neighbor’s lights sagged so low they blocked her grill. She added a third post and never looked back.
Final Thoughts: Your Patio, Your Sanctuary
Transforming your outdoor space with patio string lights post ideas isn’t just about adding light—it’s about crafting an experience. Whether you’re sipping coffee at dawn, hosting a birthday party, or stargazing alone, the right lighting turns your patio into a sanctuary. I’ve seen tiny balconies feel like Parisian courtyards and sprawling backyards become enchanted forests, all thanks to a few well-placed posts and a string of bulbs.
Remember, there’s no “perfect” setup—only what feels right for you. Start small, experiment, and don’t be afraid to mix styles. A canopy of warm lights might be perfect for summer, while a pathway of cool LEDs could shine in winter. And if you hit a snag (like my sliding door disaster), laugh it off and pivot. The goal isn’t perfection; it’s joy. So grab your tools, call a friend, and get glowing. Your dream patio is waiting.
Frequently Asked Questions
What are the best patio string lights post ideas for a cozy ambiance?
Hanging globe string lights between wooden posts or wrapping Edison bulbs around metal poles creates instant warmth. For a unique twist, try zigzag patterns or canopy-style installations above seating areas. These patio string lights post ideas enhance both style and functionality.
How do I install string lights on posts without damaging my patio?
Use removable hooks, zip ties, or adhesive clips to secure lights without drilling. Opt for weighted bases or freestanding posts if permanent installation isn’t an option. This method keeps your space damage-free while achieving a professional look.
Can I use patio string lights with posts year-round?
Yes, choose weather-resistant LED string lights and rust-proof metal or treated wooden posts for durability. Ensure connections are covered with waterproof tape to protect against rain and snow, making them ideal for all-season use.
What spacing works best between posts for string lights?
Space posts 6–10 feet apart for optimal tension and light distribution. Wider gaps may require thicker gauge wire or additional support to prevent sagging. Adjust based on your patio size and desired lighting density.
Are solar-powered string lights effective with posts?
Solar string lights work well if the solar panel on the post receives 6+ hours of direct sunlight daily. Pair with reflective surfaces or elevated posts to maximize sun exposure. They’re a low-maintenance, eco-friendly option.
How can I style patio string lights posts for special occasions?
Add removable decor like sheer curtains, garlands, or colored bulbs to transform the space. Use dimmers or twinkling lights for festive events, then revert to classic white for everyday use. This flexibility makes patio string lights posts versatile for any gathering.

