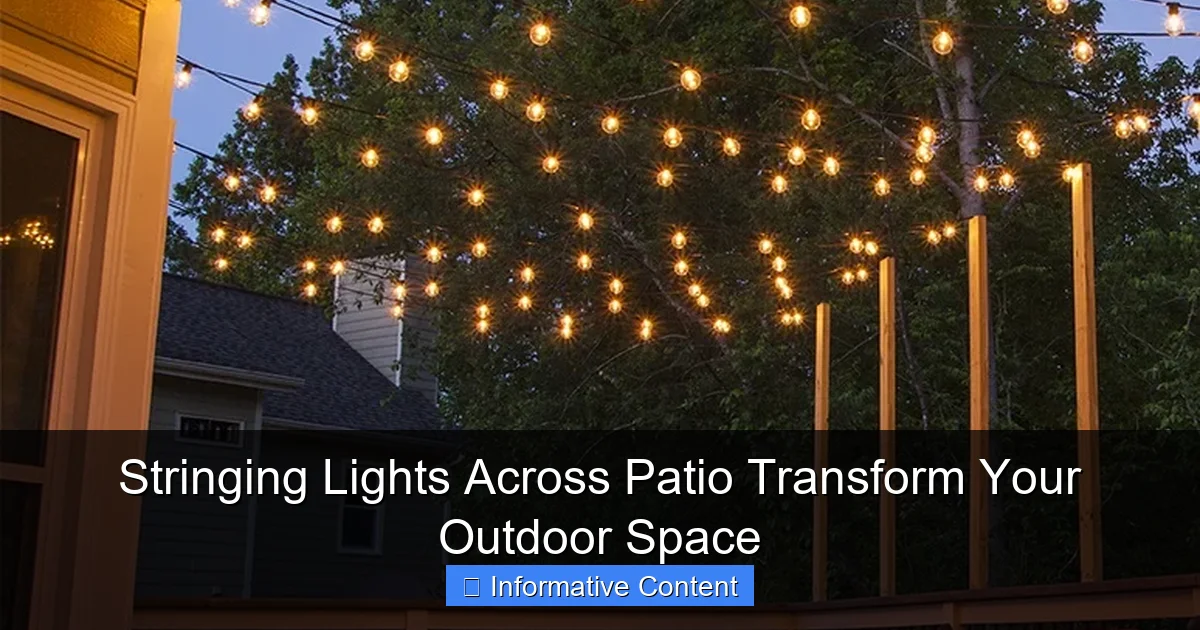
Featured image for stringing lights across patio
Image source: cdn.christmaslightsetc.com
Stringing lights across your patio instantly transforms it into a warm, inviting retreat perfect for entertaining or relaxing after dark. With weather-resistant string lights and a few strategic anchor points, you can create a stunning ambiance that enhances your outdoor space’s style and functionality. This simple upgrade offers maximum visual impact with minimal effort, making it a must-try for any patio makeover.
Key Takeaways
- Plan your layout: Sketch light placement to maximize coverage and avoid gaps.
- Choose weatherproof lights: Opt for durable, outdoor-rated string lights for safety and longevity.
- Use secure anchors: Install hooks, clips, or poles to prevent sagging or damage.
- Mix light types: Combine string lights with lanterns or spotlights for layered ambiance.
- Time it right: Install lights during dry weather to avoid electrical hazards.
- Test before finalizing: Check brightness and connections before permanent installation.
📑 Table of Contents
- Stringing Lights Across Patio: Transform Your Outdoor Space
- Why String Lights Are the Ultimate Outdoor Upgrade
- Choosing the Right String Lights for Your Patio
- Design Ideas: How to Arrange Lights for Maximum Impact
- Step-by-Step Installation Guide
- Maintenance and Safety Tips
- Real-World Examples and Inspiration
Stringing Lights Across Patio: Transform Your Outdoor Space
Imagine this: It’s a warm summer evening, the sun has just dipped below the horizon, and your patio glows softly with the warm, inviting light of string lights. The air is filled with the sound of laughter, clinking glasses, and the gentle hum of conversation. This isn’t just a scene from a movie—it’s something you can create right in your own backyard. Stringing lights across your patio is one of the simplest yet most impactful ways to transform your outdoor space into a cozy, magical retreat.
Whether you’re hosting a dinner party, enjoying a quiet night with a book, or simply unwinding after a long day, the right lighting can make all the difference. String lights aren’t just about illumination—they’re about ambiance. They create a sense of intimacy, warmth, and even luxury. But how do you go from a bare patio to a twinkling oasis? In this guide, we’ll walk you through everything you need to know about stringing lights across patio spaces, from choosing the right lights to installation tips, design ideas, and maintenance. No prior experience required—just a little creativity and a few hours of your time.
Why String Lights Are the Ultimate Outdoor Upgrade
Let’s be honest: most patios are underused. We spend hours indoors, but when the weather is nice, we want to be outside. The problem? Poor lighting. A single overhead bulb or dim security light doesn’t exactly inspire relaxation. That’s where string lights come in. They’re affordable, easy to install, and instantly elevate your outdoor experience.
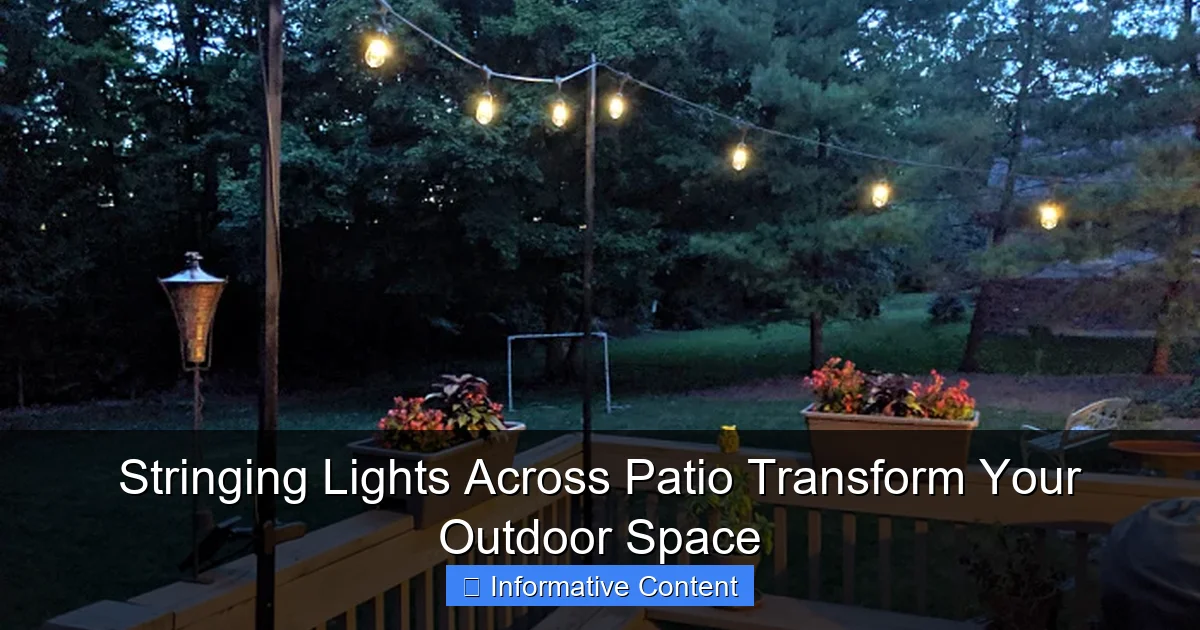
Visual guide about stringing lights across patio
Image source: chaosisbliss.com
The Emotional Impact of Soft Lighting
Lighting isn’t just functional—it’s emotional. Harsh, bright lights feel sterile and unwelcoming. But soft, warm glows from string lights create a sense of comfort and safety. Studies show that warm lighting (around 2700K–3000K) promotes relaxation and social bonding. Think about it: when was the last time you felt stressed under fairy lights? Exactly.
Versatility Across Seasons and Uses
Stringing lights across your patio isn’t just a summer thing. They’re perfect for:
- Fall gatherings with hot cider and blankets
- Winter holiday decor (think twinkling icicles or warm white strands)
- Spring evenings when the garden is in bloom
- Year-round ambiance for solo relaxation or small get-togethers
I installed my first set of string lights in October, thinking they’d be a seasonal fling. Three years later, they’re still up—and I use them almost every night. They’ve become part of my routine, like flipping on a lamp inside.
Affordable and Low-Maintenance
Compared to built-in landscape lighting (which can cost hundreds or thousands), string lights are a budget-friendly option. A basic 48-foot strand costs as little as $15–$25. Even premium solar or smart lights rarely top $100. And maintenance? Most are weather-resistant and require little more than an occasional wipe-down.
Choosing the Right String Lights for Your Patio
Not all string lights are created equal. Picking the right ones can mean the difference between a magical glow and a frustrating installation. Let’s break down the key factors to consider.
Light Bulb Types: LED vs. Incandescent
This is the biggest decision you’ll make. Here’s the lowdown:
- LED lights: Energy-efficient (use up to 80% less power), last 25,000+ hours, stay cool to the touch, and are available in warm white, cool white, multicolor, and color-changing options. Best for year-round use.
- Incandescent lights: Give off a softer, warmer glow (closer to candlelight), but use more energy, get hot, and typically last 1,000–2,000 hours. Great for occasional use or vintage aesthetics.
Pro tip: If you’re stringing lights across patio spaces with kids or pets, always go LED. They’re safer and more durable.
Power Source: Plug-In vs. Solar vs. Battery
- Plug-in: Most reliable. No charging or battery swaps. Just plug into an outdoor GFCI outlet. Ideal for permanent installations.
- Solar: Eco-friendly and wire-free. Requires direct sunlight for 6–8 hours a day. Lights may dim on cloudy days. Best for patios with sun exposure.
- Battery-powered: Portable and flexible. Great for renters or temporary setups. Replace batteries every 10–20 hours of use. Good for small spaces or events.
My patio gets partial shade, so I use a mix: plug-in lights for the main area and solar strands for the pergola. It’s the best of both worlds.
Bulb Shape and Spacing
Bulb shape affects the mood:
- Globe (round): Classic, even glow. Great for ambient lighting.
- Edison (filament): Vintage, industrial vibe. Pairs well with rustic or modern decor.
- Fairy (tiny LED): Delicate, magical feel. Perfect for draping or wrapping.
- Icicle (hanging): Adds vertical interest. Ideal for eaves or railings.
Spacing matters too. Closer bulbs (6–12 inches apart) create a denser, cozier glow. Wider spacing (12–24 inches) is better for outlining structures.
Weather Resistance and Certifications
Always check the IP (Ingress Protection) rating. For patios, look for:
- IP44 or higher: Splash-proof and dust-resistant. Suitable for covered patios.
- IP65 or higher: Weatherproof. Can handle rain, snow, and direct exposure.
Also, ensure cords and plugs are rated for outdoor use. Look for “UL Listed” or “CSA Certified” labels.
Design Ideas: How to Arrange Lights for Maximum Impact
Now for the fun part—design! How you arrange your lights shapes the entire vibe of your patio. Here are five tried-and-true layouts, plus tips to make them shine.
1. The Classic “Canopy” (Overhead Grid)
Best for: Large, open patios.
How to do it:
- Install hooks or eye screws on the edges of your patio (e.g., on house walls, fence posts, or pergola beams).
- Run lights in a grid pattern (like a tic-tac-toe board) across the space.
- Space strands 2–3 feet apart for even coverage.
Pro tip: Use zip ties or light clips to secure strands. Avoid staples—they can damage cords.
I did this on my 12×16 ft patio. With 5 strands spaced 2.5 feet apart, it felt like dining under a starry sky. Total cost: ~$60.
2. “Draped” or “Swag” Style
Best for: Small patios, pergolas, or railings.
How to do it:
- Let lights hang in gentle U-shapes between two points.
- Use tension cables or wire for support (so lights don’t sag).
- Add 20–30% extra length to your strand for draping.
Design hack: Mix bulb sizes. Hang a strand of large globes with smaller fairy lights for texture.
3. “Wrap” or “Twist” Technique
Best for: Trees, railings, posts, or columns.
How to do it:
- Wrap lights around the object in a spiral.
- For trees, start at the base and work upward, spacing wraps 6–12 inches apart.
- Secure ends with removable clips or twist ties.
Caution: Don’t wrap too tightly around live trees—it can harm bark. Use battery-powered lights for flexibility.
4. “Pathway” or “Border” Lighting
Best for: Defining edges or guiding guests.
How to do it:
- Run a single strand along the perimeter of your patio.
- Use ground stakes or low hooks to secure lights.
- Pair with solar path lights for extra visibility.
This works great if you have a multi-level patio. I used this method to outline my stone steps—no more tripping in the dark!
5. “Layered” Lighting (Mixed Techniques)
Best for: Creating depth and dimension.
How to do it:
- Combine overhead, draped, and wrapped lights.
- Use warm white for ambient light, colored strands for accents.
- Install dimmers or smart plugs to control brightness.
Example: Hang a canopy over the dining area, drape lights on the pergola, and wrap a tree in multicolor LEDs. Instant party vibe.
Step-by-Step Installation Guide
Ready to install? Let’s get practical. Follow these steps for a safe, secure setup.
Step 1: Plan Your Layout
- Sketch your patio. Note where lights will go and how many strands you’ll need.
- Measure distances. Add 10–15% extra length for draping or slack.
- Identify power sources (outlets, solar access, etc.).
Pro tip: Use painter’s tape to mock up light paths before installing hardware.
Step 2: Install Mounting Hardware
Choose the right hardware for your surface:
- Wood: Use eye screws or cup hooks (screw in by hand or with a screwdriver).
- Brick/Concrete: Use masonry anchors or removable adhesive hooks (like Command Outdoor Light Clips).
- Metal: Use magnetic hooks or zip ties.
Space hooks 12–24 inches apart. For long runs, add intermediate supports every 3–5 feet to prevent sagging.
Step 3: Hang the Lights
- Start at the power source. Plug in the first strand.
- Secure lights to hooks using zip ties, light clips, or built-in loops.
- For plug-in lights, use outdoor extension cords rated for wet locations. Never daisy-chain more than 3 strands.
- For solar lights, position panels in direct sunlight.
Safety note: Keep cords off walkways to avoid tripping. Use cord covers or bury them slightly in mulch (not soil).
Step 4: Test and Adjust
- Turn on lights at dusk. Check for dark spots or glare.
- Adjust spacing or add more strands if needed.
- Use a timer or smart plug to automate on/off times.
I once hung lights too close to my grill—big mistake. The heat melted a bulb. Now I keep all lights 3+ feet from heat sources.
Step 5: Secure and Weatherproof
- Use silicone sealant on outdoor outlets.
- Cover plugs with waterproof caps or enclosures.
- For permanent setups, consider burying cords in conduit (PVC pipe).
Maintenance and Safety Tips
Great lights are only as good as their upkeep. Here’s how to keep your patio glowing safely.
Routine Care
- Wipe down: Use a damp cloth to clean bulbs and cords every 2–3 months.
- Check connections: Look for frayed wires, loose plugs, or corrosion. Replace damaged strands immediately.
- Trim foliage: Keep branches and leaves away from lights to prevent fire risk.
After a storm, inspect your setup. Wind can loosen hooks or tangle strands.
Safety First
- Use GFCI outlets: These cut power during faults, preventing shocks.
- Avoid overloading circuits: Most outdoor circuits handle 15–20 amps. Don’t exceed 80% capacity (e.g., 12 amps on a 15-amp circuit).
- Keep away from water: Never place cords in standing water or puddles.
- Turn off when not in use: Especially during storms or high winds.
I learned the hard way: One rainy night, I left my lights on. A short circuit tripped the breaker. Now I use a timer—set it and forget it.
Seasonal Storage
- Remove and store: If you live in a snowy climate, take down lights in winter. Store in a dry, temperature-controlled area.
- Use storage bags: Wrap strands around cardboard or use cord reels to prevent tangles.
- Label and organize: Keep different types (warm white, colored, etc.) separate for easy setup next year.
Real-World Examples and Inspiration
Let’s look at how real people transformed their patios with string lights.
Case Study 1: Urban Balcony Retreat
Space: 6×8 ft apartment balcony
Challenge: No overhead structure, limited power.
Solution:
- Used battery-powered fairy lights on tension wire between balcony rails.
- Added a small solar lantern for task lighting.
- Result: A cozy, romantic nook for two.
Total cost: $45. Setup time: 2 hours.
Case Study 2: Rustic Backyard Party Zone
Space: 20×30 ft patio with pergola
Challenge: Large area, uneven lighting.
Solution:
- Installed a grid of plug-in Edison bulbs over the dining area.
- Draped warm white globes on the pergola.
- Wrapped a tree in color-changing LEDs.
- Result: A vibrant, festive space for 20+ guests.
Total cost: $120. Setup time: 4 hours.
Case Study 3: Minimalist Modern Patio
Space: 10×12 ft concrete patio
Challenge: Sleek, contemporary look.
Solution:
- Used cool white LED strips along the perimeter.
- Added a single draped strand of large globe lights.
- Result: Clean, elegant ambiance with a touch of warmth.
Total cost: $75. Setup time: 3 hours.
| Setup Type | Avg. Cost | Setup Time | Best For | Maintenance Level |
|---|---|---|---|---|
| Overhead Grid | $50–$150 | 3–5 hours | Large patios, dining areas | Low |
| Draped/Swag | $25–$75 | 1–2 hours | Small patios, pergolas | Medium |
| Wrapped | $20–$60 | 1–3 hours | Trees, railings | Low |
| Pathway | $30–$80 | 1–2 hours | Edges, steps | Low |
| Layered | $75–$200 | 4–6 hours | Multi-zone patios | Medium |
Stringing lights across your patio isn’t just about aesthetics—it’s about creating a space where memories are made. Whether you’re sipping wine under a canopy of stars or hosting a lively BBQ, the right lighting sets the tone. Start small if you’re unsure. Even a single strand can make a difference. Over time, you’ll find your rhythm, your style, and your perfect glow.
Remember, there’s no “right” way to light your patio. It’s personal. It’s yours. So play, experiment, and don’t be afraid to make it your own. Because when the sun goes down and the lights come on, that’s when your outdoor space truly comes alive.
Frequently Asked Questions
How do I safely string lights across my patio without damaging the structure?
Use hooks, clips, or adhesive mounts designed for outdoor use to avoid drilling or stapling. Ensure lights are rated for outdoor use and distribute weight evenly to prevent sagging or strain.
What type of lights work best for stringing lights across a patio?
LED string lights are ideal due to their energy efficiency, durability, and weather resistance. Choose between Edison bulbs for a vintage look or globe lights for a softer glow.
Can I leave patio string lights up year-round, or should I take them down seasonally?
High-quality, weatherproof lights can stay up year-round, but inspect them periodically for damage. For longevity, consider removing them during harsh winter months or storms.
How do I power outdoor string lights if my patio lacks nearby outlets?
Use outdoor-rated extension cords or solar-powered string lights as a cord-free alternative. For permanent setups, consult an electrician to install an outdoor-rated outlet.
What’s the best spacing for stringing lights across a patio to achieve even lighting?
Hang lights 2–4 feet apart for balanced illumination, adjusting based on bulb size and patio dimensions. Overlapping strands slightly can eliminate dark spots and create a cozy ambiance.
Are there creative ways to string lights across a patio beyond the traditional grid pattern?
Try zigzag, canopy, or crisscross patterns for visual interest, or drape lights along railings or trees. Combine with lanterns or fairy lights for a layered, dynamic look.

