Featured image for stringing outdoor patio lights
Image source: bhg.com
Transform your outdoor space into a captivating retreat by mastering the art of stringing patio lights with our expert guide. From choosing weather-resistant bulbs to strategic placement for balanced illumination, we cover everything you need to create a safe, stylish, and inviting ambiance—perfect for entertaining or relaxing under the stars.
Key Takeaways
- Plan your layout first: Measure space and sketch light placement for balanced coverage.
- Choose weatherproof lights: Ensure durability with IP65-rated or higher outdoor-rated fixtures.
- Use proper hanging hardware: Install hooks, clips, or cables rated for outdoor weight loads.
- Prioritize spacing: Hang bulbs 12–24 inches apart for even, non-glaring illumination.
- Power safely: Use GFCI outlets and outdoor-rated extension cords to prevent hazards.
- Layer lighting: Combine string lights with spotlights or lanterns for depth and function.
📑 Table of Contents
Why Outdoor Lighting Matters
There’s something magical about stepping outside on a warm summer evening and being greeted by the soft, golden glow of outdoor patio lights. Maybe it’s the way they cast dancing shadows on the fence or how they make your backyard feel like a secret hideout. I remember the first time I strung up lights for a small gathering—my friends didn’t stop talking about the ambiance for weeks. That’s when I realized: the right lighting doesn’t just illuminate; it transforms.
But getting that perfect ambiance? It’s not as simple as hanging a few bulbs and calling it a day. Stringing outdoor patio lights requires planning, the right tools, and a touch of creativity. Whether you’re hosting a dinner party, enjoying a quiet night under the stars, or just want your yard to feel more inviting, this guide will walk you through every step. From choosing the right lights to avoiding common pitfalls, we’ll cover it all—no electrician needed.
Choosing the Right Lights for Your Patio
Types of Outdoor Patio Lights
Before you start stringing, you need to pick the right lights. Not all outdoor lights are created equal, and the wrong choice can leave you with a flickering mess—or worse, a safety hazard. Let’s break down your options:
- String lights: These are the classic choice for most patios. They come in various bulb styles—incandescent (warm, nostalgic glow), LED (energy-efficient and long-lasting), and vintage Edison (great for a rustic look).
- Net lights: Perfect for draping over bushes or pergolas. They provide even coverage without the hassle of individual bulbs.
- Rope lights: Flexible and great for outlining pathways, railings, or furniture. They’re less about ambiance and more about function.
- Fairy lights: Tiny, delicate bulbs that add a whimsical touch. Best for wrapping around trees or hanging in clusters.
- Solar-powered lights: Eco-friendly and easy to install, but they may not be as bright or reliable on cloudy days.
For most patios, LED string lights strike the best balance between durability, energy efficiency, and ambiance. But if you love the vintage vibe, don’t shy away from Edison bulbs—just make sure they’re rated for outdoor use.
Key Features to Look For
Not all outdoor lights are built for the elements. Here’s what to check:
- Weatherproof rating: Look for lights with an IP rating of at least IP44 (splash-proof). For areas with heavy rain or snow, aim for IP65 or higher.
- Bulb spacing: Closer spacing (e.g., 6 inches) creates a denser glow, while wider spacing (e.g., 12 inches) gives a more subtle effect. Choose based on your patio size.
- Power source: Do you want to plug into an outlet, use solar power, or hardwire into your home’s electrical system? Each has pros and cons.
- Connectable strands: Some brands let you connect multiple strands end-to-end. Handy for covering large areas without multiple outlets.
Pro tip: Buy one extra strand than you think you need. You’ll thank yourself later when you realize your patio is a few feet longer than expected.
Color Temperature and Brightness
Not all white light is the same. The color temperature (measured in Kelvin) affects the mood:
- Warm white (2000K–3000K): Cozy, inviting, and perfect for dining areas.
- Soft white (3000K–4000K): A balance of warmth and brightness, great for general lighting.
- Cool white (4000K–5000K): Crisp and bright, best for task lighting or modern spaces.
For most patios, stick with warm white (2700K–3000K). It’s flattering, relaxing, and makes everyone look their best. As for brightness, aim for 50–100 lumens per square foot for ambient lighting. Too bright, and it feels like a parking lot; too dim, and you’ll trip over your own feet.
Planning Your Lighting Layout
Mapping Out Your Space
Before you even touch a light strand, sketch your patio on paper or use a free app like SketchUp. Mark key areas:
- Seating zones (where people gather)
- Dining areas (if you eat outside)
- Pathways (to avoid dark spots)
- Architectural features (pergolas, railings, trees)
This helps you visualize where lights will shine—and where they might cast awkward shadows. For example, if your patio is L-shaped, you’ll need lights along both legs, not just one. And if you have a pergola, draping lights overhead creates a stunning “ceiling” effect.
Light Placement Ideas
Here are some tried-and-true layouts, depending on your patio’s shape:
- Rectangular patio: String lights parallel to the long sides, about 8–10 feet apart. Add a crisscross pattern for extra coverage.
- Square patio: Hang lights in a grid pattern (like a checkerboard) for even distribution.
- Circular or freeform space: Drape lights in a “starburst” pattern from a central point (like a tree or pergola).
- Small patio: Wrap lights around railings or hang them vertically from a roofline to save space.
Example: My neighbor has a small, square patio. Instead of stringing lights across, she hung them in a zigzag pattern from the house to the fence. It added depth and made the space feel larger.
Power and Safety Considerations
Nothing ruins a party like a tripped breaker. Plan your power sources early:
- Outdoor outlets: Use a heavy-duty extension cord if needed. Avoid daisy-chaining more than three strands unless the manufacturer allows it.
- Solar lights: Place them where they’ll get at least 6 hours of sunlight daily.
- Hardwired lights: Hire an electrician if you’re not comfortable with wiring. Safety first!
Also, check local codes. Some areas require GFCI (Ground Fault Circuit Interrupter) outlets for outdoor lighting. And never run cords across walkways—use cord covers or tuck them under rugs.
Step-by-Step Installation Guide
Tools and Materials You’ll Need
Gather these before you start:
- Measuring tape
- Pencil or chalk
- Drill and masonry bits (if attaching to stone)
- Screws, hooks, or zip ties
- Extension cord (if needed)
- Timer or smart plug (optional but handy)
- Ladder (for tall areas)
Pro tip: Use outdoor-rated hooks instead of nails. They’re less likely to damage surfaces and easier to adjust later.
Attaching Hardware
Where you attach your lights depends on your patio’s structure:
- Wooden railings or pergolas: Use eye hooks or screw-in hooks. Drill pilot holes to avoid splitting the wood.
- Brick or stone walls: Use masonry anchors or adhesive hooks rated for outdoor use.
- Fences: Zip ties work well, but they can degrade over time. For a permanent solution, use stainless steel wire or hooks.
- Rooflines: If your house has a gutter, you can clip lights directly into it. Otherwise, use gutter hooks or adhesive clips.
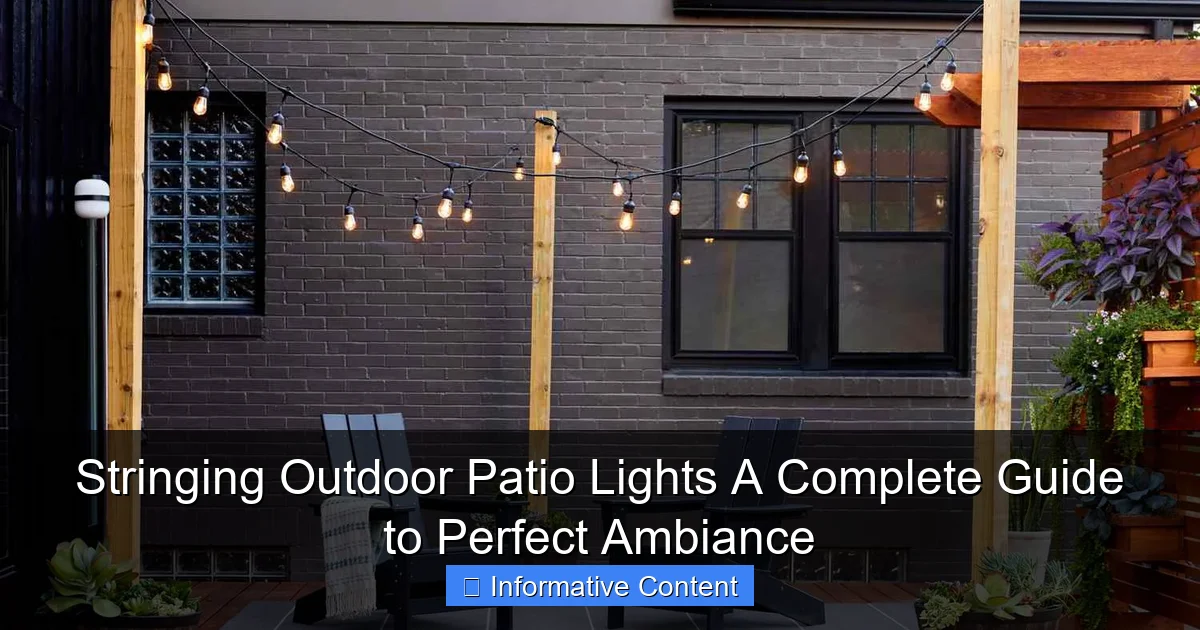
Example: For my pergola, I used stainless steel eye hooks every 10 feet. It took an hour to install, but the lights have held up for three years—even through winter storms.
Stringing the Lights
Now for the fun part! Here’s how to hang them:
- Test the lights first: Plug them in to make sure all bulbs work.
- Start at the power source: This minimizes cord length and reduces tripping hazards.
- Hang one end, then the other: Use a ladder if needed. Don’t stretch the cord too tight—leave a little slack.
- Secure the middle: Use hooks, zip ties, or clips every 2–3 feet to prevent sagging.
- Adjust for symmetry: Step back and check if the lights hang evenly. Tweak as needed.
Pro tip: For a “floating” effect, hang lights slightly above head height (about 7–8 feet). This keeps the glow at eye level without blinding anyone.
Creative Design Ideas for Maximum Impact
Layering Lights for Depth
One strand of lights is nice, but layering creates magic. Try combining:
- Overhead lights: String or net lights for a starry-night effect.
- Path lights: Solar-powered stakes along walkways.
- Accent lights: Spotlights on plants or architectural features.
- Furniture lights: Wrap fairy lights around chair backs or railings.
Example: My friend layered string lights over her pergola, added solar path lights to her garden, and wrapped fairy lights around her dining chairs. The result? A backyard that felt like a cozy outdoor café.
Unique Hanging Techniques
Think outside the box:
- Wrap trees: Use LED rope lights to highlight tree trunks.
- Drape from poles: Install temporary poles (like shepherd’s hooks) for a freestanding canopy.
- Hang from a clothesline: Stretch a wire between two posts and clip lights onto it.
- Use a curtain rod: Install a rod above your patio and hang lights like a valance.
Pro tip: For a romantic touch, hang lights in a “U” shape over a seating area. It creates an intimate, enclosed feel.
Seasonal and Themed Decor
Switch up your lights with the seasons:
- Summer: Warm white or colorful strands for a festive vibe.
- Fall: Amber or orange lights to match the foliage.
- Winter: White or blue lights for a snowy effect.
- Holidays: Red/green for Christmas, orange for Halloween, etc.
Example: My sister changes her patio lights monthly. In December, she uses warm white for a cozy glow. In July, she switches to multicolor for a party feel. It keeps the space fresh and exciting.
Maintenance and Safety Tips
Regular Upkeep
Outdoor lights need TLC to last:
- Check bulbs annually: Replace any that are dim or flickering.
- Clean the strands: Wipe them with a damp cloth to remove dust and pollen.
- Inspect connections: Look for frayed wires or loose plugs.
- Trim vegetation: Keep plants from growing into the lights.
Pro tip: Store lights in a cool, dry place during winter. Wrap them around a piece of cardboard to prevent tangles.
Weatherproofing and Longevity
Protect your investment:
- Use waterproof connectors: Silicone sealant or waterproof tape can help.
- Elevate plugs: Keep them off the ground to avoid water damage.
- Unplug during storms: Lightning can fry your lights.
- Choose UV-resistant bulbs: They won’t fade in the sun.
Example: My lights lasted five years because I stored them in a plastic bin with silica gel packets to absorb moisture. Cheap insurance!
Data Table: Comparing Outdoor Light Types
| Type | Best For | Lifespan | Energy Use | Weather Resistance |
|---|---|---|---|---|
| LED String Lights | General ambiance | 25,000–50,000 hours | Very low | IP44–IP65 |
| Incandescent | Vintage look | 1,000–2,000 hours | High | IP44 |
| Solar Lights | Off-grid areas | 2–3 years (battery) | Zero | IP55–IP67 |
| Rope Lights | Outlining edges | 10,000 hours | Medium | IP65 |
| Fairy Lights | Decorative accents | 5,000 hours | Low | IP44 |
This table helps you weigh trade-offs. For example, solar lights are eco-friendly but may not shine as brightly as LEDs.
Bringing It All Together
Stringing outdoor patio lights isn’t just about adding brightness—it’s about crafting an experience. The right lights can turn a plain backyard into a place where memories are made, conversations flow, and stress melts away. I’ll never forget the first time I hosted a dinner under my pergola lights. The glow made everyone’s faces look softer, the wine taste better, and the laughter last longer.
But here’s the truth: there’s no one-size-fits-all approach. What works for a small balcony might overwhelm a sprawling yard. The key is to start small, experiment, and adapt. Try one strand, step back, and see how it feels. Add more if needed. Play with heights, colors, and patterns. And don’t be afraid to mix styles—sometimes the best designs happen by accident.
Remember, lighting is a tool. Use it to highlight what you love about your space—the cozy seating nook, the blooming garden, the view of the stars. And most importantly, have fun with it. After all, your patio is your sanctuary. Make it shine.
Frequently Asked Questions
How do I choose the right type of outdoor patio lights for my space?
Consider the ambiance you want—warm white LEDs for cozy settings or colored lights for festive vibes. Ensure the lights are rated for outdoor use (look for “wet-rated” or “damp-rated”) and match your patio’s size and layout.
What’s the best way to hang string lights without damaging my patio or house?
Use removable hooks, adhesive clips, or tension rods to avoid nails or screws. For brick or stucco, opt for masonry hooks or removable putty designed for outdoor surfaces.
Can I leave outdoor patio lights up year-round?
Only if they’re specifically labeled for year-round outdoor use and are weather-resistant. Even then, inspect them regularly for wear and disconnect during extreme weather to prolong lifespan.
How far apart should I space the lights when stringing outdoor patio lights?
Space bulbs 6–12 inches apart for a balanced glow. For larger patios, mix spacing (e.g., tighter clusters over seating areas) to create depth and avoid a “runway” effect.
Do I need a special power source for outdoor patio lights?
Use outdoor-rated extension cords and GFCI outlets to ensure safety. Solar-powered lights are a great option for areas without easy access to electricity.
How do I troubleshoot flickering or dim outdoor patio lights?
Check for loose bulbs, damaged wires, or overloaded circuits. If using multiple strands, ensure you’re within the manufacturer’s recommended wattage or strand limit.

