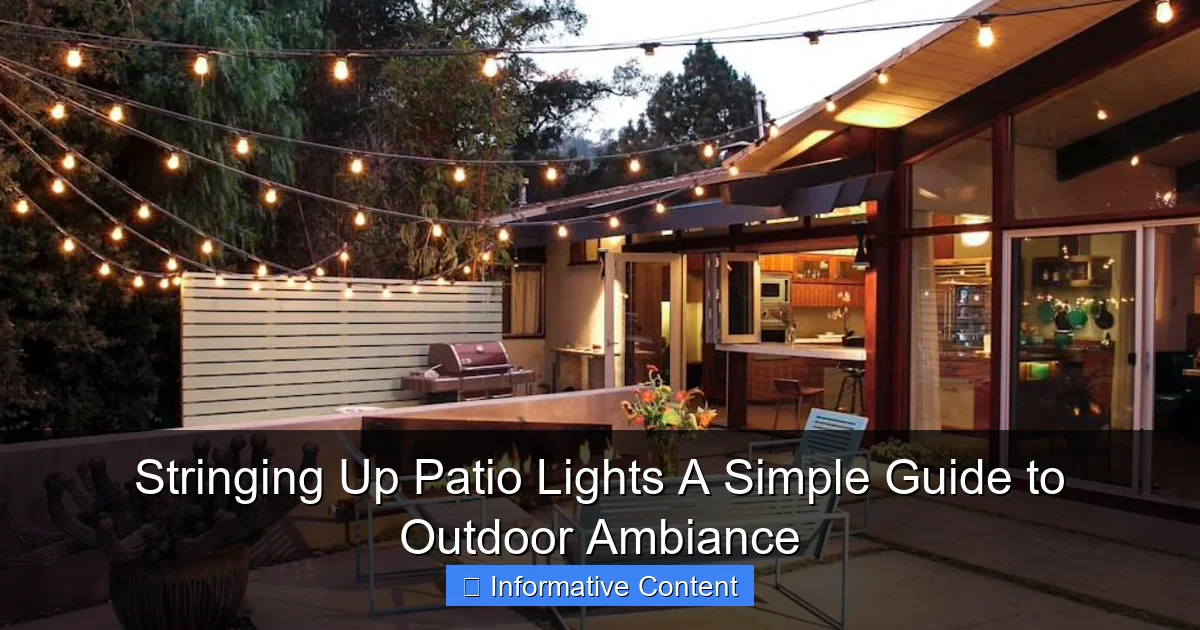
Featured image for stringing up patio lights
Image source: cdn.homedit.com
Stringing up patio lights instantly transforms your outdoor space into a warm, inviting retreat perfect for entertaining or relaxing. Choose weather-resistant, LED string lights and plan your layout along railings, pergolas, or trees for balanced, ambient glow—no electrical expertise needed. With simple tools and smart spacing, you can achieve professional-looking results in under an hour.
Key Takeaways
- Plan your layout: Sketch light placement before hanging for balanced coverage.
- Use weatherproof lights: Choose UL-rated outdoor lights for durability and safety.
- Secure with hooks: Install screw-in hooks or clips to avoid damaging walls.
- Test before installing: Check bulbs and connections to prevent mid-project failures.
- Space evenly: Hang lights 12–18 inches apart for optimal brightness and aesthetics.
- Keep power accessible: Position strands near outlets or use outdoor-rated extension cords.
📑 Table of Contents
- Why Stringing Up Patio Lights Is Worth the Effort
- Choosing the Right Lights for Your Patio
- Planning Your Layout: Where to Hang and How to Secure
- Step-by-Step Installation: From Planning to Plug-In
- Weatherproofing and Maintenance: Keeping Lights Glowing Year-Round
- Creative Ideas and Troubleshooting Tips
- Enjoy Your New Outdoor Oasis
Why Stringing Up Patio Lights Is Worth the Effort
There’s something magical about stepping onto a patio after dark and being greeted by the soft, golden glow of string lights. It’s not just the light—it’s the mood. The ambiance transforms a simple backyard into a cozy retreat, a place where conversations linger, laughter flows, and time seems to slow down. I remember my first attempt at stringing up patio lights—I was equal parts excited and intimidated. I had visions of tangled wires, uneven spacing, and lights that flickered out by midnight. But after a few trial runs (and one memorable evening with a ladder and a flashlight), I realized that the process doesn’t have to be complicated. In fact, it can be downright enjoyable.
Whether you’re planning a summer barbecue, a quiet evening with a book, or a romantic dinner under the stars, the right lighting can elevate your outdoor space from functional to unforgettable. And the best part? You don’t need to be an electrician or a DIY expert to get it right. With a few simple tools, some thoughtful planning, and a bit of patience, you can create a lighting setup that’s both beautiful and practical. In this guide, I’ll walk you through everything you need to know—from choosing the right lights to troubleshooting common pitfalls—so you can confidently tackle your own stringing up patio lights project and enjoy the results all season long.
Choosing the Right Lights for Your Patio
Types of Outdoor String Lights
When it comes to stringing up patio lights, the first step is selecting the right type. Not all string lights are created equal, and the wrong choice can leave you with dim, flickering, or weather-damaged results. Let’s break down the most common options:
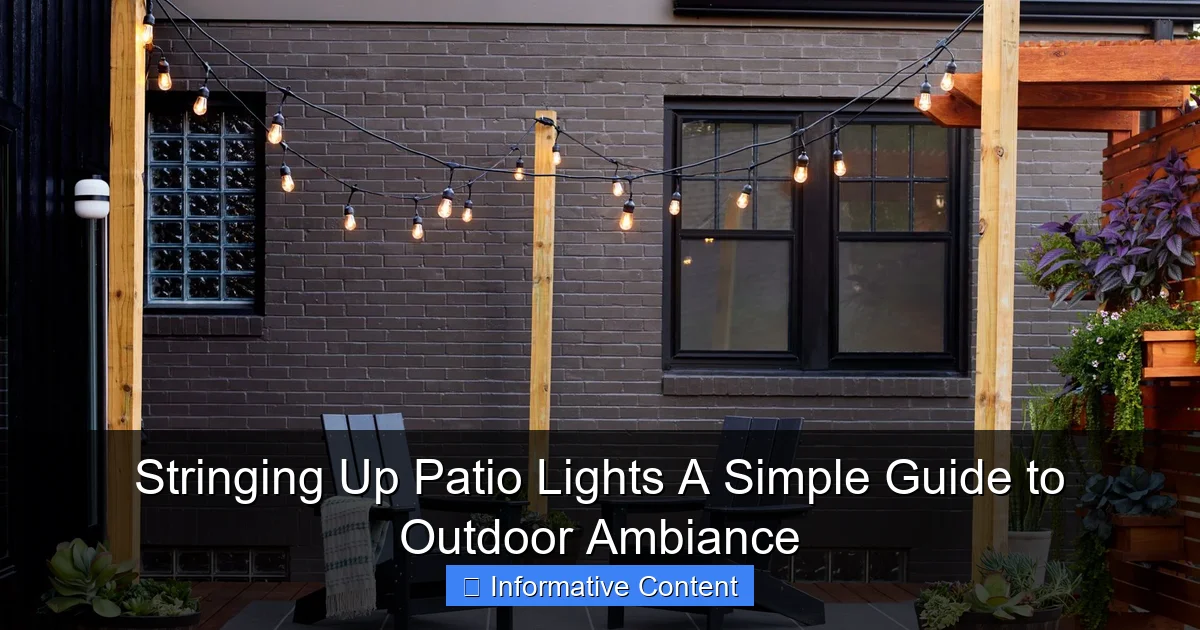
Visual guide about stringing up patio lights
Image source: bhg.com
- LED String Lights: These are the gold standard for outdoor use. They’re energy-efficient, last up to 25,000 hours, and are available in warm white, cool white, and even color-changing varieties. I once used LED lights for a friend’s wedding reception, and they stayed bright through rain, wind, and a late-night dance party.
- Incandescent String Lights: While they give off a classic, warm glow, they’re less efficient and don’t last as long as LEDs. I’ve seen them used beautifully in vintage-themed setups, but they’re not ideal for year-round outdoor use.
- Solar-Powered Lights: Great for areas without easy access to outlets. They charge during the day and turn on automatically at dusk. However, they can be dimmer and less reliable on cloudy days. I tried these on my side yard—they worked fine in summer, but by October, they barely lasted an hour.
- Smart Lights: These connect to apps or voice assistants (like Alexa or Google Home), allowing you to change colors, set timers, or sync with music. They’re fun for parties but overkill if you just want simple, steady lighting.
For most patios, I recommend weather-resistant LED string lights with a warm white tone (2700K–3000K). They’re bright enough for safety but soft enough to feel inviting.
Length, Spacing, and Brightness
Now that you’ve picked a type, consider these practical details:
- Length: Measure your patio’s perimeter or the area you want to cover. Add 10–15% extra for slack and connections. For example, if your patio is 20 feet long, buy a 22–24-foot strand (or connect multiple strands).
- Spacing: Most string lights have bulbs spaced 4–12 inches apart. Closer spacing creates a denser glow, while wider spacing gives a more scattered, “twinkle” effect. For a cozy feel, go with 6–8 inches between bulbs.
- Brightness: Measured in lumens. For ambient lighting, 100–200 lumens per bulb is plenty. For task lighting (like over a dining table), aim for 300+ lumens. I once used low-lumen lights over my grill—it looked pretty but made flipping burgers a guessing game!
Pro tip: Buy lights with replaceable bulbs or a warranty. Even the best lights can fail, and you don’t want to replace the whole strand for one dead bulb.
Planning Your Layout: Where to Hang and How to Secure
Mapping Your Patio’s Structure
Before you start stringing up patio lights, take a walk around your patio with a notebook (or your phone). Sketch a rough layout and note:
- Existing structures (eaves, railings, posts, pergolas, trees)
- Obstacles (vents, windows, furniture)
- Power source locations (outlets, GFCI-protected boxes)
I once skipped this step and ended up trying to drape lights over a vent—less than ideal. Now I always plan first. For example, if you have a pergola, you can string lights along the beams for a “canopy” effect. If your patio is open, use poles, trees, or even temporary stakes to create anchor points.
Securing Lights Without Damaging Surfaces
The last thing you want is to ruin your home’s exterior while adding beauty. Here’s how to hang lights safely:
- For Wood, Vinyl, or Metal: Use outdoor-rated hooks or eye screws. I prefer self-adhesive hooks for vinyl siding—they peel off cleanly in winter. For wood, small cup hooks work great. Just drill a pilot hole first to avoid splitting.
- For Brick or Concrete: Use masonry anchors or removable adhesive strips rated for outdoor use. I’ve used 3M Command strips on a brick patio—they held for three seasons before I took them down.
- For Trees: Wrap lights loosely around trunks or branches. Avoid nails or screws—they can harm the tree. I once used zip ties on young saplings; a year later, the ties had to be cut off as the bark grew.
- Temporary Setups: For renters or seasonal use, try lightweight poles or stakes driven into the ground. I use these for my deck—they’re easy to remove and store.
Key rule: Never use nails or screws on painted surfaces—they leave unsightly holes and can void warranties.
Creating Visual Flow and Balance
Think of your lights as a design element, not just a utility. Here’s how to make them look intentional:
- Frame the Space: Run lights along the edges of your patio to define the area. This works especially well for small or oddly shaped patios.
- Layer Heights: Mix high (e.g., pergola) and low (e.g., railings) strings for depth. I once hung a single strand at eye level—it felt flat. Adding a second layer overhead transformed the space.
- Focus on Focal Points: Highlight a dining table, fire pit, or water feature with a denser cluster of lights.
Example: For a rectangular patio, I often run a single strand along each long side, then add a “canopy” of lights across the top. It’s simple, elegant, and uses minimal hardware.
Step-by-Step Installation: From Planning to Plug-In
Gather Your Tools and Materials
Before you start, make sure you have:
- String lights (tested and working)
- Hooks, screws, or adhesive strips
- Measuring tape
- Drill (if using screws)
- Ladder (for high areas)
- Extension cords (outdoor-rated, GFCI-protected)
- Zip ties (for temporary setups)
- Timer or smart plug (optional but recommended)
I keep a “lighting kit” in my garage—it saves time and prevents last-minute runs to the hardware store.
Install Anchors and Run the Lights
Follow these steps for a smooth installation:
- Mark Anchor Points: Use a pencil or tape to mark where hooks will go. Space them 2–4 feet apart for even tension.
- Secure Hooks: Drill pilot holes if needed, then install hooks. For adhesive strips, clean the surface first with rubbing alcohol.
- Start at the Power Source: Plug in the first strand and work outward. This helps avoid tangled cords.
- Hang the Lights: Drape each strand loosely—don’t pull it tight. Bulbs should hang 1–2 inches below the hooks to prevent strain.
- Connect Strands: If using multiple strands, connect them end-to-end. Most outdoor lights are “end-to-end” compatible. Just check the packaging.
- Test as You Go: Plug in each strand after hanging it. Fix any issues before moving on.
Pro tip: For long runs, use a light stringer tool (a hook on a pole) to reach high areas without a ladder.
Managing Cords and Power
Messy cords ruin the ambiance. Here’s how to keep them tidy:
- Use Outdoor Extension Cords: Choose cords with a minimum 16-gauge wire for safety. I once used a thin indoor cord—it overheated and melted!
- Hide Cords: Run them along walls, behind furniture, or under deck railings. Use cord clips or weatherproof tape to secure them.
- Protect Outlets: Cover outdoor outlets with a weatherproof cover or use a GFCI outlet to prevent shocks.
- Add a Timer: Plug your lights into a timer or smart plug. I set mine to turn on at dusk and off at midnight—no more forgetting to unplug.
Example: For my pergola, I ran the cord down a support beam and tucked it behind a planter. No one ever notices it.
Weatherproofing and Maintenance: Keeping Lights Glowing Year-Round
Protecting Against the Elements
Outdoor lights face sun, rain, wind, and snow. Here’s how to protect them:
- Check IP Ratings: Look for lights with an IP65 rating or higher (dustproof and waterproof). I once used “outdoor” lights rated IP44—they survived rain but died after a winter snowfall.
- Use Weatherproof Covers: Cover bulb sockets with rubber boots or silicone caps (often included with lights).
- Elevate Connections: Keep plug connections off the ground. Use a weatherproof box or hang them on a hook.
- Trim Overhanging Branches: Falling leaves or twigs can damage lights. I prune my maple tree every spring for this reason.
For extreme climates, consider commercial-grade lights (rated for -40°F to 140°F). They cost more but last years longer.
Cleaning and Storage
Even the best lights need care. Here’s my routine:
- Clean Bulbs: Wipe dust and debris with a damp cloth (unplugged, of course). Avoid harsh chemicals.
- Inspect Wires: Look for fraying, corrosion, or loose bulbs. Replace damaged strands.
- Store Properly: At season’s end, unplug and remove lights. Coil them loosely and store in a dry, cool place. I use a labeled bin—no more tangles in spring!
- Replace Bulbs: Keep spare bulbs (or a replacement strand) on hand. I once spent an hour troubleshooting a “dead” strand—only to find one bulb needed replacing.
Pro tip: For permanent installations, consider in-ground conduit for cords. It’s a bigger upfront cost but eliminates tripping hazards and cord damage.
Creative Ideas and Troubleshooting Tips
Beyond the Basics: Unique Lighting Ideas
Want to go beyond simple strands? Try these creative touches:
- Fairy Light Curtains: Hang vertical strands from a pergola or awning for a “starry” effect. I used this for a garden party—it felt like dining under the stars.
- Edison Bulbs: Vintage-style bulbs add rustic charm. Great for patios with a farmhouse or industrial vibe.
- Color-Changing Lights: Use them for holidays or themed parties. I sync mine to my outdoor speakers for a “light show” during summer nights.
- DIY Chandeliers: Hang a cluster of lights inside a wire basket or lantern for a focal point. I made one from an old birdcage—it’s now a conversation starter.
Common Mistakes and Fixes
Even pros run into issues. Here’s how to solve the most common problems:
| Problem | Cause | Solution |
|---|---|---|
| Flickering lights | Loose bulb, bad connection, or voltage drop | Tighten bulbs, check plugs, use shorter cords |
| Dim lights | Too many strands connected | Limit to 3–4 strands per circuit (check manufacturer’s guide) |
| Water in sockets | Poorly sealed bulbs or damaged cords | Replace damaged strands, use silicone sealant on sockets |
| Uneven spacing | Hooks too far apart or lights pulled tight | Rehang with closer anchor points, leave slack |
| Cord tripping hazard | Cords on the ground | Use cord covers, run cords along walls, or bury in conduit |
I once had a strand that flickered every time it rained. After checking, I found a tiny crack in the socket. A dab of silicone sealant fixed it for good.
When to Call a Pro
For complex setups (like wiring lights into your home’s electrical system), hire a licensed electrician. Safety first! But for most DIY projects, you’ve got this.
Enjoy Your New Outdoor Oasis
There’s a quiet satisfaction in stepping back after stringing up patio lights and seeing your hard work come to life. The glow of the bulbs, the soft shadows they cast, the way they invite you to stay outside a little longer—it’s all worth the effort. I’ll never forget the first time I lit up my own patio. My neighbor came over, coffee in hand, and said, “It feels like a vacation right here.” That’s the magic of good outdoor lighting.
Remember, this isn’t about perfection. It’s about creating a space where you want to be. If a bulb burns out or a cord gets a little tangled, it’s okay. The goal is ambiance, not a magazine-worthy setup. Start small, experiment, and let your patio evolve over time. Maybe next year, you’ll add a chandelier or try color-changing lights. The possibilities are endless.
So grab your lights, your hooks, and a little patience. With this guide, you’re ready to transform your patio into a place of warmth, comfort, and beauty. Turn off the overheads, light up the strings, and enjoy the glow. After all, the best moments happen when the sun goes down—and the lights come on.
Frequently Asked Questions
How do I choose the right type of patio lights for my space?
Consider LED string lights for energy efficiency and durability, or opt for solar-powered options if you want to avoid wiring. Make sure the lights are rated for outdoor use and match your desired ambiance, whether warm white for cozy vibes or colorful for festive occasions.
What’s the best way to hang string lights without damaging my patio or walls?
Use removable hooks, adhesive clips, or tension rods to avoid nails or screws. For a secure yet damage-free setup, look for outdoor-rated mounting hardware designed for stringing up patio lights.
How far apart should I space the lights when stringing up patio lights?
For even illumination, hang lights 6–12 inches apart, depending on bulb size and spacing. If using multiple strands, plan your layout to avoid gaps or overcrowding.
Can I connect multiple strands of patio lights together?
Yes, but check the manufacturer’s limit for how many strands can be safely linked. Overloading circuits can cause damage or fire hazards, so always stay within recommended limits.
How do I safely power my patio lights if I don’t have an outdoor outlet?
Use a heavy-duty extension cord rated for outdoor use, or install a weatherproof outlet with professional help. Solar-powered lights are another great option for off-grid setups.
What’s the easiest way to create a balanced look when hanging patio lights?
Start from a central point and work outward, using a guide string or measuring tape to keep lines straight. For a professional touch, drape lights in gentle “S” shapes between anchor points instead of pulling them taut.

