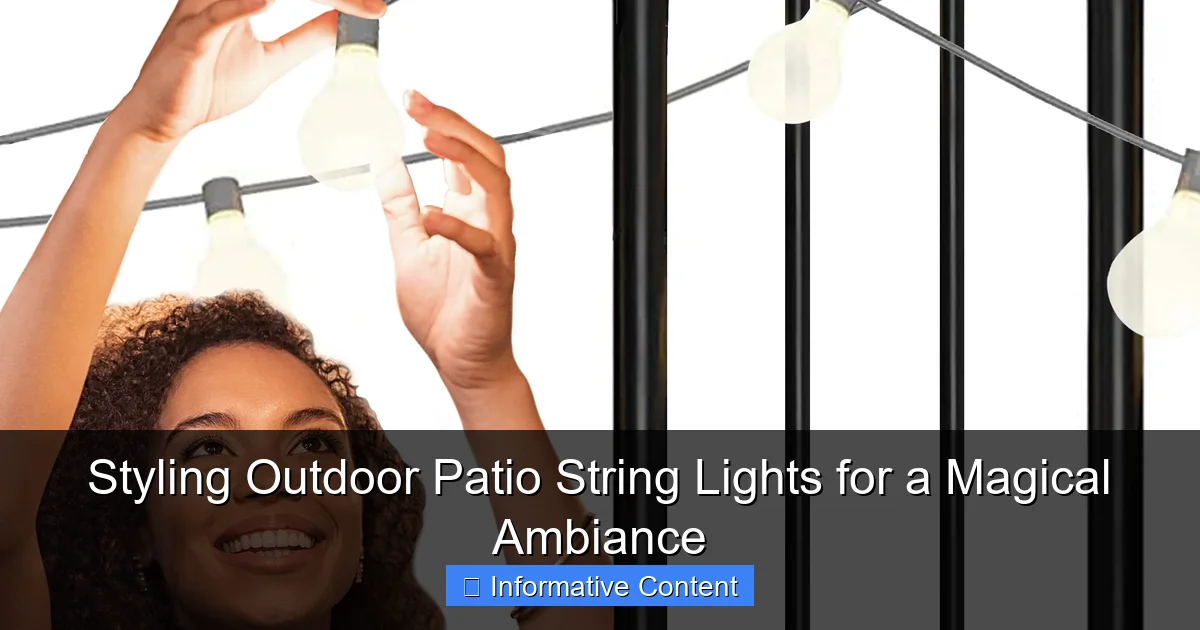
Featured image for styling outdoor patio string lights
Image source: m.media-amazon.com
Transform your outdoor space into a captivating retreat by strategically styling patio string lights to enhance ambiance and functionality. Layer lights at varying heights and weave them through railings, trees, or pergolas to create depth, warmth, and a magical glow perfect for entertaining or unwinding.
Key Takeaways
- Plan your layout: Sketch light placement for balanced coverage and visual appeal.
- Choose warm bulbs: Opt for 2200K-2700K LEDs to create a cozy glow.
- Layer with fixtures: Combine string lights with lanterns for depth and dimension.
- Secure safely: Use clips or hooks—never nails—to protect wires and surfaces.
- Dimmable options: Install dimmers to adjust brightness for any mood or occasion.
- Weatherproof wisely: Pick UL-rated outdoor lights and seal connections from moisture.
📑 Table of Contents
- Styling Outdoor Patio String Lights for a Magical Ambiance
- Choosing the Right String Lights for Your Patio
- Planning Your Layout: Mapping Light Placement
- Installation Tips for a Seamless Look
- Styling Techniques for Different Aesthetics
- Maintenance and Seasonal Care
- Final Touches: Bringing It All Together
Styling Outdoor Patio String Lights for a Magical Ambiance
There’s something undeniably magical about stepping into a backyard after sunset and being greeted by the warm, twinkling glow of outdoor patio string lights. Whether you’re hosting a summer barbecue, enjoying a quiet evening with a book, or sharing stories around a fire pit, the right lighting can transform your outdoor space into an enchanting retreat. I still remember the first time I draped string lights across my patio—what was once a dim, overlooked corner instantly felt cozy, inviting, and full of personality. It wasn’t just about adding light; it was about creating a mood, a feeling, a moment.
But here’s the thing: styling outdoor patio string lights isn’t just about hanging them up and hoping for the best. It’s an art. Too many lights can feel overwhelming, while too few might leave your space looking unfinished. The placement, spacing, color temperature, and even the type of bulbs you choose all play a role in crafting that perfect ambiance. Whether you’re working with a sprawling backyard or a compact balcony, this guide will walk you through everything you need to know to style your outdoor patio string lights like a pro—without overcomplicating things or breaking the bank.
Choosing the Right String Lights for Your Patio
Types of Outdoor String Lights
Not all string lights are created equal. When shopping for outdoor patio string lights, you’ll come across several types, each with its own strengths and quirks. Here’s a quick breakdown:
Visual guide about styling outdoor patio string lights
Image source: nextluxury.com
- Incandescent bulbs: The classic, warm glow you remember from childhood. They’re affordable and nostalgic, but they use more energy and don’t last as long as LEDs. Great for short-term or seasonal use.
- LED bulbs: Energy-efficient, long-lasting, and available in a range of color temperatures (warm white, cool white, multicolor). They’re ideal for year-round use and can often be dimmed or controlled with a remote. A bit pricier upfront, but they’ll save you money in the long run.
- Edison-style bulbs: These vintage-looking bulbs with visible filaments add instant charm and are perfect for rustic or industrial aesthetics. They come in both incandescent and LED versions.
- Fairy lights (micro LED): Tiny, delicate, and often battery-powered, these are great for wrapping around railings, plants, or furniture. Less intense than standard string lights, but perfect for subtle sparkle.
For most patios, I recommend LED string lights with warm white bulbs (2700K–3000K color temperature). They strike the perfect balance between brightness and coziness, mimicking candlelight without the fire hazard. Plus, they’re weather-resistant—a must for outdoor use.
Weather Resistance and Safety Ratings
Since your lights will be exposed to rain, wind, and temperature changes, look for models with an IP65 or higher weather resistance rating. This means they’re dust-tight and protected against water jets. Avoid anything labeled “indoor use only”—it won’t hold up to the elements.
Also, check for safety certifications like UL (Underwriters Laboratories) or ETL (Intertek). These ensure the lights meet electrical safety standards. I once bought a cheap set without proper certification—after a heavy rain, one of the sockets sparked. Not fun. Lesson learned: spend a little more for peace of mind.
Length, Spacing, and Connectability
Measure your space before buying. Most patio string lights come in 25–50-foot strands with bulbs spaced every 6–12 inches. If you’re covering a large area, look for lights that can be connected end-to-end (usually up to 3–5 strands, depending on the model). This avoids the need for multiple outlets or extension cords.
For example, if your patio is 20 feet wide, a 50-foot strand with 10-inch spacing gives you plenty of coverage. But if you’re wrapping lights around a pergola, you might need two 25-foot strands connected together. Always buy an extra strand or two—better to have a little extra than come up short.
Planning Your Layout: Mapping Light Placement
Start with a Sketch or Visualization
Before you start hammering hooks or climbing ladders, sketch a simple layout of your patio. Include key features: furniture, trees, railings, pergolas, and power sources. This helps you visualize how the lights will interact with your space.
I like to use a free tool like SketchUp Free or even just a napkin sketch. Mark where you plan to hang lights and note any obstacles (like roof overhangs or gutters). This step alone can save you hours of trial and error later.
Key Areas to Illuminate
Think about how you use your patio. Do you entertain? Dine outside? Relax with a drink? Each activity calls for different lighting. Here are the most effective zones to target:
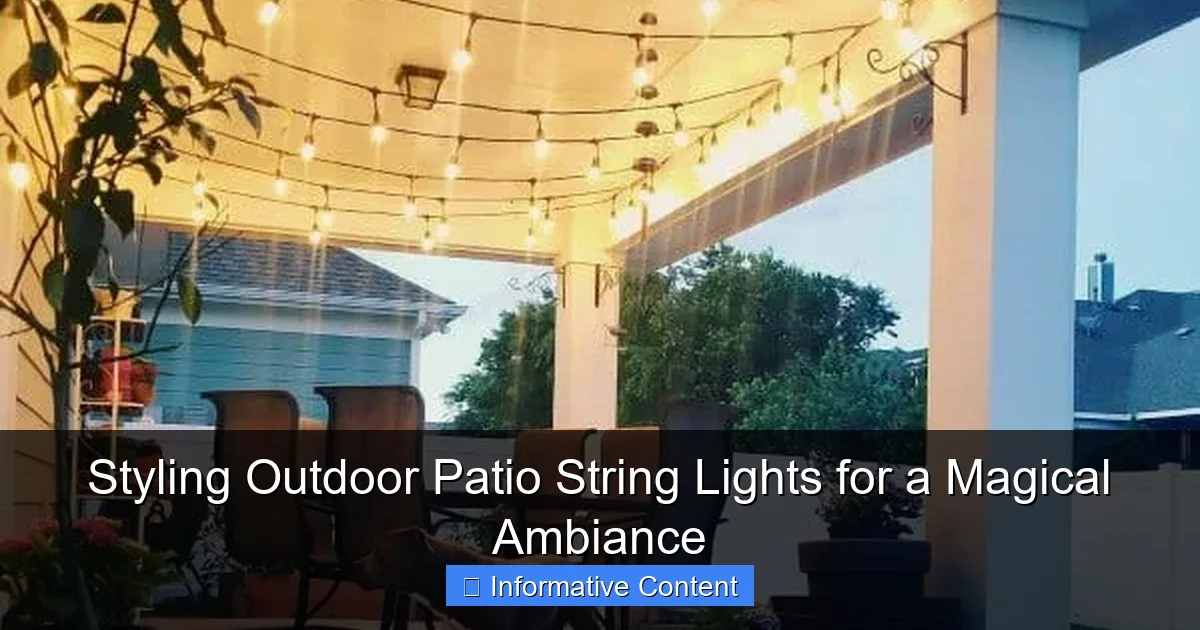
- Above the seating area: This is your primary focus. Drape lights over the center of your conversation or dining space to create a “canopy” effect. Think of it as a floating ceiling of light.
- Along railings or fences: Wrap lights vertically or horizontally to define the perimeter and add depth. This works especially well on balconies or enclosed patios.
- On pergolas, arbors, or trellises: Run lights across the beams or weave them through slats for a structured, architectural look.
- On trees or shrubs: Wrap lights around trunks or drape them through branches for a natural, fairy-tale vibe. Use zip ties or light clips to secure them without damaging the bark.
- Under furniture or along pathways: Battery-powered fairy lights under benches or along walkways add subtle, functional glow without needing outlets.
One of my favorite tricks? Layer the lighting. For example, hang a main strand over your dining table, then add a secondary strand along the fence behind it. This creates depth and makes the space feel larger at night.
Spacing and Overlap
Avoid the “Christmas tree” effect—where lights are clustered in one spot and leave the rest of the patio dark. Instead, aim for even coverage with slight overlap. A good rule of thumb: if you can’t see a dark gap between strands from the center of your patio, you’re doing it right.
For a 10-foot-wide seating area, I typically use two parallel strands spaced 3–4 feet apart. This gives a soft, diffused glow without harsh shadows. If you’re using Edison bulbs, you can space them a bit wider (5–6 feet) since their larger bulbs emit more light per socket.
Installation Tips for a Seamless Look
Choosing the Right Hanging Hardware
How you hang your lights matters as much as the lights themselves. Here are the most reliable methods:
- Hooks or eye screws: Ideal for wood, stucco, or brick. Use stainless steel or galvanized hooks to prevent rust. I like to use small cup hooks for a clean look.
- Adhesive clips: Great for vinyl siding, metal, or glass. Look for outdoor-rated, waterproof clips with UV resistance. They’re easy to install and remove, but avoid them in extreme heat—adhesive can fail.
- Zip ties or cable clips: Perfect for wrapping lights around trees, railings, or pergola beams. Use UV-resistant zip ties to avoid brittleness over time.
- Light line or guide wire: For large patios, run a thin, nearly invisible wire between two anchor points (like posts or trees), then clip the lights to it. This keeps strands taut and prevents sagging.
Pro tip: Don’t nail or staple the light cords directly to surfaces. This can damage the insulation and create a fire hazard. Always use clips or hooks designed for outdoor lights.
Power Source and Outlet Management
Most outdoor string lights use a standard plug. But running an extension cord across your patio isn’t just unsightly—it’s a tripping hazard. Here’s how to handle power:
- Use a weatherproof outlet cover: Install a flip-up outlet cover to protect the plug from rain.
- Hide cords with cord covers: Run extension cords under rugs, behind furniture, or through cord channels (available at hardware stores).
- Consider a timer or smart plug: Automate your lights to turn on at sunset and off at bedtime. I use a Wi-Fi smart plug so I can control the lights from my phone—no more running outside to plug/unplug.
If you don’t have an outdoor outlet, talk to an electrician about installing one. It’s a small investment that pays off in convenience and safety.
Dealing with Obstacles and Uneven Surfaces
Not every patio is flat and obstacle-free. Here’s how to adapt:
- Roof overhangs or eaves: Use gutter hooks or clips to hang lights without drilling into your house.
- Uneven railings or posts: Use adjustable light clips or zip ties to secure lights at varying heights.
- Sloped yards: Hang lights at a slight angle or use a zigzag pattern to follow the terrain. This adds visual interest instead of fighting the slope.
Styling Techniques for Different Aesthetics
Rustic or Farmhouse Vibe
For a cozy, down-to-earth look, go with Edison bulbs on black or brown cords. Hang them in a crisscross pattern over your dining table or lounge area. Add vintage-inspired lanterns or mason jar lights for extra charm. I love pairing these with wooden furniture and linen cushions—it feels like a countryside escape.
Bonus: Use burlap ribbon to tie the strands to hooks or railings. It adds texture without competing with the lights.
Modern or Minimalist Style
Keep it clean and simple. Choose warm white LED string lights with clear or white cords. Hang them in straight, parallel lines—no zigzags or swags. For a sleek touch, use track lighting-style clips that sit flush against the wall or railing.
Pair with monochromatic decor (grays, whites, blacks) and geometric planters. The key is restraint: one well-placed strand can feel more intentional than a dozen tangled ones.
Tropical or Boho Atmosphere
Embrace color and texture. Mix multicolor string lights with fairy lights in glass orbs. Drape them through palm fronds, hang them from a tiki bar, or wrap them around bamboo poles. Add tiki torches (battery-operated, for safety) and woven rattan furniture.
One summer, I created a “jungle canopy” by hanging lights at different heights from my pergola. It felt like dining in a secret garden—even though I live in a suburban backyard.
Romantic or Intimate Setting
For date nights or quiet evenings, go soft and subtle. Use fairy lights in warm white or soft pink draped over a canopy bed or lounge chair. Add candles in hurricane jars and sheer fabric panels to diffuse the light.
I once styled a friend’s small patio for a proposal. We hung fairy lights in a heart shape above the seating area, then added floating candles in a nearby pond. The glow reflected on the water—it was pure magic.
Maintenance and Seasonal Care
Cleaning and Storage
Even weatherproof lights need occasional care. After a season of use, unplug and gently wipe down bulbs with a dry or slightly damp cloth. Avoid harsh cleaners—they can damage coatings. For stubborn dirt, use a soft brush (an old toothbrush works great).
Before storing, check for damaged bulbs or frayed cords. Replace any faulty sockets. Coil the lights loosely (never tightly) and store them in a cool, dry place. I use labeled bins—one for each patio zone—so I know exactly where to hang them next year.
Seasonal Adjustments
Your lighting needs might change with the seasons. In summer, you might want brighter lights for late-night gatherings. In winter, softer, warmer tones create a cozy vibe.
For holidays, consider interchangeable light covers (like colored sleeves or snowflake-shaped shades). Or, keep a second set of lights in festive colors (red and green for Christmas, orange and purple for Halloween) and swap them out as needed.
Data: Comparing Popular Outdoor String Lights
| Brand/Model | Bulb Type | Length | Weather Rating | Connectable? | Price (approx.) | Best For |
|---|---|---|---|---|---|---|
| Brightech Ambience Pro | LED (warm white) | 48 ft | IP65 | Yes (up to 5 strands) | $45 | Large patios, year-round use |
| Twinkle Star Edison | LED (Edison-style) | 25 ft | IP65 | Yes (up to 3 strands) | $35 | Rustic, vintage aesthetics |
| GE Enbrighten | LED (color-changing) | 24 ft | IP65 | Yes (up to 12 strands) | $50 | Parties, seasonal themes |
| Philips Hue Outdoor | Smart LED | 25 ft | IP67 | Yes (via hub) | $120 | Tech-savvy users, app control |
| Minetom Fairy Lights | Micro LED (battery) | 33 ft | IP65 | No | $25 | Railings, plants, small spaces |
Final Touches: Bringing It All Together
Styling outdoor patio string lights isn’t just about the lights—it’s about how they make you feel. A well-lit patio should invite you to linger, laugh, and unwind. It’s the difference between a space you tolerate and one you truly love.
Remember, there’s no one-size-fits-all approach. Your patio is an extension of your home, so let your personality shine through. Maybe that means a bold, colorful display for your next party. Or perhaps it’s a quiet, twinkling canopy for reading under the stars. The beauty of string lights is their versatility—they can be festive, romantic, cozy, or playful, all with a few simple adjustments.
And don’t be afraid to experiment. I’ve redone my patio lighting setup every year, trying new layouts, bulbs, and styles. Some worked better than others, but each attempt taught me something. Now, when I step outside at night, I don’t just see lights—I see memories, moments, and a little slice of magic.
So go ahead: grab a strand, grab a friend, and start hanging. Your perfect outdoor ambiance is just a few twinkles away.
Frequently Asked Questions
How do I choose the right styling outdoor patio string lights for my space?
Consider the size of your patio, the mood you want (warm white for cozy, colored for festive), and bulb type (LED for energy efficiency). Opt for weather-resistant, commercial-grade lights for durability and safety. Match the spacing and length to your layout for balanced coverage.
Can I install outdoor patio string lights without damaging my walls or roof?
Yes! Use adhesive hooks, removable clips, or tension rods for a no-damage setup. For trees or railings, wrap lights loosely with zip ties or use freestanding poles to avoid drilling holes.
What’s the best way to hang string lights for a professional look?
Plan a layout with even spacing (8–12 feet between bulbs) and use a guide string or tape to align them. Avoid drooping by securing lights at multiple points, and mix heights (e.g., zigzag or canopy style) to add visual interest.
How do I style outdoor patio string lights for special events like parties or weddings?
Layer lights with lanterns, candles, or sheer drapes for a romantic vibe. Use dimmers or smart bulbs to adjust brightness, and drape lights over pergolas, fences, or tables to create focal points.
Are solar-powered string lights bright enough for evening gatherings?
Yes, modern solar lights offer strong illumination (look for 200+ lumens) and last 6–8 hours after charging. Place the solar panel in direct sunlight during the day for optimal performance, or use hybrid models with backup USB charging.
How can I make my outdoor string lights last longer?
Store lights in a dry, temperature-controlled space during off-seasons and inspect wires yearly for wear. Use surge protectors for plug-in models, and avoid overloading circuits to extend lifespan.

