Featured image for attach bistro string lights to pergola
Image source: img.ltwebstatic.com
Secure bistro string lights to your pergola in 2026 with durable, weather-resistant mounting hardware designed for long-term shine. Use stainless steel cable ties, eye hooks, or specialized LED light clips to ensure a clean, professional look without damaging wood or metal structures. Always plan your layout first and test lights before final installation for optimal ambiance and safety.
Key Takeaways
- Plan spacing first: Measure and mark light placement before installing any hardware.
- Use pergola beams: Secure lights directly to sturdy crossbeams for maximum support.
- Choose removable clips: Opt for no-damage clips to preserve your pergola’s finish.
- Weatherproof connections: Use outdoor-rated lights and seal plugs to prevent water damage.
- Test before finalizing: Hang and power lights temporarily to check alignment and brightness.
- Anchor end points: Reinforce start and end with heavy-duty hooks or zip ties.
📑 Table of Contents
- Why Bistro String Lights Are the Perfect Touch for Your Pergola
- Choosing the Right Bistro String Lights for Your Pergola
- Preparing Your Pergola for String Light Installation
- Step-by-Step Guide to Attaching Bistro String Lights to Pergola
- Creative Lighting Ideas and Design Tips
- Maintenance and Safety Tips for Long-Lasting Lights
- Final Thoughts: Transform Your Pergola with Bistro Lights
Why Bistro String Lights Are the Perfect Touch for Your Pergola
Imagine this: it’s a warm summer evening, and you’re sitting under your pergola with friends, sipping a cold drink. The sun has just dipped below the horizon, and as twilight sets in, a soft, golden glow begins to shimmer above you—bistro string lights strung across your pergola, casting a cozy, inviting light. There’s something magical about that moment, isn’t there? It feels like your backyard has transformed into a private outdoor oasis, perfect for relaxing, dining, or just enjoying the night air.
If you’ve ever wanted to attach bistro string lights to pergola spaces, you’re not alone. More homeowners in 2026 are turning to these elegant, energy-efficient lights to elevate their outdoor living areas. Whether your pergola is made of wood, vinyl, or metal, bistro string lights can instantly add charm, warmth, and functionality. But the real question is: how do you do it right? From choosing the right lights to ensuring they stay put through wind, rain, and seasons, there’s a lot to consider. In this guide, I’ll walk you through every step—sharing what I’ve learned from years of outdoor decorating, a few DIY mishaps, and plenty of trial and error.
Choosing the Right Bistro String Lights for Your Pergola
Before you start hammering or drilling, it’s crucial to pick the right kind of bistro string lights. Not all lights are created equal, and the wrong choice can leave you with dim lighting, tangled wires, or—worst of all—lights that fall after a gust of wind. Let’s break down what matters most.
Visual guide about attach bistro string lights to pergola
Image source: img.ltwebstatic.com
LED vs. Incandescent: The Efficiency Factor
In 2026, LED bistro string lights are the clear winner for most homeowners. They use up to 80% less energy than incandescent bulbs, last 25 times longer, and generate almost no heat—making them safer for outdoor use. I learned this the hard way when I tried incandescent lights on my pergola; after a few hot summer nights, the bulbs started burning out, and the wires got dangerously warm.
- LED Pros: Energy-efficient, long-lasting, cool to the touch, available in warm white, cool white, and color options.
- LED Cons: Slightly higher upfront cost (but pays off in energy savings and longevity).
- Incandescent Pros: Classic, warm glow (some people prefer this look).
- Incandescent Cons: High energy use, short lifespan, heat output, not ideal for extended outdoor use.
For most pergolas, go with LED bistro string lights. They’re the smart, sustainable choice.
Bulb Style and Spacing: Finding the Right Look
Bistro lights come in two main styles: edison-style bulbs (exposed filaments, vintage look) and globe bulbs (round, diffused light). Edison bulbs give a rustic, café vibe—perfect for a backyard bistro feel. Globe bulbs offer a softer, more uniform glow, great for ambient lighting.
Spacing matters too. Standard spacing is 6–12 inches between bulbs. For a cozy, intimate feel, go with closer spacing (6–8 inches). If you want a more subtle, ambient look, 10–12 inches works well. I recommend measuring your pergola’s length and calculating how many bulbs you’ll need. For example, a 12-foot pergola with 6-inch spacing needs about 24 bulbs.
Weather Resistance and Power Source
Since your lights will be outdoors, look for a weatherproof rating of IP65 or higher. This means they’re dust-tight and protected against low-pressure water jets (like rain). Avoid anything rated below IP44.
Power options:
- Plug-in lights are easiest but require an outdoor outlet. Use a GFCI-protected outlet for safety.
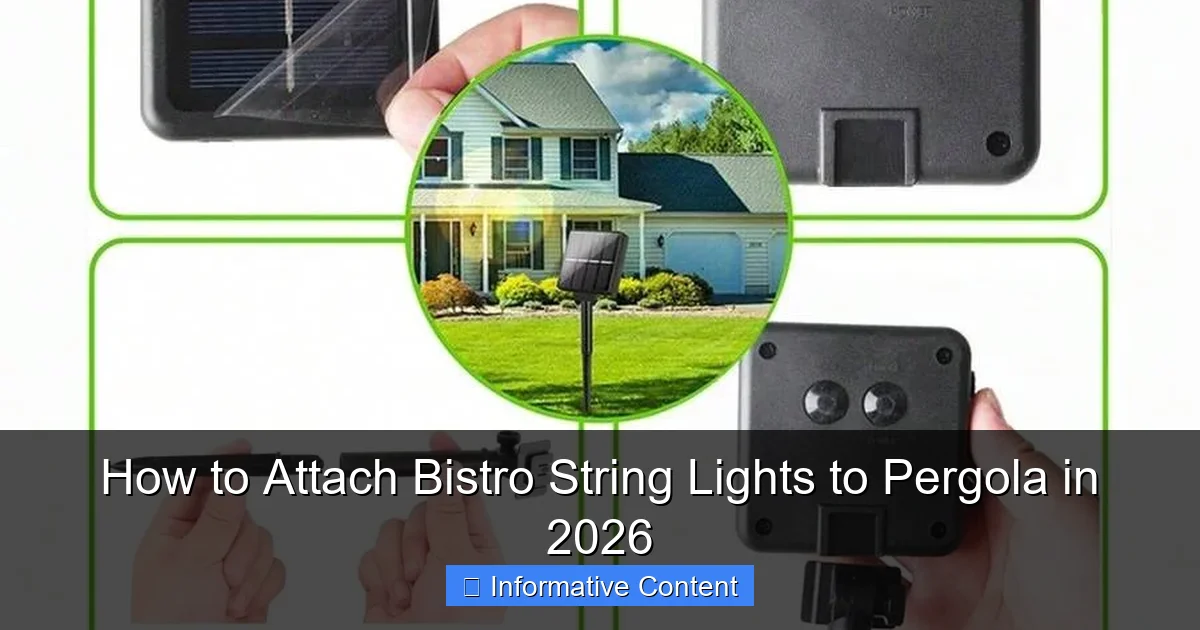
- Solar-powered lights are wire-free and eco-friendly, but may dim in cloudy weather or during winter. Best for low-light needs.
- Battery-powered lights offer portability but need frequent battery changes. Not ideal for long-term use.
For most pergolas, I suggest plug-in LED bistro lights with a 25–50 ft cord—plenty of reach, reliable, and bright.
Preparing Your Pergola for String Light Installation
Now that you’ve got your lights, it’s time to prep your pergola. This step is often overlooked, but it’s critical for a safe, long-lasting setup. A little prep now saves headaches later.
Inspect the Pergola Structure
Start by checking your pergola’s condition. Are the beams solid? Any rot, rust, or loose joints? I once tried to hang lights on a pergola with a slightly wobbly crossbeam—after a week, the weight of the lights pulled one end loose. Not a fun fix.
- Wood pergolas: Sand down rough spots, check for splinters, and treat with a weatherproof sealant if needed.
- Metal pergolas: Look for rust or weak joints. Use rust-resistant hardware.
- Vinyl or composite: Ensure the material can support the weight of lights and hardware.
If your pergola is new, you’re in luck. If it’s older, consider reinforcing weak areas before hanging anything.
Plan the Layout and Measure Carefully
Sketch out your lighting design. Do you want a straight line across the beams? A zigzag pattern? Or a crisscross web for maximum coverage?
Use a tape measure to:
- Measure the total length of the pergola (e.g., 12 ft).
- Determine how many light strands you need (e.g., one 25-ft strand covers 25 ft, but leave a little slack).
- Mark anchor points where you’ll attach hardware (e.g., every 4–6 ft).
I like to use painter’s tape to mark spots on the pergola before drilling. It lets me visualize the layout and adjust if needed.
Gather the Right Tools and Hardware
Here’s what you’ll need:
- Drill with appropriate bits (for wood, metal, or masonry)
- Screwdriver or impact driver
- Measuring tape and pencil
- Level (to keep lines straight)
- Hardware: stainless steel eye hooks, S-hooks, or cable clips (avoid cheap plastic—they break easily)
- Optional: zip ties, wire clips, or light hooks for extra security
Pro tip: Buy extra hardware. You’ll likely drop a few screws or need to adjust spacing.
Step-by-Step Guide to Attaching Bistro String Lights to Pergola
Now for the fun part—installing the lights! This section walks you through a safe, effective method that works for most pergolas. I’ve used this on my own backyard setup, and it’s held up through rain, wind, and even a minor storm.
Step 1: Install Anchor Points (Eye Hooks or Clips)
Start by installing anchor points on the pergola’s beams or rafters. Use a pencil to mark spots every 4–6 ft along the planned light path. For a 12-ft pergola, that’s 3–4 anchor points.
- Wood pergolas: Drill pilot holes (slightly smaller than the eye hook’s screw), then twist in stainless steel eye hooks. Don’t overtighten—this can split the wood.
- Metal pergolas: Use self-tapping metal screws or rivet eye hooks. A magnetic drill bit helps keep things steady.
- Vinyl/composite: Use plastic-coated hooks or adhesive clips designed for outdoor use.
Use a level to ensure all hooks are aligned. A crooked line looks unprofessional and can strain the lights.
Step 2: Test the Layout with a Dummy Strand
Before hanging the real lights, test with a cheap string of lights or even a rope. This lets you check:
- If the spacing looks right
- If the sag is even (you want a gentle curve, not a droop)
- If the lights reach the outlet
I once skipped this step and ended up with one strand that sagged too low—my kids kept hitting it with their heads. Lesson learned.
Step 3: Hang the Lights
Now, attach the real bistro string lights:
- Start at one end. Loop the light strand’s end cap (or plug end) through the first eye hook.
- Use an S-hook or zip tie to secure it—don’t tie a knot, as it can damage the wire.
- Run the strand to the next hook, allowing a slight sag (about 6–12 inches between hooks). This prevents tension and looks more natural.
- At corners or turns, use a second hook to guide the strand smoothly.
- Secure the end cap at the final hook.
If using multiple strands, connect them with a waterproof connector (not a regular plug—this can short out). I recommend end-to-end connectors rated for outdoor use.
Step 4: Manage the Power Cord
Keep the power cord tidy and safe:
- Use outdoor-rated zip ties or cable clips to secure the cord along the pergola beam.
- Keep the plug end accessible and elevated (use a cord cover or loop it on a hook).
- Never run the cord across walkways—tripping hazard!
For extra safety, use a GFCI outlet or a GFCI extension cord.
Step 5: Test and Adjust
Turn on the lights! Check for:
- Even brightness (no dim bulbs)
- Proper sag (no tight lines or excessive droop)
- Secure connections (no loose strands)
Make small adjustments as needed. It’s easier to tweak now than after a storm.
Creative Lighting Ideas and Design Tips
Now that your lights are up, let’s talk design. Bistro string lights aren’t just for straight lines—they can be a design feature. Here are some ideas to make your pergola truly shine.
Zigzag or Crisscross Patterns
Instead of a single line, try a zigzag or crisscross pattern. This adds visual interest and fills the space with light. For a 12-ft pergola, run strands diagonally from corner to corner, creating a web of light. Use additional eye hooks at the corners and midpoints.
I did this for a friend’s pergola, and it looked like a starry sky—perfect for evening parties.
Layered Lighting: Add Pendants or Lanterns
Combine bistro lights with other fixtures. Hang a few outdoor pendant lights or hanging lanterns from the pergola beams. This creates depth and focus—great for dining areas.
Pro tip: Use warm white lights (2700K–3000K) for a cozy feel. Cool white (4000K+) can feel too clinical for outdoor spaces.
Color and Smart Lighting Options
In 2026, many bistro lights come with smart features: color-changing, dimming, or app control. Use color to set the mood:
- Warm white: classic, inviting
- Soft yellow: romantic, cozy
- Blue or white: crisp, modern
- Color modes: fun for parties or holidays
Smart lights let you adjust brightness or color with a phone or voice command. Just make sure your pergola is within Wi-Fi range.
Seasonal and Holiday Decor
Your bistro lights can adapt to the seasons:
- Summer: warm white or soft yellow
- Fall: amber or orange (add pumpkins for extra flair)
- Winter: white or blue (pair with greenery for a festive look)
- Holidays: red/green, pastels, or themed colors
Use interchangeable bulbs or smart lights to switch colors easily.
Maintenance and Safety Tips for Long-Lasting Lights
Your bistro lights will last for years if you take care of them. Here’s how to keep them safe, functional, and beautiful.
Regular Cleaning and Inspection
Dust, pollen, and spiderwebs can dim your lights. Every few months:
- Turn off and unplug the lights.
- Wipe bulbs gently with a damp cloth (use a mild soap solution if needed).
- Check for loose connections, frayed wires, or damaged bulbs.
- Inspect hardware for rust or wear (replace if needed).
I clean my lights every spring—it takes 15 minutes and keeps them looking new.
Weatherproofing and Storage
Even weatherproof lights can suffer in extreme conditions:
- During heavy storms or snow, unplug the lights to avoid surges.
- In winter, consider removing the lights and storing them indoors (or cover with a waterproof tarp).
- For year-round use, use commercial-grade lights rated for all seasons.
Pro tip: Store lights in a cool, dry place. Wrap them loosely to avoid tangling.
Electrical Safety
Never cut or modify the wires—this voids the warranty and creates a fire hazard. Use only outdoor-rated extension cords and outlets. If you notice flickering, buzzing, or overheating, turn off the lights immediately and check for loose connections or water damage.
Data Table: Recommended Hardware for Pergola Lighting
| Hardware | Material | Best For | Durability | Price Range |
|---|---|---|---|---|
| Stainless Steel Eye Hooks | Stainless steel | Wood, metal pergolas | High (resists rust) | $0.50–$1.50 each |
| Plastic-Coated Hooks | Steel with PVC coating | Vinyl, composite pergolas | Medium (coating can wear) | $0.75–$2.00 each |
| Adhesive Cable Clips | Plastic with outdoor adhesive | Smooth surfaces (no drilling) | Low–medium (may loosen in heat) | $5–$10 per pack of 20 |
| S-Hooks (Stainless) | Stainless steel | Connecting light strands | High | $0.30–$1.00 each |
| Zip Ties (Outdoor) | UV-resistant nylon | Securing cords, temporary use | Medium (lasts 1–2 years) | $6–$12 per 100 |
Final Thoughts: Transform Your Pergola with Bistro Lights
Attaching bistro string lights to your pergola isn’t just a DIY project—it’s a way to create lasting memories. Whether you’re hosting a dinner party, enjoying a quiet night, or just watching the stars, those soft, golden lights turn your backyard into a personal retreat.
Remember: start with quality LED bistro string lights, prep your pergola carefully, and use durable hardware. Don’t rush the installation—take time to test the layout and adjust for even lighting. And once they’re up, don’t forget to enjoy them! I’ve found that the best part of this project isn’t the work—it’s the first night you turn them on and see your pergola glow.
In 2026, outdoor living is more important than ever. With the right lights, your pergola can be a year-round sanctuary. So grab your tools, pick your favorite bulbs, and start stringing. The magic is in the details—and the glow.
Frequently Asked Questions
How do I attach bistro string lights to a pergola without damaging the wood?
Use removable adhesive hooks or zip ties wrapped around the pergola beams to avoid drilling. For a sturdier hold, opt for stainless steel cup hooks screwed lightly into the wood, which can be easily removed later.
What’s the best way to hang bistro string lights on a pergola in 2026?
The most popular method in 2026 is using adjustable tension rods or LED-compatible mounting clips that secure lights along the pergola’s crossbeams. Ensure lights are spaced evenly and rated for outdoor use to withstand weather.
Can I use nails or screws to attach bistro string lights to my pergola?
Yes, but use small finishing nails or outdoor-rated screws with rubber washers to protect the lights’ wiring. Avoid over-tightening to prevent damage to the pergola or the light strands.
How far apart should I space the attachment points for pergola bistro lights?
Space hooks or clips every 12–18 inches for even sag and visual appeal. For longer runs, measure the string light length and divide by the spacing to ensure consistent support.
Are there no-drill options to attach bistro string lights to a pergola?
Absolutely! Try heavy-duty adhesive hooks, magnetic clips (for metal pergolas), or zip ties threaded through existing pergola slats. These methods are ideal for renters or those avoiding permanent modifications.
How do I power bistro string lights on a pergola if there’s no nearby outlet?
Use solar-powered string lights or a weatherproof extension cord routed discreetly along the pergola beams. For a cleaner look, install a GFCI-protected outdoor outlet nearby or use a battery-operated LED set.

