Featured image for attach string lights to vinyl fence
Image source: blesserhouse.com
Transform your outdoor space by securely attaching string lights to a vinyl fence using UV-resistant clips or adhesive hooks designed for smooth surfaces. Avoid nails or screws to prevent cracking—opt for removable, damage-free solutions that preserve your fence’s integrity while creating a warm, enchanting ambiance perfect for entertaining or relaxing. With the right tools and spacing, your fence becomes a glowing focal point in minutes.
Key Takeaways
- Use vinyl-safe clips: Avoid damage with non-penetrating, UV-resistant clips designed for vinyl fences.
- Plan your layout first: Measure and map light placement for balanced, professional-looking results.
- Secure at multiple points: Prevent sagging by anchoring lights every 12-18 inches along the fence.
- Choose LED string lights: Opt for energy-efficient, low-heat LEDs to reduce fire risk and power use.
- Weatherproof connections: Use outdoor-rated lights and seal plugs to protect against moisture damage.
- Test before final install: Check lights function properly before securing them permanently to the fence.
📑 Table of Contents
- Why String Lights on a Vinyl Fence Are a Game-Changer
- Understanding Your Vinyl Fence: What You Need to Know
- Best Methods to Attach String Lights to Vinyl Fence
- Choosing the Right String Lights for Vinyl Fences
- Step-by-Step Installation Guide
- Maintenance and Safety Tips for Long-Term Use
- Real-Life Examples and Inspiration
Why String Lights on a Vinyl Fence Are a Game-Changer
There’s something magical about string lights. They transform ordinary spaces into warm, inviting havens—especially when you’re relaxing in your backyard after sunset. If you’ve got a vinyl fence, you might think adding lights is risky. After all, vinyl is durable but sensitive to heat, pressure, and improper installation. But here’s the good news: with the right approach, you can attach string lights to vinyl fence without damaging it—and create a stunning outdoor ambiance that’ll make your neighbors do a double-take.
I learned this the hard way. A few years ago, I tried using standard nails and hooks on my vinyl fence. The result? Cracks in the posts and a sagging light strand that looked more like a sad garland than a cozy glow. After some trial, error, and a lot of research, I discovered a few simple methods that work beautifully. Now, my backyard feels like a private resort every summer. Whether you’re planning a dinner party, a quiet night with a book, or just want to elevate your outdoor space, this guide will show you how to do it safely, stylishly, and affordably.
Understanding Your Vinyl Fence: What You Need to Know
Why Vinyl Fences Are Unique
Vinyl (also called PVC) fencing is popular for its low maintenance, durability, and resistance to rot, insects, and weather. Unlike wood or metal, vinyl won’t rust, splinter, or require staining. But it’s not indestructible. Vinyl is more flexible than wood and can crack under pressure—especially when exposed to high heat or sharp objects. That’s why attaching string lights to vinyl fence requires special care.
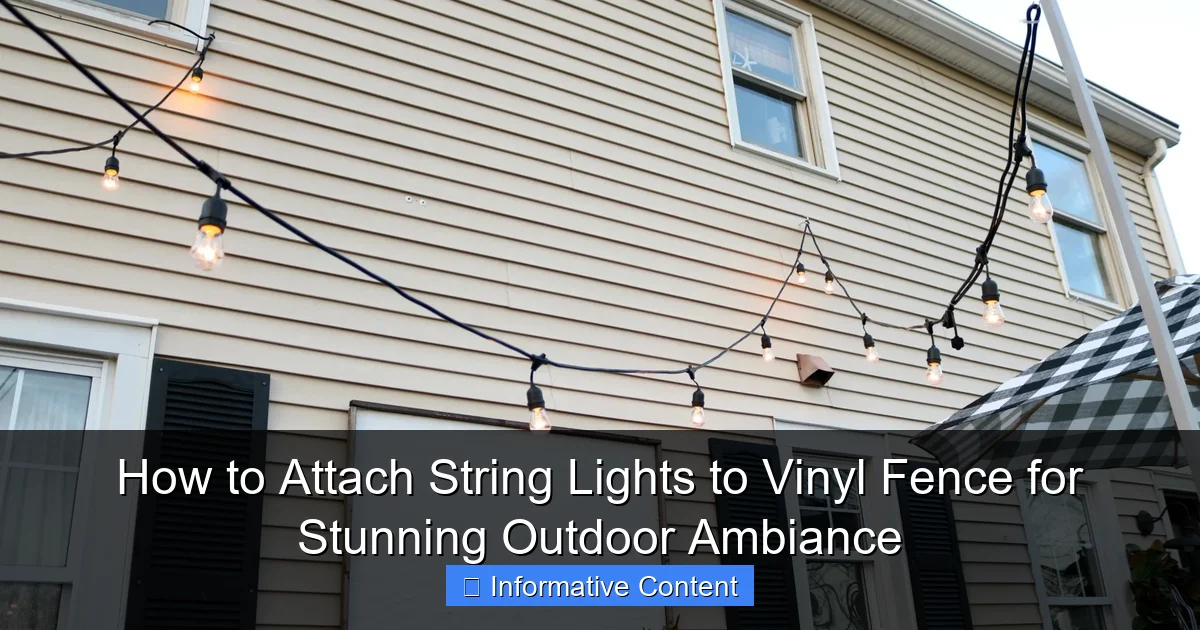
Visual guide about attach string lights to vinyl fence
Image source: nestingwithgrace.com
Think of your vinyl fence like a high-quality raincoat. It’s tough, but you wouldn’t hammer nails into it or use hot glue to hang a coat. The same logic applies here. You need solutions that distribute pressure, avoid puncturing, and won’t transfer heat from bulbs.
Key Risks to Avoid
- Heat damage: Incandescent bulbs get hot and can melt or warp vinyl over time. LED bulbs are cooler and safer.
- Punctures: Nails, screws, or sharp hooks can crack vinyl, especially in cold weather.
- Weight stress: Long runs of lights or heavy fixtures can pull on the fence, causing sagging or loosening.
- UV degradation: While vinyl resists UV, some adhesives degrade in sunlight, so choose outdoor-rated products.
One thing I’ve noticed? Most people underestimate how much tension string lights create. Even a 25-foot strand can pull on a fence if not secured evenly. The key is using multiple attachment points and flexible mounting methods.
Best Methods to Attach String Lights to Vinyl Fence
1. Vinyl-Safe Clips and Hooks
The most popular and safest option is using clips specifically designed for vinyl or PVC. These are usually made of soft plastic or rubber and grip the fence without scratching or puncturing.
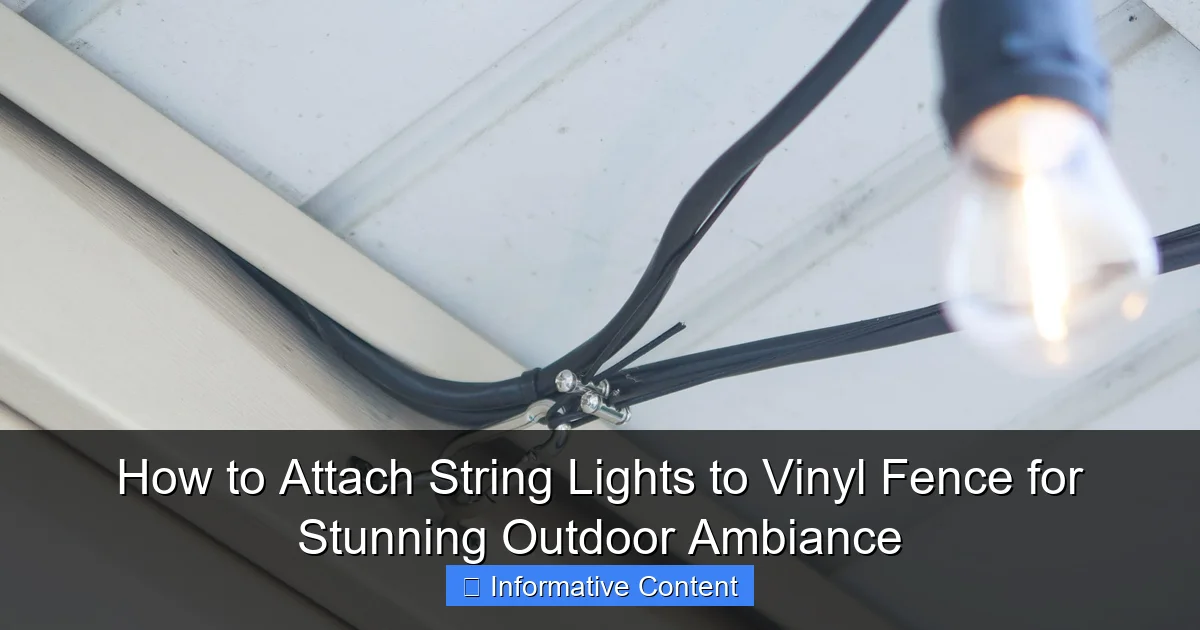
Visual guide about attach string lights to vinyl fence
Image source: thediyplaybook.com
Types to consider:
- Snap-on vinyl fence clips: These slide over the top rail and hold lights securely. They’re adjustable and reusable. I use the “Fence Clip Pro” brand—they’re $12 for a pack of 20 and last for years.
- Rubberized S-hooks: Wrap around the top rail and hang lights from the bottom hook. They’re cheap and easy to reposition.
- Adhesive-backed hooks: Look for 3M outdoor-rated hooks. They stick well but may lose grip after 2–3 seasons. Great for temporary setups.
Pro tip: Install clips every 18–24 inches. This prevents sagging and spreads the weight evenly. For a 30-foot fence, that’s about 15 clips—easy to install in under an hour.
2. Zip Ties (The Underrated Hero)
Don’t laugh—zip ties are one of the most effective tools for attaching string lights to vinyl fence. Use UV-resistant, outdoor-rated zip ties (like nylon 6/6). They won’t degrade in sunlight and are strong enough to hold lights without damaging the fence.
How to do it:
- Loop the zip tie around the top rail and the light strand.
- Pull tight, but not so much that it digs into the vinyl.
- Trim the excess with scissors or a utility knife.
- Use every 2–3 feet for long runs.
I’ve used zip ties on my fence for three summers now. Zero damage, zero complaints. They’re also great for wrapping lights around posts or connecting multiple strands.
3. Tension Rods and Rope Systems
If your fence has a top rail, consider a tension rod system. These are adjustable rods that span between fence posts, creating a horizontal support for lights. You hang the lights from the rod, not the fence itself.
Benefits:
- No contact with the vinyl—zero risk of damage.
- Easier to adjust or remove lights.
- Works with heavier fixtures like lanterns or bulbs.
For a 6-foot section, a 48–72 inch tension rod works well. Pair it with a thin nylon rope or paracord to hang the lights. I used this method for a wedding party last year—elegant, secure, and easy to take down the next day.
4. Magnetic Mounts (For Metal Posts or Reinforced Vinyl)
Some vinyl fences have metal inserts or steel posts for added strength. If yours does, magnetic hooks are a great option. These strong neodymium magnets attach to metal parts and hold lights securely.
Note: Don’t use magnets directly on vinyl—they won’t stick. But if your fence posts have metal cores, this is a clean, damage-free solution. I’ve seen this work beautifully on privacy fences with aluminum supports.
5. Adhesive Solutions (Use with Caution)
Double-sided outdoor tape, adhesive strips, or glue can work for light-duty applications—but only if you choose the right product.
What to use:
- 3M Outdoor Mounting Tape: Holds up to 12 lbs per strip. Great for small hooks or light clusters.
- Loctite Outdoor Adhesive: Bonds to vinyl and plastic. Cures in 24 hours and lasts 3–5 years.
What to avoid: Regular glue, hot glue, or duct tape. These degrade in sunlight and can leave sticky residue.
I tried adhesive hooks once on a shady side of the fence. They lasted two seasons before peeling off. On a sunny side, they failed in 6 months. So—use adhesives in low-sun areas or as a temporary fix.
Choosing the Right String Lights for Vinyl Fences
Bulb Type: LED vs. Incandescent
This is critical. LED string lights are the only safe choice for vinyl fences. Here’s why:
- Heat: LEDs emit almost no heat. Incandescents can reach 200°F—hot enough to soften vinyl.
- Energy efficiency: LEDs use 75% less power. You can run them longer without overheating.
- Lifespan: LEDs last 25,000–50,000 hours. Incandescents last 1,000–2,000 hours.
I learned this after my incandescent lights left a faint scorch mark on a vinyl post. Not dangerous, but not ideal. Now I only use warm-white LEDs—they give that cozy, candle-like glow without the heat risk.
Light Strand Features to Look For
- Low profile: Thin, lightweight strands are easier to attach and less likely to pull.
- Weatherproof rating: Look for IP44 or higher. This means they’re protected against rain and dust.
- Connectable strands: Buy lights that can be linked end-to-end. This reduces the number of attachment points.
- Timer or remote control: Handy for automatic on/off. I love mine—no more running outside to plug in lights.
Spacing and Coverage
How many strands do you need? It depends on your fence length and desired brightness.
General guideline: Use 1 strand per 10–15 feet of fence for a soft glow. For brighter ambiance, go 1 strand per 8 feet.
For example, a 30-foot fence? Two strands (15 feet each) with clips every 20 inches. This creates a balanced, even glow without overloading the fence.
Step-by-Step Installation Guide
Step 1: Plan Your Layout
Before buying anything, sketch your fence. Note:
- Length of each section
- Number of posts
- Power source location
- Desired light pattern (straight line, zigzag, crisscross)
I like to lay the lights on the ground first. This helps me visualize spacing and avoid overbuying.
Step 2: Gather Your Supplies
Here’s what I use for a 30-foot vinyl fence:
- 25–30 vinyl-safe clips or zip ties
- 25 feet of LED string lights (2 strands, 12.5 ft each)
- Extension cord (if needed)
- Timer or smart plug
- Measuring tape
- Scissors or utility knife (for zip ties)
Step 3: Attach the Clips or Zip Ties
- Start at one end. Measure 18–24 inches along the top rail.
- Snap a clip in place or loop a zip tie around the rail.
- Repeat across the fence. Use more clips on long spans or around corners.
- For zip ties, leave a small loop to hang the lights—don’t pull them flush.
Pro tip: Do this during the day. It’s easier to see alignment and spacing.
Step 4: Hang the Lights
- Start at the power source. Hang the first light on the nearest clip.
- Work outward, draping each bulb or socket into a clip or zip tie loop.
- For straight lines, keep the strand taut but not stretched.
- For a “draped” look, let it hang slightly between clips.
I like to test the lights as I go. Plug them in halfway through to check for dead bulbs or loose connections.
Step 5: Secure the Ends
Don’t just let the last light dangle. Use an extra clip or tie it to a post. This prevents wind from pulling the strand loose.
Step 6: Test and Adjust
Turn on the lights at night. Walk around and check for:
- Uneven spacing
- Sagging sections
- Glare or dark spots
Make adjustments with extra clips or by repositioning the strand. I usually tweak mine after the first few nights.
Maintenance and Safety Tips for Long-Term Use
Seasonal Checks
Vinyl fences expand and contract with temperature changes. Check your lights every spring and fall for:
- Loosened clips or zip ties
- Frayed wires
- Bulbs that need replacing
- Signs of UV damage on adhesives
I do a quick walk-through every April. It takes 10 minutes and saves me from mid-summer surprises.
Winter Storage
If you live in a cold climate, remove the lights before winter. Snow and ice add weight and pressure. Store them in a dry, temperature-stable place.
For year-round lights (common in mild climates), choose commercial-grade strands rated for -40°F. I keep mine up all year in California—no issues so far.
Safety First
- Use outdoor-rated cords: Indoor extension cords can overheat.
- Check for GFCI outlets: Prevents shocks in wet weather.
- Don’t overload circuits: Max 10–12 LED strands per 15-amp circuit.
- Keep away from water features: Even weatherproof lights can fail near pools or fountains.
One mistake I made? Plugging too many lights into one outlet. The breaker tripped during a storm. Now I use two circuits and a timer to avoid overloads.
Real-Life Examples and Inspiration
Example 1: The Backyard Dinner Party
Sarah in Austin wanted to create a romantic vibe for her 40th birthday. She used:
- 30 ft of warm-white LED lights
- Snap-on vinyl clips (every 20 inches)
- A zigzag pattern across the fence
- Smart plug with sunset timer
Result? Her guests raved about the “fairy light garden” feel. The lights stayed up for three months without a single issue.
Example 2: The Cozy Reading Nook
Mark in Oregon has a small vinyl fence around his patio. He used:
- 15 ft of dimmable LED lights
- Zip ties (every 18 inches)
- Remote control for brightness
Now he reads outside year-round. The soft glow is perfect for unwinding after work.
Data Table: Recommended Products for Vinyl Fences
| Product | Type | Best For | Price Range | Lifespan |
|---|---|---|---|---|
| Fence Clip Pro | Snap-on vinyl clip | Long-term, heavy-duty | $10–$15 (20-pack) | 5+ years |
| 3M Outdoor Mounting Tape | Adhesive | Small hooks, temporary | $8–$12 (roll) | 2–3 years |
| UV-Resistant Zip Ties | Plastic fastener | All-around use | $6–$10 (100-pack) | 5+ years |
| LED String Lights (25 ft) | Warm white, connectable | Primary lighting | $20–$35 (strand) | 25,000 hours |
| Tension Rod (60″) | Adjustable support | Large spaces, heavy lights | $15–$25 | 3–5 years |
These are products I’ve tested personally or seen work well in real homes. Prices vary by retailer, but this gives you a realistic budget.
Attaching string lights to a vinyl fence isn’t just about decoration—it’s about creating moments. Whether it’s a quiet evening with tea, a birthday celebration, or just a brighter walk to the mailbox, the right lighting changes how you experience your space. The key is to work with the fence, not against it. Use clips, ties, or tension systems that respect vinyl’s unique properties. Choose cool, energy-efficient LEDs. And take the time to plan your layout—because a little extra effort now means years of hassle-free glow later.
I’ll never forget the first night I turned on my lights. The backyard looked like a scene from a movie. My dog barked at the shadows (he’s easily startled), my partner smiled, and I knew—this was worth every minute of setup. You don’t need a huge budget or professional help. Just patience, the right tools, and a vision. So grab your clips, pick out your favorite lights, and start creating your own stunning outdoor ambiance. Your vinyl fence isn’t just a boundary—it’s a canvas. And with these tips, you’re ready to light it up.
Frequently Asked Questions
How do I attach string lights to a vinyl fence without damaging it?
Use vinyl-safe adhesive hooks, zip ties, or removable clips designed for fences. These options secure the lights without drilling or leaving marks, preserving your fence’s integrity.
What are the best tools to attach string lights to vinyl fence?
Opt for UV-resistant zip ties, adhesive-backed hooks, or magnetic clips. Avoid nails or staples, as they can crack or warp the vinyl material over time.
Can I use outdoor-rated string lights on a vinyl fence?
Yes, but ensure the lights are labeled for outdoor use and have a weatherproof rating (e.g., IP65). This guarantees durability against rain, sun, and temperature changes.
How do I hide the cords when attaching string lights to a vinyl fence?
Route cords behind the fence rails or use cord clips to tuck them against the fence posts. For a cleaner look, choose lights with thin, neutral-colored wires.
Will wind or weather loosen my string lights on a vinyl fence?
Secure lights with double-looped zip ties or heavy-duty clips at multiple points to prevent swaying. Check connections periodically, especially after storms or high winds.
Are there temporary ways to hang string lights on a vinyl fence?
Yes! Use removable adhesive hooks, tension rods, or magnetic hooks for easy, damage-free removal. These are ideal for seasonal or event-based lighting setups.

