Featured image for best way to attach string lights to fence
Image source: homeshowradio.com
The best way to attach string lights to a fence is using durable, weather-resistant clips or hooks designed for outdoor use—ensuring a secure, damage-free hold. Space them evenly along the top rail or between pickets for a balanced, professional look that highlights your outdoor space. For a stunning glow, opt for LED string lights with warm white tones and connect them to a timer for effortless ambiance.
Key Takeaways
- Use clips or hooks: Secure lights with durable, weather-resistant clips for easy, damage-free attachment.
- Plan your layout: Measure and mark spacing before hanging to ensure even, balanced light distribution.
- Choose LED lights: Opt for energy-efficient, long-lasting LEDs to reduce power use and maintenance.
- Test lights first: Check functionality before installation to avoid mid-project failures or rewiring.
- Anchor at corners: Reinforce connections at fence edges to prevent sagging or loose sections.
- Weatherproof connections: Cover plugs and joints with silicone or waterproof tape for outdoor safety.
📑 Table of Contents
- Why String Lights on a Fence Transform Your Outdoor Space
- Understanding Your Fence and Lighting Goals
- Top 5 Methods to Attach String Lights (With Pros and Cons)
- Step-by-Step Installation Guide for Every Fence Type
- Pro Tips to Avoid Common Mistakes
- Data Table: Quick Reference for Fence Types
- Final Thoughts: Creating a Glow That Lasts
Why String Lights on a Fence Transform Your Outdoor Space
There’s something magical about string lights draped across a backyard fence. Maybe it’s the way they cast a soft, golden glow over a summer evening, or how they turn a plain wooden barrier into a cozy, inviting space. I remember the first time I strung up lights on my fence—after a long day of trial and error. I used flimsy hooks that snapped, tape that peeled off in the rain, and nails that left unsightly holes. But when I finally got it right? That warm, twinkling ambiance made every struggle worth it.
If you’ve ever stared at your fence, wondering how to attach string lights without damaging it or creating a tangled mess, you’re not alone. The best way to attach string lights to a fence isn’t just about aesthetics—it’s about durability, safety, and ease of setup. Whether you’re planning a romantic patio dinner, a festive party, or just want to enjoy your garden at night, this guide will walk you through the most effective, damage-free methods. From clever tools to pro tips, we’ll cover everything so your lights stay put, look stunning, and last for seasons to come.
Understanding Your Fence and Lighting Goals
Assessing Fence Material and Structure
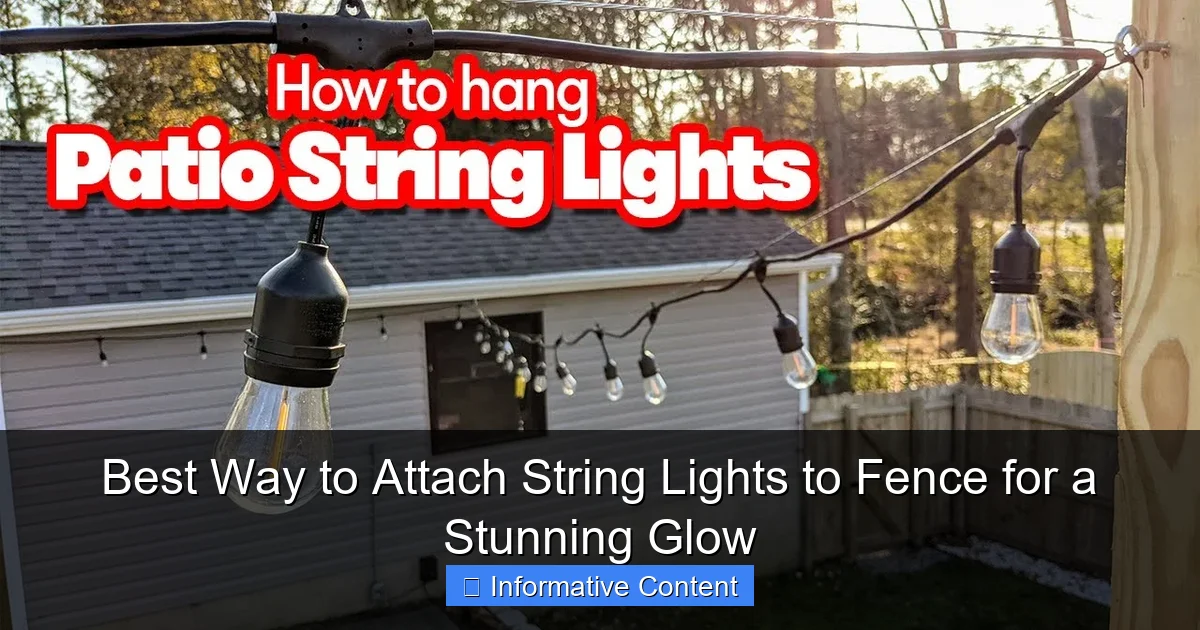
Before you start hammering or gluing, take a moment to study your fence. Is it wood, vinyl, metal, or composite? Each material reacts differently to adhesives, fasteners, and weather. For example, wooden fences are forgiving—they can handle small nails or hooks without cracking, but over-tightening can split the wood. Vinyl or PVC fences, on the other hand, are slippery and prone to warping under heat (like from incandescent bulbs). Metal fences? They’re sturdy but can conduct electricity, so always opt for outdoor-rated, low-voltage LED lights.
Visual guide about best way to attach string lights to fence
Image source: i.ytimg.com
Pro tip: Check for existing hardware. If your fence has decorative posts, lattice, or existing brackets, use them as anchor points. They’ll save you time and reduce damage. I once ignored the pre-drilled holes on my vinyl fence and ended up with a wobbly setup—lesson learned!
Choosing the Right String Lights
Not all string lights are created equal. For fences, prioritize outdoor-rated LED lights with a waterproof rating (look for IP44 or higher). LEDs run cooler, use less energy, and last longer than incandescent bulbs. Here’s what to consider:
- Bulb type: Globe lights create a classic, diffused glow, while fairy lights offer a delicate, starry effect. Edison bulbs add vintage charm.
- Length and spacing: Measure your fence’s perimeter and add 10–15% extra for draping. Bulbs spaced 4–6 inches apart work well for visibility without overcrowding.
- Power source: Solar-powered lights are great for remote areas, but they may dim on cloudy days. Plug-in lights offer consistent brightness but require access to an outlet.
Personal example: I once bought cheap solar lights for my shaded side yard. They looked great on sunny days but flickered at dusk—switching to a hybrid (solar-charged with a battery backup) fixed the issue.
Setting the Mood: Light Placement Ideas
How you hang your lights changes the vibe. For a romantic feel, drape lights in gentle waves (like a curtain). For a festive look, run them straight along the fence line or zigzag across posts. Want to highlight specific areas? Cluster lights around seating zones or garden features. A friend once used fence-mounted net lights to cover her entire back fence—it looked like a glittering wall!
Top 5 Methods to Attach String Lights (With Pros and Cons)
1. Fence Hooks and Clips (Best for Wood and Vinyl)
These are the unsung heroes of string light installation. Fence hooks are small, L-shaped metal or plastic brackets that screw or clip into fence posts. Adhesive clips (like 3M Command Outdoor Light Clips) stick to vinyl or smooth surfaces.

Visual guide about best way to attach string lights to fence
Image source: cdn.christmaslightsetc.com
- Pros: Easy to install, removable, no damage to wood. Adhesive clips work on non-porous surfaces.
- Cons: Adhesive fails in extreme heat or rain. Hooks may bend under heavy lights.
- Pro tip: For vinyl, use clips with UV-resistant adhesive. Space hooks every 12–18 inches for even weight distribution.
My go-to: I use Zinc-Plated Screw Hooks for my cedar fence. They blend in and hold 100+ feet of lights without sagging.
2. Zip Ties (Best for Temporary Installations)
Zip ties (or cable ties) are cheap, strong, and perfect for quick setups. Use UV-resistant, outdoor-rated ties to avoid brittleness.
- Pros: Super fast, no tools needed. Great for renters or seasonal displays.
- Cons: Can damage wood if over-tightened. Not reusable unless cut.
- Pro tip: Thread ties through the light’s cord (not just the socket) for a cleaner look. Use black ties to blend into dark fences.
Example: For my annual Halloween party, I zip-tied orange fairy lights to my fence. Removed them in minutes—no residue!
3. Adhesive Hooks and Tape (Best for Smooth Surfaces)
Heavy-duty adhesive hooks (like Command Outdoor Hooks) or outdoor double-sided tape work on vinyl, metal, or painted fences.
- Pros: Zero holes, invisible on smooth surfaces. Hooks hold up to 5 lbs.
- Cons: Adhesive fails in humidity or temperature swings. Tape can peel off over time.
- Pro tip: Clean the fence with rubbing alcohol first. Apply adhesive on a dry, 50°F+ day for best bonding.
Caution: I once used regular tape on my vinyl fence. It peeled after a week—switching to outdoor-rated tape fixed it.
4. Eye Screws and Turnbuckles (Best for Permanent Installations)
For a permanent, industrial-chic look, install eye screws (screw-in loops) and turnbuckles (tension adjusters) into wood or metal posts.
- Pros: Extremely durable, allows tension control. No sagging.
- Cons: Requires drilling. Not ideal for renters.
- Pro tip: Use stainless steel hardware to prevent rust. Space eye screws every 2–3 feet for heavy lights.
DIY win: My neighbor used turnbuckles to create a “catenary” (draped) effect. The lights stayed taut all winter!
5. Fence Clips and Clamps (Best for Metal or Chain-Link Fences)
Metal fences (like chain-link or wrought iron) need specialized clips. Look for fence clips with rubber grips or bungee cords with hooks.
- Pros: No drilling, grips securely. Bungee cords allow stretch for wind resistance.
- Cons: Clips may slip on wet metal. Bungee cords lose elasticity over time.
- Pro tip: For chain-link, thread lights through the mesh, then clip every few feet. Use rubber-coated clips to avoid scratching.
Real-world fix: My chain-link fence had a gap between the top rail and mesh. Clips solved it—no drilling required!
Step-by-Step Installation Guide for Every Fence Type
Wooden Fence: The Balanced Approach
- Measure and plan: Map light placement with chalk or string. Leave 6–12 inches between bulbs and the ground.
- Install hooks: Screw in L-hooks every 12–18 inches. Pre-drill holes to avoid splitting.
- Hang lights: Loop the cord over hooks, not just the sockets. Use zip ties for extra support.
- Test and adjust: Turn on lights to check for sagging. Tighten hooks or add clips as needed.
Pro tip: Paint hooks to match your fence color. I used brown spray paint—they’re barely visible!
Vinyl/PVC Fence: Damage-Free Techniques
- Clean the surface: Wipe with isopropyl alcohol to remove residue.
- Apply adhesive clips: Press firmly for 30 seconds. Wait 24 hours before hanging.
- Use tension rods (optional): For long runs, insert a tension rod between posts to reduce sag.
- Hang lights: Clip lights to the adhesive hooks. Avoid pulling—let the clips bear the weight.
Caution: Vinyl warps in heat. Never use incandescent bulbs near it!
Metal Fence: Secure and Wind-Resistant
- Choose clips: Use rubber-grip clips or bungee cords with hooks.
- Anchor to posts: Clip lights to the top rail or posts. For chain-link, weave lights through the mesh.
- Add wind protection: Tie lights to the fence with zip ties at 10-foot intervals.
- Test in wind: Shake the fence gently. If lights swing wildly, add more clips.
Example: My windy backyard needed extra clips. Now, my lights survive 40 mph gusts!
Pro Tips to Avoid Common Mistakes
Preventing Sagging and Tangling
Sagging lights look sloppy. To avoid it:
- Support every 12–18 inches: Use hooks, clips, or zip ties.
- Choose lightweight lights: LED fairy lights (2–3 oz/ft) sag less than heavy Edison bulbs.
- Use tension: For straight runs, pull lights taut before securing.
My fix: I added a second row of hooks halfway down my fence. Sagging? Gone.
Weatherproofing and Safety
- Use outdoor-rated lights and cords: Check for “UL Listed” or “ETL Listed” labels.
- Seal connections: Cover plug junctions with waterproof tape or a cord cover.
- Elevate plugs: Keep plugs off the ground to avoid water damage. Use a covered outlet box.
Lesson learned: A thunderstorm fried my lights because the plug was on the grass. Never again!
Removing and Storing Lights
- Remove gently: Don’t yank adhesive clips—heat them with a hairdryer to loosen glue.
- Store coiled: Wrap lights around a cardboard rectangle or use a light reel.
- Label and date: Note the year and bulb type for easy setup next season.
Pro tip: I keep my lights in a sealed plastic bin with silica packets to prevent moisture.
Data Table: Quick Reference for Fence Types
| Fence Material | Best Attachment Method | Tools Needed | Durability | Damage Risk |
|---|---|---|---|---|
| Wood | Screw hooks + zip ties | Drill, screwdriver | 5+ years | Low (if pre-drilled) |
| Vinyl/PVC | Adhesive clips + tension rods | Rubbing alcohol, clips | 2–3 years (adhesive) | None |
| Metal (Chain-Link) | Rubber-grip clips + bungee cords | Clips, zip ties | 3–4 years | Low |
| Metal (Wrought Iron) | Eye screws + turnbuckles | Drill, wrench | 10+ years | Medium (holes) |
| Composite | Adhesive hooks + zip ties | Clips, ties | 2–3 years | Low |
Final Thoughts: Creating a Glow That Lasts
Attaching string lights to your fence isn’t just a DIY project—it’s a way to transform your outdoor space into a sanctuary. The best way to attach string lights to a fence depends on your materials, goals, and commitment to longevity. Whether you choose no-damage adhesive clips for a vinyl fence or sturdy eye screws for a permanent wooden setup, the key is planning, patience, and using the right tools for the job.
Remember, the magic isn’t just in the final look. It’s in the process: the smell of fresh air as you string lights, the satisfaction of a taut, even line, and the first moment you flip the switch. My fence lights have survived three winters, countless parties, and one curious raccoon (who, thankfully, didn’t pull them down). With these methods, your lights will too. So grab your tools, measure twice, and let your fence shine. That stunning glow? It’s waiting for you.
Frequently Asked Questions
What is the best way to attach string lights to a fence without damaging it?
The best way to attach string lights to a fence without causing damage is by using removable hooks, adhesive clips, or zip ties. These options provide a secure hold while allowing easy removal or adjustment, especially on wood or vinyl fences.
Can I use nails or screws to attach string lights to my wooden fence?
Yes, small nails or cup hooks are effective for wooden fences and offer a sturdy hold for heavier string lights. Space them evenly (every 12–18 inches) to prevent sagging and avoid over-tightening to prevent wood splitting.
Are there special clips for attaching string lights to a metal fence?
Yes, magnetic clips or vinyl-coated hooks are ideal for metal fences, as they grip securely without scratching the surface. These clips also work well for chain-link fences, allowing you to weave lights through the links effortlessly.
How do I hide the wires when attaching string lights to a fence?
Use cable clips or zip ties to tuck wires behind the fence rails or run them along the base for a clean look. For a seamless effect, choose clips in a matching color to your fence.
What’s the best way to attach string lights to a vinyl fence without drilling?
Adhesive-backed hooks or outdoor-rated tape are the best way to attach string lights to a vinyl fence without drilling. Ensure the surface is clean and dry before applying for maximum adhesion, and avoid overloading the clips.
How do I keep string lights from sagging on a long fence?
Prevent sagging by spacing support hooks or clips every 12–16 inches and using tension wire or guide strings for extra support. For longer runs, consider LED string lights, which are lighter and less prone to drooping.