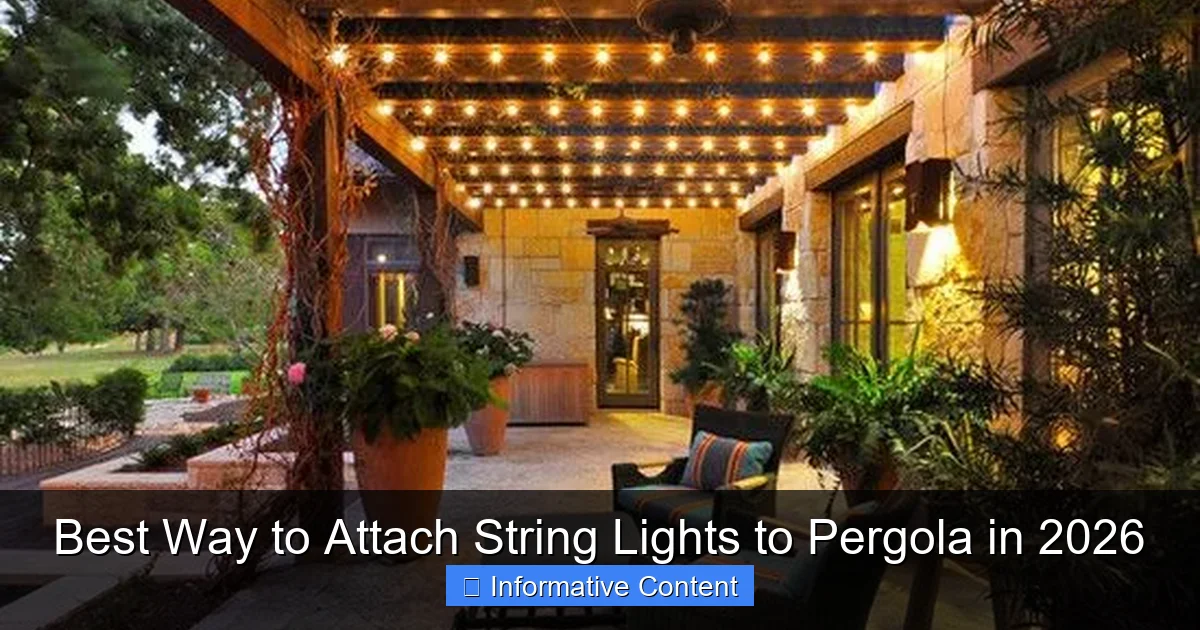
Featured image for best way to attach string lights to pergola
Image source: myamazingthings.com
The best way to attach string lights to a pergola in 2026 is using adjustable, weather-resistant mounting clips designed specifically for outdoor use—ensuring a secure, damage-free hold. These clips easily snap onto pergola beams and rafters, allowing for customizable spacing and quick installation without drilling or permanent hardware. Pair them with LED string lights on a dimmer for a professional, energy-efficient glow that lasts all season.
Key Takeaways
- Use adhesive hooks: Best for no-damage, easy setup on smooth pergola surfaces.
- Opt for zip ties: Secure and adjustable for quick, sturdy light attachment.
- Install guide wires: Distribute weight evenly and prevent sagging over time.
- Choose removable clips: Ideal for seasonal changes without harming wood.
- Plan spacing first: Measure and mark positions before installing lights.
- Weatherproof connections: Protect outlets and wiring from rain and sun damage.
- Layer lights creatively: Mix heights and patterns for a custom ambiance.
📑 Table of Contents
- The Joy of Pergola Lighting: Why String Lights Matter
- 1. Assess Your Pergola and Choose the Right String Lights
- 2. Plan Your Lighting Layout Like a Pro
- 3. Best Hardware and Tools for a Secure Installation
- 4. Step-by-Step Installation Guide
- 5. Weatherproofing and Maintenance Tips
- 6. Creative Ideas to Elevate Your Pergola Lighting
- Final Thoughts: Light Up Your Life
The Joy of Pergola Lighting: Why String Lights Matter
There’s something magical about stepping outside on a warm evening, the sun dipping below the horizon, and seeing your pergola glowing with soft, warm light. String lights aren’t just decorations—they’re mood setters, conversation starters, and the quiet heroes of backyard ambiance. Whether you’re hosting a dinner party, enjoying a quiet night with a book, or stargazing with loved ones, the right lighting transforms your outdoor space into a sanctuary.
But here’s the thing: attaching string lights to a pergola isn’t as simple as hanging them and hoping they stay put. I learned this the hard way after my first attempt ended in a tangled mess of lights dangling unevenly, with one side sagging like a tired hammock. Wind, rain, and gravity all conspire against a DIY lighting project. That’s why, after years of trial, error, and a few “why didn’t I think of that?” moments, I’ve compiled the best way to attach string lights to pergola in 2026. This guide is practical, tested, and designed to save you time, money, and frustration—so you can focus on what really matters: enjoying your beautifully lit space.
1. Assess Your Pergola and Choose the Right String Lights
Understand Your Pergola’s Structure
Before you buy a single light, take a good look at your pergola. Is it made of wood, vinyl, metal, or composite materials? Each has different weight-bearing and attachment capabilities. For example:
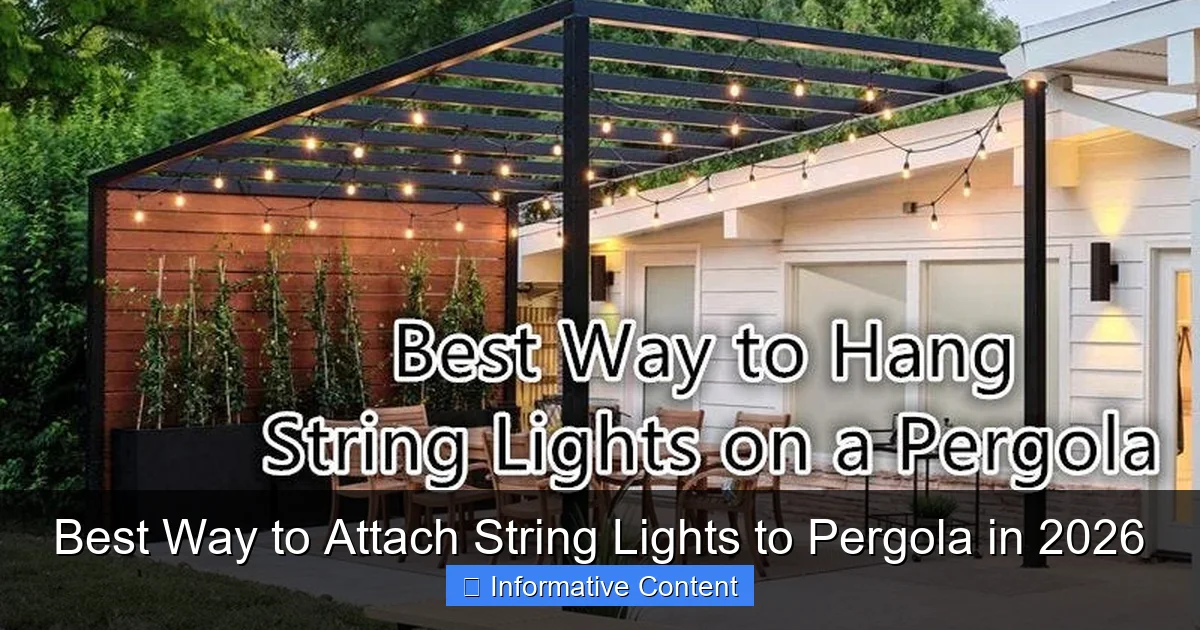
Visual guide about best way to attach string lights to pergola
Image source: miro.medium.com
- Wooden pergolas are sturdy and can support screws or nails, but avoid over-tightening to prevent splitting.
- Metal or aluminum pergolas often have smooth surfaces, so you’ll need non-penetrating methods like clips or magnetic hooks.
- Vinyl or composite pergolas are lightweight and may not handle heavy-duty hardware well—opt for low-impact solutions.
Also, note the spacing between beams. If your pergola has wide gaps, you’ll need longer runs of lights or additional support. I once tried to drape lights across a 10-foot span with no center support—big mistake. The weight pulled them down, creating an eyesore. Lesson learned: measure twice, hang once.
Pick the Right Type of String Lights
Not all string lights are created equal. For pergolas in 2026, here are the top contenders:
- LED Edison-style bulbs: Energy-efficient, long-lasting, and give that classic vintage glow. Ideal for ambiance.
- Smart string lights: Wi-Fi or Bluetooth-enabled, allowing you to change colors, set schedules, or sync with music. Great for tech lovers.
- Solar-powered lights: Eco-friendly and easy to install since no wiring is needed. Best for areas with good sun exposure.
- Commercial-grade lights: Thicker cords, weatherproof, and designed for year-round use. Worth the investment if you live in a rainy or windy climate.
Pro tip: Look for lights with a “gutter clip” or “hook” design—they’re easier to attach and remove without damaging your pergola.
2. Plan Your Lighting Layout Like a Pro
Sketch Your Design Before Installing
Grab a piece of paper (or use a free app like SketchUp or Canva) and sketch your pergola from above. Mark where each beam is, and decide how you want the lights to flow. Common layouts include:
- Linear (straight lines): Simple and clean. Attach lights along the top beams, parallel to the ground. Best for modern pergolas.
- X-pattern (crisscross): Lights run diagonally across the pergola, creating a starry effect. Works well for larger spaces.
- Hanging (draped): Lights are hung in gentle swags or “U” shapes between beams. Adds softness and romance.
- Grid pattern: Horizontal and vertical lines form a grid. Great for symmetry and even light distribution.
I prefer a mix: linear along the sides with a few draped swags in the center for depth. It gives structure while keeping the cozy factor high.
Calculate Light Spacing and Power Needs
Most string lights come in 25- to 50-foot lengths with bulbs spaced every 6 to 12 inches. To avoid dead zones, aim for:
- 6- to 8-inch spacing for a bright, even glow.
- 10- to 12-inch spacing for a subtle, twinkling effect.
Also, check the wattage and voltage. If you’re using multiple strands, ensure your outlet can handle the load. A 15-amp circuit can typically handle up to 1,800 watts. For example, ten 100-watt light strands would max out the circuit—so stick to LED, which uses about 10 watts per strand.
And don’t forget: if you’re using smart or color-changing lights, make sure your hub or app is compatible with your setup. Nothing’s worse than installing everything only to realize your phone can’t connect.
3. Best Hardware and Tools for a Secure Installation
Non-Permanent Solutions (No Drilling Required)
If you rent, have a delicate pergola, or just want flexibility, these are your best friends:
- Adhesive hooks or clips: Look for outdoor-rated, UV-resistant versions (e.g., Command Outdoor Hooks). They hold up to 3 pounds and remove cleanly. I use them on my vinyl pergola—no marks, no fuss.
- Zip ties or cable clips: Use UV-protected zip ties to attach lights to beams or crossbars. Wrap them loosely so they don’t cut into the cord. For a cleaner look, tuck the tails inside the pergola.
- Magnets: Magnetic hooks work wonders on metal pergolas. Just make sure the magnet is strong enough for the light weight (e.g., Neodymium magnets).
- Gutter clips: Originally for Christmas lights, these snap onto the edge of beams and hold the light cord securely. They’re reusable and perfect for seasonal setups.
Permanent Solutions (For Long-Term Use)
If you’re in it for the long haul and want lights year-round, go for a more permanent setup:
- Stainless steel screw-in hooks: These are durable, rust-resistant, and can hold up to 25 pounds. Pre-drill holes in wood to prevent splitting.
- Eye bolts or lag screws: Ideal for heavy-duty commercial lights or if you’re creating a grid. Use a drill with the correct bit size.
- Aluminum channels or light tracks: These are sleek metal tracks you screw into the pergola beams. You then snap the light cord into the channel for a professional, hidden-wire look. A bit pricier, but worth it for a polished finish.
Tip: For wooden pergolas, use a pilot hole when screwing in hooks. It prevents the wood from cracking and makes installation smoother.
Tools You’ll Need
Keep these on hand for a stress-free install:
- Drill with screwdriver bits
- Measuring tape
- Level (to keep lines straight)
- Ladder (with a stabilizer for safety)
- Zip ties, pliers, and a utility knife
- Extension cord (outdoor-rated, GFCI-protected)
I once tried to install lights without a level—big mistake. The whole setup looked crooked, and I had to redo it. A $10 level saved me hours of frustration.
4. Step-by-Step Installation Guide
Step 1: Prepare the Lights and Pergola
Unpack your lights and test them indoors. Plug them in to make sure every bulb works. Nothing’s worse than hanging them only to find a dead section. Also, clean the pergola beams with a damp cloth to remove dust or debris—this helps adhesive hooks stick better.
Step 2: Install Hooks or Clips
Start at one corner and work your way around. For adhesive hooks, press firmly for 30 seconds and wait 24 hours before hanging lights. For screw-in hooks, space them every 2 to 3 feet for linear layouts, or at the intersection points for X-patterns.
For draped designs, install hooks slightly higher than the beam so the lights hang in a gentle curve. Use a measuring tape to keep spacing consistent.
Step 3: Hang the Lights
Start at the power source. If using an outlet, run the cord down a beam or along the edge of the pergola (use clips or ties to secure it). Then, drape the lights over the hooks or snap them into clips. For swags, let the lights hang 6 to 12 inches below the beam—just enough to catch the light without looking sloppy.
If you’re using multiple strands, connect them with a waterproof connector. Avoid daisy-chaining more than 250 feet of LED lights to prevent voltage drop.
Step 4: Secure and Adjust
Use zip ties to anchor the cord to beams or hooks. Trim excess with a utility knife. Step back and look at your work from different angles. Adjust any sagging sections or uneven swags. A little tweaking goes a long way in making it look professional.
Step 5: Test and Enjoy
Plug in the lights and admire your handiwork. If you’re using smart lights, download the app and set up your favorite scenes. Dim the lights, change colors, or set a timer. Then, grab a drink, sit back, and enjoy your glowing oasis.
5. Weatherproofing and Maintenance Tips
Protect Against the Elements
Even the best lights can fail if not properly protected. Here’s how to keep them shining:
- Use weatherproof connectors: These rubber or silicone covers prevent water from seeping into connections.
- Elevate the power source: Don’t let the plug sit on the ground. Use a GFCI outlet with a cover, or hang the plug on a hook above puddles.
- Seal screw-in hooks: Add a dab of clear silicone caulk around the base to prevent water from pooling in the hole.
- Choose UV-resistant materials: Adhesive hooks, zip ties, and light cords should be rated for outdoor use.
Regular Maintenance
Check your lights every few months. Look for:
- Frayed cords or loose connections
- Bulbs that aren’t working (replace or use a voltage tester)
- Hooks or clips that have shifted
- Debris like leaves or spiderwebs (clean with a soft brush)
I do a quick inspection every spring and fall. It takes 10 minutes and saves me from mid-summer surprises.
Winter Care
If you live in a snowy area, consider removing the lights in winter. Snow and ice add weight and can damage cords or hooks. Store them in a cool, dry place, coiled loosely to avoid tangles.
6. Creative Ideas to Elevate Your Pergola Lighting
Add Layers with Multiple Light Types
Why stop at one style? Combine string lights with:
- Fairy lights in glass jars for a whimsical touch
- LED rope lights along the pergola edges for a glow
- Fairy or icicle lights on the outer beams for a festive look
I love using warm white string lights with a few colored fairy lights for holidays—it’s like having a chameleon pergola.
Incorporate Natural Elements
Weave the lights through hanging plants, ivy, or climbing vines. Just make sure the plants aren’t too dense—you want the light to shine through. For a rustic vibe, use wooden or bamboo hooks.
Use Smart Features for Wow Factor
Smart lights can sync with your voice assistant, music, or even weather. Imagine your pergola pulsing to your favorite playlist or changing color with the sunset. It’s not just lighting—it’s an experience.
Here’s a quick comparison of popular smart light options for pergolas in 2026:
| Product | Max Length | Weatherproof | Smart Features | Best For |
|---|---|---|---|---|
| Philips Hue Outdoor String Lights | 50 ft | IP44 | Voice control, color change, app scheduling | Tech-savvy homeowners |
| Luminoodle Weatherproof LED Strip | 33 ft | IP67 | App control, music sync, dimming | Modern pergolas |
| GE Cync Outdoor Smart String Lights | 48 ft | IP65 | Voice control, color change, energy monitoring | Energy-conscious users |
| Twinkly Smart LED String Lights | 65 ft | IP44 | App control, animations, music sync | Entertainers and party hosts |
Final Thoughts: Light Up Your Life
Attaching string lights to your pergola isn’t just a DIY project—it’s a way to reclaim your outdoor space, extend your living area, and create moments of joy. The best way to attach string lights to pergola in 2026 combines smart planning, the right hardware, and a touch of creativity. Whether you go for a simple linear look or a dazzling smart display, the key is to do it safely, securely, and with an eye for longevity.
Remember, the goal isn’t perfection—it’s enjoyment. A little sagging, a bulb that flickers, or a swag that’s slightly uneven? That’s part of the charm. What matters is that when the sun goes down, your pergola becomes a place where memories are made. So grab your lights, pick your favorite method, and get to work. Your future self—sipping wine under a canopy of light—will thank you.
Frequently Asked Questions
What is the best way to attach string lights to a pergola without damaging wood?
Use removable adhesive hooks or zip ties paired with eye screws to avoid drilling. This method secures lights firmly while protecting the pergola’s structure and finish.
How do I hang string lights on a pergola evenly and without sagging?
Plan your layout with a measuring tape and use tension wire or turnbuckles between anchor points. For longer runs, attach lights to a guide wire first, then clip them in place for uniform spacing.
Can I use nails or screws to attach string lights to a pergola?
While possible, screws or nails may cause permanent damage; opt for removable hooks or outdoor-rated adhesive clips instead. If using screws, choose small-gauge, weather-resistant ones and space them every 12–18 inches.
What are the best anchors for attaching string lights to a metal pergola?
Magnetic hooks or stainless steel zip ties work best for metal pergolas. For a semi-permanent solution, use UV-resistant cable clamps to secure lights without rust or corrosion.
How do I hide the cords when attaching string lights to a pergola?
Route cords along pergola beams using cord clips or raceways for a clean look. Paintable cord covers can also blend wires into the structure for a seamless appearance.
What’s the safest method for attaching string lights to a tall pergola?
Use a sturdy ladder with a stabilizer and wear non-slip footwear. For added safety, install anchor points (e.g., hooks or wires) before hanging lights, and consider hiring a professional for heights over 10 feet.

