Featured image for best way to hang string lights on fence
Image source: jessicawellinginteriors.com
The best way to hang string lights on a fence is using durable, weather-resistant clips or hooks spaced evenly to support the weight and maintain a clean, professional look. Avoid nails or staples—opt for adjustable fence-mounted brackets or zip ties for a secure, damage-free installation that withstands wind and rain. For maximum ambiance, stagger lights at varying heights and use LED bulbs to enhance energy efficiency and visual appeal.
Key Takeaways
- Plan spacing first: Measure and mark light placement for even, balanced coverage.
- Use removable hooks: Install damage-free clips or adhesive hooks for easy adjustments.
- Choose weatherproof lights: Opt for outdoor-rated, waterproof string lights for durability.
- Secure with zip ties: Reinforce connections with UV-resistant ties for windy conditions.
- Hide cords neatly: Run wires along fence edges for a clean, professional look.
- Test before hanging: Check lights work fully before installing to avoid mid-job fixes.
📑 Table of Contents
- Why Hanging String Lights on Your Fence Is a Game Changer
- 1. Choosing the Right String Lights for Your Fence
- 2. Tools and Hardware: What You Really Need
- 3. Step-by-Step Installation Methods by Fence Type
- 4. Design Tips for Maximum Ambiance
- 5. Maintenance, Safety, and Longevity
- 6. Real-Life Examples and Pro Tips
Why Hanging String Lights on Your Fence Is a Game Changer
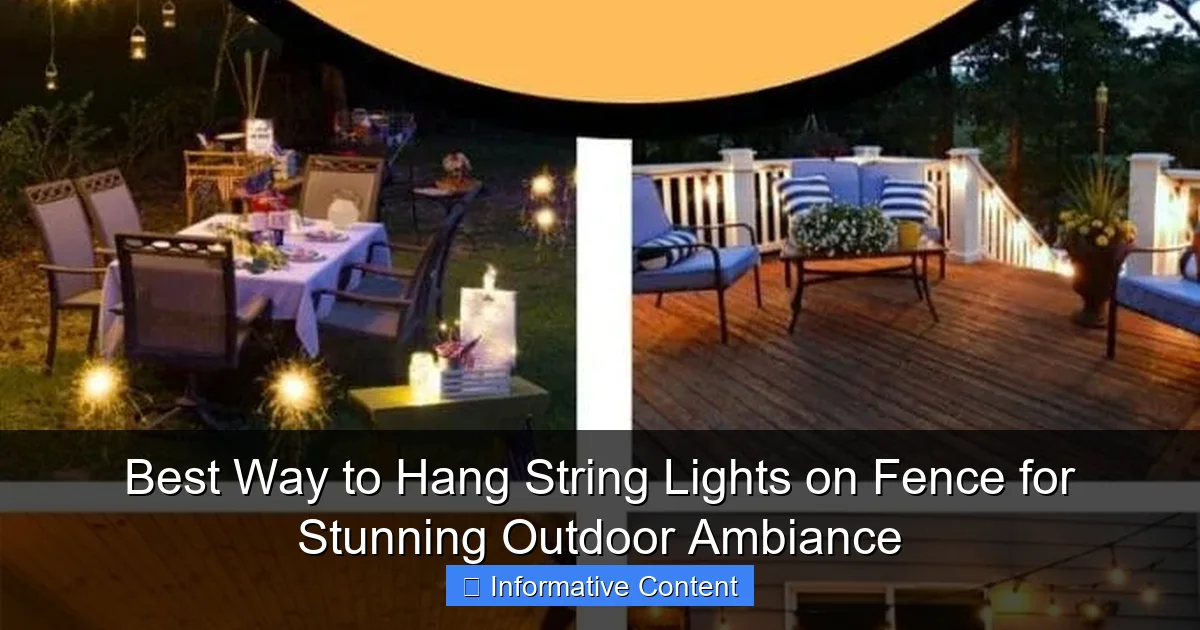
Imagine this: it’s a warm summer evening, the air is soft with the scent of blooming jasmine, and the sun is just dipping below the horizon. You’re sitting in your backyard, sipping a cool drink, and suddenly, your fence comes alive with a warm, golden glow. String lights—those simple, twinkling wonders—transform an ordinary outdoor space into a magical retreat. But here’s the thing: getting that perfect look isn’t as easy as just tossing lights up and hoping for the best. I’ve been there. I’ve tangled myself in cords, fought with staples, and watched my carefully placed lights sag in the middle of a party. The good news? With the right approach, hanging string lights on your fence can be simple, durable, and absolutely stunning.
Whether you’re hosting a cozy dinner, celebrating a holiday, or just want to enjoy your yard after dark, string lights add instant ambiance. They’re not just decorative—they’re mood-setters. But the best way to hang string lights on a fence depends on your fence type, the lights you choose, and how long you want them to last. In this guide, I’ll walk you through everything I’ve learned over years of trial and error (and yes, a few backyard mishaps). From choosing the right tools to avoiding common pitfalls, this is your go-to resource for creating a beautiful, long-lasting outdoor glow.
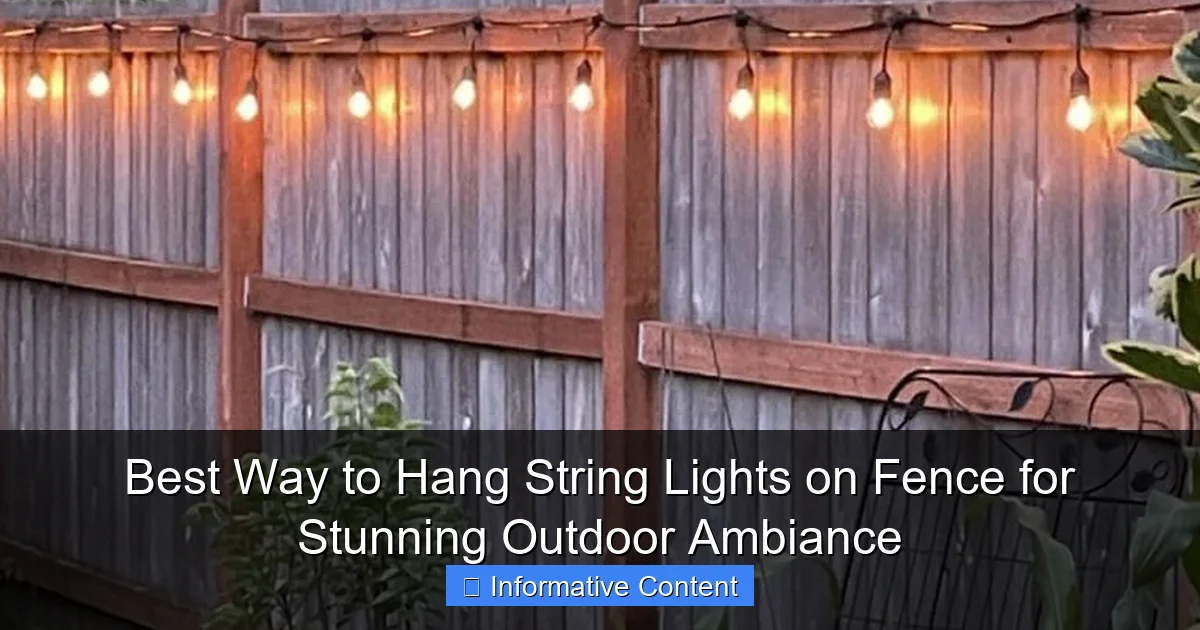
1. Choosing the Right String Lights for Your Fence
Before you even think about hanging, you need to pick the right lights. Not all string lights are created equal, and the wrong choice can mean flickering bulbs, short circuits, or lights that barely survive one season. Let’s break it down.
Visual guide about best way to hang string lights on fence
Image source: jessicawellinginteriors.com
LED vs. Incandescent: Which Is Better?
LEDs are the clear winner for outdoor use. They use up to 80% less energy, last up to 25,000 hours (that’s over 10 years of nightly use), and stay cool to the touch. Incandescent lights, while nostalgic and warm in color, burn out faster, use more power, and can get hot enough to damage wood or vinyl fences. I once used incandescent lights on a cedar fence—within a month, the heat had slightly scorched the wood near the bulbs. Lesson learned.
Stick with outdoor-rated LED string lights. Look for an IP44 or higher weatherproof rating, which means they’re protected against rain and dust. And if you’re in a cold climate, make sure they’re rated for temperatures below freezing.
Bulb Shape and Spacing: Aesthetic Matters
The look of your lights depends a lot on the bulb style. Edison-style bulbs (with exposed filaments) give a vintage, romantic glow—perfect for boho or farmhouse decor. Mini bulbs (like fairy lights) are subtle and magical, great for a soft, twinkling effect. Globe bulbs offer a modern, clean look.
Spacing matters too. Bulbs spaced 4–6 inches apart create a dense, cozy feel. If your fence is long or you want a more minimalist look, go with 8–12 inch spacing. I used 6-inch spaced Edison bulbs on my 20-foot wooden fence, and the effect was like a golden ribbon weaving through the yard.
Length and Power Source: Plan Ahead
Measure your fence first. You don’t want to run out of lights halfway through or have too much cord dragging on the ground. Add 10% extra for overlaps or curves. Most string lights come in 20–40 foot lengths. If your fence is longer, you’ll need to connect multiple strands. But—important—check the manufacturer’s max connection limit. Usually, it’s 3–5 strands. Exceeding that can overload the circuit or dim the bulbs.
Power source? If your fence is far from an outlet, consider solar-powered string lights. They charge during the day and turn on automatically at dusk. I used solar lights on a back fence with no nearby outlet, and they’ve worked flawlessly for two years. Just remember: they shine for 6–8 hours, so they’re not ideal for late-night parties.
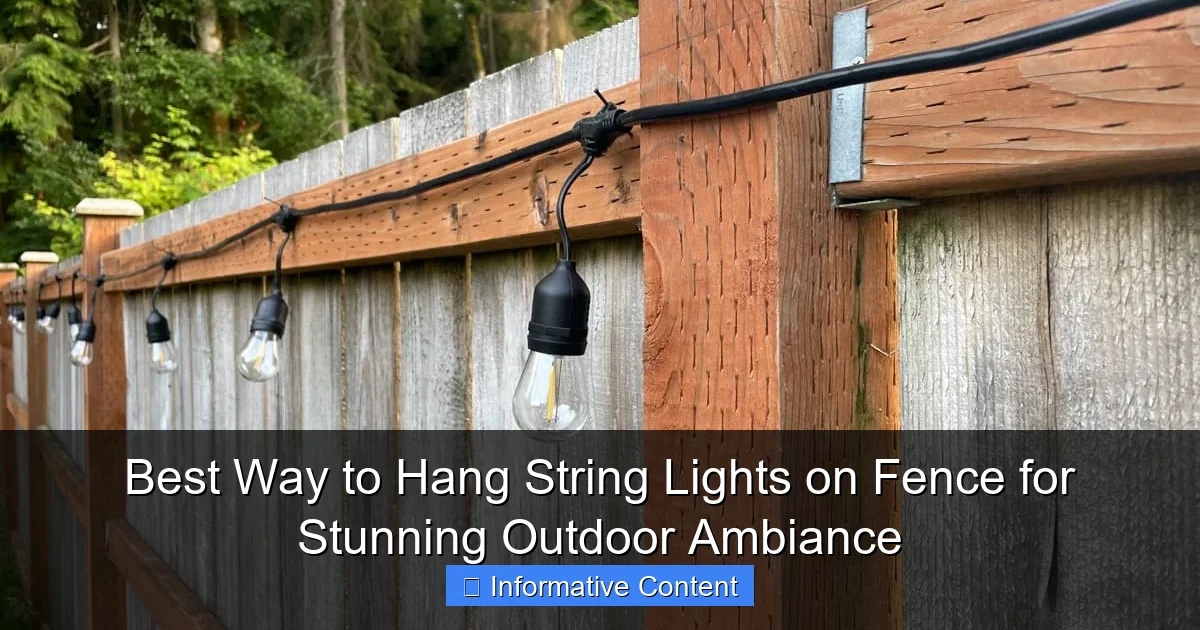
2. Tools and Hardware: What You Really Need
You don’t need a full workshop, but having the right tools makes all the difference. I’ve tried using duct tape (don’t), zip ties (okay in a pinch), and even thumbtacks (disaster). Here’s what actually works.
Visual guide about best way to hang string lights on fence
Image source: jessicawellinginteriors.com
Fence-Specific Mounting Options
- Fence Clips or Hooks: These are designed for string lights and attach to fence posts, pickets, or rails without nails or glue. They’re removable, reusable, and gentle on your fence. I use plastic S-hooks on my chain-link fence—they snap on easily and hold tight.
- Adhesive Hooks or Strips: For vinyl or painted wood fences, use outdoor-rated adhesive hooks. Brands like Command make ones that hold up to 5 pounds. They’re perfect for temporary setups or renters. Just make sure the surface is clean and dry before applying.
- Eye Screws or Cup Hooks: For permanent installations on wood or metal fences, drill small pilot holes and screw in cup hooks. They’re sturdy and hold heavy lights. I used these on my cedar fence and haven’t had a single one loosen after three years.
Essential Tools for a Smooth Install
- Measuring Tape: For planning light placement and avoiding gaps.
- Level: If you want a perfectly straight line (I didn’t at first, but guests noticed the tilt—lesson learned).
- Extension Ladder: For tall fences. Safety first!
- Zip Ties (Reusable): For securing excess cord or grouping multiple strands.
< Drill with Small Bit: For pre-drilling holes if using screws (prevents wood from splitting).
Pro tip: Keep a pair of scissors handy to trim zip ties or open packaging. And wear gloves—fence edges can be rough.
What to Avoid
Skip the staples—they can damage wood, create fire hazards if they pierce wires, and are a pain to remove. Same with hot glue—it doesn’t hold well in rain or temperature changes. And never use tape (even duct tape). It dries out, leaves residue, and falls off in weeks.
3. Step-by-Step Installation Methods by Fence Type
Your fence’s material and design dictate the best hanging method. Let’s cover the most common types.
Wooden Fences: Classic and Versatile
Wood fences are ideal for string lights because they’re sturdy and easy to work with. Here’s how I did mine:
- Measure the fence and plan light placement. I spaced bulbs 6 inches apart along the top rail.
- Pre-drill holes (1/8 inch bit) every 2 feet for cup hooks. This prevents the wood from splitting.
- Screw in cup hooks. I used brass hooks—they look nice and resist rust.
- Hang the lights. Start at the power source and work outward. Loop the light’s end cap over the first hook, then stretch the strand taut to the next, and so on.
- Secure the plug end with a zip tie to a nearby hook. This prevents strain on the cord.
Result? A clean, even glow that’s held up through two winters. Note: If your wood is rough, sand the hook areas first to avoid snagging the lights.
Vinyl or PVC Fences: Gentle but Durable
Vinyl can’t handle nails or screws, so go adhesive. I used outdoor Command hooks on my neighbor’s vinyl fence:
- Clean the fence with isopropyl alcohol. Adhesive won’t stick to dust or grease.
- Press each hook firmly for 30 seconds. Wait 1 hour before hanging lights.
- Use S-hooks to connect the lights. They’re easy to remove for cleaning or storage.
These hooks held 20 feet of lights through a rainy spring. Just avoid placing them where lawn mowers might hit.
Chain-Link Fences: Quick and Flexible
Chain-link is perfect for clips or S-hooks. No tools needed:
- Attach plastic clips every 18 inches along the top rail.
- Snap the lights into the clips. You can adjust spacing easily.
- For a zigzag pattern, clip lights diagonally across the mesh. I did this for a party—looked like a starry sky!
Bonus: You can take them down in minutes if needed.
Metal or Wrought Iron Fences: Permanent but Precise
Use magnetic hooks or drill cup hooks (if allowed). Magnetic hooks are great for temporary use, but they can slide in wind. For permanence, drill pilot holes and use stainless steel hooks (they won’t rust). I used this method on a wrought iron gate—looked elegant and stayed put.
Mixed or Curved Fences: Get Creative
Got a fence with posts, curves, or planters? Use zip ties to secure lights to posts or branches. For curves, hang lights in gentle waves instead of straight lines. I used this on a curved wooden fence—added a whimsical touch.
4. Design Tips for Maximum Ambiance
Hanging lights isn’t just functional—it’s art. Here’s how to make your fence a showstopper.
Spacing and Patterns: Less Is Sometimes More
Too many lights can look chaotic. Aim for even spacing. For a subtle effect, hang lights only on the top rail or posts. For drama, go for layered lighting—top rail + mid-fence + ground-level (using stakes or low clips).
I tried a “double strand” look (one row at the top, one at mid-height) on my fence. The effect was like a glowing curtain—guests loved it.
Color Temperature: Warm vs. Cool
Warm white (2700K–3000K) feels cozy and inviting—ideal for dinners or quiet evenings. Cool white (4000K+) is brighter and more modern—great for parties or security. I use warm white for my fence but switch to cool for holiday lights.
Layering with Other Elements
String lights shine when paired with other decor:
- Greenery: Weave lights through climbing vines or hang them on a trellis.
- Furniture: Drape lights over a pergola or patio umbrella.
- Pathways: Add solar stake lights along the fence base for a “glowing path” effect.
For a wedding in my backyard, I combined string lights with paper lanterns and lanterns on the ground. The layered glow was magical.
Timing and Controls
Use a timer or smart plug to turn lights on at dusk and off at 10 PM. No more fumbling with switches! I use a Wi-Fi plug—I can control the lights from my phone or set a schedule.
5. Maintenance, Safety, and Longevity
Great lights should last more than one season. Here’s how to keep them shining.
Weatherproofing and Storage
- After each season, clean lights with a dry cloth. Remove debris or cobwebs.
- Store in a cool, dry place. Wrap them around cardboard or a reel to prevent tangles.
- For permanent setups, check hooks annually. Tighten loose screws or replace worn adhesive hooks.
I leave my lights up year-round (they’re rated for -20°F). But I inspect them each spring—last year, one hook had rusted, so I replaced it.
Safety First: Avoid Fire and Electrical Hazards
- Never use indoor lights outdoors. They’re not weatherproof.
- Don’t overload circuits. If your lights dim or flicker, you’ve connected too many strands.
- Keep cords away from water sources (like sprinklers). Use GFCI outlets.
- Check for frayed wires or damaged bulbs before installing.
One winter, a squirrel chewed through part of my cord. I replaced the damaged section with a waterproof connector—problem solved.
When to Replace vs. Repair
If a strand has 1–2 dead bulbs, try replacing them (if removable). But if half the strand is out, it’s time to replace. I keep spare bulbs and a repair kit in my garage.
6. Real-Life Examples and Pro Tips
Let’s look at how different setups work in real life.
Example 1: The Backyard Oasis
Fence: 25-foot cedar fence with posts every 6 feet.
Lights: 40-foot warm white LED string (6-inch spacing).
Method: Cup hooks on top rail + eye screws on posts for vertical drops.
Result: A golden glow that’s held up for 3 years. I added a timer for automatic on/off.
Example 2: The Renter-Friendly Setup
Fence: Vinyl fence, no drilling allowed.
Lights: Solar-powered mini lights.
Method: Adhesive hooks + S-hooks. Lights charge during the day and shine from 7 PM to 1 AM.
Result: No damage to the fence, and the soft twinkle is perfect for evenings.
Pro Tips from the Trenches
- Test lights first. Plug them in before hanging—no one wants to fix a dead strand halfway up a ladder.
- Use a buddy. Hanging lights alone is tough. A helper can hold the ladder or guide the cord.
- Plan for growth. If you add a pergola or garden later, leave extra cord or hooks for expansion.
- Embrace imperfection. Slight sags or waves add charm. Perfection is overrated.
I once spent hours trying to get every hook perfectly level. My partner finally said, “It’s beautiful—just enjoy it.” He was right.
Data Table: Comparison of String Light Options
| Light Type | Best For | Lifespan | Weather Resistance | Power Source | Cost (per 20 ft) |
|---|---|---|---|---|---|
| LED (Edison) | Vintage, cozy ambiance | 25,000 hours | IP44+ | Plug-in or solar | $25–$40 |
| LED (Mini) | Subtle, magical glow | 20,000 hours | IP44+ | Solar or battery | $15–$25 |
| LED (Globe) | Modern, clean look | 30,000 hours | IP65 | Plug-in | $30–$50 |
| Incandescent | Short-term use | 2,000 hours | IP44 | Plug-in | $10–$20 |
Note: Prices are approximate and vary by brand. Always check reviews for durability.
The best way to hang string lights on a fence isn’t one-size-fits-all. It’s about matching your tools to your fence, your style, and your lifestyle. Whether you’re going for a rustic glow, a modern sparkle, or a whimsical twinkle, the key is patience and planning. Start with quality lights, use the right hardware, and don’t be afraid to experiment. I’ve had my share of “what was I thinking?” moments—like the year I used Christmas lights on a spring fence (they looked out of place). But each attempt taught me something.
Now, when I sit in my backyard under that golden canopy, I feel pride. Not just in the lights, but in the process. The measuring, the drilling, the late-night adjustments—it all led to this moment of peace. And that’s the real magic. So grab your tools, measure twice, and hang those lights. Your perfect outdoor ambiance is just a few hooks away. And when the sun sets and your fence comes alive with light, you’ll know: it was worth every minute.
Frequently Asked Questions
What is the best way to hang string lights on a fence without damaging it?
The best way to hang string lights on a fence is by using removable hooks, adhesive clips, or zip ties. These options secure the lights while preventing damage to the fence surface, especially when using low-profile hardware.
Can I use nails or screws to hang string lights on a wooden fence?
Yes, small nails or cup hooks work well for wooden fences, but ensure they’re rust-resistant and placed between bulbs to avoid wire strain. For a safer, adjustable option, consider using S-hooks or eye screws instead.
How do I hang string lights on a chain-link fence?
For chain-link fences, use zip ties, twist ties, or specialized fence clips to weave lights through the mesh. This method keeps the lights secure and evenly spaced without requiring tools or permanent modifications.
What’s the easiest method to hang string lights on a vinyl fence?
Adhesive outdoor-rated clips or magnetic hooks are ideal for vinyl fences, as they avoid drilling or pressure damage. Ensure clips are UV-resistant to withstand sun exposure and maintain grip over time.
How do I ensure my string lights stay evenly spaced on a long fence?
Plan spacing by measuring the fence and marking clip/hook positions every 12–18 inches before installation. Use tension wire or guide strings between posts to align lights evenly and prevent sagging.
Are there weatherproof ways to hang string lights on a fence year-round?
Use waterproof clips, silicone-sealed hooks, or heavy-duty zip ties designed for outdoor use. Pair these with weather-resistant LED string lights for a durable, year-round display that withstands rain, snow, and wind.