
Featured image for best way to string lights on a pergola
Image source: myamazingthings.com
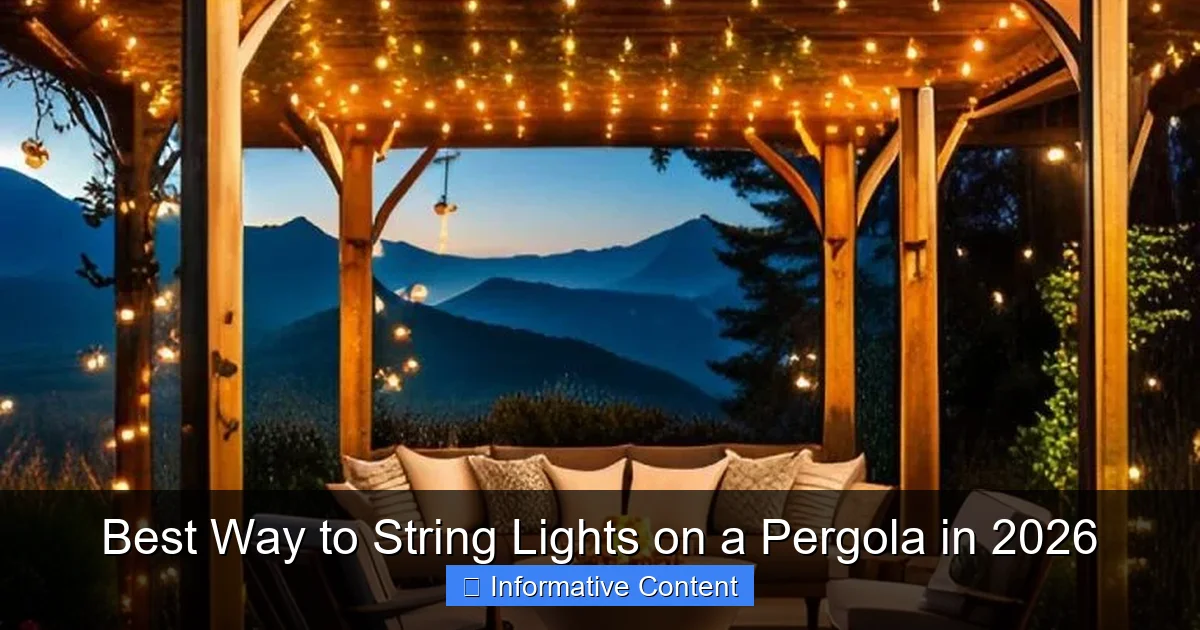
The best way to string lights on a pergola in 2026 is using adjustable, weather-resistant LED string lights with smart controls for effortless ambiance. Mount them along the beams with stainless steel cable clips or zip ties to ensure a secure, clean look that withstands wind and rain—no sagging or damage. This method combines durability, style, and modern tech for year-round outdoor enjoyment.
Key Takeaways
- Plan spacing first: Map light placement for even, balanced coverage.
- Use weatherproof lights: Choose IP65-rated LEDs for year-round durability.
- Secure with clips: Install adhesive or screw-in clips for clean, damage-free hanging.
- Hide cords neatly: Route wires along beams and use zip ties for a tidy look.
- Layer lighting: Combine string, spot, and uplights for depth and ambiance.
- Test before fixing: Hang lights temporarily to check brightness and coverage.
📑 Table of Contents
- Why String Lights on a Pergola Are the Ultimate Mood Boost
- Understanding Your Pergola: The Foundation for Success
- Choosing the Right String Lights: Quality Over Quantity
- Installation Methods: The Best Way to String Lights on a Pergola
- Creative Lighting Patterns: Beyond the Straight Line
- Maintenance, Safety, and Long-Term Care
- Data Table: Comparison of Pergola Lighting Methods
- Final Thoughts: Creating Your Perfect Outdoor Glow
Why String Lights on a Pergola Are the Ultimate Mood Boost
There’s something magical about walking under a pergola strung with twinkling lights. Maybe it’s the way the glow dances across the wooden beams or how the soft illumination makes a backyard feel like a secret hideout. I still remember the first time I strung lights on my pergola—after a long summer evening, my family and I sat outside, sipping lemonade, laughing under a canopy of warm white LEDs. It wasn’t just about the lights; it was about the feeling they created. Cozy. Inviting. Like the outdoors had been gently pulled inside.
But let’s be honest—getting those lights up without them sagging, tangling, or falling during the first breeze? That’s a challenge. Over the years, I’ve tried every method: nails, zip ties, adhesive hooks, even repurposing old picture wire. Some worked for a season. Others lasted just a few weeks. After trial, error, and a few DIY disasters, I’ve finally cracked the code on the best way to string lights on a pergola—and it’s not just about aesthetics. It’s about durability, ease of installation, and creating a lighting setup that lasts through seasons, storms, and countless backyard gatherings.
Understanding Your Pergola: The Foundation for Success
Know Your Structure: Wood, Metal, or Composite?
Before you even think about buying lights, take a close look at your pergola. The material matters—big time. Wooden pergolas are the most common, and they’re generally the easiest to work with. They can handle nails, screws, and even heavy-duty staples. But if you’re dealing with pressure-treated wood, be cautious: some adhesives and metals can react poorly over time.
Visual guide about best way to string lights on a pergola
Image source: images.farmfoodfamily.com
Metal pergolas, especially aluminum, are sleek and modern but tricky. You can’t hammer into them, and many adhesives fail under UV exposure or temperature shifts. Composite pergolas? They’re low-maintenance but often have smooth, non-porous surfaces that reject glue. I once tried using outdoor-rated double-sided tape on a composite beam—by the second rainstorm, the lights were dangling like limp noodles. Lesson learned.
Assess the Beam Layout and Span
Most pergolas have horizontal beams (also called rafters or purlins) spaced 12 to 24 inches apart. The spacing determines how you’ll run your lights. If the beams are close together, you can create a crisscross pattern. Wider gaps? You’ll need a more linear approach or additional support wires.
Also, check the span—the distance between vertical posts. If it’s over 8 feet, your lights will likely sag without extra support. I have a 12-foot span in my backyard, and I learned the hard way that “just draping” lights across it results in a droopy, unflattering mess. You want a gentle curve, not a saggy hammock.
Weatherproofing and Longevity
Let’s talk about the elephant in the backyard: weather. Rain, wind, snow, and UV rays will all test your setup. I’ve seen people use indoor-rated string lights outdoors—big mistake. They corrode, short out, or fade within months. Always choose outdoor-rated LED string lights with a minimum IP44 rating (splash-proof). For areas with heavy rain or snow, go for IP65 or higher.
Also, consider how often you want to take them down. If you’re in a region with harsh winters, a semi-permanent setup with removable clips or hooks makes seasonal removal easier. In milder climates, you can go more permanent—just make sure everything is UV-stabilized and corrosion-resistant.
Choosing the Right String Lights: Quality Over Quantity
LED vs. Incandescent: Why LED Wins Every Time
I used to love the warm, soft glow of incandescent string lights. But after replacing a whole strand every year due to burnt-out bulbs and high energy bills, I switched to LEDs—and I’ll never go back. LEDs are:
- 80% more energy-efficient
- Last 25,000+ hours (vs. 1,000–2,000 for incandescents)
- Cool to the touch—safe around kids and pets
- Available in warm white (2700K), cool white (4000K), and color-changing options
For a pergola, I recommend warm white LEDs (2700K–3000K). They mimic candlelight and create that cozy, inviting vibe. Cool white can feel clinical, and while color-changing lights are fun for parties, they’re overkill for everyday use.
Bulb Style: Globe, Edison, or Mini?
This is where personal taste comes in, but here’s my take:
- Globe lights (like G40 or G50): Great for a vintage, café-style look. They cast soft, diffused light but can be bulky. Best for pergolas with wide beams.
- Edison-style (exposed filament): Super trendy, but the filaments are fragile. Not ideal if you live in a windy area. I once lost three bulbs in a single storm.
- Mini LEDs (5mm or 3mm): My personal favorite. They’re lightweight, durable, and can be spaced closely for a starry-sky effect. Perfect for crisscross patterns.
For 2026, I’m seeing a rise in smart string lights—Wi-Fi or Bluetooth-enabled, app-controlled, with dimming and scheduling. They’re pricier (around $80–$150 for a 48-foot strand), but if you love tech, they’re worth it. Just make sure your pergola is within range of your router or a mesh extender.
Length, Spacing, and Voltage
Measure your pergola’s perimeter and beam layout. A general rule: you’ll need 1.5 to 2 feet of lights per linear foot of pergola for a full, layered look. If you’re doing a crisscross pattern, add 20% more length.
Spacing between bulbs should be 2 to 6 inches. Closer spacing = denser glow. Farther = more spread-out, “twinkle” effect. And always check voltage. Most outdoor strings are 120V, but low-voltage (12V) options are safer and easier to install if you’re running lights far from an outlet. You’ll need a transformer, though.
Installation Methods: The Best Way to String Lights on a Pergola
Method 1: The Cable Wire System (My Top Pick)
This is the best way to string lights on a pergola for durability and flexibility. Here’s how it works:
- Run a stainless steel cable wire (1/16” or 3/32”) across the top of the pergola, anchored to each vertical post with eye hooks or turnbuckles.
- Use light clips (like 3M Outdoor Light Clips or Command Outdoor Light Clips) to attach the string lights to the wire.
- Space clips every 6–12 inches, depending on bulb density.
Why it’s great:
- No damage to pergola beams (no drilling)
- Easy to remove and replace lights seasonally
- Handles wind and weight better than adhesive or zip ties
- You can adjust tension with turnbuckles to prevent sagging
I used this method on my 12-foot span, and the lights have stayed taut for three years. The cable is nearly invisible at night, and the setup took about 90 minutes.
Method 2: Adhesive Hooks and Clips (Good for Light Loads)
If you don’t want to drill or run cables, adhesive hooks are a solid option—but with caveats.
- Use outdoor-rated adhesive hooks (like Command Outdoor or 3M VHB). Avoid cheap dollar-store versions.
- Clean the surface with isopropyl alcohol before applying.
- Let the adhesive cure for 24 hours before hanging lights.
- Limit weight to under 3–5 lbs per hook (check the package).
This works well for mini LEDs or short runs (under 20 feet). But in my experience, adhesive fails on:
- High-humidity areas
- Metal or composite surfaces with low porosity
- Long spans with heavy globe bulbs
I used adhesive clips on a small side pergola—fine for one season. After a hot summer, they started peeling. Not a total fail, but not ideal for long-term.
Method 3: Zip Ties and Cable Ties (Quick but Risky)
Zip ties are fast and cheap, but they’re not the best way to string lights on a pergola for longevity. UV exposure degrades nylon ties over time. I’ve had them snap after 18 months, dropping lights mid-summer.
If you use them:
- Choose UV-resistant, outdoor-rated zip ties (black ones are better than clear).
- Don’t over-tighten—they can cut into wood or damage light wires.
- Use a zip tie mount (like a plastic base) for a cleaner look and easier removal.
Good for temporary setups or renters, but not recommended for permanent installations.
Method 4: Drilling and Eye Hooks (For Permanent Installations)
If you’re okay with drilling into your pergola, eye hooks offer a classic, sturdy solution.
- Drill pilot holes (use a bit slightly smaller than the hook).
- Screw in stainless steel eye hooks at regular intervals.
- Hang lights directly on the hooks or use S-hooks for easy removal.
Pros:
- Extremely durable
- No sagging
- Looks clean and intentional
Cons:
- Permanent (not ideal for renters)
- Requires tools and DIY confidence
- Can rust if not stainless steel
I used this method on a cedar pergola. After sealing the holes with wood filler and outdoor caulk, the hooks have held strong for five years.
Creative Lighting Patterns: Beyond the Straight Line
The Classic Crisscross (Diamond Weave)
This is the most popular pergola lighting pattern—and for good reason. It maximizes coverage and creates a 3D effect.
How to do it:
- Run a cable wire from one corner of the pergola to the opposite (diagonal).
- Attach lights to the wire, spacing bulbs every 6 inches.
- Repeat on the other diagonal.
- Optional: add a third wire across the center for extra density.
Tip: Use a laser level or chalk line to keep wires straight. I once eyeballed it and ended up with a lopsided “X” that looked like a drunk spider’s web.
The Linear Drape (Soft Curves)
For a more relaxed, boho look, drape lights in gentle curves along the beams.
How to do it:
- Attach lights to the front edge of each horizontal beam.
- Let them drape down 12–18 inches between beams.
- Use clips or hooks to secure the lowest point.
This works best with mini LEDs or fairy lights. I used it on a pergola with wide 24-inch beam spacing—looks like a canopy of fireflies.
The Zigzag (Modern and Dynamic)
For a contemporary feel, zigzag lights across the top.
- Run lights from one beam to the next, alternating high and low points.
- Use a cable wire or adhesive clips for support.
- Space bulbs closer at the “peaks” for a brighter effect.
Great for metal pergolas where drilling isn’t an option. I did this on a friend’s aluminum pergola—looks sleek and industrial.
Layering: Combine Patterns for Depth
Don’t stop at one layer. I love combining a crisscross pattern on top with linear drapes on the sides. It adds depth and makes the space feel larger. Just be mindful of weight—too many layers can stress your pergola.
Maintenance, Safety, and Long-Term Care
Weatherproofing Your Setup
Even the best lights need protection. Here’s how I keep mine going year after year:
- Seal connections: Use waterproof electrical tape or silicone sealant on plug joints.
- Elevate cords: Don’t let power cords drape on the ground. Use conduit or run them along beams.
- Trim nearby branches: Falling leaves and twigs can snag lights or create fire hazards.
- Check annually: Inspect wires, clips, and connections before each season.
When to Remove or Store Lights
In areas with heavy snow, ice, or high winds, I take my lights down in late fall. For mild climates, they can stay up—but I still unplug them during storms. Smart plugs make this easy: I schedule them to turn off at sunset and on at dusk, but I can override it via app if a storm hits.
Repairing and Replacing
LEDs rarely burn out, but wires can fray. Keep a repair kit:
- Extra bulbs (for globe lights)
- Waterproof tape
- Spare clips and hooks
- Wire cutters and strippers
I once fixed a frayed connection in 10 minutes with tape and a heat-shrink tube. Saved me $60 on a new strand.
Data Table: Comparison of Pergola Lighting Methods
| Method | Best For | Durability | Ease of Install | Cost | Removable? |
|---|---|---|---|---|---|
| Cable Wire System | Long spans, heavy lights, all materials | ★★★★★ (5+ years) | ★★★☆☆ (1–2 hours) | $$ (cable, clips, hooks) | Yes |
| Adhesive Clips | Short runs, light bulbs, renters | ★★☆☆☆ (1–2 years) | ★★★★★ (15–30 mins) | $ | Yes |
| Zip Ties | Temporary setups, quick fixes | ★★☆☆☆ (1–2 years) | ★★★★★ (10–20 mins) | $ | Yes (but messy removal) |
| Eye Hooks | Permanent, heavy-duty setups | ★★★★★ (10+ years) | ★★★☆☆ (1–3 hours) | $$ (hooks, sealant) | No (but lights removable) |
Final Thoughts: Creating Your Perfect Outdoor Glow
Stringing lights on a pergola isn’t just a DIY project—it’s an act of transformation. It turns a plain structure into a sanctuary. And while there’s no single “right” way, the best way to string lights on a pergola in 2026 combines smart planning, quality materials, and a method that suits your space and lifestyle.
For me, it’s the cable wire system. It’s reliable, flexible, and lets me change up patterns seasonally without starting from scratch. But if you’re renting or just want a quick glow, adhesive clips or zip ties can work—just know their limits.
Remember: the goal isn’t perfection. It’s feeling. Whether you’re hosting a dinner party, reading a book, or just enjoying the quiet, your pergola lights should make you smile. So go ahead—string them up, tweak them, and enjoy the magic. And when the sun goes down and the first bulb flickers on? That’s when your backyard becomes something more. Something beautiful.
Frequently Asked Questions
What is the best way to string lights on a pergola without damaging the wood?
The best way to string lights on a pergola without damaging wood is to use removable adhesive hooks or UV-resistant zip ties. These methods provide secure hold while preserving the structure and finish of your pergola.
How do I evenly space string lights across a large pergola for a professional look?
Measure the pergola’s length and divide it by the number of light bulbs or sockets to ensure equal spacing. Use a laser level or chalk line to mark hook placements before hanging the lights for a clean, uniform appearance.
Can I use outdoor string lights year-round on my pergola, and what type lasts the longest?
Yes, choose commercial-grade, weatherproof LED string lights with shatterproof bulbs for year-round pergola use. These are designed to withstand rain, wind, and UV exposure, making them the best way to string lights on a pergola long-term.
What’s the safest method for hanging string lights on a tall pergola?
Use an extendable pole with a hook attachment or hire a professional for tall pergolas to avoid ladder risks. Always turn off power sources when adjusting lights and follow manufacturer guidelines for safe installation.
How do I hide the cords and plugs for pergola string lights for a cleaner aesthetic?
Route cords through pergola rafters using cable clips or conduit, and place power sources behind furniture or planters. The best way to string lights on a pergola includes concealing wires to maintain a polished look.
Are solar-powered string lights a good option for a pergola with limited outlets?
Yes, solar-powered lights are ideal for pergolas lacking nearby outlets—just ensure the solar panel gets 6+ hours of direct sunlight. They offer easy installation and are a cost-effective, eco-friendly lighting solution.

