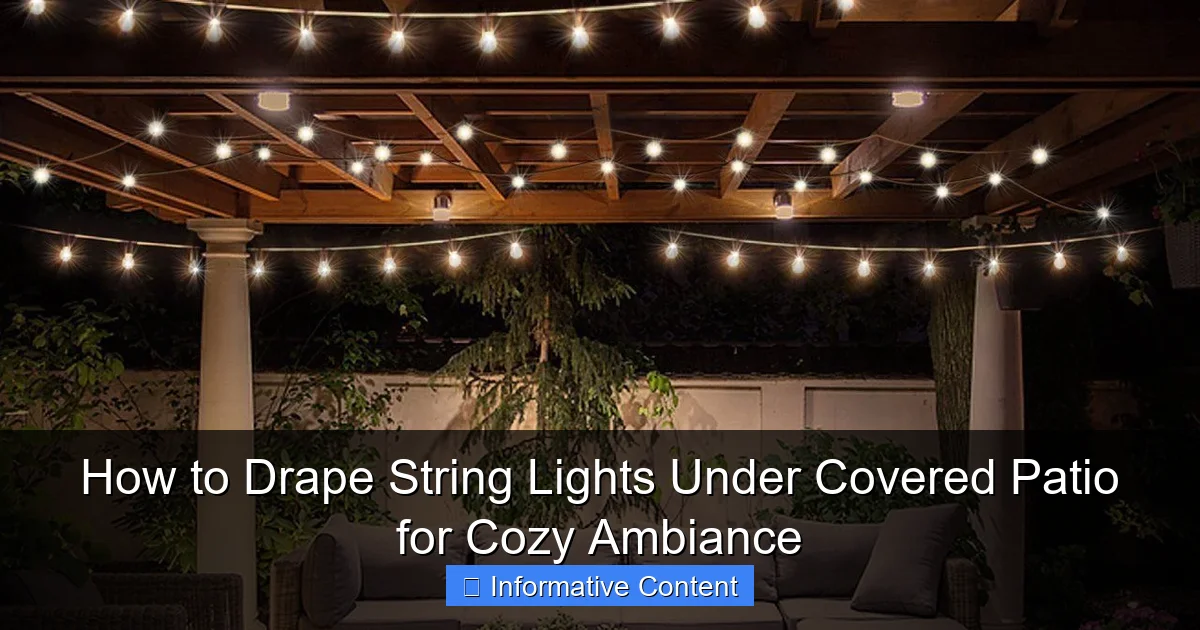
Featured image for drape string lights under covered patio
Image source: i.pinimg.com
Transform your covered patio into a cozy retreat by draping string lights strategically for warm, inviting ambiance. Choose weather-resistant lights and secure them along beams, railings, or eaves using hooks or zip ties to create soft, layered illumination. For maximum effect, opt for warm white bulbs and space them evenly to enhance depth and comfort without overwhelming the space.
Key Takeaways
- Plan your layout: Sketch light placement before hanging for balanced coverage.
- Use weatherproof lights: Choose UL-rated string lights for outdoor durability.
- Secure with hooks: Install adhesive or screw-in hooks every 12–18 inches.
- Create layers: Hang lights at multiple heights for depth and dimension.
- Hide power sources: Use extension cords with in-use covers for safety.
- Test before finalizing: Check brightness and spacing before permanent installation.
📑 Table of Contents
- Why Drape String Lights Under a Covered Patio?
- Choosing the Right String Lights for Your Covered Patio
- Planning Your Layout: How to Drape String Lights Under Covered Patio
- Installation Tips: Making It Easy and Safe
- Enhancing the Ambiance: Beyond Just Lights
- Maintenance and Long-Term Care
- Final Thoughts: Creating Your Perfect Patio Glow
Why Drape String Lights Under a Covered Patio?
Picture this: It’s a warm summer evening. The sun has dipped below the horizon, and a soft breeze rustles the leaves. You’re sitting on your covered patio with a glass of wine, a good book, or maybe friends gathered around, laughing over dinner. Now, imagine that space glowing with the warm, golden flicker of drape string lights under covered patio—not too bright, not too dim, just enough to make everything feel magical. That’s the power of thoughtful lighting. It doesn’t just illuminate; it transforms.
String lights under a covered patio aren’t just a trend. They’re a timeless way to extend your living space outdoors. Whether your patio is a simple wooden overhang or a fully enclosed lanai, the soft glow of draped lights adds warmth, intimacy, and a touch of whimsy. I remember the first time I hung string lights under my own covered porch. I was skeptical—would they look tacky? Would they be too dim? But after a single evening, I was hooked. The space felt cozier, more inviting, and honestly, more *mine*. That’s what this guide is about: helping you create that same feeling, with practical tips, real-life examples, and a few lessons learned the hard way.
Choosing the Right String Lights for Your Covered Patio
Not all string lights are created equal—especially when you’re draping them under a covered patio. The goal is ambiance, not glare. So, choosing the right type, color, brightness, and durability is key. Let’s break it down.
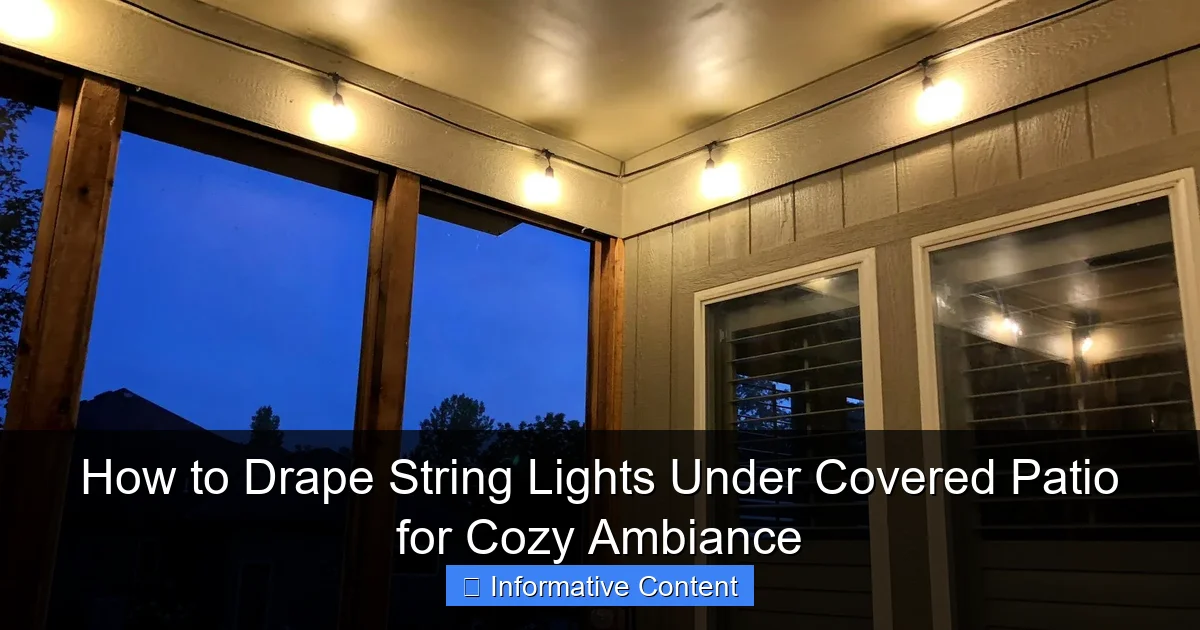
Visual guide about drape string lights under covered patio
Image source: sengerson.com
LED vs. Incandescent: Which Is Better?
Most people today opt for LED string lights, and for good reason. They use up to 80% less energy, last 25,000+ hours (that’s over 10 years of nightly use), and generate almost no heat—critical for covered spaces where airflow is limited. Incandescent bulbs, while nostalgic and warm, burn hotter, use more power, and have a much shorter lifespan. For a covered patio, where safety and long-term use matter, LEDs are the clear winner.
That said, if you love the vintage look of Edison-style bulbs, go for LED filament bulbs. They mimic the warm glow of incandescents but with LED efficiency. I used these on my patio and get compliments all the time. They look like old-school café lights but last way longer.
Warm White, Cool White, or Colored?
For a cozy, inviting feel, warm white (2200K–3000K) is the go-to. It mimics candlelight or firelight, creating that “hygge” vibe. Cool white (4000K+) feels more clinical—great for workspaces, but not for relaxation. Colored lights (like blue, red, or multicolor) can be fun for parties, but for everyday use, they can feel gimmicky or distracting.
One tip: Avoid RGB (color-changing) lights unless you plan to use them for specific events. They often have a “party mode” that’s hard to turn off, and the remote can get lost in the couch cushions. Stick with warm white for everyday coziness, and add colored lights only as accents during holidays.
Bulb Shape and Spacing
Here’s where personal preference comes in. Globe bulbs (round, evenly spaced) give a clean, modern look—perfect for a minimalist patio. Edison bulbs (exposed filaments, often in a teardrop shape) add vintage charm. Fairy lights (tiny bulbs on thin wire) are delicate and great for draping over railings or plants.
Spacing matters too. Lights spaced 4–6 inches apart are ideal for a soft, even glow. Closer spacing (2–3 inches) feels more festive; wider spacing (8+ inches) can look sparse. For a covered patio, I recommend 4–6 inches—it’s the sweet spot between cozy and cluttered.
Weather Resistance and Safety
Even under a cover, your lights are exposed to humidity, temperature swings, and occasional rain. Look for lights rated IP44 or higher—this means they’re splash-resistant and safe for outdoor use. Avoid lights labeled “indoor only,” even if they’re under a roof. I once used indoor-rated lights on my patio, and after a humid summer, the connections corroded. Not fun.
Also, check for UL or ETL certification. These ensure the lights meet safety standards. And if you’re using extension cords, make sure they’re rated for outdoor use and have built-in surge protection.
Planning Your Layout: How to Drape String Lights Under Covered Patio
Now that you’ve picked your lights, it’s time to plan the layout. This is where the magic happens. A well-draped setup can make your patio feel larger, cozier, and more intentional. A haphazard one? Well, let’s just say I’ve seen a few “spiderweb of doom” setups that made me wince.
Measure Your Space First
Grab a tape measure and note the length and width of your covered patio. Measure from the ceiling or beam down to the ground, if you plan to drape vertically. This helps you buy the right length of lights. As a rule of thumb, add 10–15% extra for draping and overlap. For example, if your patio is 10 feet wide, get lights that are at least 11–12 feet long per strand.
Pro tip: Sketch a quick diagram. Mark where your power outlets are, where you want lights to hang, and any obstacles (like fans, vents, or plants). This saves time and frustration later.
Popular Draping Styles (With Examples)
- Grid or Crisscross: Run lights horizontally and vertically to form a grid. Great for large patios. I used this in my backyard and it feels like a cozy canopy. Use hooks or clips every 2–3 feet to keep lines straight.
- Swag or Wave: Let lights drape in gentle curves between anchor points. This adds softness and movement. Ideal for smaller patios or over dining tables. I swag mine from one corner to the center beam—it creates a focal point.
- Perimeter Wrap: Hang lights along the outer edges of the patio. It defines the space without overwhelming it. Works well if you have railings or beams around the sides.
- Ceiling Drape: Attach lights directly to the ceiling or beams in a loose, flowing pattern. This gives a “starry sky” effect. I did this with fairy lights and it’s my favorite for intimate evenings.
- Layered Look: Combine two styles—e.g., perimeter lights with a swag over the table. Adds depth and dimension. My patio has perimeter lights plus a crisscross over the grill area. It’s functional *and* pretty.
Anchor Points: Where to Attach the Lights
You’ll need secure spots to hang your lights. Here are the most common options:
- Ceiling Beams or Rafters: The sturdiest option. Use eye hooks (for wood) or adhesive hooks (for drywall or stucco). Pre-drill holes to avoid splitting wood.
- Wall or Post Attachments: If your patio has columns or railings, use zip ties, hooks, or clips. For metal posts, magnetic hooks work great.
- Ceiling Hooks: Small metal hooks that screw into wood or masonry. I use these for crisscross grids—they’re cheap and hold up well.
- Adhesive Hooks (for smooth surfaces): Great for glass, tile, or painted wood. Look for ones rated for outdoor use and weight (most hold 2–5 lbs per hook).
One caution: Avoid nails or screws in drywall unless you’re sure of the framing. I once hung lights on drywall with regular hooks, and after a few weeks, they pulled out. Now I use drywall anchors or stick to beams.
Installation Tips: Making It Easy and Safe
Hanging lights can feel overwhelming, but it doesn’t have to be. With the right tools and a little patience, you can do it in a weekend—or even an afternoon. Here’s how to make the process smooth.
Gather Your Tools
Before you start, have these on hand:
- String lights (obviously!)
- Hooks, clips, or ties (based on your anchor points)
- Measuring tape
- Pencil or marker (for marking hook spots)
- Drill and drill bits (if installing hooks in wood)
- Step ladder or scaffolding (if you can’t reach the ceiling)
- Extension cord (outdoor-rated)
- Timer or smart plug (optional, but highly recommended)
I keep a “light kit” in my garage with all these items. It saves time and keeps everything organized.
Step-by-Step Installation
Step 1: Turn off the power. If you’re using an outdoor outlet, make sure it’s GFCI-protected (look for a reset/test button). Safety first.
Step 2: Mark your anchor points. Use a pencil to mark where hooks will go. For a grid, measure every 2–3 feet. For a swag, mark start, end, and center points.
Step 3: Install hooks. For wood beams, drill pilot holes and screw in eye hooks. For drywall, use anchors. For railings, attach clips or zip ties.
Step 4: Test the lights *before* hanging them. Plug them in to make sure all bulbs work. I learned this the hard way—once I hung a strand, only to find a dead section. Took me an hour to take it down and replace it.
Step 5: Hang the lights. Start at the power source. Use S-hooks or carabiners to attach strands to hooks—this makes it easy to remove or replace them later. For swags, let the middle dip 6–12 inches below the anchors. For grids, keep lines taut but not stretched.
Step 6: Connect multiple strands (if needed). Most string lights have end-to-end connectors. Just plug them in. If you’re using more than 3–4 strands, check the manufacturer’s wattage limit to avoid overloading.
Step 7: Secure cords. Use cord clips or zip ties to keep cords tidy and off the floor. This prevents tripping and keeps the look clean.
Smart Upgrades for Convenience
Want to take it up a notch? Try these:
- Timer: Plug your lights into a timer. They’ll turn on at sunset and off at bedtime. No more fumbling with switches.
- Smart Plug: Control lights with your phone or voice (via Alexa, Google, or Siri). Great for parties or when you’re away.
- Dimmer: Some LED lights work with dimmer switches. Adjust the brightness for different moods—brighter for cooking, softer for relaxing.
I use a smart plug on my patio lights. I can turn them on from my phone while I’m still at work. By the time I get home, my space is already glowing. It’s a game-changer.
Enhancing the Ambiance: Beyond Just Lights
String lights are the star, but they don’t have to be the *only* act. Pair them with other elements to create a truly immersive atmosphere.
Layer Your Lighting
Think of lighting like layers in an outfit. String lights are the base layer. Add:
- Floor Lamps or Lanterns: Place a solar-powered lantern on a side table. It adds warm, localized light.
- Under-Bench Lighting: Stick LED strips under benches or steps. It highlights the space and improves safety.
- Fairy Lights in Jars: Place battery-powered fairy lights in glass jars. Scatter them on tables or hang from hooks.
I have a mix: string lights overhead, a lantern on the coffee table, and LED strips under the grill counter. It’s cozy but functional.
Use Nature as a Frame
If your patio has plants, vines, or a pergola, use them to your advantage. Drape lights through branches or along the edges of a pergola roof. It creates a natural canopy effect. I have jasmine growing on my patio pergola—I wove string lights through the vines. In summer, the fragrance and glow are heavenly.
Add Texture and Color
String lights work best with soft, natural textures. Think:
- Outdoor rugs with earthy tones
- Throw pillows in warm colors (terracotta, mustard, navy)
- Wooden or wicker furniture
- Warm-toned tableware (like terracotta or stoneware)
The lights reflect off these surfaces, enhancing the glow. Avoid glossy or metallic finishes—they can create glare.
Music and Scent
Lighting sets the mood, but sound and smell complete it. Add:
- A small Bluetooth speaker for soft background music
- Outdoor-safe candles or essential oil diffusers (try lavender or cedarwood)
- A fire pit (if your patio allows it)
One evening, I had string lights, soft jazz, and a lavender candle burning. My friend said it felt like a “private spa.” That’s the power of layered ambiance.
Maintenance and Long-Term Care
You’ve hung your lights—now keep them looking great for years. A little care goes a long way.
Seasonal Checkups
Every spring and fall, do a quick inspection:
- Check bulbs: Replace any dead ones. Most LED strands let you swap individual bulbs.
- Inspect cords: Look for fraying, cracks, or corrosion. Replace damaged strands.
- Clean hooks and clips: Wipe off dust, dirt, or rust. This prevents wear.
- Test the timer or smart plug: Make sure it’s still working.
I do this in April and October. It takes 20 minutes and saves me from mid-summer surprises.
Storage Tips (If Removing)
If you take lights down in winter (common in cold climates), store them properly:
- Unplug and unhook carefully. Don’t yank cords.
- Coil lights loosely (avoid tight knots). Use a light reel or wrap them around a piece of cardboard.
- Store in a dry, cool place. A sealed plastic bin works well.
- Label the bin with the type and length of lights.
I keep my lights in labeled bins in the garage. It makes spring setup a breeze.
When to Replace
Even the best lights don’t last forever. Replace them if:
- More than 20% of bulbs are dead
- Cords are frayed or melted
- The plug feels loose or hot
- The color has shifted (LEDs can fade over time)
I replaced my first set after 5 years. The new ones were brighter, more efficient, and had better weatherproofing. It was worth the upgrade.
| Light Type | Lifespan | Energy Use | Best For | Cost (per 25 ft strand) |
|---|---|---|---|---|
| LED (Warm White) | 25,000+ hours | Very Low | Everyday use, ambiance | $20–$40 |
| LED Filament (Edison) | 15,000–20,000 hours | Low | Vintage look, patios | $30–$60 |
| Incandescent | 1,000–2,000 hours | High | Short-term, parties | $10–$25 |
| Fairy Lights | 10,000–15,000 hours | Very Low | Delicate draping, accents | $15–$30 |
Final Thoughts: Creating Your Perfect Patio Glow
Draping string lights under a covered patio isn’t just about lighting—it’s about crafting an experience. It’s about turning a functional space into a place where you want to linger, laugh, and unwind. Whether you go for a simple swag or a full grid, the goal is the same: to make your patio feel warm, inviting, and uniquely *yours*.
I’ve learned that the best setups are the ones that evolve. Start small. Hang one strand over the table. See how it feels. Add more as you go. Mix in lanterns, plants, or music. There’s no “right” way—only what works for you. And remember: it’s okay to make mistakes. My first attempt looked like a tangled mess. But with a little tweaking, it became my favorite spot in the house.
So grab those lights, invite a friend, and start draping. The magic is in the process—and the glow at the end. Your cozy patio oasis is waiting.
Frequently Asked Questions
How do I drape string lights under a covered patio without damaging the structure?
Use adhesive hooks, removable clips, or tension rods designed for outdoor use to hang string lights without nails or screws. These options provide secure hold while protecting your patio’s ceiling or beams.
What type of string lights work best for a covered patio?
Opt for weather-resistant LED string lights with a damp or wet location rating, as they’re safe for covered outdoor spaces. Choose warm white or soft yellow bulbs to enhance the cozy ambiance.
Can I install string lights under my covered patio by myself?
Yes, most drape string lights setups are DIY-friendly with basic tools like a ladder, measuring tape, and clips. Just ensure the power source is nearby and use outdoor-rated extension cords if needed.
How far apart should I space the hooks when draping string lights under a covered patio?
Place hooks or clips 12–18 inches apart for even distribution, adjusting based on your desired drape style (tight zigzag vs. loose waves). Always measure the light strand first to avoid overstretching.
Are solar-powered string lights suitable for covered patios?
Solar lights can work if your covered patio gets direct sunlight for at least 6 hours daily. For shadier areas, choose plug-in or battery-operated options to ensure consistent brightness.
How do I create a draped effect with string lights under a covered patio?
Start by anchoring the first hook, then loop the lights in gentle swags or zigzag patterns between hooks, leaving slight slack for a soft drape. Adjust the depth of each swag for visual depth and texture.

