Featured image for hang light strings on patio
Image source: bhg.com
Transform your patio into a cozy retreat by hanging light strings strategically to enhance ambiance and functionality. Use secure mounting hooks or tension wires along railings, eaves, or pergolas to create a warm, inviting glow that highlights key areas like seating or dining spaces. Always choose weather-resistant lights and follow spacing guidelines for a safe, stunning setup.
Key Takeaways
- Plan your layout first: Sketch where lights will hang to ensure even coverage and avoid gaps.
- Use weatherproof lights: Choose UL-rated outdoor strings to withstand sun, rain, and wind.
- Secure with proper hardware: Install hooks, clips, or cables designed for outdoor weight and tension.
- Hide cords strategically: Tuck wires under eaves or furniture for a clean, safe appearance.
- Layer light heights: Mix overhead and ground-level strings for depth and ambiance.
- Test before finalizing: Check brightness and connections before securing lights permanently.
📑 Table of Contents
- Why String Lights Transform Your Patio Into a Magical Escape
- Choosing the Right String Lights for Your Patio
- Planning Your Layout: Design Tips for a Balanced Look
- Tools and Materials You’ll Need (And Where to Find Them)
- Step-by-Step Guide to Hanging Light Strings on Patio
- Maintenance and Longevity: Keeping Your Lights Shining Year-Round
- Final Thoughts: Light Up Your Evenings, One Bulb at a Time
Why String Lights Transform Your Patio Into a Magical Escape
Remember that one summer night when you sat outside, wrapped in a soft blanket, sipping iced tea as tiny lights flickered above like stars that had fallen to earth? That’s the magic of string lights on a patio. They don’t just brighten the space—they transform it. What was once a plain concrete slab or wooden deck becomes a cozy, inviting retreat, perfect for quiet evenings, family gatherings, or impromptu dance parties under the stars.
But let’s be honest: hanging light strings on patio spaces isn’t always as simple as it looks. I’ve had my fair share of tangled cords, sagging wires, and lights that refused to stay put after one gust of wind. The good news? With a little planning, the right tools, and a few pro tips, you can create that dreamy ambiance without the headache. Whether you’re going for rustic farmhouse charm, modern minimalist glow, or boho backyard vibes, the key is in the how—not just the what. In this guide, I’ll walk you through everything you need to know to hang light strings on patio areas safely, beautifully, and with lasting results.
Choosing the Right String Lights for Your Patio
Types of String Lights: LED, Incandescent, Solar, and More
Before you even think about installation, you need to pick the right lights. Not all string lights are created equal. Let’s break down the most common types and where they shine (pun intended).
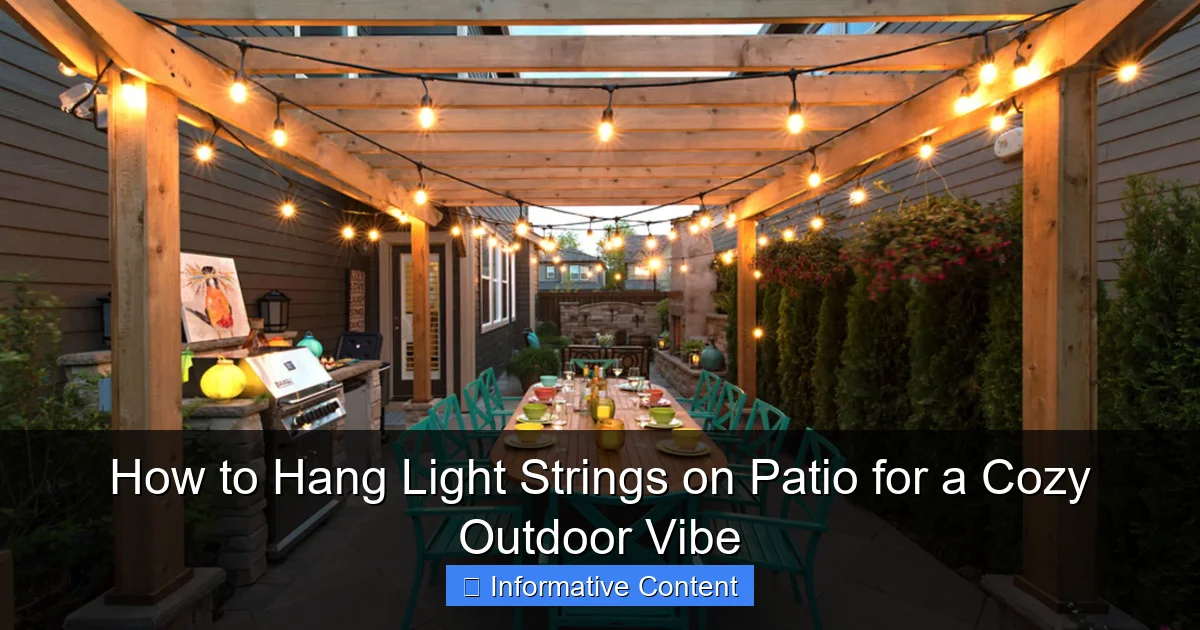
Visual guide about hang light strings on patio
Image source: shadefxcanopies.com
- LED String Lights: These are the gold standard for outdoor use. They’re energy-efficient, last up to 25,000 hours (that’s over 10 years with 6 hours of nightly use), and generate very little heat. Perfect for long-term patio setups. Plus, many come with remote controls, dimmers, or color-changing options.
- Incandescent String Lights: The classic warm glow we all love. They’re cheaper upfront but burn out faster and use more electricity. Best for short-term or decorative use, not ideal for year-round patio lighting.
- Solar String Lights: Eco-friendly and easy to install—no wiring needed. They charge during the day and turn on automatically at dusk. Great for areas far from outlets, but brightness and reliability depend on sunlight. Not ideal in shady or rainy climates.
- Fairy Lights or Micro LED Strings: Delicate and twinkly, perfect for wrapping around railings, trees, or pergolas. Less bright, so use them for accent lighting rather than primary illumination.
Pro tip: Always check the outdoor rating (look for IP44 or higher) to ensure your lights can handle rain, humidity, and temperature changes. Indoor lights won’t last long outside.
Length, Spacing, and Bulb Count: Getting the Balance Right
Imagine this: you buy a 50-foot strand, excited to drape it across your patio, only to find it’s too short. Or you buy three 25-foot strands and realize they’re too bright, washing out the space. Size and spacing matter.
- Measure your patio perimeter or layout first. For a standard 12×12 ft patio, a 25- to 35-foot strand is usually sufficient for one continuous run. If wrapping around a pergola, add 20% extra for overlap and drape.
- Spacing between bulbs: 6 to 12 inches is ideal for a balanced look. Closer spacing (6″) gives a denser glow; wider (12″) creates a more subtle, starry effect.
- Bulb count: 10 to 15 bulbs per foot is a sweet spot. Too few, and it looks sparse; too many, and it becomes a light show. For a cozy vibe, go for 10–12 bulbs per foot.
- Connectable strands: Many LED sets allow you to connect multiple strands (e.g., 3–5 max). Check the packaging to avoid overloading the circuit.
Example: I once hung 200 bulbs on a small 10×10 ft patio. It looked like a Christmas display in July. Lesson learned: less is often more. A single 30-foot strand with warm white LEDs at 8-inch spacing created a much cozier feel.
Color Temperature: Warm vs. Cool vs. Colorful
This is where mood-setting happens. The color temperature of your lights affects the entire atmosphere.
- Warm White (2700K–3000K): The most popular choice. It mimics candlelight and feels inviting, romantic, and relaxing. Ideal for dining, lounging, or intimate conversations.
- Cool White (4000K–5000K): Brighter and crisper. Better for task lighting or modern spaces, but can feel clinical. Use sparingly or mix with warm lights.
- Colorful or RGB Lights: Fun for parties or themed nights, but not for everyday use. They can feel gimmicky if overused. Save them for special occasions.
My go-to? A mix of warm white and a few subtle amber or soft yellow bulbs for depth. It feels like a campfire glow—perfect for unwinding after a long day.
Planning Your Layout: Design Tips for a Balanced Look
Mapping the Space: Start with a Sketch or Digital Tool
Before you hammer a single hook, take 10 minutes to plan. Grab paper, a tape measure, and sketch your patio. Note:
- Walls, railings, and support posts
- Existing structures (pergola, gazebo, trees)
- Power source locations (outlets, extension cords)
- High-traffic zones (doorways, seating areas)
Use a free tool like SketchUp Free or even Google Drawings to map your layout. This helps you visualize where the lights will go and avoid last-minute changes.
Popular Hanging Styles and When to Use Them
There’s no one-size-fits-all approach. Your layout should match your patio’s shape, size, and purpose. Here are five tried-and-true styles:
- Straight Line (Linear): Run lights along the perimeter or across a pergola beam. Great for rectangular patios. Simple, clean, and effective.
- Zigzag or Crisscross: Hang lights diagonally between posts or walls. Adds visual interest and spreads light evenly. Best for larger patios or open decks.
- Canopy or “Cloud” Effect: Hang multiple strands in a grid pattern, slightly overlapping. Creates a ceiling of light. Ideal for covered patios or pergolas.
- Wrap Around: Drape lights around railings, posts, or tree trunks. Adds texture and depth. Works well in rustic or boho settings.
- Focal Point Lighting: Highlight a specific area—like a dining table, fire pit, or seating nook—with a cluster of lights. Draws attention and creates intimacy.
Tip: For a zigzag pattern, use a 30–45 degree angle between strands. Too steep, and it looks chaotic; too flat, and it loses impact.
Spacing and Height: Avoiding Sagging and Shadows
Nothing ruins a cozy vibe like drooping lights or harsh shadows. Here’s how to keep it balanced:
- Hang lights 7–9 feet above the ground. High enough to walk under, low enough to feel intimate. If you have a pergola, hang them just below the beams.
- Use support points every 3–5 feet. This prevents sagging, especially with longer or heavier strands. For spans over 5 feet, add a central anchor.
- Angle lights slightly downward. This reduces glare and casts a warm, inviting glow on the seating area.
- Avoid direct overhead lighting. It’s harsh and unflattering. Instead, bounce light off walls or ceilings for a softer effect.
Example: On my patio, I hung lights 8 feet high on a zigzag pattern across two pergola beams. I added a central hook in the middle to support the longest span. No sagging, and the light spreads perfectly over the dining table.
Tools and Materials You’ll Need (And Where to Find Them)
Essential Hanging Hardware: Hooks, Clips, and Anchors
You don’t need a full toolbox, but the right hardware makes all the difference. Here’s what I keep in my outdoor lighting kit:
- Outdoor-rated screw hooks or cup hooks: Ideal for wood, pergolas, or fascia boards. Use stainless steel or galvanized to resist rust.
- Adhesive hooks (for vinyl siding or metal): Look for heavy-duty, removable options like Command Outdoor Hooks. Test them with a light first to ensure they hold.
- Zip ties or cable clips: Perfect for railings, fences, or temporary setups. Use UV-resistant ties to avoid brittleness.
- Eye hooks with wall anchors: For stucco, brick, or concrete. Use a masonry bit and anchors rated for outdoor use.
- Light clips or gutter hooks: Designed specifically for string lights. They grip the wire without damaging it and work on gutters, eaves, or railings.
Pro tip: Buy a mix of hardware. I keep a pack of 20 outdoor hooks, 30 zip ties, and 10 gutter clips in my garage. Always have extras—trust me, you’ll need them.
Tools for Installation: Drills, Ladders, and Measuring Tapes
You’ll need a few basic tools to get the job done safely and efficiently:
- Power drill with various bits: For screwing in hooks or drilling pilot holes. A cordless drill with a 1/8” or 3/16” bit works best.
- Measuring tape: To space hooks evenly and ensure symmetry.
- Level: Keeps your lights straight. A small torpedo level fits easily in your pocket.
- Step ladder or extension ladder: For reaching high points. Make sure it’s stable and on level ground.
- Work gloves: Protect your hands from splinters or sharp edges.
- Extension cord (if needed): Use a heavy-duty, outdoor-rated cord. Avoid daisy-chaining more than 3 cords.
Safety note: Always turn off the power when working near outlets. If using a ladder, have someone spot you. No DIY is worth a fall.
Weatherproofing Your Setup: Protecting Wires and Connections
Outdoor lights are exposed to rain, wind, and UV rays. Protect them with these simple steps:
- Use outdoor-rated extension cords and timers. Look for “wet location” ratings.
- Seal plug connections with silicone sealant or use a weatherproof cover. I use small plastic enclosures from the hardware store—they’re cheap and effective.
- Elevate cords off the ground. Use cord clips or run them along railings to avoid tripping and water pooling.
- Inspect annually. Check for frayed wires, loose bulbs, or corroded connections. Replace damaged strands immediately.
Example: After a heavy rainstorm, I found one of my light strands flickering. A quick check revealed water in the plug. A dab of silicone and a plastic cover fixed it—and it’s worked perfectly since.
Step-by-Step Guide to Hanging Light Strings on Patio
Step 1: Mark and Install Hooks or Clips
Start by marking your support points. Use a pencil and measuring tape to space hooks every 3–5 feet. For a zigzag pattern, stagger them slightly.
- Drill pilot holes for screw hooks (prevents wood splitting).
- Twist hooks in by hand, then tighten with pliers.
- For adhesive hooks, clean the surface with rubbing alcohol and let it dry.
- Press firmly for 30 seconds and wait 24 hours before hanging lights.
Tip: Use a template—like a piece of cardboard with hook spacing—to ensure consistency across long runs.
Step 2: Test the Lights Before Hanging
Plug in the string lights and test them indoors. Check for:
- Burned-out bulbs (replace if needed)
- Flickering or dim sections
- Loose connections
Never hang a faulty strand. It’s easier to fix on the ground than on a ladder.
Step 3: Hang the Lights with Proper Tension
Start at the power source. Drape the lights over the hooks, keeping tension even. Avoid pulling too tight—it can damage wires or pull hooks loose.
- For long runs, hang from one end and work toward the other.
- Use zip ties to secure excess cord or bundle multiple strands.
- For a “cloud” effect, hang strands in parallel lines, overlapping slightly.
My trick: I use a broom handle to gently lift and position the lights from the ground, reducing ladder trips.
Step 4: Add Finishing Touches: Dimmers, Timers, and Decor
Take your setup to the next level:
- Smart plug or timer: Set lights to turn on at sunset. I use a dusk-to-dawn timer—no more forgetting to turn them off.
- Dimmer switch: Adjust brightness for different moods. Perfect for dinner vs. late-night chats.
- Decorative elements: Add lanterns, sheer fabric, or potted plants to soften the look.
Example: I added sheer white curtains to my pergola and hung lights behind them. The result? A soft, diffused glow that feels like a luxury resort.
Maintenance and Longevity: Keeping Your Lights Shining Year-Round
Cleaning and Storage Tips
Even the best lights need care. Here’s how to extend their life:
- Clean bulbs annually: Wipe with a dry cloth or mild soapy water. Avoid abrasive cleaners.
- Remove lights for winter (if in harsh climates): Store in a cool, dry place. Wrap loosely in paper or bubble wrap—never coil tightly.
- Check for damage before rehanging: Look for cracks, frayed wires, or loose bulbs.
Tip: Label your strands by length and color. Makes reinstallation a breeze.
Troubleshooting Common Issues
Here’s a quick reference for when things go wrong:
| Issue | Likely Cause | Solution |
|---|---|---|
| Flickering lights | Loose bulb or water in plug | Tighten bulb or dry connection with hair dryer |
| Half the strand out | One bulb burned out (in series circuits) | Replace bulb or use a bulb tester to find the culprit |
| Sagging wires | Too few support points | Add a hook or zip tie at the midpoint |
| Lights won’t turn on | Tripped breaker or faulty timer | Check outlet with another device; reset timer |
Remember: most issues are fixable. Don’t toss the whole strand over one dead bulb.
When to Replace vs. Repair
LEDs last a long time, but they’re not immortal. Consider replacement when:
- More than 30% of bulbs are out
- Wires are frayed or corroded
- Color temperature shifts (e.g., warm lights turn blue)
- You want to upgrade to smart or color-changing models
But if it’s just a few bulbs, keep the strand. It’s more eco-friendly and cost-effective.
Final Thoughts: Light Up Your Evenings, One Bulb at a Time
Hanging light strings on patio spaces isn’t just about adding brightness—it’s about crafting an experience. It’s the soft glow that makes your backyard feel like a sanctuary. It’s the way laughter lingers a little longer when the lights are on. And it’s the simple joy of stepping outside and seeing your patio transformed into a place you love.
You don’t need to be an electrician or a designer to get it right. With the right lights, a clear plan, and a few quality tools, anyone can create that cozy outdoor vibe. Start small. Hang one strand. See how it feels. Then add more. Adjust. Tweak. Make it yours.
And remember: the best patio lighting isn’t the brightest or the most expensive. It’s the one that makes you want to stay outside a little longer—sipping wine, sharing stories, or just sitting in quiet contentment under a canopy of light. So go ahead, grab those hooks, and let your patio shine.
Frequently Asked Questions
How do I hang light strings on patio without damaging walls or ceilings?
Use removable adhesive hooks, tension rods, or freestanding shepherd’s hooks to avoid nails or screws. For stucco or brick, opt for masonry hooks or zip-tie anchors designed for outdoor use.
What’s the best way to hang patio lights for even spacing?
Measure the area and mark hook placements with chalk or painter’s tape before installing. Use a template (like a folded paper guide) to ensure consistent spacing between each light string.
Can I leave light strings on my patio year-round?
Only if the lights are rated for permanent outdoor installation (check the packaging for “wet location” or “all-weather” labels). Otherwise, remove them during extreme weather to prevent damage.
How do I hang light strings on a patio with no overhead structures?
Install ground-mounted poles, pergola kits, or tall planters with hooks to create anchor points. Alternatively, drape lights across railings or fences for a similar effect.
What tools do I need to hang light strings on a patio safely?
Basic tools include a ladder, outdoor-rated hooks, zip ties, and a measuring tape. For tall spaces, use a stud finder to locate ceiling joists or a drill for permanent mounts.
How can I hide the cords when I hang light strings on patio?
Run cords along edges of railings, under outdoor rugs, or through cord covers painted to match your patio. For a seamless look, use clips to guide cords behind furniture or planters.

