Featured image for hang string lights covered patio
Image source: i.pinimg.com
Transform your covered patio into a magical retreat by hanging string lights to create warm, inviting ambiance and functional nighttime illumination. From zigzag patterns to draped canopies, these easy-to-install lighting ideas instantly elevate your outdoor space for entertaining or relaxing after dark.
Key Takeaways
- Choose weatherproof lights: Ensure durability with IP65-rated string lights for year-round patio use.
- Plan your layout: Sketch light placement to avoid overhangs and maximize coverage.
- Use dimmers or smart bulbs: Adjust brightness for ambiance or task lighting effortlessly.
- Mix light styles: Combine globe, Edison, or fairy lights for visual interest.
- Secure with removable hooks: Protect patio finishes while ensuring stable, easy installation.
- Layer with other lighting: Add floor lamps or lanterns for a balanced glow.
📑 Table of Contents
- Why Hang String Lights on a Covered Patio?
- Choosing the Right String Lights for Your Covered Patio
- Creative Ways to Hang String Lights on a Covered Patio
- Smart Installation Tips and Common Mistakes to Avoid
- Enhancing the Ambiance: Pairing Lights with Decor
- Maintenance and Long-Term Care
- Conclusion: Light Up Your Life (Literally)
Why Hang String Lights on a Covered Patio?
Imagine stepping outside after dinner, the sun just dipping below the horizon, and being greeted by a soft, golden glow that wraps your patio in warmth. That’s the magic of hang string lights covered patio—a simple, affordable upgrade that can transform an ordinary outdoor space into a cozy retreat. Whether you’re hosting a summer barbecue, enjoying a quiet evening with a book, or celebrating a special occasion, string lights set the mood effortlessly.
I remember the first time I strung up lights on my covered patio. I was skeptical—would they look too “carnival” or just messy? But after a few trial runs and some creative placement, the result was nothing short of enchanting. The space felt more inviting, more *mine*. Suddenly, my patio became the go-to spot for family game nights and impromptu coffee chats. That’s the power of thoughtful lighting: it’s not just about visibility—it’s about atmosphere, comfort, and connection.
Choosing the Right String Lights for Your Covered Patio
Not all string lights are created equal, especially when it comes to covered patios. You need to consider durability, brightness, style, and how well they’ll hold up under a roof, awning, or pergola. Let’s break down what matters most.
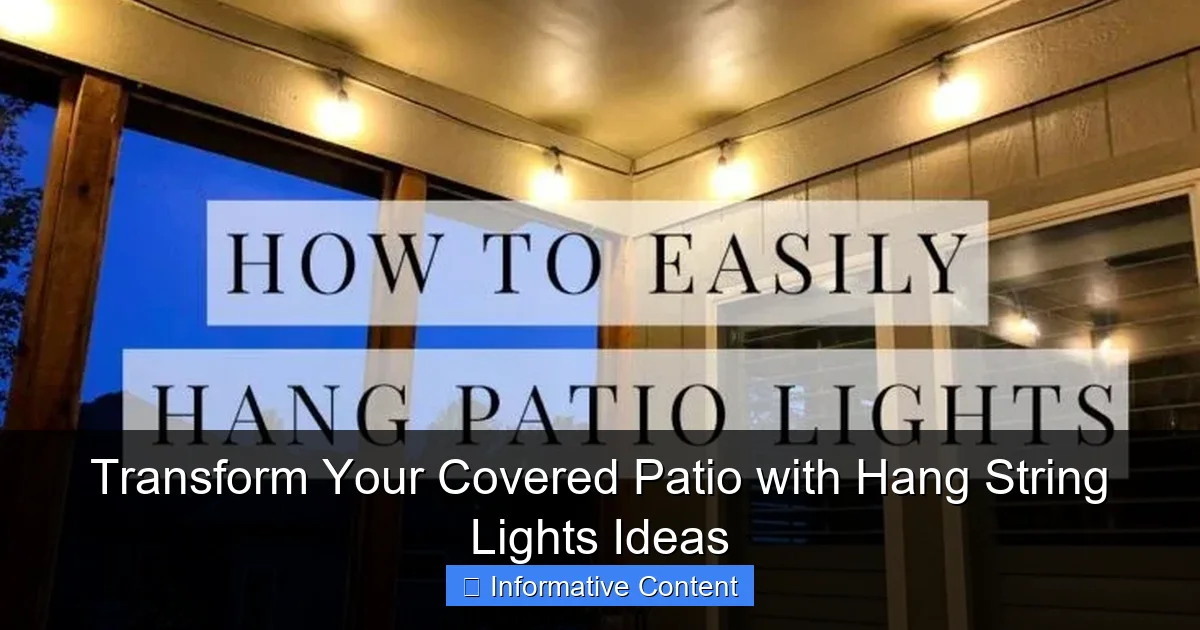
Visual guide about hang string lights covered patio
Image source: sengerson.com
Types of String Lights: LED vs. Incandescent
When shopping for hang string lights covered patio, you’ll likely see two main options: LED and incandescent. Here’s the lowdown:
- LED lights: Energy-efficient, long-lasting (up to 25,000–50,000 hours), and cool to the touch. They’re perfect for year-round use and come in a wide range of colors and shapes. Slightly more expensive upfront, but save money over time.
- Incandescent lights: Give off a warm, nostalgic glow that some people love. They’re cheaper initially but burn out faster, use more energy, and get hot—something to consider if you have kids or pets.
Pro tip: If you want that classic “twinkle” effect without the heat or high energy bill, go with LED filament bulbs. They look like old-school Edison bulbs but have all the benefits of modern LEDs.
Bulb Shapes and Sizes
The bulb style can completely change the vibe of your patio:
- Round globe bulbs: Great for a soft, diffused glow. Ideal if you want ambient lighting for dining or lounging.
- Edison-style bulbs: Exposed filaments create a vintage, rustic feel. Perfect for a boho or farmhouse patio.
- Mini lights (fairy lights): Tiny and delicate. Best for wrapping around beams, railings, or draping across the ceiling for a “starry sky” effect.
- Oversized bulbs: Make a bold statement. Use sparingly for visual interest, especially in larger patios.
For a balanced look, I like mixing two types—say, globe bulbs on the main lines and mini lights woven into plants or railings.
Weather Resistance and Plug Type
Even under a cover, your lights may face humidity, temperature swings, and occasional rain splashes. Look for:
- IP44 or higher rating: This means the lights are splash-proof and safe for covered outdoor use.
- Outdoor-rated plugs: Avoid indoor-only lights. Outdoor plugs have thicker insulation and are built to resist moisture.
- Extension cords: Use outdoor-rated cords and keep them off the ground. A cord cover or raceway can hide them neatly.
I once used indoor fairy lights on my patio—big mistake. After one humid summer night, they started flickering. Now I always check the packaging for “outdoor use” or “weather-resistant” labels.
Creative Ways to Hang String Lights on a Covered Patio
Now for the fun part: the *how*. The way you hang your lights can make your patio feel intimate, expansive, or somewhere in between. Here are my favorite techniques, with real-world examples.
Classic Ceiling Grid (The “Canopy” Look)
This is the most popular method—and for good reason. Run parallel lines of lights across the ceiling, spaced 12–18 inches apart. It mimics a starry night and evenly illuminates the space.
- Tools needed: Hooks, clips, or adhesive hooks (for smooth ceilings).
- Spacing: Closer for a dense glow, farther apart for a more subtle effect.
- Tip: Use a laser level to keep lines straight. Nothing ruins the look like crooked lights!
Example: On my 10×12 ft patio, I hung five lines of globe lights, spaced 15 inches apart. I used small S-hooks on the ceiling beams, which let me adjust tension easily. The result? A soft, even glow perfect for dinner parties.
Criss-Cross or “X” Pattern
Want more visual interest? Try crossing the lights diagonally from corner to corner. This creates a dynamic web of light and draws the eye upward.
- Best for: Larger patios or spaces with high ceilings.
- Tip: Use a central anchor point (like a hook in the middle) to tie the lines together. This keeps the pattern balanced.
Example: A friend of mine has a vaulted pergola. She criss-crossed Edison bulbs from each corner to the center, then added a chandelier in the middle. It feels like a rustic-chic outdoor dining room.
Wrap Around Beams or Posts
If your patio has beams, columns, or railings, wrap lights around them in a spiral. It adds texture and highlights architectural features.
- Tools needed: Zip ties, light clips, or adhesive strips.
- Tip: Wrap loosely—tight spirals can look cluttered. Leave 2–3 inches between wraps.
Example: I wrapped mini LED lights around the support beams of my pergola. At night, they glow like lanterns, creating a warm frame around the space.
Drape or “Cascading” Effect
For a romantic, bohemian vibe, drape lights in gentle swags or loops. This works great with sheer curtains or between trees.
- Best for: Smaller patios or intimate nooks.
- Tip: Use adjustable hooks to change the drape depth. Deeper swags = more drama.
Example: My neighbor has a cozy corner with a hammock. She draped fairy lights from the roof to a nearby tree, creating a “light curtain” that feels magical at dusk.
Layer Multiple Techniques
Don’t feel limited to one style. Combine ceiling grids with wrapped beams or drape lights over a dining table. Layering creates depth and dimension.
- Tip: Use different light types—globe bulbs on the ceiling, mini lights on the beams, and a chandelier over the table.
- Pro move: Install dimmers or smart plugs to adjust brightness for different moods.
Example: My patio has a ceiling grid, wrapped beams, and a string of mini lights above the grill. When I dim the main lights and turn up the grill lights, it’s like an instant outdoor kitchen vibe.
Smart Installation Tips and Common Mistakes to Avoid
Even the best lights can look off if installed poorly. Here’s how to get it right—and avoid the pitfalls I’ve learned the hard way.
Plan Before You Hang
Measure your patio and sketch a layout. Decide:
- Where the lights will start and end.
- How many lines you’ll need.
- Where outlets are (and if you need extension cords).
- Which fixtures or hooks to use.
Tip: Use painter’s tape to mark hook locations. It’s easy to adjust and leaves no residue.
Use the Right Mounting Hardware
Not all hooks are created equal. Match your hardware to your ceiling type:
- Wood beams: Use small eye hooks or screw-in hooks. They’re sturdy and easy to install.
- Metal or vinyl ceilings: Use adhesive hooks (like 3M Command strips) or magnetic clips. Avoid drilling into metal roofs.
- Concrete or stucco: Use plastic anchors and screws. A drill is usually needed.
Common mistake: Using weak adhesive hooks on heavy lights. I once hung a strand of oversized bulbs with Command strips—within a week, the whole line crashed down. Now I only use adhesive for mini lights or lightweight decor.
Manage Cords and Plugs Neatly
Messy cords ruin the look. Here’s how to keep them tidy:
- Use cord covers: These plastic or fabric sleeves hide cords and protect them from weather.
- Zip ties: Bundle cords together and secure them to beams or railings.
- Hide the plug: Place it behind furniture or in a planter. Use a weatherproof outlet cover.
Pro tip: If your outlet is far away, use a heavy-duty outdoor extension cord rated for your total wattage. Never overload the circuit.
Test Before You Commit
Always test your lights *before* installing all the hooks. Turn them on to check for dead bulbs, flickering, or uneven brightness. It’s much easier to fix issues on the ground than 8 feet up on a ladder.
My lesson: I once installed a whole ceiling grid before realizing one section wasn’t working. Had to take down half the lights to find the loose bulb. Now I test every strand first.
Don’t Overdo It
More isn’t always better. Too many lights can feel overwhelming or commercial. Aim for a balance—enough to set the mood, not so much that you’re blinded.
- Rule of thumb: Use 10–15 feet of lights per 100 square feet of patio.
- Example: For a 120 sq ft patio, 12–18 feet of lights is plenty.
Enhancing the Ambiance: Pairing Lights with Decor
String lights are just the start. To truly transform your patio, pair them with other elements that amplify the cozy, inviting feel.
Outdoor Furniture and Seating
Arrange furniture to create “zones”:
- Dining area: Use a table with a light-colored tablecloth. Hang a chandelier or pendant light above for focused lighting.
- Conversation area: Place a sectional or lounge chairs in a circle. Let the string lights provide ambient glow.
- Reading nook: Add a floor lamp or lantern for task lighting. Keep string lights soft in the background.
Example: My patio has a dining table on one side and a cozy seating area with a fire pit on the other. I keep the dining lights brighter for meals and dim the seating area for relaxation.
Greenery and Plants
Plants and lights are a match made in heaven. Weave mini lights through vines, wrap them around tree trunks, or hang them from planters.
- Tip: Use battery-powered fairy lights for hanging planters—no cords!
- Plants to pair: Climbing ivy, jasmine, or pothos. They add texture and scent.
Example: I wrapped fairy lights around a jasmine vine growing up my pergola. In summer, the flowers bloom and the lights glow—pure magic.
Curtains or Sheer Panels
Hang outdoor curtains from the ceiling or pergola. When paired with string lights, they create a “room within a room” effect.
- Best fabrics: Linen, cotton, or weather-resistant polyester.
- Tip: Use curtain clips to hang lights behind the fabric for a soft, diffused glow.
Example: My friend added sheer white curtains to her patio. With string lights behind them, it feels like a dreamy, enclosed space—perfect for date nights.
Outdoor Rugs and Textiles
A patterned rug or colorful cushions add warmth and tie the space together. Choose fade-resistant fabrics for longevity.
- Tip: Use a rug to define the seating area. It grounds the space and makes it feel more “indoor.”
Example: I added a jute rug under my seating area. With the lights glowing above, it feels like a cozy living room—but with fresh air.
Maintenance and Long-Term Care
To keep your hang string lights covered patio looking great year after year, a little maintenance goes a long way.
Seasonal Cleaning
Wipe down bulbs and cords every few months with a dry or slightly damp cloth. Remove dust, spider webs, and debris that can dim the glow.
- Tip: Turn off and unplug lights before cleaning.
- For stubborn spots: Use a soft brush or compressed air.
Inspect for Damage
Check for:
- Frayed cords
- Loose bulbs
- Corroded sockets
- Water damage (especially near plugs)
My rule: I do a full inspection every spring. I replace any damaged bulbs or cords before the summer season.
Smart Controls and Timers
Use timers or smart plugs to automate your lights. This saves energy and ensures they turn on at the same time every night.
- Best for: Busy households or vacation homes.
- Tip: Set lights to turn on 30 minutes before sunset for a seamless transition.
Storage Tips
If you remove lights seasonally:
- Coil cords loosely (no tight knots).
- Store in a dry, cool place.
- Use a storage bag or box to prevent tangles.
Pro tip: Wrap lights around a piece of cardboard or a pool noodle to keep them tangle-free.
Conclusion: Light Up Your Life (Literally)
Transforming your covered patio with hang string lights covered patio isn’t just about adding brightness—it’s about creating a space where memories are made. Whether you go for a simple ceiling grid, a dramatic criss-cross, or a layered, textured look, the right lighting turns an ordinary outdoor area into a sanctuary.
Remember: it’s okay to start small. Try one strand over your dining table or wrap a few lights around a beam. See how it feels. Adjust. Experiment. The goal isn’t perfection—it’s creating a space that feels like *you*.
And don’t forget the little things: a cozy rug, some potted plants, maybe a fire pit. When paired with your string lights, they’ll make your patio the place everyone wants to be. So go ahead—grab a ladder, some hooks, and a strand of lights. Your dream patio is just a few twinkles away.
| Light Type | Best For | Lifespan | Energy Use | Weather Resistance |
|---|---|---|---|---|
| LED Globe | Even ambient lighting | 25,000–50,000 hours | Low | IP44 or higher |
| LED Edison | Vintage, rustic look | 25,000 hours | Low | IP44 or higher |
| Mini LED (fairy) | Wrapping, draping, details | 20,000–30,000 hours | Very low | IP44 or higher |
| Incandescent | Warm, nostalgic glow | 1,000–3,000 hours | High | IP44 (limited) |
| Oversized LED | Statement pieces | 25,000 hours | Low | IP44 or higher |
Frequently Asked Questions
How do I hang string lights on a covered patio without drilling holes?
Use adhesive hooks, tension rods, or magnetic mounts to hang string lights without damaging your patio structure. These options work well for rental-friendly setups or delicate surfaces.
What type of string lights work best for a covered patio?
LED string lights are ideal for covered patios—they’re energy-efficient, durable, and safe for semi-outdoor use. Choose weatherproof or damp-rated lights for added protection against humidity.
Can I hang string lights on a covered patio with a high ceiling?
Yes! Use tall shepherd’s hooks, ceiling anchors, or zigzag patterns with guide wires to create visual interest on high ceilings. This adds depth and ensures even light distribution.
How do I power string lights on a covered patio without nearby outlets?
Opt for solar-powered string lights or use heavy-duty extension cords routed discreetly along walls or railings. Battery-operated options also work for small setups.
What are creative ways to hang string lights for a covered patio ambiance?
Try draping lights in a canopy, outlining patio edges, or weaving them through railings and plants. Mixing light colors or adding dimmers enhances the mood.
Are string lights safe for covered patios in rainy climates?
Yes, but always use lights labeled for “damp locations” or “wet-rated” to prevent electrical hazards. Keep connections elevated and use waterproof covers for outlets.

